Introduction
Thank you for choosing the Phonjoroo 15'x7'x7' Walk-in Greenhouse with Spraying System. This manual provides essential information for the safe and efficient assembly, operation, and maintenance of your new greenhouse. Designed to provide an optimal growing environment, this greenhouse features a robust galvanized frame, a durable PE mesh cover, and an integrated spraying system.
Safety Information
Please read and understand all safety instructions before assembly and use. Failure to follow these instructions may result in injury or damage to the product.
- Always assemble and disassemble the greenhouse with care, being aware of sharp edges and heavy components.
- Ensure the greenhouse is properly anchored and ventilated to prevent damage or injury, especially in windy conditions.
- Be cautious of potential hazards from falling objects or structures.
- Protect yourself from UV exposure and be aware of any chemical treatments applied to the greenhouse material.
Package Contents
Verify that all components are present before beginning assembly. If any parts are missing or damaged, please contact customer support.
- Heavy-duty galvanized frame components (various pipes and connectors)
- 140g PE plastic mesh cover
- Spraying system (32' water pipe, 3 removable nozzles)
- 4 L-shaped ground spikes
- 8 U-shaped ground spikes
- 4 wind ropes
- Assembly tools (if included)
Setup
Assembly is straightforward, but having a second person can make the process easier, especially for larger components.
1. Unpacking and Preparation
Carefully unpack all components from the box. Lay out all parts and verify against the package contents list. Clear the chosen assembly area of any debris or brush.
Video: Overview of the greenhouse components and initial setup steps.
2. Frame Assembly
Connect the galvanized frame pipes using the provided connectors. Ensure all connections are secure. The horizontal bars and 4 diagonal bars are crucial for stability. Note: Do not tighten screws until the final position is confirmed.

Image: All frame components laid out before assembly.
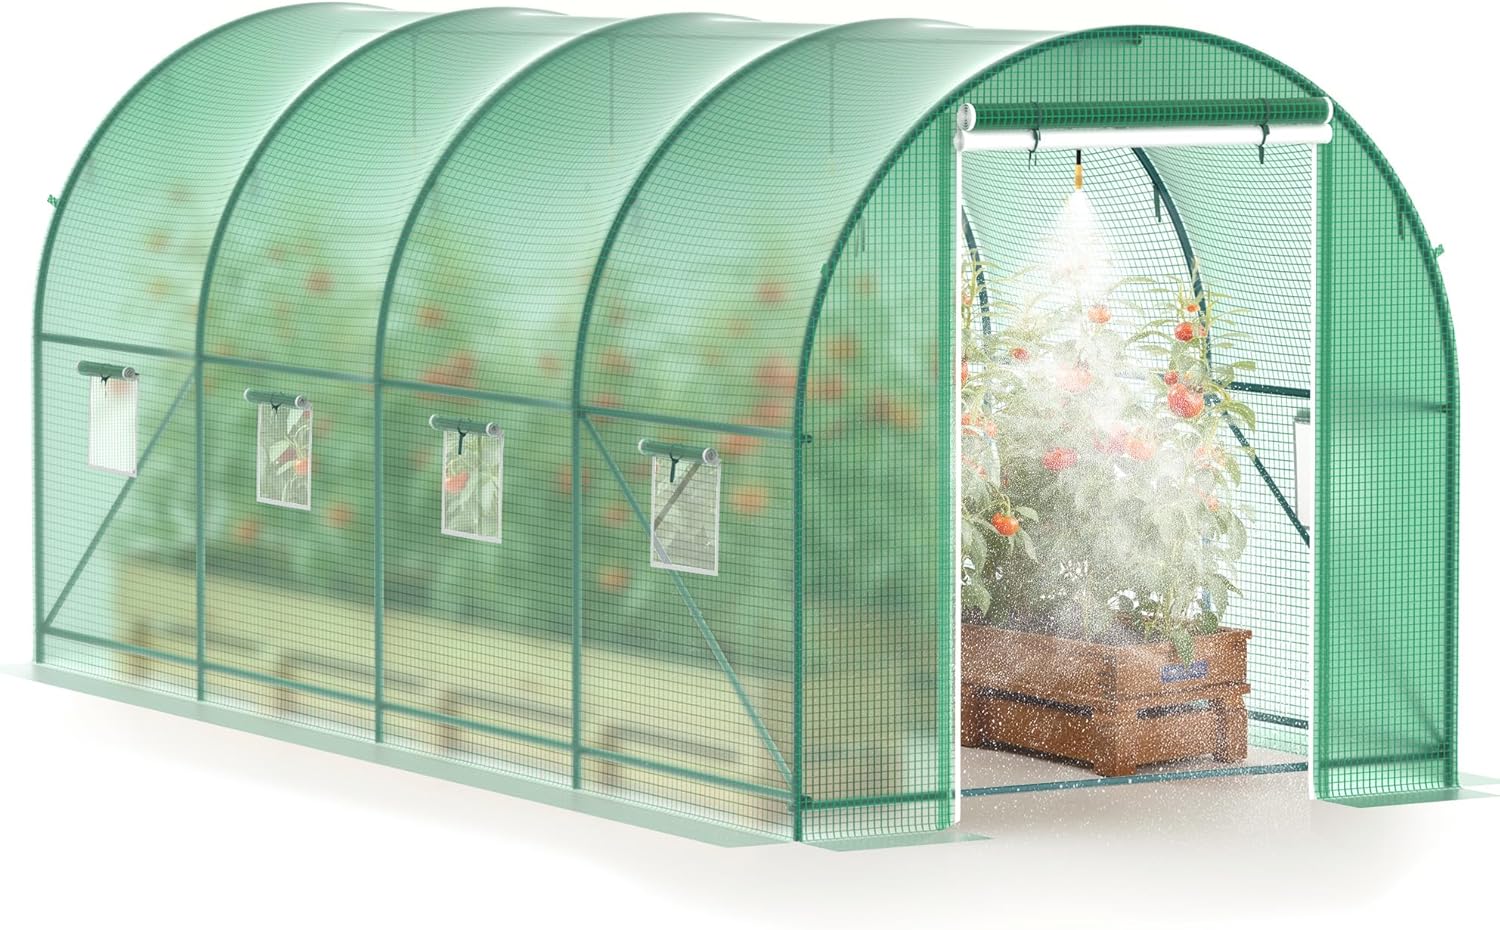
Image: The fully assembled galvanized frame structure.
3. Cover Installation
Carefully drape the 140g PE plastic mesh cover over the assembled frame. Ensure it is centered and evenly distributed. Secure the cover to the frame using the integrated ties or straps.

Image: Illustration of the walk-in greenhouse with its cover installed.
4. Anchoring the Greenhouse
The bottom of the greenhouse cover has an extension design. Place stones or sandbags on this extension to make the warming house more stable. Use the provided 4 L-shaped ground spikes, 8 U-shaped ground spikes, and 4 wind ropes for added security, stability, and strength, especially in windy conditions.
5. Spraying System Setup
The 32' long water pipe can be cut to your desired length. Connect it to a water source. The 3 removable nozzles can be bent to different angles and offer 3 spraying modes for automatic watering.

Image: Detailed view of the multi-functional sprayer and its various spray patterns.

Image: Illustration of the spraying system installed inside the greenhouse, showing water pipe length and connector detail.
Operating Instructions
1. Door Operation
The greenhouse features a double zippered roll-up door. The outer PE door provides heat preservation, while the inner screen door prevents small insects from entering. To open, unzip and roll up the door, then secure it with the ties provided.
Video: Demonstration of opening and closing the greenhouse door.
2. Ventilation and Airflow
The greenhouse is equipped with 6 ventilated mesh windows. These windows promote air circulation and airflow. Open them as needed to regulate temperature and humidity. It is recommended to close both the door and windows in windy and snowy weather to maintain indoor temperature.

Image: The greenhouse showing open mesh windows for optimal air circulation.
3. Using the Spraying System
Once connected to a water source, the spraying system can be activated for automatic watering. Adjust the nozzles to direct water flow and select from the three spraying modes (water flow, small spray, large spray) to suit your plants' needs.
Maintenance
1. Cleaning the Cover
Regularly clean the PE mesh cover with mild soap and water to remove dirt, dust, and algae buildup. Avoid harsh chemicals or abrasive materials that could damage the cover.
2. Frame Inspection
Periodically inspect the galvanized frame for any signs of rust, damage, or loose connections. Tighten any loose screws or connectors to maintain structural integrity.
3. Spraying System Care
Check the water pipe and nozzles for blockages or leaks. Clean nozzles regularly to ensure consistent spray patterns. Drain the system before freezing temperatures to prevent damage.
Troubleshooting
1. Greenhouse Instability in Wind
Ensure the base of the cover is weighted down with stones or sandbags. Verify that all ground spikes (L-shaped and U-shaped) are firmly secured into the ground. Use the provided wind ropes to further anchor the greenhouse, especially in areas prone to strong winds.
2. Zipper Malfunction
If a zipper becomes stiff, apply a silicone-based lubricant. If the zipper teeth are misaligned or broken, avoid forcing it. Contact customer support for potential replacement parts or repair advice.
3. Uneven Water Spray from Nozzles
Check the nozzles for any debris or mineral buildup. Remove and clean them thoroughly. Ensure the water pressure is adequate for the desired spray mode.
Specifications
| Brand | Phonjoroo |
| Model | 15'x7'x7' w/ Spray System |
| Color | Green |
| Overall Size (L x W x H) | 177.17" x 78.74" x 77.17" (15' x 7' x 7') |
| Item Weight | 22.59 Kilograms |
| Cover Material | 140g PE Plastic Mesh |
| Frame Material | Galvanized Alloy Steel |
| Number of Vents | 6 (mesh windows) |
| Door Style | Double Zippered Roll-Up Door (PE and Screen) |
| Spraying System Pipe Length | 32.8 feet |

Image: Detailed product dimensions and key features.
Warranty
This product comes with a standard manufacturer's warranty. For specific details regarding warranty coverage, duration, and claims process, please refer to the warranty card included in your package or contact Phonjoroo customer support.
Support
For technical assistance, troubleshooting, or replacement parts, please contact Phonjoroo customer service. Our support team is available to help you with any questions or concerns you may have regarding your greenhouse.
- Online Support: Visit the official Phonjoroo website for FAQs and support resources.
- Email: Refer to your product packaging or warranty card for customer service email address.
- Phone: Refer to your product packaging or warranty card for customer service phone number.