The Katalic PF004 Automatic Cat Feeder is designed to provide scheduled meals for your pets, ensuring they are fed consistently even when you are away. This feeder features a large capacity food storage, a meal divider for multiple pets, voice recording for meal calls, and a reliable dual power supply system.
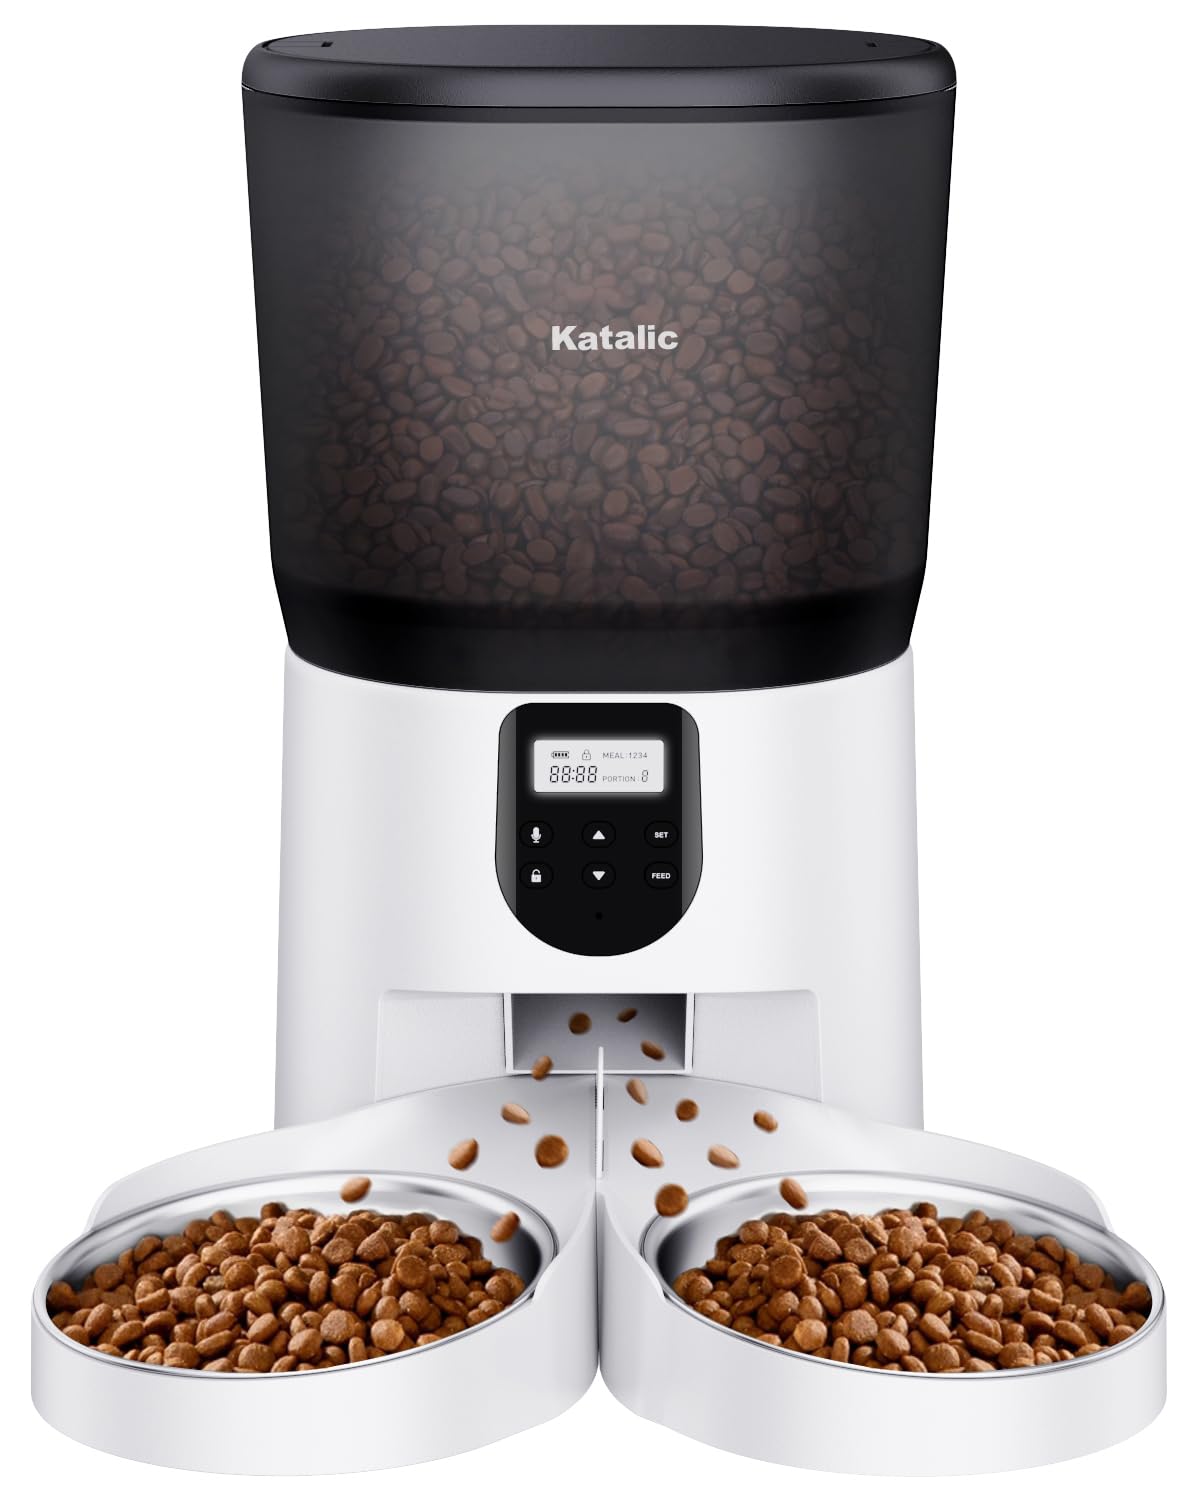
Image: Katalic PF004 Automatic Cat Feeder. This image shows the complete feeder unit, including the transparent food hopper, the control panel, and the dual stainless steel food bowls.
Important Safety Instructions
Read all instructions before using the appliance.
Do not immerse the main unit in water or other liquids.
Use only dry pet food. Do not use wet, canned, or moist food.
Keep out of reach of children and pets to prevent tampering.
Ensure the power adapter is securely connected and batteries (if used) are correctly installed.
Do not attempt to repair or modify the feeder yourself. Contact customer support for assistance.
Place the feeder on a stable, level surface to prevent tipping.
Package Contents
Please check the package contents. If any items are missing or damaged, contact customer support.
Katalic PF004 Automatic Pet Feeder Main Unit
Food Storage Container (6L)
Lid with Desiccant Compartment
Stainless Steel Food Bowl (detachable)
Meal Divider
Power Adapter
User Manual (this document)
Product Components
Food Hopper: Transparent 6L container for dry pet food.
Lid: Secures the food hopper, often includes a desiccant holder.
Control Panel: Buttons and display for setting schedules, recording voice, and manual feeding.
Food Outlet: Where food dispenses into the bowl.
Stainless Steel Bowl: Detachable, food-grade bowl for pets to eat from.
Meal Divider: Splits dispensed food into two sections for multiple pets.
Power Port: For connecting the power adapter.
Battery Compartment: Holds D-size batteries for backup power.
Setup Guide
1. Assembly
Place the main feeder unit on a stable, level surface.
Insert the stainless steel food bowl into the designated slot at the base of the feeder. Ensure it is securely seated.
If feeding two pets, insert the meal divider into the stainless steel bowl.
Place the 6L food storage container onto the main unit, ensuring it locks into place.
Open the lid and, if applicable, insert a desiccant pack into its holder to keep food fresh. Close the lid securely.
2. Power Supply
AC Power: Connect the power adapter to the feeder's power port and plug it into a standard wall outlet.
Battery Backup: For uninterrupted operation during power outages, install 3 D-size batteries (not included) into the battery compartment located at the bottom of the feeder. Ensure correct polarity.
3. Filling the Food Hopper
Open the lid of the food storage container.
Pour dry pet food into the hopper. The transparent design allows you to monitor food levels.
Close the lid securely to maintain food freshness and prevent pets from accessing the food directly.
Operating Instructions
Familiarize yourself with the control panel buttons (e.g., SET, UP, DOWN, REC, PLAY, FEED, LOCK/UNLOCK).
1. Setting the Current Time
Press and hold the "SET" button until the clock icon flashes.
Use "UP" and "DOWN" buttons to adjust the hour, then press "SET" to confirm.
Repeat for minutes.
Press "SET" again to exit time setting.
2. Programming Feeding Schedules
The feeder allows for multiple scheduled meals per day.
Press "SET" once to enter Meal 1 setting. The meal number will flash.
Use "UP" and "DOWN" to set the desired feeding time (hour and minute), pressing "SET" after each.
Next, set the portion size (number of units). Use "UP" and "DOWN" to adjust, then "SET".
Repeat for additional meals (Meal 2, Meal 3, etc.) as supported by your model.
To disable a meal, set its portion size to 0.
Press and hold "SET" to save and exit.
3. Voice Recording
Record a 10-second message to call your pets at mealtime.
Press and hold the "REC" button until you hear a beep.
Speak your message clearly into the microphone.
Release the "REC" button when finished (max 10 seconds).
Press the "PLAY" button to listen to your recording.
The recorded message will play automatically before each scheduled meal.
4. Manual Feeding
To dispense food immediately, press the "FEED" button. Each press typically dispenses one portion unit. Hold the button for continuous dispensing.
5. Control Panel Lock
To prevent accidental changes by pets or children, the control panel may automatically lock after a period of inactivity. Press and hold the "LOCK/UNLOCK" button (or a similar designated button) for a few seconds to unlock it for programming.
Maintenance and Cleaning
Regular cleaning ensures hygiene and proper functioning of your feeder.
Disconnect Power: Before cleaning, always unplug the power adapter and remove backup batteries.
Remove Food: Empty any remaining food from the hopper.
Clean Bowl: The stainless steel food bowl is detachable and can be washed with soap and water. Rinse thoroughly and dry completely before reattaching.
Clean Hopper: The food storage container can be wiped clean with a damp cloth. Ensure it is completely dry before refilling with food. Do not wash the main unit or lid with water.
Wipe Main Unit: Use a soft, dry cloth to wipe the exterior of the main feeder unit. Do not use abrasive cleaners or immerse the main unit in water.
Replace Desiccant: If your lid has a desiccant compartment, replace the desiccant pack periodically (e.g., monthly) to maintain food freshness.
Troubleshooting
Problem
Possible Cause
Solution
Feeder not powering on.
Power adapter not connected; batteries drained or incorrectly installed.
Check power adapter connection. Replace D-size batteries, ensuring correct polarity.
For warranty information and customer support, please refer to the warranty card included with your product or visit the official Katalic website. If you encounter any issues not covered in this manual, please contact our customer service team for assistance.
Contact Information: Please refer to your product packaging or the manufacturer's website for the most up-to-date contact details.