1. Introduction
This manual provides essential information for the safe and efficient installation, operation, and maintenance of your PEXMOR 48V 1200W 26-inch Front Wheel E-Bike Hub Motor Conversion Kit. This kit is designed to transform a standard 26-inch bicycle into an electric bicycle, offering three riding modes: Throttle, Pedal Assist System (PAS), and Manual. Please read this manual thoroughly before installation and use to ensure proper function and safety.
2. Safety Information
- Always wear a helmet and appropriate safety gear when riding an electric bicycle.
- Ensure all connections are secure and properly insulated before operating the e-bike.
- Regularly inspect brakes, tires, and all mechanical and electrical components for wear or damage.
- The brake levers are designed to cut power to the motor when engaged, enhancing safety. Verify this function before each ride.
- Do not operate the e-bike in adverse weather conditions or on unsafe terrain.
- This kit is CE certified, indicating compliance with European safety standards.
- Ensure the battery (not included) used with this kit meets the specified voltage and current requirements (48V, >30A BMS current).
- The aluminum alloy frame of the motor wheel is durable and designed to hold up to 220 lbs. Do not exceed this weight limit.
3. Package Contents
The PEXMOR Electric Bike Conversion Kit includes the following components:

Image: All components of the PEXMOR Electric Bike Conversion Kit laid out, including the hub motor wheel, controller, and various accessories.
- Hub Motor Wheel (26-inch Front Wheel)
- Controller
- Twist Throttle with Battery Display
- Pedal Assist Sensor (PAS)
- Brake Levers (with power cut-off function)
- Cable Ties
- Controller Bag
- User Manual (this document)
- Extension & Transfer Cables
- Terminal Box
- Torque Arm
- Spoke Key
- Tool Kit
4. Setup and Installation
This section provides an overview of the installation process. Refer to the detailed assembly instructions included with your kit for step-by-step guidance.
4.1 Pre-installation Checks
- Fork Dropout Spacing: Ensure your bicycle's front fork has a dropout spacing of 100mm (3.93 inches). The fork notch width should be 10mm (3/8 inch).

Image: Diagram showing front fork dropout dimensions (3.93 inches / 100mm) and rear fork dropout dimensions (5.12 inches / 135mm), indicating compatibility for the front wheel kit.
- Gearshift Compatibility: This conversion kit is compatible with freewheel gearshifts only. It is not compatible with cassette gearshifts.

Image: Visual guide distinguishing between compatible freewheel and incompatible cassette gearshift types.
4.2 Component Installation Overview
- Install the Hub Motor Wheel: Replace your bicycle's front wheel with the PEXMOR hub motor wheel. Ensure it is securely fastened and centered within the fork. Use the included torque arm for added safety and stability.
- Mount the Controller: Place the controller in a suitable location on your bike frame, preferably within the provided controller bag, ensuring it is protected from elements and vibrations.
- Install Twist Throttle and Brake Levers: Mount the twist throttle and brake levers on your handlebars. Ensure they are positioned comfortably for easy access.
- Install Pedal Assist Sensor (PAS): Attach the PAS to your bicycle's bottom bracket, ensuring proper alignment with the crank.
- Wiring Connections: Connect all components to the controller using the provided cables. Refer to the wiring diagram for correct connections.
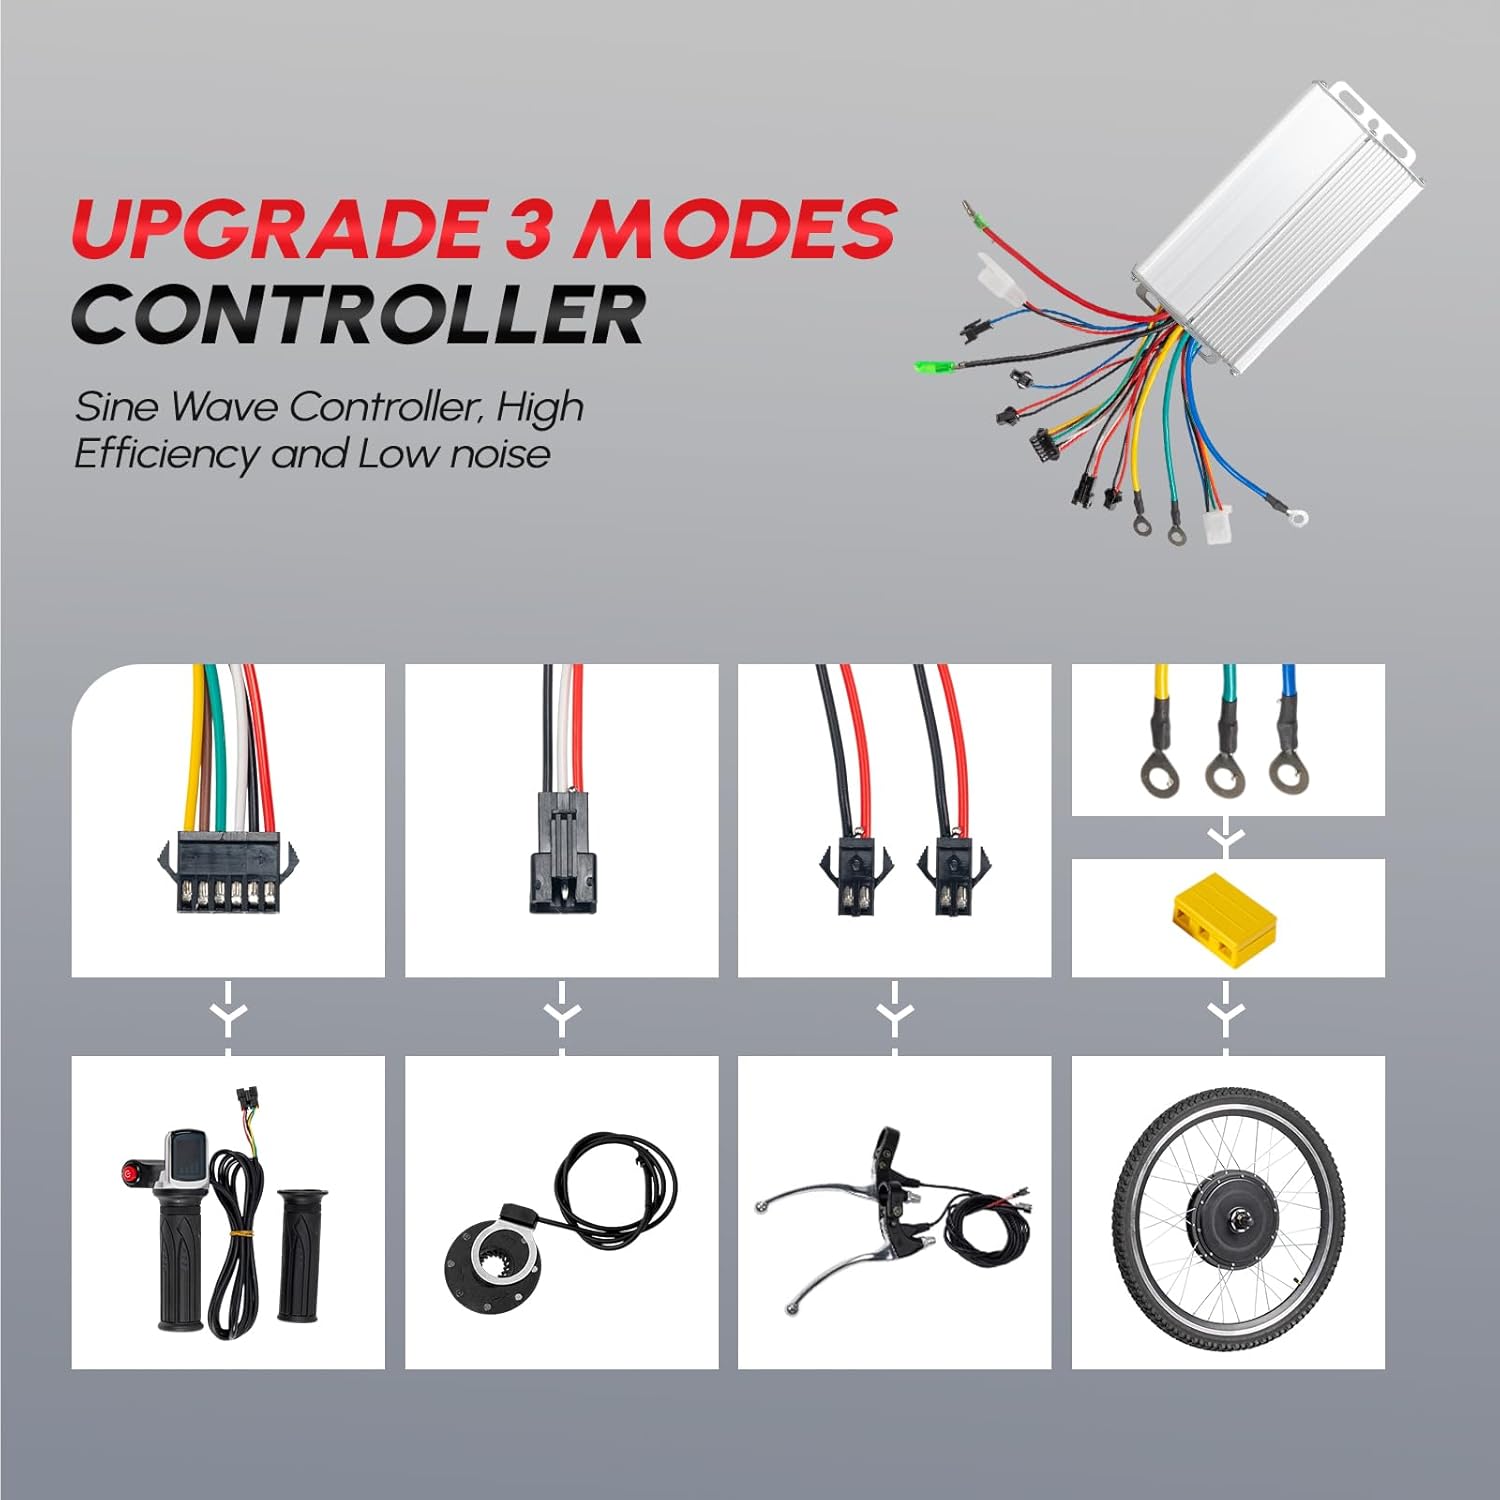
Image: Wiring diagram for the 3-mode controller, showing connections for the motor, brake levers, Hall sensor, PAS, throttle with battery indicator, headlight, and battery terminals.
- Connect Battery: Once all other components are connected, connect your 48V battery (not included) to the controller.
5. Operating Instructions
5.1 Power On/Off
To power on the system, ensure the battery is connected and turn on the battery's power switch (if applicable). The twist throttle's display should illuminate.
5.2 Riding Modes
Your PEXMOR E-Bike Conversion Kit supports three riding modes:

Image: Illustration of the three riding modes: Throttle, PAS, and Manual, with a cyclist on an e-bike.
- Throttle Mode: Twist the throttle to engage the motor and control speed directly, without pedaling.
- Pedal Assist System (PAS) Mode: The motor provides assistance as you pedal, making riding easier. The level of assistance can typically be adjusted via the controller or display (if available).
- Manual Mode: Ride the bicycle like a traditional bike, without any motor assistance.
You can switch between these modes as needed to suit your riding conditions and preferences.
5.3 Battery Indicator
The twist throttle features an integrated battery indicator to display the remaining battery power. Monitor this display to plan your rides and avoid running out of power unexpectedly.
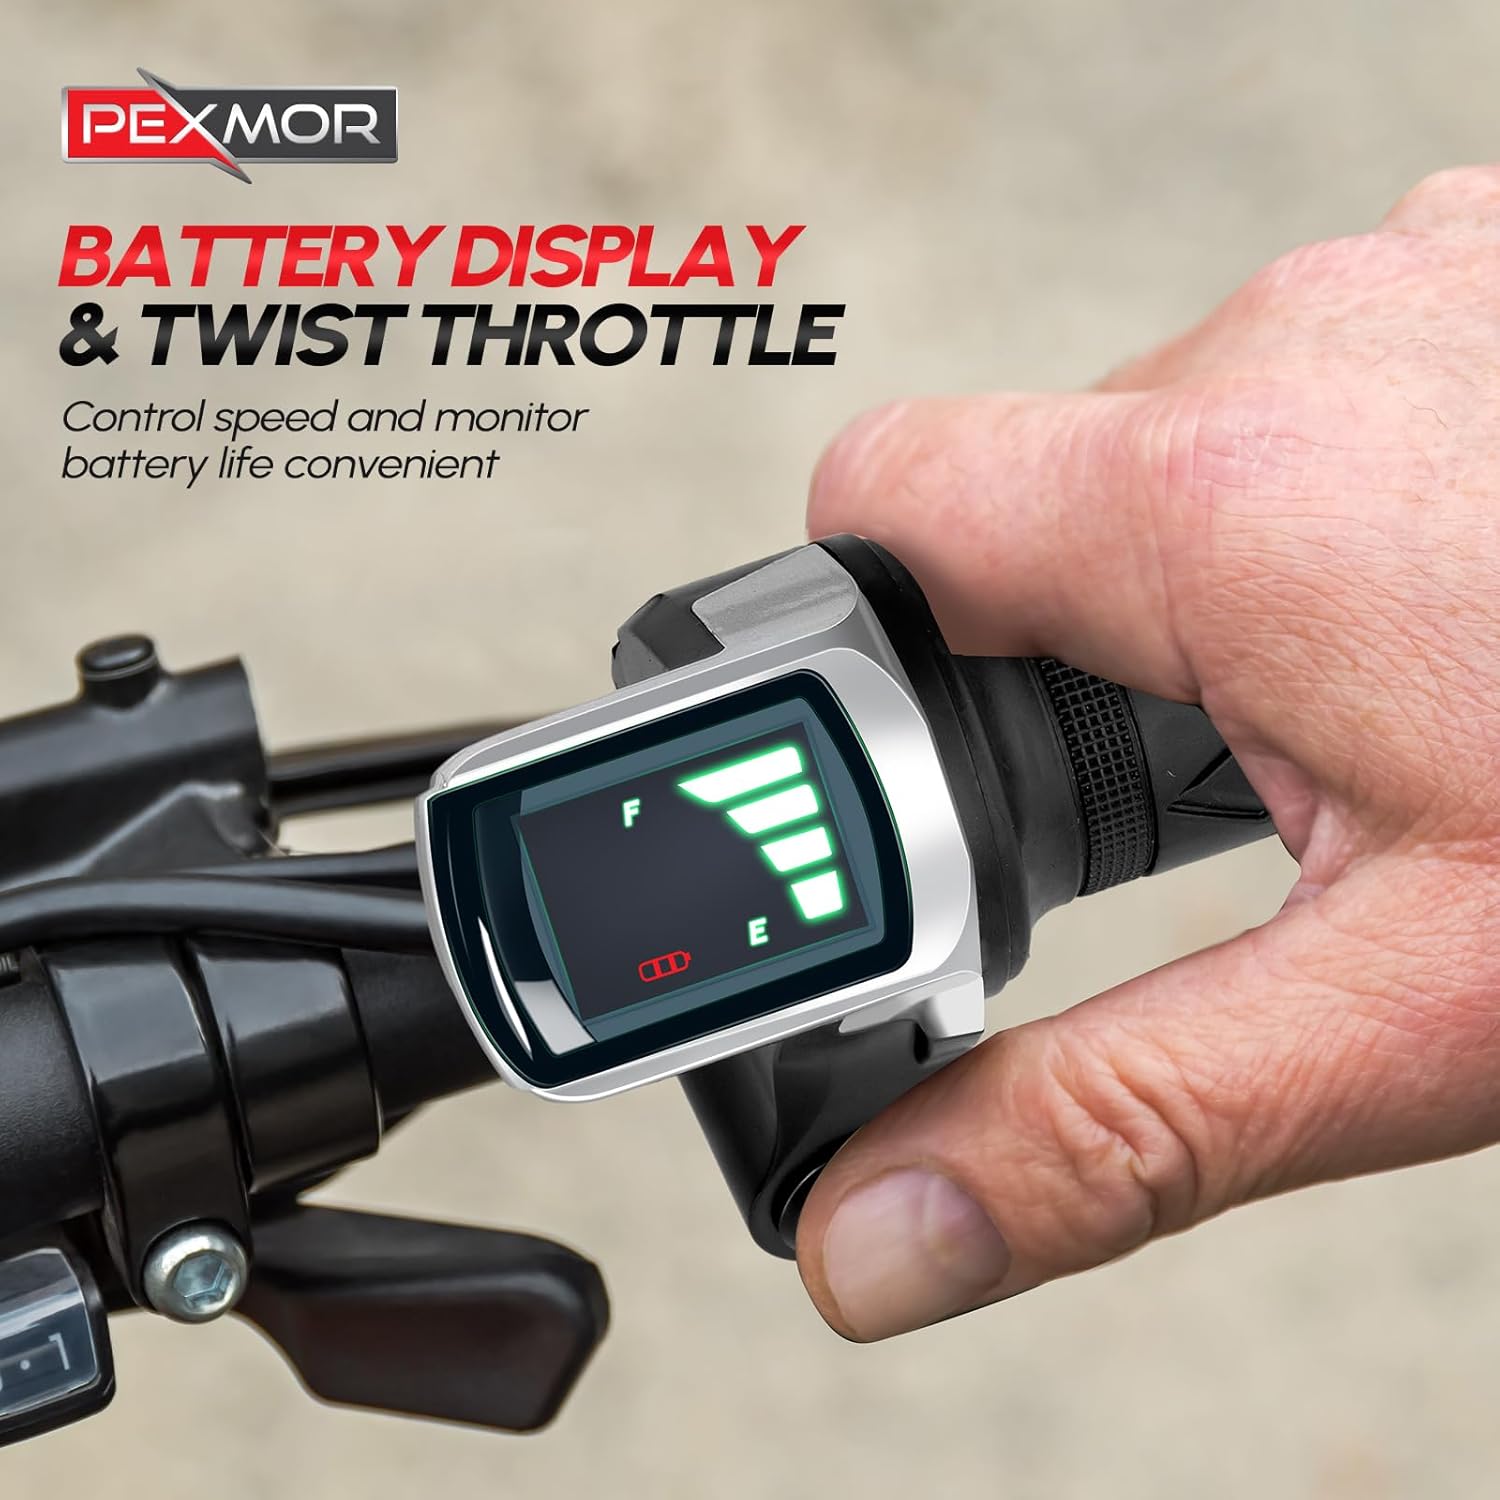
Image: Close-up view of the twist throttle with a clear battery level display.
5.4 Brake Levers
The included brake levers are equipped with a safety feature that cuts power to the motor when activated. This ensures safe braking and prevents the motor from working against the brakes.

Image: Detail of the motor power cut-off brake levers and the pedal assist sensor.
6. Maintenance
Regular maintenance ensures the longevity and optimal performance of your e-bike conversion kit.
- Routine Checks: Before each ride, check tire pressure, brake function, and ensure all electrical connections are secure.
- Cleaning: Keep the motor, controller, and other components clean and free from dirt and debris. Use a damp cloth; avoid high-pressure washing directly on electrical parts.
- Motor Inspection: The brushless hub motor is designed for efficiency and quiet operation. Periodically check for any unusual noises or vibrations.
- Cable Management: Ensure all cables are neatly routed and secured with cable ties to prevent snagging or damage.
- Fasteners: Periodically check and tighten all bolts and fasteners, especially on the motor wheel and torque arm.
7. Troubleshooting
If you encounter issues with your e-bike kit, refer to the following common troubleshooting tips:
- No Power: Check battery connection, ensure the battery is charged, and verify all controller connections are secure.
- Motor Not Engaging: Ensure the throttle is functioning, the PAS sensor is correctly installed and aligned, and brake levers are not partially engaged.
- Controller Operation: The controller is designed to operate under both Hall effect and non-Hall effect modes. If Hall components fail, the controller will automatically switch to non-Hall effect mode, allowing the motor to continue functioning, though performance might be slightly altered.
- Unusual Noises: Inspect the motor wheel for any obstructions or loose spokes. Check for proper installation of the torque arm.
For persistent issues, contact PEXMOR customer support.
8. Specifications
Key specifications for the PEXMOR 48V 1200W 26-inch Front Wheel E-Bike Hub Motor Conversion Kit:

Image: Detailed specifications of the 48V 1200W brushless hub motor.
| Feature | Specification |
|---|---|
| Bike Type | Electric Bike (Conversion Kit) |
| Brand | PEXMOR |
| Model Number | PMG40000540 |
| Motor Wattage | 1200W |
| Motor Voltage | 48V |
| Motor Type | Brushless Hub Motor |
| Motor Rotating Speed | Up to 470 RPM |
| Motor Torque | 33 NM |
| Motor Efficiency | 83.6% |
| Wheel Size | 26 Inches |
| Tire Width | 1.95 Inches / 4.95 CM |
| Motor Hub Diameter | 250mm / 9.84 Inches |
| Axial Length | 17cm / 6.8 Inches |
| Rim Diameter | 572mm / 22.5 Inches |
| Frame Material | Aluminum |
| Brake Style | Disc |
| Applicable Front Dropout Spacing | 100mm / 3.93 Inches |
| Max Weight Capacity | 220 lbs (100 kg) |
| Climbing Angle | 9° |
| Recommended Battery (not included) | 48V 18AH/20AH with >35A BMS Current |
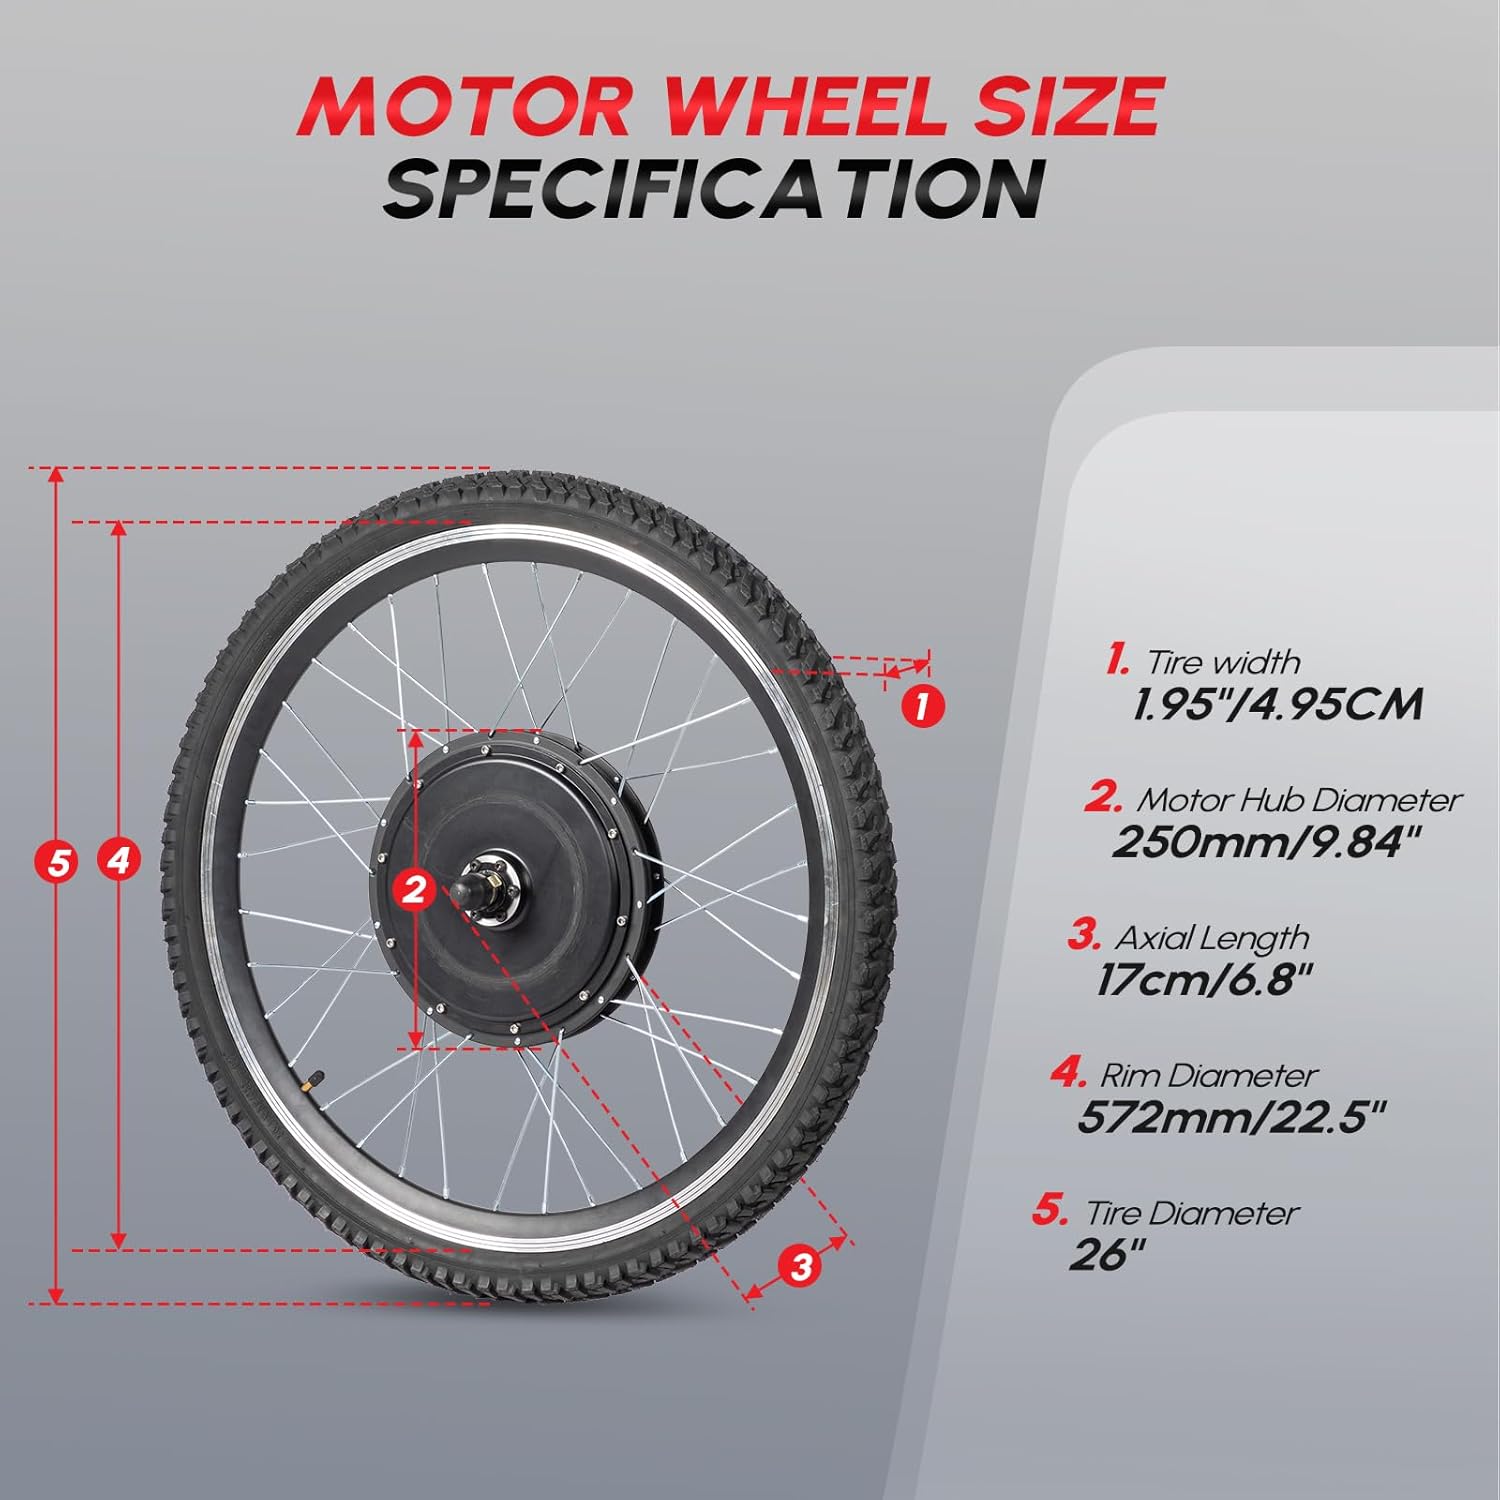
Image: Diagram detailing the dimensions of the motor wheel, including tire width, motor hub diameter, axial length, rim diameter, and overall tire diameter.
9. Warranty and Support
9.1 Warranty Information
The PEXMOR Electric Bike Conversion Kit comes with a 1-Year Warranty from the date of purchase. This warranty covers manufacturing defects under normal use. Please retain your proof of purchase for warranty claims.
9.2 Customer Support
For technical assistance, troubleshooting, or warranty inquiries, please contact PEXMOR customer support. You can find more information and contact details by visiting the official PEXMOR store: