1. Introduction
Thank you for choosing the Generic Targa TG-H12000.4 Hitman Series 4-Channel Amplifier. This manual provides essential information for the proper installation, operation, and maintenance of your amplifier. Please read this manual thoroughly before attempting installation or operation to ensure optimal performance and safety.
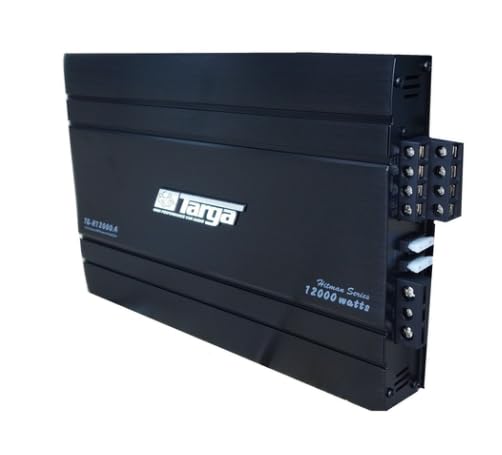
Image 1.1: Front view of the Targa TG-H12000.4 Hitman Series 4-Channel Amplifier. This image displays the sleek black casing with the 'Targa' logo and model number 'TG-H12000.4' visible on the top surface.
2. Safety Information
Always observe the following safety precautions to prevent injury or damage to the amplifier or vehicle:
- Professional Installation Recommended: Installation of car audio equipment can be complex. If you are unsure about any part of the installation process, seek assistance from a qualified professional.
- Disconnect Battery: Before starting any wiring, disconnect the vehicle's negative battery terminal to prevent electrical shorts.
- Proper Wiring: Ensure all wiring is correctly routed and secured to prevent pinching, cutting, or shorting. Use appropriate gauge wires for power, ground, and speakers.
- Ventilation: Install the amplifier in a location that allows for adequate air circulation to prevent overheating. Do not cover the amplifier with carpets or other materials.
- Fuse Protection: Always use the correct fuse rating as specified in the specifications. Never replace a fuse with one of a higher rating.
- Avoid Moisture: Do not expose the amplifier to moisture or water.
- Volume Levels: Prolonged exposure to high volume levels can cause hearing damage. Adjust volume to a safe level.
3. Package Contents
Please check the box for the following items:
- 1 x Targa TG-H12000.4 Hitman Series 12000W 4-Channel Amplifier
- User Manual (this document)
- Mounting hardware (screws, etc. - may vary by package)
4. Setup and Installation
4.1. Mounting the Amplifier
Choose a secure, well-ventilated location for mounting the amplifier. Common locations include under a seat, in the trunk, or on an amplifier rack. Ensure the mounting surface is solid and can support the amplifier's weight. Use the provided mounting hardware to secure the amplifier firmly.

Image 4.1: Top-down view of the Targa TG-H12000.4 amplifier. This image shows the overall dimensions and the heat sink fins along the sides, which are crucial for proper heat dissipation.
4.2. Wiring Connections
All wiring should be done with the vehicle's battery disconnected.
- Power (B+): Connect a heavy-gauge power cable (e.g., 8 AWG or 4 AWG depending on total system power) directly from the positive (+) terminal of the vehicle's battery to the B+ terminal on the amplifier. Install an in-line fuse holder within 18 inches (45 cm) of the battery.
- Ground (GND): Connect a heavy-gauge ground cable of the same size as the power cable from the GND terminal on the amplifier to a clean, unpainted metal surface on the vehicle's chassis. Ensure a good electrical connection.
- Remote (REM): Connect a remote turn-on wire (typically 18 AWG) from the REM terminal on the amplifier to the remote output of your head unit. This wire turns the amplifier on and off with your car stereo.
- RCA Input: Connect RCA cables from the pre-amp outputs of your head unit to the RCA input jacks on the amplifier.
- Speaker Output: Connect your speakers to the speaker output terminals on the amplifier. Ensure correct polarity (+ to + and - to -) for each speaker. This is a 4-channel amplifier, allowing for connection of up to four speakers or two speakers in bridged mode (refer to specific wiring diagrams for bridged mode, not detailed here).
4.3. Initial Settings
After all wiring is complete and checked, reconnect the vehicle's battery.
- Gain Control: Start with the gain control set to minimum. Gradually increase the gain until you achieve a clear, undistorted sound at your desired maximum volume level from the head unit. Avoid setting the gain too high, as this can cause distortion and damage to speakers.
- Crossover Settings: The amplifier features a frequency response of 20Hz - 36Hz. Adjust any built-in crossover settings (if available on your specific model or head unit) to match your speaker types (e.g., high-pass for tweeters, low-pass for subwoofers). For mid-range and tweeter applications, a high-pass filter is typically used.
5. Operating the Amplifier
Once installed and configured, the amplifier operates automatically with your car's audio system. When the head unit is turned on, the amplifier will power up via the remote turn-on wire. When the head unit is turned off, the amplifier will power down.
- Volume Control: Adjust the overall system volume using your head unit. The amplifier's gain control is for matching the output of the head unit to the amplifier's input sensitivity, not for daily volume adjustments.
- Sound Quality: If you experience distortion, first check the gain settings. If distortion persists, inspect all wiring connections and ensure speakers are correctly matched to the amplifier's output capabilities.
6. Maintenance
The Targa TG-H12000.4 amplifier requires minimal maintenance.
- Cleaning: Periodically wipe the amplifier's exterior with a soft, dry cloth to remove dust. Do not use harsh chemicals or abrasive cleaners.
- Ventilation: Ensure that the area around the amplifier remains clear of obstructions to allow for proper airflow and prevent overheating.
- Connections: Occasionally check all wiring connections to ensure they are secure and free from corrosion.
7. Troubleshooting
If you encounter issues with your amplifier, refer to the following common problems and solutions:
| Problem | Possible Cause | Solution |
|---|---|---|
| No Power / Amplifier Not Turning On |
|
|
| No Sound Output |
|
|
| Distorted Sound |
|
|
| Amplifier Overheating |
|
|
8. Specifications
The following are the technical specifications for the Targa TG-H12000.4 Hitman Series 4-Channel Amplifier:
- Model: TG-H12000.4
- Max Power: 12000W
- RMS Power: 4 x 85W
- Channels: 4-Channel
- Frequency Response: 20Hz - 36Hz (-9dB)
- Signal-to-Noise Ratio: 9dB
- Fuse: 2 x 20A
- Item Model Number: TG_H12000.4
9. Warranty Information
This product comes with a Limited 6 Months Manufacturer's Warranty. Please retain your proof of purchase for any warranty claims. The warranty covers manufacturing defects under normal use. It does not cover damage caused by improper installation, misuse, accident, neglect, or unauthorized modification.
10. Support
For further assistance, technical support, or warranty inquiries, please contact the retailer where you purchased this product. They will be able to provide guidance or direct you to the appropriate service channels.