1. Introduction
This manual provides essential information for the safe and efficient operation, setup, and maintenance of your TUXING TXES031 High Pressure Air Compressor. Please read this manual thoroughly before operating the compressor to ensure proper use and to prevent damage or injury.
The TUXING TXES031 is an electric high-pressure pump designed for filling air tanks, such as those used for PCP airguns, paintball tanks, and small diving cylinders, up to 4500 PSI (300 Bar / 30 Mpa).
2. Safety Instructions
Always observe the following safety precautions to prevent personal injury or damage to the equipment:
- Ensure the compressor is placed on a stable, level surface in a well-ventilated area.
- Do not operate the compressor in wet or damp conditions.
- Always connect the compressor to a grounded power outlet with the correct voltage (220V).
- Never exceed the maximum rated pressure of the compressor or the tank being filled.
- Regularly check all hoses and connections for leaks or damage.
- Allow the compressor to cool down after extended use to prevent overheating.
- Keep children and pets away from the compressor during operation.
- Wear appropriate personal protective equipment (PPE), such as eye protection, when operating.
3. Product Overview
The TUXING TXES031 High Pressure Air Compressor is a compact and powerful unit designed for efficient air compression. It features a robust motor, a high-pressure pump, and integrated cooling mechanisms.
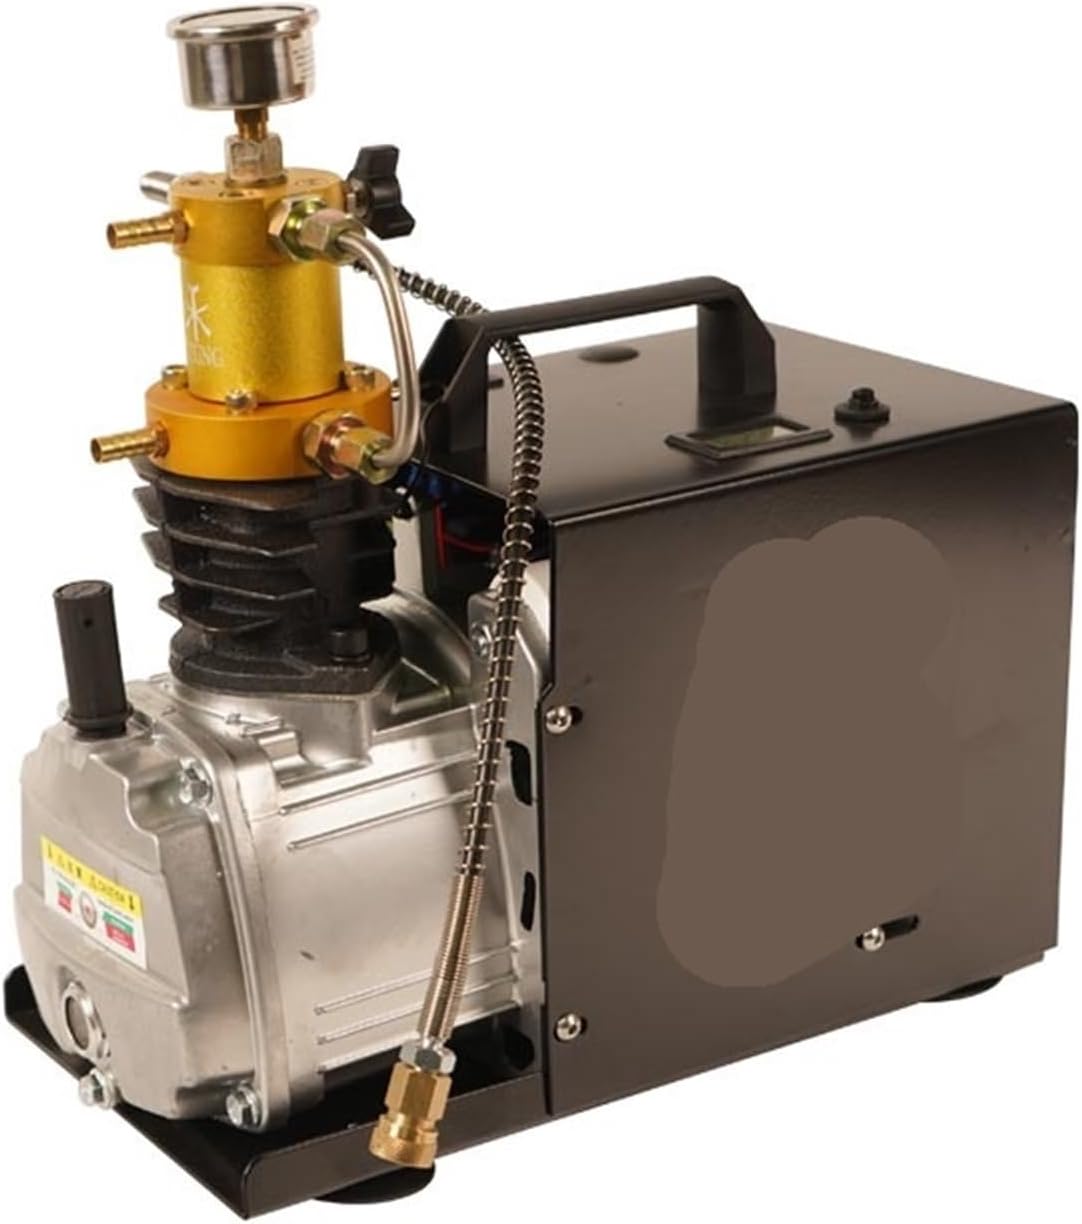
Figure 3.1: Front-right view of the TUXING TXES031 High Pressure Air Compressor, showing the main unit, pressure gauge, and hose connection.

Figure 3.2: Side view of the TUXING TXES031 High Pressure Air Compressor, highlighting the compact design and carrying handle.

Figure 3.3: Front view of the TUXING TXES031 High Pressure Air Compressor, showing the air intake and cooling fins.

Figure 3.4: Rear-left view of the TUXING TXES031 High Pressure Air Compressor, showing the power input and switch.

Figure 3.5: The TUXING TXES031 High Pressure Air Compressor connected to an external filter and gas cylinder. Note: The filters and gas cylinders shown are for display only and are not included with the compressor.
4. Setup
Follow these steps to set up your TUXING TXES031 compressor for the first time:
- Unpacking and Inspection: Carefully remove the compressor from its packaging. Inspect for any visible damage that may have occurred during shipping. Report any damage to your supplier immediately.
- Placement: Place the compressor on a firm, level, and stable surface. Ensure there is adequate space around the unit for ventilation and cooling. Avoid placing it near heat sources or in direct sunlight.
- Power Connection: Connect the power cord to the compressor's power inlet, then plug it into a standard 220V grounded electrical outlet. Ensure the power switch on the compressor is in the 'OFF' position before plugging it in.
- Hose Connection: Connect the high-pressure hose from the compressor to the tank or device you intend to fill. Ensure all connections are tight and secure to prevent air leaks.
- Cooling System (if applicable): If your model requires external water cooling, ensure the water pump and reservoir are properly set up and connected according to their respective instructions. Ensure water flows freely through the cooling system before operation.
- Initial Checks: Before starting, double-check all connections, ensure the power cord is securely plugged in, and verify that the tank you are filling is rated for the desired pressure.
5. Operating Instructions
Once the compressor is set up, follow these steps for safe operation:
- Prepare the Tank: Ensure the tank you are filling is securely connected to the compressor's high-pressure hose. Open the valve on the tank.
- Start the Compressor: Flip the power switch to the 'ON' position. The compressor will begin to operate and build pressure.
- Monitor Pressure: Continuously monitor the pressure gauge on the compressor. Do not exceed the maximum working pressure of your tank or the compressor (4500 PSI / 300 Bar).
- Monitor Temperature: If your compressor has a temperature gauge, monitor it to ensure it stays within safe operating limits. If the temperature rises too high, turn off the compressor and allow it to cool.
- Drain Condensation: During operation, condensation will accumulate. Periodically open the bleed valve (usually located at the bottom of the compressor or on the hose) to drain moisture. This is crucial for compressor longevity and air quality.
- Stop Operation: Once the desired pressure is reached, turn off the compressor by flipping the power switch to 'OFF'.
- Release Pressure: Slowly open the bleed valve to release the pressure from the hose and compressor. Do not disconnect the hose until all pressure has been released.
- Disconnect Tank: Close the valve on your tank, then disconnect the high-pressure hose from the tank.
6. Maintenance
Regular maintenance is essential for the longevity and optimal performance of your compressor.
- Drain Condensation: After each use, or at least daily during continuous operation, fully drain all condensation from the compressor and any connected filters. Moisture is the primary cause of internal corrosion.
- Air Filter Replacement: Check the air intake filter regularly. Replace it if it appears dirty or clogged. A dirty filter can reduce efficiency and cause overheating.
- Cooling System Check: For water-cooled models, regularly check the water level in the reservoir and ensure the water pump is functioning correctly. Clean the cooling coils if necessary.
- Lubrication: Refer to the specific lubrication requirements for your compressor model. Some models may require periodic oil changes or lubrication of moving parts.
- General Cleaning: Keep the exterior of the compressor clean and free of dust and debris. Ensure cooling vents are not obstructed.
- Storage: When not in use, store the compressor in a dry, clean environment, protected from extreme temperatures.
7. Troubleshooting
If you encounter issues with your compressor, refer to the following common problems and solutions:
| Problem | Possible Cause | Solution |
|---|---|---|
| Compressor does not start | No power supply Power switch off Thermal overload protection activated | Check power cord and outlet Turn power switch ON Allow compressor to cool down, then restart |
| Low pressure output | Air leaks in connections Clogged air filter Worn piston rings/seals | Check and tighten all hose connections Replace air filter Contact service for repair |
| Compressor overheats | Insufficient cooling Blocked air vents Continuous operation for too long | Ensure water cooling is functioning (if applicable) Clear any obstructions from vents Allow compressor to cool down after 15-20 minutes of continuous use |
| Excessive noise or vibration | Loose components Compressor not on level surface Internal mechanical issue | Check and tighten all screws and bolts Place on a stable, level surface Contact service for inspection |
| Moisture in air output | Condensation not drained regularly Humid environment | Drain condensation frequently Use a moisture filter (if not already integrated) |
8. Specifications
| Feature | Specification |
|---|---|
| Model | TXES031 |
| Brand | TUXING |
| Manufacturer | NICGQMQR |
| Max Pressure | 4500 Psi / 300 Bar / 30 Mpa |
| Voltage | 220V |
| Item Weight | 1.76 ounces (50 Grams) - Note: This weight appears to be for a component, not the full compressor. Refer to product packaging for actual unit weight. |
| Package Dimensions | 1.18 x 0.79 x 0.39 inches - Note: These dimensions appear to be for a component, not the full compressor. Refer to product packaging for actual unit dimensions. |
| Assembly Required | No (Minor setup required) |
9. Warranty and Support
For warranty information, please refer to the documentation included with your product packaging or contact the seller directly. Warranty terms and conditions may vary.
If you require technical support, have questions about operation, or need assistance with troubleshooting beyond what is covered in this manual, please contact the seller or manufacturer (NICGQMQR) through their official support channels. Provide your product model number (TXES031) and purchase details when contacting support.