
1. Introduction
This manual provides detailed instructions for the SoloGood FPV Monitor and Spotter V2 FPV Camera AIO Kit. It covers product components, specifications, setup procedures, operational guidelines, maintenance tips, and troubleshooting information to ensure optimal performance and user experience. This kit is designed for use with RC cars, boats, FPV drones, and other compatible remote-controlled vehicles.
2. Package Contents
Verify that all items listed below are included in your package:
- FPV Monitor
- FPV Camera
- FPV Display Screen
- Spotter V2 FPV Camera Transmitter
3. Product Overview
The SoloGood FPV Monitor and Spotter V2 FPV Camera AIO Kit offers a comprehensive solution for first-person view applications. The monitor features a 4.3-inch IPS screen with 800x480 resolution and 40 channels for 5.8Ghz signal reception. The Spotter V2 FPV Camera is a 700TVL camera with a 170° FOV and adjustable power output (20/100/200mW).

Figure 3.1: The SoloGood FPV Monitor and Spotter V2 FPV Camera Kit, showing the monitor with antennas and the compact camera unit.

Figure 3.2: Various views of the SoloGood FPV Monitor, highlighting its compact design and antenna ports.

Figure 3.3: Rear view of the SoloGood FPV Monitor, displaying the brand logo and general casing.
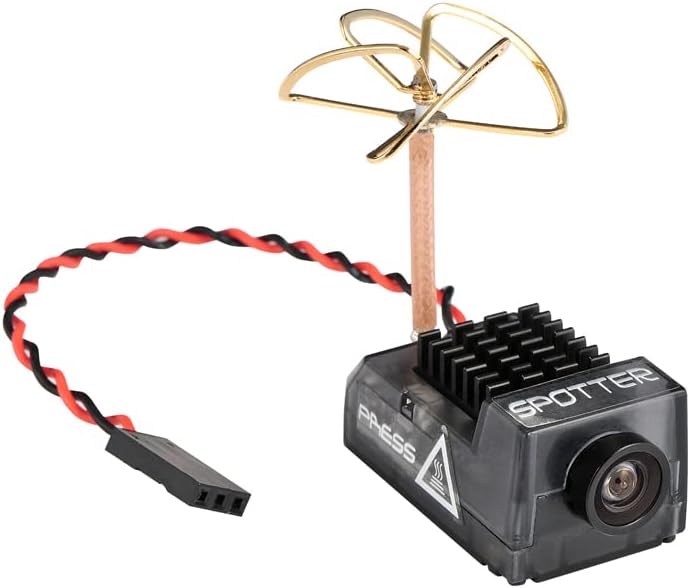
Figure 3.4: The SoloGood FPV Monitor held in a hand, illustrating its portable size.

Figure 3.5: The Spotter V2 FPV Camera, showing its compact form factor and power/video wiring.

Figure 3.6: The SoloGood FPV Monitor displaying a live video feed from the FPV camera, demonstrating its operational capability.
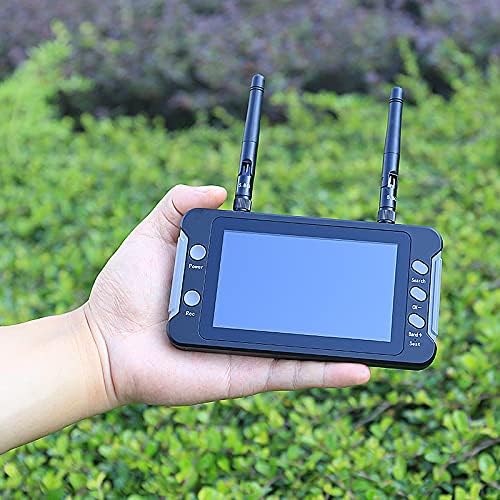
Figure 3.7: Front view of the Spotter V2 FPV Camera, highlighting its lens and heat sink.
Product Videos
Video 3.1: This video demonstrates the SoloGood 4.3-inch FPV Monitor in operation, showing its power-on sequence and receiving a live FPV feed from a drone. It highlights the monitor's automatic channel search function and clear display.
Video 3.2: This video provides a guide on how to set up a head-tracking FPV system for an RC car. It illustrates the process of connecting FPV goggles, a camera with a VTX, and a 3-axis gimbal, then activating head tracking for an immersive driving experience.
4. Specifications
| Feature | Detail |
|---|---|
| Brand | SoloGood |
| Model Name | Spotter V2 |
| Special Feature | FPV Capability |
| Color | Black |
| Video Capture Resolution | 800x480 |
| Connectivity Technology | 5.8Ghz |
| Skill Level | Advanced |
| Video Capture Format | MP4 |
| Material | Plastic |
| Wireless Communication Technology | Radio Frequency |
| Optical Sensor Technology | CMOS |
| Video Output Resolution | 800x480 |
| Supported Image Format | JPEG |
5. Setup Instructions
- Attach Antennas to Monitor: Carefully screw the two included antennas onto the SMA connectors located on the top of the FPV monitor. Ensure they are finger-tight.
- Power On Monitor: Press and hold the 'Power' button on the monitor until the screen illuminates. The monitor will typically display static or a 'No Signal' message initially.
- Connect FPV Camera: Connect the Spotter V2 FPV Camera to a compatible power source (e.g., your RC vehicle's battery or a dedicated FPV power supply). Ensure correct polarity to prevent damage. The camera will automatically begin transmitting video.
- Automatic Channel Search: On the FPV monitor, press the 'Search' button. The monitor will automatically scan through available 5.8Ghz channels to find the strongest signal from your Spotter V2 FPV Camera. Once a clear signal is found, the live video feed will appear on the screen.
- Manual Channel Adjustment (Optional): If the automatic search does not yield a clear image, you can manually adjust the channel and band using the 'CH+' and 'Band+' buttons on the monitor. Refer to your camera's specifications for its transmitting frequency.
- Mounting the Camera: Securely mount the Spotter V2 FPV Camera to your RC vehicle using appropriate mounting hardware (not included). Ensure the camera has a clear line of sight for optimal video transmission.
6. Operating Instructions
Monitor Controls:
- Power Button: Press and hold to turn the monitor ON/OFF. A short press may cycle through display modes or confirm selections in menus.
- Rec Button: Press to start or stop video recording to a microSD card (if inserted). A recording indicator will typically appear on the screen.
- Search Button: Initiates the automatic channel search function to find the best 5.8Ghz FPV signal.
- CH+ Button: Manually cycles through channels within the current band.
- Band+ Button: Manually cycles through the available 5.8Ghz frequency bands.
Recording Video:
- Insert a formatted microSD card into the TF Card slot on the monitor.
- Ensure a stable FPV video feed is displayed.
- Press the 'Rec' button once to start recording. A red dot or similar icon will indicate active recording.
- Press the 'Rec' button again to stop recording.
7. Maintenance
- Cleaning: Use a soft, dry cloth to clean the monitor screen and camera lens. For stubborn smudges, a slightly damp cloth with water can be used, followed by immediate drying. Avoid harsh chemicals.
- Storage: Store the FPV monitor and camera in a cool, dry place away from direct sunlight and extreme temperatures. Protect the camera lens from scratches.
- Antenna Care: Handle antennas carefully to avoid bending or breaking. Ensure they are securely attached during use.
- Cable Inspection: Regularly inspect all cables for signs of wear, fraying, or damage. Replace damaged cables immediately.
8. Troubleshooting
- No Signal/Static on Monitor:
- Ensure the FPV camera is powered on and transmitting.
- Verify that both the monitor and camera antennas are securely connected.
- Perform an automatic channel search on the monitor.
- Manually cycle through bands and channels to find the correct frequency.
- Check for obstructions between the camera and monitor that might interfere with the signal.
- Poor Video Quality/Interference:
- Ensure the camera and monitor are on the same channel and band.
- Move away from other 5.8Ghz devices or sources of electromagnetic interference.
- Check for physical damage to antennas or cables.
- Ensure the camera lens is clean.
- Monitor Not Turning On:
- Ensure the monitor is fully charged or connected to a power source.
- Press and hold the power button for several seconds.
- Recording Issues:
- Ensure a compatible microSD card is inserted and properly formatted (FAT32 recommended).
- Check if the microSD card has sufficient free space.
- Try a different microSD card.
9. Warranty and Support
For warranty information and technical support, please refer to the SoloGood official website or contact their customer service directly. Keep your purchase receipt as proof of purchase for any warranty claims.