1. Introduction
This instruction manual provides essential information for the safe and effective installation, operation, and maintenance of your new Generic Refrigerator Ice Maker Assembly. Please read this manual thoroughly before attempting any installation or repair to ensure proper function and to prevent potential damage or injury. This ice maker is designed as a replacement part for specific Samsung refrigerator models.
2. Safety Information
WARNING: Risk of Electric Shock. Disconnect power before servicing.
- Always disconnect the refrigerator from the power supply before attempting any installation, repair, or maintenance.
- Wear appropriate personal protective equipment, such as gloves, to prevent injury.
- If you are unsure about any part of the installation process, it is recommended to seek assistance from a qualified appliance technician.
- Ensure all connections are secure and properly insulated after installation.
- Keep children and pets away from the work area during installation.
3. Package Contents
Verify that all components are present and undamaged upon opening the package.
- 1x Generic Refrigerator Ice Maker Assembly (as pictured)

Figure 1: Front view of the Generic Refrigerator Ice Maker Assembly. This image shows the complete ice maker unit, including the ice mold and electrical wiring harness.
4. Compatibility
This ice maker assembly is designed to replace the original ice maker in various Samsung refrigerator models. Please verify your refrigerator's model number against the list below to ensure compatibility. You can typically find your model number inside the refrigerator compartment or on the back of the unit.
Compatible Samsung Refrigerator Models:
- RS25H5000BC, RS25H5000SP, RS25H5000SR, RS25H5000WW
- RS25J500DBC, RS25J500DSG, RS25J500DSR, RS25J500DWW
- RS261MDBP, RS261MDBP/XAA, RS261MDPN, RS261MDRS, RS261MDRS/XAA, RS261MDRSXAA
- RS261MDWP, RS261MDWP/XAA
- RS263TDBP, RS263TDBP/XAA, RS263TDBPXAA, RS263TDPN, RS263TDPN/XAA
- RS263TDRS, RS263TDRS/XAA, RS263TDWP, RS263TDWP/XAA
If your model number is not listed or you are unsure about compatibility, please contact customer support for assistance.
5. Setup and Installation
Follow these general steps for installing the ice maker assembly. Specific steps may vary slightly depending on your refrigerator model. Refer to your refrigerator's service manual for detailed instructions if available.
- Disconnect Power: Unplug the refrigerator from the electrical outlet to prevent electric shock.
- Access the Old Ice Maker: Open the freezer door and locate the existing ice maker. Depending on your model, you may need to remove an ice bucket or a cover panel.
- Disconnect Wiring and Water Line: Carefully disconnect the electrical wiring harness from the old ice maker. If a water line is directly connected to the ice maker, disconnect it as well.
- Remove Old Ice Maker: Unscrew or unclip the old ice maker from its mounting brackets. Note the orientation and how it was secured for reinstallation.
- Install New Ice Maker: Position the new Generic Ice Maker Assembly in the same location and orientation as the old one. Secure it using the existing screws or clips.
- Connect Wiring and Water Line: Reconnect the electrical wiring harness to the new ice maker. Ensure the connection is firm and fully seated. If applicable, reconnect the water line.
- Replace Covers/Ice Bucket: Reinstall any cover panels or the ice bucket that were removed.
- Restore Power: Plug the refrigerator back into the electrical outlet.
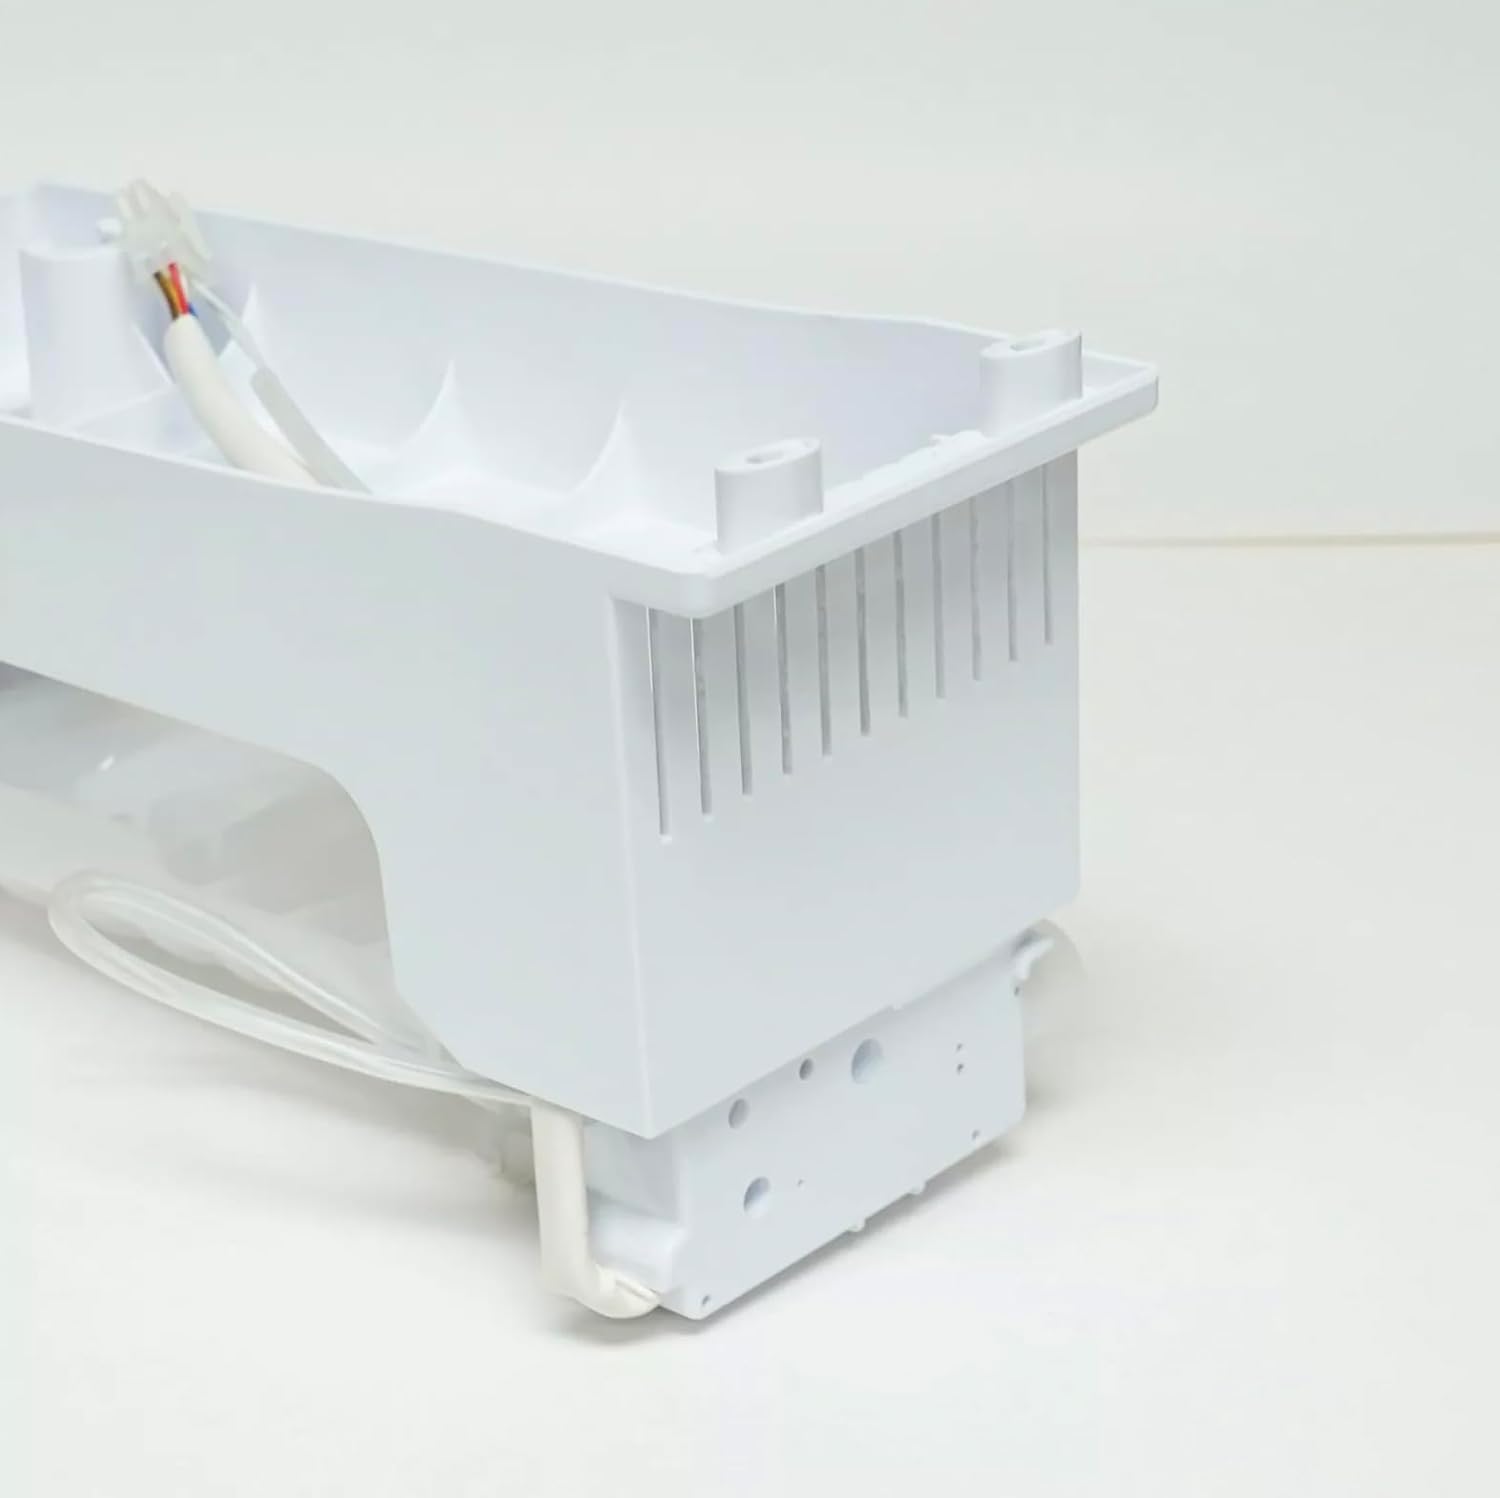
Figure 2: Side view of the ice maker, highlighting the electrical connector port. Ensure this connection is secure during installation.

Figure 3: Bottom view of the ice maker, showing the mounting points and structural support. These points align with the refrigerator's internal brackets.
6. Operating Instructions
After installation, the ice maker will typically begin its first cycle within a few hours. The first few batches of ice may be smaller or have an unusual taste; it is recommended to discard these initial batches.
- Ensure the ice maker's control arm (if present) is in the 'down' or 'on' position.
- Allow 12-24 hours for the freezer compartment to reach optimal temperature and for the ice maker to produce a full bin of ice.
- Check for any leaks around the water line connection points.
7. Maintenance
Regular maintenance helps ensure optimal performance and longevity of your ice maker.
- Cleaning: Periodically remove the ice bucket and clean it with mild soap and warm water. Rinse thoroughly and dry completely before returning it to the freezer.
- Water Filter: If your refrigerator has a water filter, ensure it is replaced regularly according to the manufacturer's recommendations to maintain ice quality.
- Inspection: Occasionally inspect the ice maker for any signs of wear, damage, or ice buildup that might impede its function.
8. Troubleshooting
If you encounter issues with your ice maker, refer to the following common problems and solutions:
| Problem | Possible Cause | Solution |
|---|---|---|
| No ice production | Refrigerator not plugged in; water supply off; ice maker arm in 'off' position; freezer temperature too high; clogged water filter. | Check power connection; ensure water supply valve is open; lower ice maker arm; verify freezer temperature is below 0°F (-18°C); replace water filter. |
| Small or hollow ice cubes | Low water pressure; clogged water filter; partially frozen water line. | Check household water pressure; replace water filter; thaw water line if frozen. |
| Ice tastes bad | Old water in reservoir; dirty ice bucket; old water filter. | Discard first few batches of ice; clean ice bucket; replace water filter. |
| Ice maker making unusual noises | Normal operation sounds; loose components; motor issue. | Some sounds are normal during ice production. If persistent or loud, check for loose parts. If problem persists, contact support. |
For issues not listed here or if troubleshooting steps do not resolve the problem, please contact customer support.
9. Specifications
- Product Name: Refrigerator Ice Maker Assembly
- Brand: Generic
- Model Name: Ice Maker
- Product Dimensions (D x W x H): 1" x 1" x 1" (Note: These dimensions appear to be placeholder values. Actual dimensions may vary slightly.)
- Capacity: 1 Cubic Feet (Ice storage capacity, approximate)
- Voltage: 1V (Note: This voltage appears to be a placeholder value. The actual operating voltage will be determined by the refrigerator's internal power supply for the ice maker.)
- Included Components: Ice Maker
10. Warranty and Customer Support
This Generic Refrigerator Ice Maker Assembly is intended as a replacement part. For specific warranty information, please refer to the retailer or seller from whom you purchased the product.
If you have any questions regarding compatibility, installation, or troubleshooting, please do not hesitate to contact our customer support team. We aim to resolve your inquiries within 24 hours.
Contact Information:
- Refer to your purchase documentation for specific contact details.
- Online support may be available through the seller's website.