FELLOSTAR 8-Core 2+32G
FELLOSTAR 9-Inch Android 13 Car Stereo Head Unit Instruction Manual
For Ford Mustang (2014-2021) - Model: 8-Core 2+32G
1. Introduction
This manual provides detailed instructions for the installation, operation, and maintenance of your FELLOSTAR 9-Inch Android 13 Car Stereo Head Unit. This unit is specifically designed for Ford Mustang models manufactured between 2014 and 2021, offering advanced features such as wireless CarPlay, Android Auto, GPS navigation, Bluetooth connectivity, and an intuitive touch screen interface. Please read this manual thoroughly before installation and use to ensure proper function and safety.
2. Setup and Installation
The FELLOSTAR head unit is designed for a plug-and-play installation, minimizing complex wiring. However, professional installation is recommended to ensure correct setup and avoid damage to your vehicle's electrical system.
2.1 Package Contents
Before beginning installation, verify that all components are present:
- FELLOSTAR 9-Inch Head Unit
- Power Cable with Canbus Box
- 4G Antenna
- 2 x USB Cables
- Microphone (MIC)
- GPS Antenna
- RCA Input & Output Cables
- Reversing Camera Audio Out Cable
- Backup Camera

Figure 2.1: Included Accessories
2.2 Pre-Installation Check
Ensure your Ford Mustang is within the compatible model years (2014-2021). Note that there may be slight differences between Style A and Style B units; confirm you have the correct unit for your vehicle's dashboard configuration.
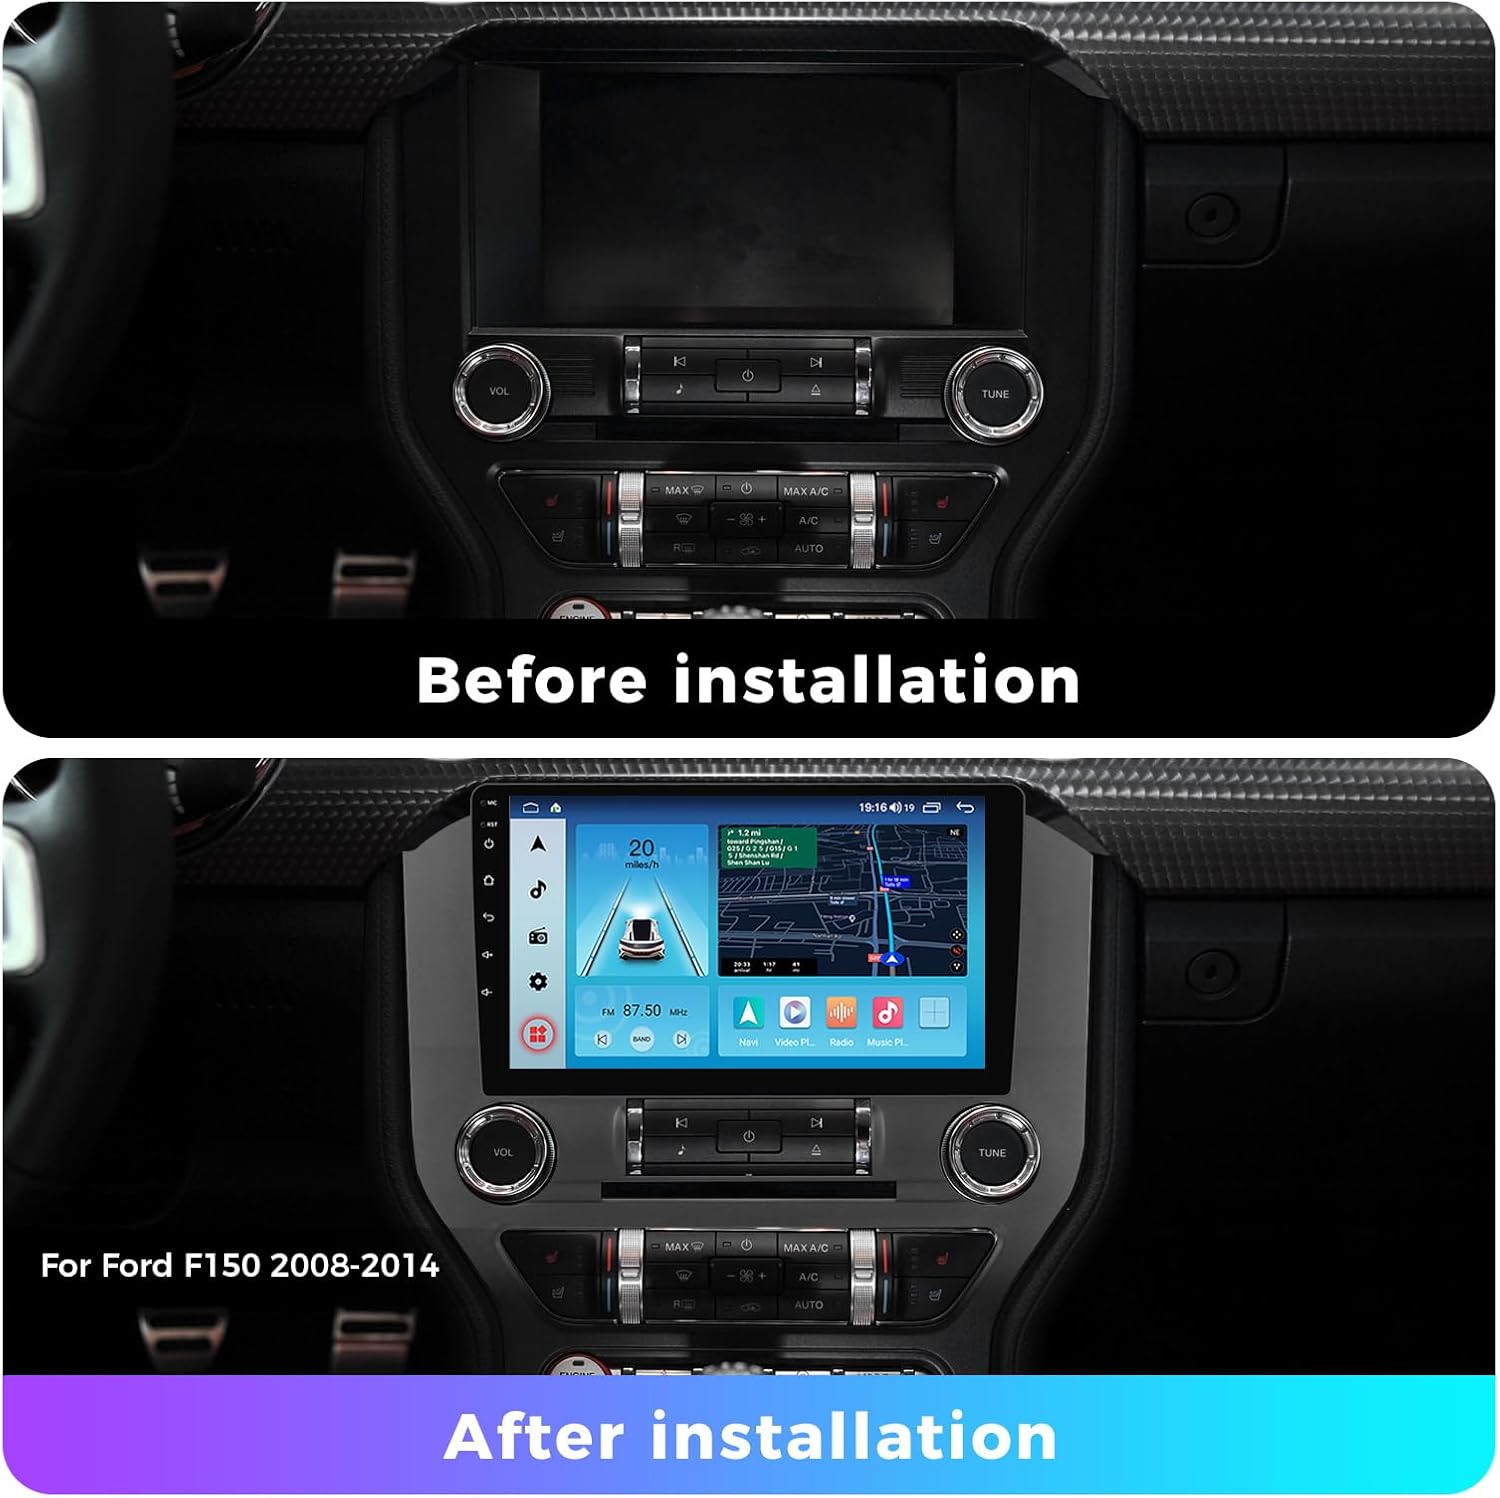
Figure 2.2: Before and After Installation Example
2.3 Installation Steps (General Guide)
- Disconnect Battery: For safety, disconnect the negative terminal of your vehicle's battery.
- Remove Factory Radio: Carefully remove the existing factory radio and dashboard trim. Refer to your vehicle's service manual for specific instructions.
- Connect Wiring Harness: Connect the provided power cable and Canbus box to the vehicle's wiring harness. Ensure all connections are secure.
- Connect Antennas: Connect the GPS antenna and 4G antenna to the corresponding ports on the new head unit. Position the antennas in a location with clear signal reception.
- Connect USB & RCA Cables: Connect the USB cables and RCA input/output cables as needed for external devices or amplifiers.
- Install Backup Camera: If installing the included backup camera, route the camera cable to the rear of the vehicle and connect it to the reversing camera input on the head unit.
- Mount Head Unit: Securely mount the FELLOSTAR head unit into the dashboard opening.
- Reconnect Battery: Reconnect the vehicle's battery.
- Initial Power On: Turn on the vehicle's ignition and power on the head unit to test functionality.
3. Operating Instructions
3.1 Android 13 System Overview
Your head unit runs on Android 13, powered by an 8-core processor with 2GB RAM and 32GB ROM. This provides a responsive and customizable user experience, allowing access to various Android applications.

Figure 3.1: Android 13 System Features
3.2 CarPlay and Android Auto
Enjoy seamless smartphone integration with both wired and wireless CarPlay and Android Auto. This allows access to navigation, media, notifications, and hands-free communication.
- Wireless Connection:
- Connect your phone via Bluetooth to the head unit.
- Select "Car Link" on the head unit and wait for the connection to establish.
- USB Wired Connection:
- Connect your mobile phone to the head unit using a USB cable.
- Select "Car Link" on the head unit and wait for the connection to establish.

Figure 3.2: CarPlay and Android Auto Connectivity
3.3 Bluetooth Connectivity
Pair your smartphone via Bluetooth for hands-free calls and audio streaming.
- Hands-Free Calling: Access your phone's contacts and make/receive calls directly from the head unit.
- Bluetooth Music: Stream audio from your phone to the car's speakers.

Figure 3.3: Bluetooth Phone and Music Functions
3.4 GPS Navigation
The unit includes a built-in GPS antenna for real-time location services. It supports various navigation applications and offers offline navigation capabilities (download of maps may be required).

Figure 3.4: GPS Navigation Interface
3.5 FM/AM Radio
Tune into your favorite FM/AM radio stations. The unit features a clear interface for station selection and saving presets.

Figure 3.5: FM/AM Radio Interface
3.6 Steering Wheel Control (SWC)
Retain your vehicle's original steering wheel controls. The unit supports learning functions to map your steering wheel buttons for volume adjustment, track skipping, answering calls, and more, enhancing driving safety.
Figure 3.6: Steering Wheel Control Functionality
3.7 Split Screen Functionality
Utilize the split-screen feature to run two applications simultaneously, such as navigation and music playback, for enhanced multitasking.

Figure 3.7: Split Screen Mode
3.8 Backup Camera
The included backup camera provides a clear view of the area behind your vehicle when reversing, enhancing safety and aiding in parking maneuvers.

Figure 3.8: Backup Camera View
4. Maintenance
- Screen Cleaning: Use a soft, lint-free cloth to gently wipe the touch screen. Avoid abrasive cleaners or solvents.
- Software Updates: Periodically check for software updates through the unit's settings menu to ensure optimal performance and access to new features.
- General Care: Keep the unit free from dust and extreme temperatures. Ensure all cables are securely connected.
5. Troubleshooting
| Problem | Possible Cause | Solution |
|---|---|---|
| Unit does not power on. | Loose power connection, blown fuse, vehicle battery issue. | Check power cable connections. Inspect vehicle fuses. Ensure vehicle battery is charged. |
| No sound. | Volume too low, mute activated, incorrect audio source, loose speaker wires. | Increase volume. Check mute status. Select correct audio source. Verify speaker wire connections. |
| CarPlay/Android Auto not connecting. | Incorrect connection steps, phone compatibility, faulty USB cable, Bluetooth issue. | Ensure correct wired/wireless steps are followed. Check phone compatibility. Try a different USB cable. Re-pair Bluetooth. |
| GPS signal weak or inaccurate. | GPS antenna obstruction, poor antenna placement. | Ensure GPS antenna has a clear view of the sky. Reposition antenna if necessary. |
| Steering Wheel Controls not working. | Incorrect Canbus connection, SWC learning not performed. | Verify Canbus box connection. Perform SWC learning procedure in settings. |
6. Specifications
- Operating System: Android 13
- Processor: 8-Core
- RAM: 2GB
- ROM: 32GB
- Screen Size: 9-Inch IPS Touch Screen
- Resolution: 1280x720 HD
- Connectivity: Wireless/Wired CarPlay, Wireless/Wired Android Auto, Bluetooth, Wi-Fi, 4G LTE (via 4G antenna)
- Navigation: Built-in GPS Module, supports offline maps
- Radio: FM/AM Tuner, RDS
- Audio: Digital Sound Processor (DSP)
- Compatibility: Ford Mustang (2014-2021)
- Included Accessories: Backup Camera
7. Warranty and Support
For technical assistance, troubleshooting, or warranty inquiries, please contact FELLOSTAR customer support. While specific warranty details are not provided in this manual, general support is available.
Customer Support Email: fello-service@outlook.com

Figure 7.1: FELLOSTAR Customer Support Information
Ask a question about this manual
Ask about setup, troubleshooting, compatibility, parts, safety, or missing instructions. Manuals+ will review the question and use this page’s manual context to help answer it.