Huacaoe TYWB 2CH 7V-32V RF
Huacaoe 2CH Smart Life WiFi Relay Module Instruction Manual
Model: TYWB 2CH 7V-32V RF
1. Product Overview
The Huacaoe 2CH Smart Life WiFi Relay Module is a versatile smart switch designed to integrate various electrical appliances into your smart home system. It supports WiFi, Bluetooth, and 433MHz RF remote control, offering compatibility with popular voice assistants like Alexa and Google Home. This module provides momentary (inching), self-locking, and interlock operating modes for flexible control of connected devices.

Figure 1: Huacaoe 2CH Smart Life WiFi Relay Module (Top View)
2. Specifications
| Working Voltage | AC/DC 7-32V |
| Power Consumption | <1W |
| Quiescent Current | 80mA |
| Cutover Current | <10A |
| Cutover Voltage | <250V |
| Working Temperature | -40 to 70 degrees Celsius |
| Working Humidity | 40% to 80% RH |
| Connectivity | WiFi (2.4G only), Bluetooth, 433MHz RF |
| Dimensions | 4.13 x 1.34 x 0.87 inches |
| Item Weight | 1.28 ounces |
| Model Number | TYWB 2CH 7V-32V RF |
3. Setup
3.1 Component Identification

Figure 2: Key components of the relay module, including input terminals, USB 5V input, manual switches, reset button, relay outputs, and network indicator.
- Input DC 7V~32V: Main power input for the module.
- Input USB 5V: Alternative power input via USB.
- Reset Button: Used for resetting the device and initiating pairing mode.
- Manual Switch: Buttons for local control of the relays.
- Relay: Electromechanical switches for controlling connected devices.
- NC (Normally Closed): Relay contact that is closed when the relay is de-energized and open when energized.
- COM (Common): Common terminal for the relay contact.
- NO (Normally Open): Relay contact that is open when the relay is de-energized and closed when energized.
- Network Indicator: LED indicating network status.
3.2 Wiring Instructions
Ensure all power is disconnected before performing any wiring. Incorrect wiring can damage the device or connected appliances.
- Power Supply: Connect the module to a DC/AC 7-32V power source via the input terminals or use a 5V USB power supply.
- Appliance Connection: Connect your appliances to the relay output terminals (NC, COM, NO) based on the desired operating mode.
3.2.1 Interlock Mode Wiring (for Motors/Two-Way Control)
This mode is suitable for controlling devices like motors (e.g., garage doors, window blinds) where only one direction of movement should be active at a time.
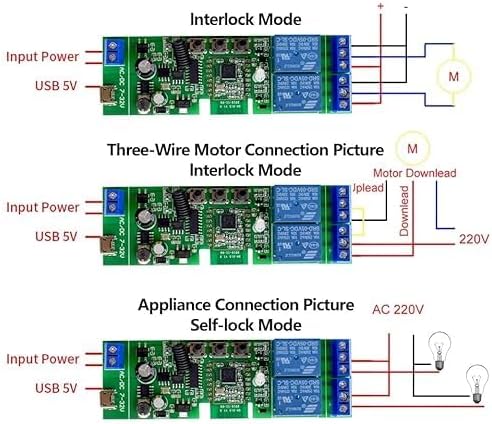
Figure 3: Wiring for a three-wire motor in Interlock Mode. The module's outputs control the motor's up/down or forward/reverse functions, ensuring only one is active at a time.
For three-wire motors, connect the motor's control wires to the relay outputs (e.g., one to NO1, one to NO2, and the common to COM). The module will prevent both relays from being active simultaneously.
3.2.2 Self-Lock Mode Wiring (for On/Off Appliances)
This mode is used for standard on/off control of individual appliances, such as lights.
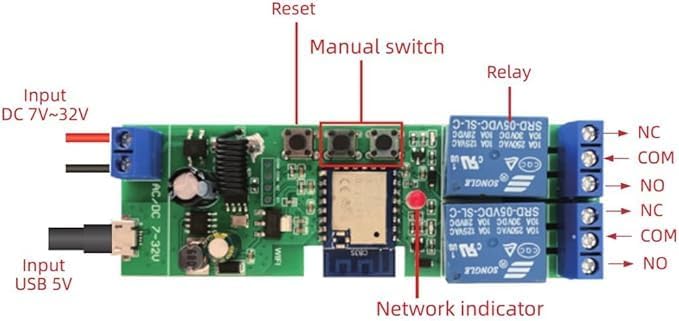
Figure 4: Wiring for AC 220V appliances in Self-Lock Mode. Each relay can independently switch an appliance on or off.
Connect the appliance's power line through the relay's COM and NO terminals. When the relay is activated, the circuit closes, turning the appliance on. When deactivated, the circuit opens, turning it off.
3.3 App Installation and Device Pairing
The module uses the Tuya Smart Life app for configuration and control. Ensure your mobile phone has Bluetooth and location services enabled.
- Download the "Smart Life" or "Tuya Smart" app from your mobile app store (iOS App Store or Google Play Store).
- Register or log in to your account.
- Power on the device. The network indicator should flash quickly. If it does not, press and hold the Reset button until it flashes quickly.
- Open the Tuya app, tap the "+" icon in the upper right corner to add a device.
- The app will search for nearby devices via Bluetooth. Tap on the discovered device to add it.
- Enter your 2.4G WiFi network name and password. Note: 5G WiFi networks are not supported.
- Wait for the device to connect and be added successfully.
- Once added, you can rename the device and individual channels within the app.
Video 1: Demonstrates the process of pairing the Huacaoe Smart Relay Module with the Tuya Smart Life app, including initial power-on, resetting the device if needed, and connecting to a 2.4G WiFi network.
4. Operating Instructions
4.1 Control Modes
The module supports three primary operating modes, configurable via the Smart Life app:
- Momentary (Inching) Function: When enabled, pressing the switch in the app will turn the relay on for a preset duration (e.g., 1 second to 1 hour) and then automatically turn it off. This is ideal for triggering actions like opening a garage door or gate.
- Self-Locking (On/Off) Mode: Each relay acts as a standard on/off switch. Pressing the button turns it on, and pressing it again turns it off. This is suitable for lights or other appliances requiring continuous power until manually switched off.
- Interlock Mode: Designed for controlling two-way devices (e.g., motors). When one relay is activated, the other is automatically deactivated, preventing simultaneous operation and potential damage.
Video 2: Demonstrates setting the inching time within the Tuya Smart Life app, showing how to configure the duration for momentary relay activation.
4.2 App Control
Once paired, you can control the module and its connected devices from anywhere with an internet connection using the Smart Life/Tuya app.
- Remote On/Off: Toggle connected devices on or off directly from the app.
- Timing Schedules: Set up to 8 single, repeat, or countdown timers to automatically turn devices on or off at specified times.
- Device Sharing: Share control of the module with family members through the app.
- Real-time Status: View the current status of connected devices within the app.

Figure 5: The Smart Life app interface demonstrating the timing function, allowing users to set schedules for automatic device control.
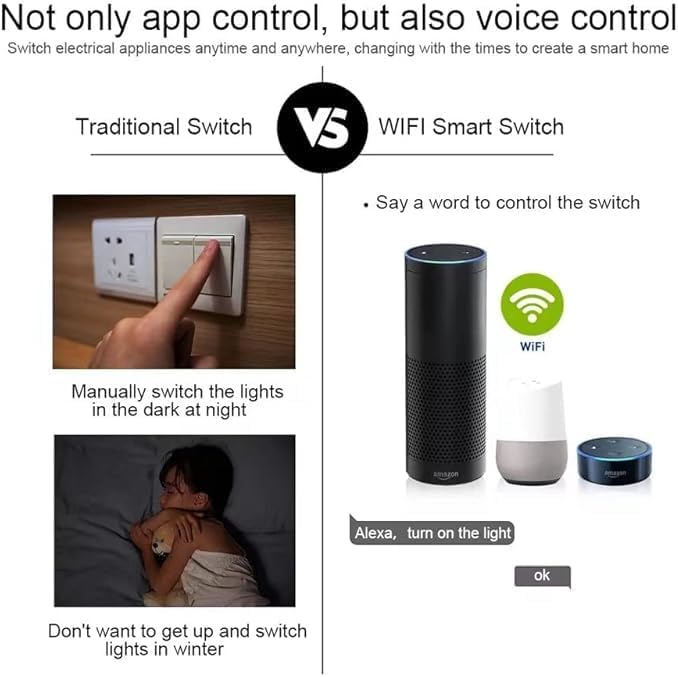
Figure 6: A smartphone displaying the app interface used to control a garage door, highlighting the ability to open/close and schedule operations.
4.3 Voice Control
The module is compatible with Alexa and Google Home. Link your Smart Life/Tuya account to your voice assistant app to enable voice commands.
- For Alexa: "Alexa, turn on the light." or "Alexa, turn on Garage door."
- For Google Home: "Hey Google, turn off the bedroom light."
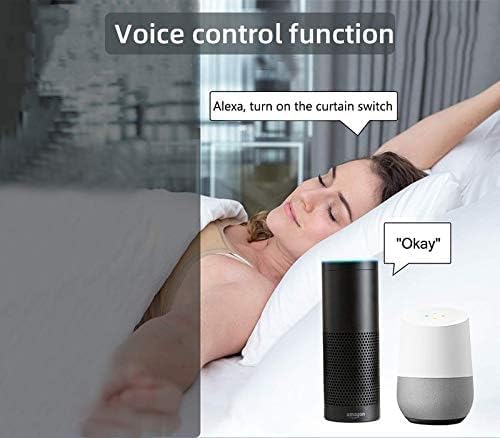
Figure 7: Depiction of voice control functionality, showing Amazon Echo and Google Home devices responding to commands to operate connected switches.
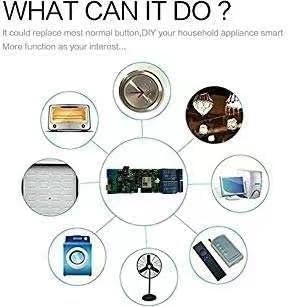
Figure 8: A user in bed issuing a voice command to "turn on the curtain switch," illustrating the convenience of voice-activated smart home control.
5. Maintenance
To ensure optimal performance and longevity of your Huacaoe Smart Life WiFi Relay Module, consider the following maintenance guidelines:
- Regular Cleaning: Keep the module free from dust and debris. Use a soft, dry cloth for cleaning. Do not use liquid cleaners.
- Environmental Conditions: Operate the module within the specified temperature (-40 to 70 degrees Celsius) and humidity (40% to 80% RH) ranges. Avoid exposure to extreme conditions, moisture, or direct sunlight.
- Firmware Updates: Periodically check the Smart Life/Tuya app for available firmware updates for the device. Updates can improve performance, add features, and enhance security.
- Wiring Integrity: Occasionally inspect wiring connections to ensure they are secure and free from corrosion or damage.
6. Troubleshooting
| Problem | Solution |
| Network indicator not flashing quickly during setup. | Press and hold the Reset button on the module until the indicator flashes quickly. This puts the device into pairing mode. |
| Device fails to connect to WiFi or frequently disconnects. |
|
| Voice control not working. |
|
| Appliance not responding to module commands. |
|
7. Warranty and Support
Specific warranty information for the Huacaoe 2CH Smart Life WiFi Relay Module is typically provided at the point of purchase or within the product packaging. Please refer to your purchase documentation for details regarding warranty coverage and duration.
For technical support, troubleshooting assistance beyond this manual, or inquiries about product functionality, please contact the seller or manufacturer directly through the platform where the product was purchased. Ensure you have your product model number (TYWB 2CH 7V-32V RF) and purchase details available when seeking support.
Ask a question about this manual
Ask about setup, troubleshooting, compatibility, parts, safety, or missing instructions. Manuals+ will review the question and use this page’s manual context to help answer it.