1. Introduction
Thank you for choosing the KGKGK P56 Hologram Projector. This device utilizes advanced LED technology and high-speed rotation to create stunning 3D holographic visuals, perfect for advertising, events, or decorative purposes. This manual provides essential information for the safe and effective operation, setup, and maintenance of your projector. Please read it thoroughly before use and retain it for future reference.
2. Product Overview and Package Contents
The KGKGK P56 Hologram Projector is designed for clear and vibrant 3D displays. It features a fan-like structure with integrated LEDs that create a floating image effect when in motion.
2.1 Package Contents
Upon unpacking, please ensure all items listed below are present and in good condition:
- Hologram Projector Unit (P56)
- Remote Control Unit
- Power Adapter
- Mounting Attachments (screws, anchors)
- User Manual (this document)
- 16GB Memory Card (pre-installed or included separately)

Image 2.1: The KGKGK P56 Hologram Projector unit with its dimensions (56cm diameter, 5cm height) and included accessories: remote control, mounting hardware, and user manual.
3. Specifications
| Material | Aluminum + ABS |
| LED Quantity | 678 |
| Voltage | 24V |
| Resolution | 2000*1356 |
| Supported Formats | MP4, AVL, MVB, JPE, PNG, etc. |
| Internal Memory | 16GB (included) |
| Product Size | 56 cm (diameter) |
| Weight | 1.05 kg |
| Model Number | 329339509 |
4. Setup
Follow these steps to set up your Hologram Projector:
- Choose a Location: Select a suitable location for mounting the projector. Ensure it is a stable surface or wall, away from direct sunlight or excessive heat. Consider the viewing angle for optimal 3D effect.
- Mounting: Use the provided mounting attachments (screws and anchors) to securely fix the projector to the chosen surface. Ensure the projector is level and firmly attached to prevent vibration or detachment during operation.
- Power Connection: Connect the power adapter to the projector's power input port, then plug the adapter into a standard electrical outlet (24V).
- Initial Power On: Once connected, the projector should power on automatically or can be turned on using the remote control. The fan blades will begin to rotate.
5. Operation
The KGKGK P56 Hologram Projector offers multiple control methods and features for a dynamic display experience.
5.1 Remote Control Operation
The included remote control allows for basic functions such as power on/off, content playback, and adjustments.
Image 5.1: The remote control unit, showing buttons for power, play/pause, stop, and navigation.
5.2 Mobile App Control
For advanced control and content management, download the 'Holoscope' app from your mobile phone's app store. The app provides features such as brightness control, angle adjustment, Bluetooth audio pairing, and content splicing.

Image 5.2: Illustration of the mobile app interface ('Holoscope') demonstrating various control options including brightness, angle adjustment, Bluetooth audio, and content management.
5.3 Content Upload and Playback
The projector supports various media formats including MP4, AVL, MVB, JPE, and PNG. Content can be uploaded to the included 16GB memory card. The app or a computer can be used to transmit and manage content.

Image 5.3: A laptop screen displaying a content management interface, indicating the process of uploading video footage to the holographic projector for 3D suspension effects.
5.4 Bluetooth Audio Integration
The projector features Bluetooth audio functionality, allowing you to connect external Bluetooth speakers for synchronized audio with your 3D visuals, enhancing the overall audiovisual experience.

Image 5.4: The hologram projector displaying a 3D image, with a Bluetooth speaker nearby, illustrating the Bluetooth audio connection feature for enhanced audiovisual effects.
5.5 Creating 3D Content with the App
The mobile app allows users to create custom 3D content, such as '3D word balls,' using multiple templates and editing tools. This feature enables personalized displays.
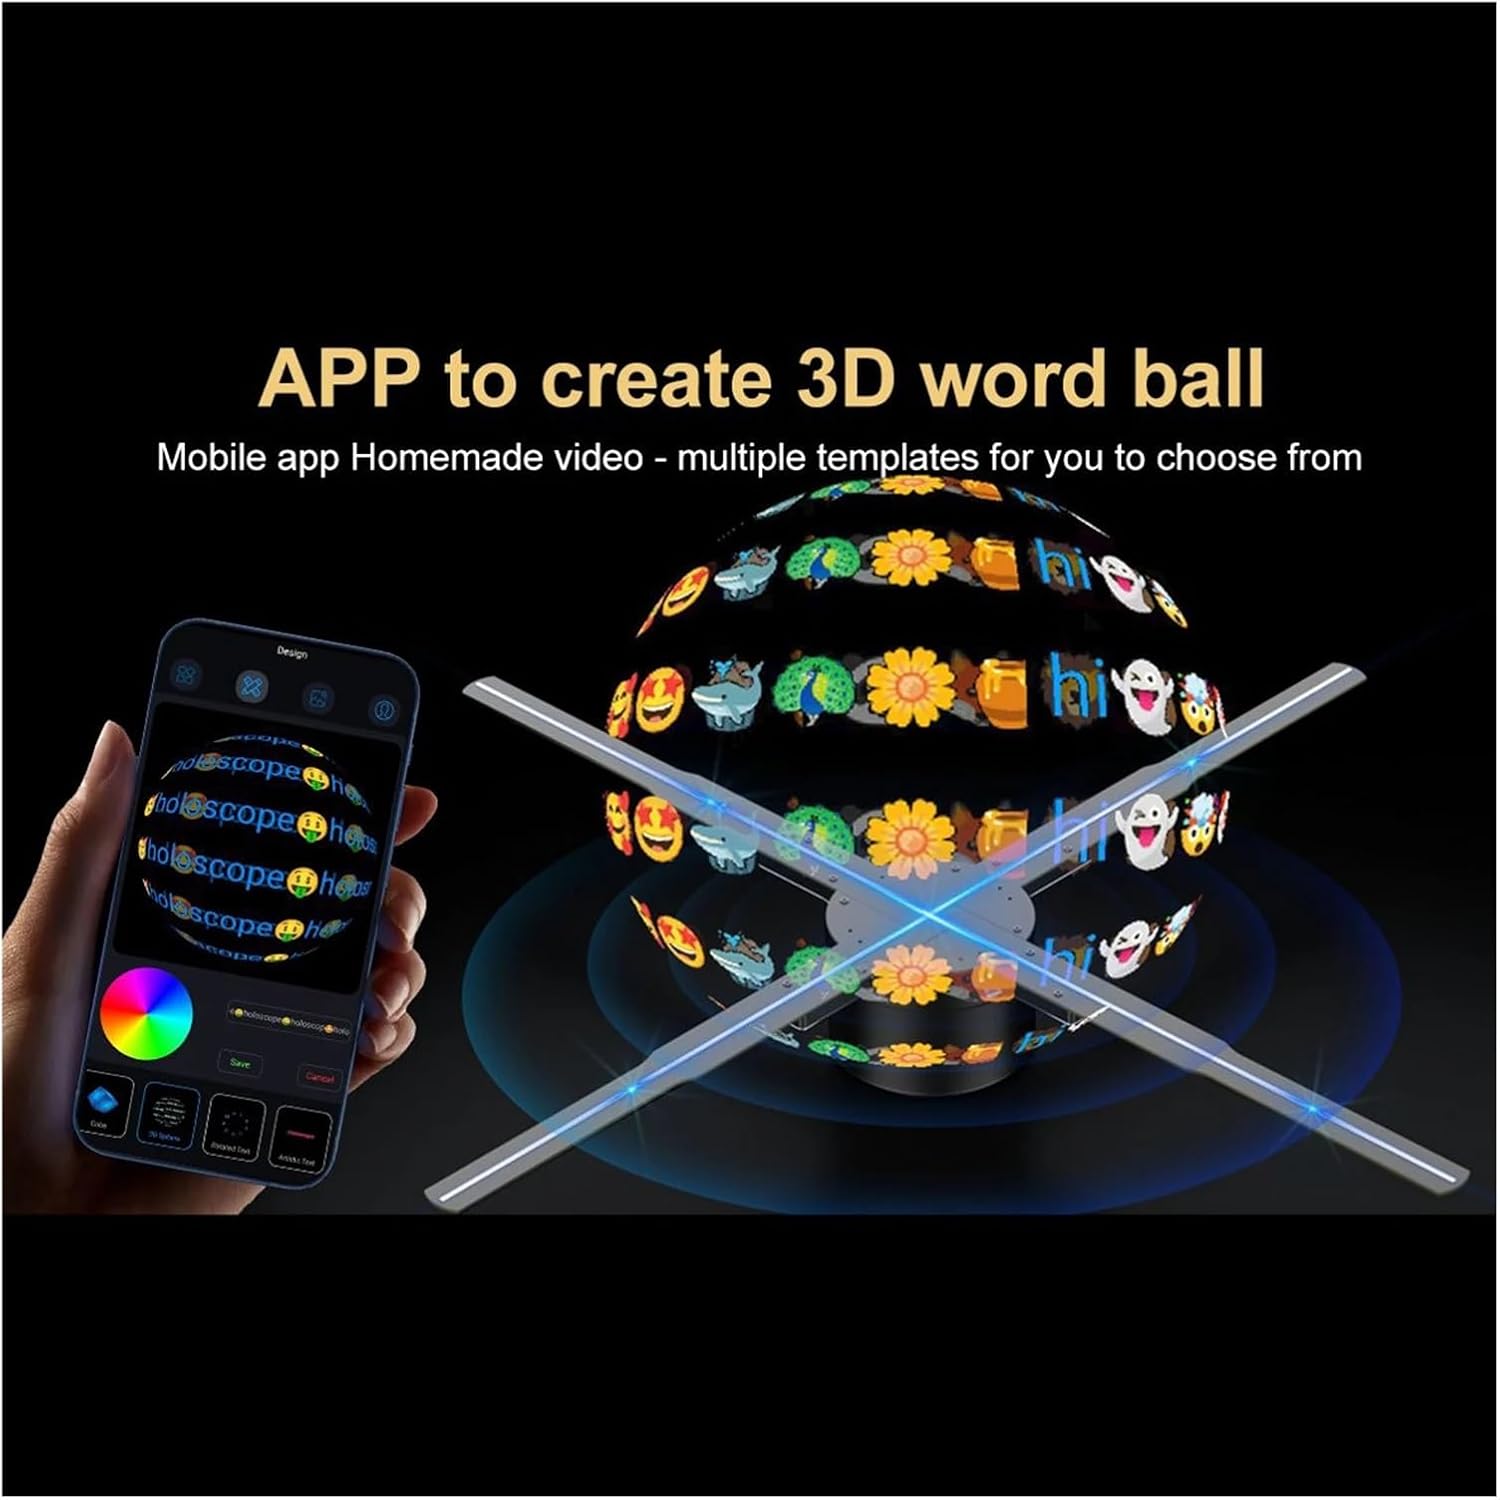
Image 5.5: A mobile phone screen showing the app's interface for creating custom 3D content, such as a '3D word ball,' with various templates and editing options, projected by the hologram fan.
6. Maintenance
Proper maintenance ensures the longevity and optimal performance of your projector.
- Cleaning: Gently wipe the projector's surface and fan blades with a soft, dry cloth. Do not use liquid cleaners or abrasive materials, as they may damage the LEDs or finish.
- Storage: When not in use for extended periods, store the projector in a cool, dry place, away from direct sunlight and extreme temperatures.
- Handling: Avoid touching the fan blades when the device is powered on or rotating. Handle the device carefully to prevent damage to the blades or internal components.
7. Troubleshooting
If you encounter issues with your KGKGK P56 Hologram Projector, refer to the following common problems and solutions:
- No Power:
- Ensure the power adapter is securely connected to both the projector and a working electrical outlet.
- Check if the power outlet is functional by plugging in another device.
- Verify the remote control batteries if using the remote to power on.
- No Image Display:
- Confirm that content has been successfully uploaded to the memory card.
- Check the content format compatibility (MP4, AVL, MVB, JPE, PNG).
- Ensure the fan blades are rotating at full speed.
- Remote Control Not Responding:
- Replace the batteries in the remote control.
- Ensure there are no obstructions between the remote and the projector.
- App Connection Issues:
- Ensure Bluetooth is enabled on your mobile device.
- Restart the 'Holoscope' app and the projector.
- Ensure your mobile device is within range of the projector.
If the issue persists after trying these steps, please contact customer support.
8. Safety Information
Please observe the following safety precautions:
- Do not touch the rotating fan blades. Keep hands, hair, and loose clothing away from the device during operation.
- Ensure the projector is securely mounted to prevent it from falling.
- Do not expose the device to water, moisture, or extreme temperatures.
- Use only the provided power adapter. Using unauthorized adapters may damage the device or pose a safety risk.
- Keep out of reach of children.
- Do not attempt to disassemble or repair the device yourself. Refer to qualified service personnel.
9. Warranty and Support
This product comes with a standard manufacturer's warranty. For specific warranty details, please refer to the documentation provided at the time of purchase or contact your retailer. For technical support, troubleshooting assistance, or service inquiries, please contact KGKGK customer service through the contact information provided on the product packaging or the official KGKGK website.