1. Important Safety Information
Please read this entire manual before installation and assembly. If you have any questions regarding these instructions or the safety of the installation, please contact customer service. Improper assembly or installation may cause serious personal injury or damage to property. The manufacturer is not responsible for injury or damage caused by incorrect assembly or use.
- Ensure the mounting surface can safely support the combined weight of the equipment and all attached hardware.
- Never exceed the maximum load capacity of 1000 kg (2200 lbs).
- Use only the provided hardware. Do not use power tools for assembly unless specified.
- This product is intended for indoor use only.
- Keep children and pets away during installation.
2. Package Contents
Verify that all components are present and undamaged before installation. If any parts are missing or defective, do not proceed with installation. Contact customer service for assistance.
- Wall Mount Bracket (Main Frame)
- TV Mounting Rails (2 pieces)
- All Necessary Mounting Hardware (screws, anchors, washers, spacers)
- Integrated Bubble Level
- Detailed Installation Guide (this manual)
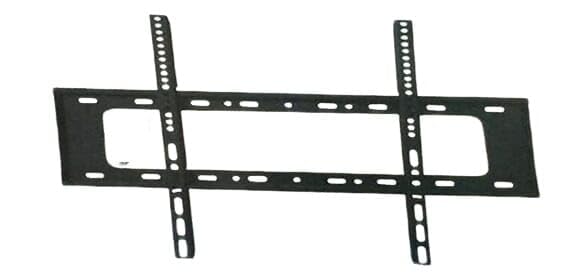
Image 1: Overview of the Generic Universal Fixed TV Wall Mount and its components.
3. Installation Instructions
This wall mount is designed for easy installation and universal compatibility, including with models like the Hitachi HE100532 32HE1005. Follow these steps carefully for secure mounting.
3.1 Tools Required (Not Included)
- Pencil
- Stud Finder (for wood stud walls)
- Drill with appropriate drill bits
- Phillips Head Screwdriver
- Measuring Tape
3.2 Mounting the Wall Plate
- Determine Mounting Location: Choose a suitable location on your wall. Ensure there are no hidden electrical wires or plumbing. For wood stud walls, locate the center of the studs. For concrete or brick walls, ensure the wall is solid.
- Mark Drill Holes: Hold the wall mount bracket against the wall at the desired height. Use the integrated bubble level to ensure it is perfectly horizontal. Mark the drill hole locations with a pencil.
- Drill Pilot Holes: Drill pilot holes at the marked locations. The size of the drill bit will depend on your wall type and the anchors provided. Refer to the hardware guide for specific drill bit sizes.
- Attach Wall Plate: Insert wall anchors (if required for your wall type) into the pilot holes. Secure the wall mount bracket to the wall using the provided screws and a Phillips head screwdriver. Ensure all screws are tightened firmly.
3.3 Attaching TV Mounting Rails to TV
- Identify VESA Holes: Locate the four mounting holes on the back of your TV. These are typically in a square or rectangular pattern.
- Select Correct Screws and Spacers: Choose the appropriate screws and spacers from the provided hardware kit that fit your TV's VESA holes. Ensure the screws are not too long, which could damage internal components.
- Attach Rails: Align the TV mounting rails with the VESA holes on the back of your TV. Secure the rails using the selected screws and spacers. Ensure the rails are oriented correctly so they can hook onto the wall mount bracket.
3.4 Mounting the TV to the Wall Plate
- Lift and Hook: With assistance, carefully lift the TV and hook the attached mounting rails onto the top edge of the wall mount bracket.
- Lower and Secure: Gently lower the TV until the rails fully engage with the wall mount bracket. Ensure the TV is centered and level.
- Engage Safety Locks: This mount is equipped with safety locks to prevent accidental detachment. Locate the safety locks (usually pull-straps or screws at the bottom of the rails) and engage them to secure the TV firmly to the wall mount.
- Final Check: Gently pull on the bottom of the TV to ensure it is securely attached and does not lift off the mount.
4. Operating Your Mounted TV
Once your TV is securely mounted, you can enjoy its sleek, modern appearance. As this is a fixed wall mount, the TV position is static. Ensure all cables are properly connected and managed for a clean setup.
- Cable Management: Route all necessary cables (power, HDMI, etc.) neatly behind the TV and through any cable management features of the mount or wall.
- Viewing Angle: Position your seating to optimize the viewing angle for your fixed TV.
5. Maintenance
Regular maintenance ensures the longevity and safety of your TV wall mount.
- Periodic Checks: Every 6-12 months, inspect all screws and connections to ensure they remain tight and secure.
- Cleaning: Wipe the mount with a soft, dry cloth. Avoid abrasive cleaners or solvents.
- Damage Inspection: If you notice any signs of damage, corrosion, or wear, discontinue use and contact customer service.
6. Troubleshooting
If you encounter issues during or after installation, refer to the following common problems and solutions.
| Problem | Possible Cause | Solution |
|---|---|---|
| TV is not level after mounting. | Wall plate not level during installation. | Remove TV, loosen wall plate screws, adjust using bubble level, re-tighten screws, and re-mount TV. |
| Mount feels loose on the wall. | Screws not fully tightened or incorrect anchors used. | Remove TV, check all wall plate screws for tightness. Ensure appropriate anchors were used for your wall type. If necessary, re-drill and use stronger anchors. |
| TV does not fit the mount. | Incorrect VESA pattern or TV size. | Verify your TV's VESA pattern and weight against the mount's specifications. This mount supports up to 1000 kg. |
7. Specifications
| Feature | Detail |
|---|---|
| Brand | Generic |
| Mounting Type | Wall Mount |
| Movement Type | Fixed |
| Material | High-quality, heavy-duty steel |
| Maximum Load Capacity | 1000 kg (2200 lbs) |
| Distance from Wall | 1.2 inches (3 cm) |
| Compatibility | Universal, suitable for various TV sizes including Hitachi HE100532 32HE1005 |
| Special Features | Integrated bubble level, safety locks |
| ASIN | B0DLJ6JRZ8 |
| Manufacturer | bnhyuu8121 |
8. Warranty and Support
This product comes with a standard warranty. The product title mentions a two-year warranty. For specific warranty terms, conditions, and to register your product, please refer to the product packaging or the seller's information on the purchase platform.
For technical support, missing parts, or any other inquiries, please contact the seller or manufacturer directly through the platform where the product was purchased.
Manufacturer: bnhyuu8121
ASIN: B0DLJ6JRZ8


