1. Introduction
This manual provides comprehensive instructions for the installation, maintenance, and general use of the VRTYVEYBB 5-piece filter replacement set. These filters are designed to maintain the air quality and operational efficiency of compatible iHome robotic vacuum cleaners. Please read this manual thoroughly before proceeding with installation or maintenance.
2. Product Overview
The VRTYVEYBB filter replacement set includes five (5) high-efficiency filters, each consisting of a pleated filter element and a foam pre-filter. These components work in conjunction to capture fine dust particles, pet dander, and other airborne allergens, contributing to a cleaner home environment and preserving the performance of your robotic vacuum.

Image 2.1: Overview of the five-piece filter replacement set.
3. Compatibility
This filter replacement set is compatible with the following iHome robotic vacuum cleaner models:
- iHome AutoVac Nova
- iHome AutoVac Nova Pro
- iHome AutoVac Nova S1 Pro
- iHome AutoVac Halo
- iHome AutoVac Orbita Pro
- iHome AutoVac Eclipse Pro
- iHome AutoVac Luna Pro
- iHRVS1PRO-3BLK
- iHRVS1-3BLKS
- iHRV9-BLKS
Important: Before installation, please verify that the dimensions of these replacement filters match your original vacuum cleaner filters to ensure proper fit and function. The approximate dimensions of each filter are 47mm x 108mm x 8mm.
4. Setup and Installation
Follow these steps to replace the filters in your iHome robotic vacuum cleaner:
- Power Off: Ensure your robotic vacuum cleaner is powered off and disconnected from its charging base before beginning any maintenance.
- Locate Filter Compartment: Refer to your vacuum cleaner's original manual to locate the dustbin and filter compartment. This is typically found on the top or underside of the unit.
- Remove Dustbin: Carefully remove the dustbin from the vacuum cleaner.
- Remove Old Filters: Open the dustbin to access the filter assembly. Gently pull out the old pleated filter and foam pre-filter. Dispose of them responsibly.
- Insert New Foam Pre-filter: Place a new black foam pre-filter into the designated slot within the dustbin. Ensure it sits flat and securely.
- Insert New Pleated Filter: Insert a new white pleated filter into the dustbin, ensuring the pull tab is facing outwards for easy removal during future maintenance. Press gently to ensure it is seated correctly.
- Reassemble Dustbin: Close the dustbin cover and reinsert the dustbin into the vacuum cleaner until it clicks securely into place.
- Power On: You may now power on your robotic vacuum cleaner.

Image 4.1: Individual pleated filter and foam pre-filter components.
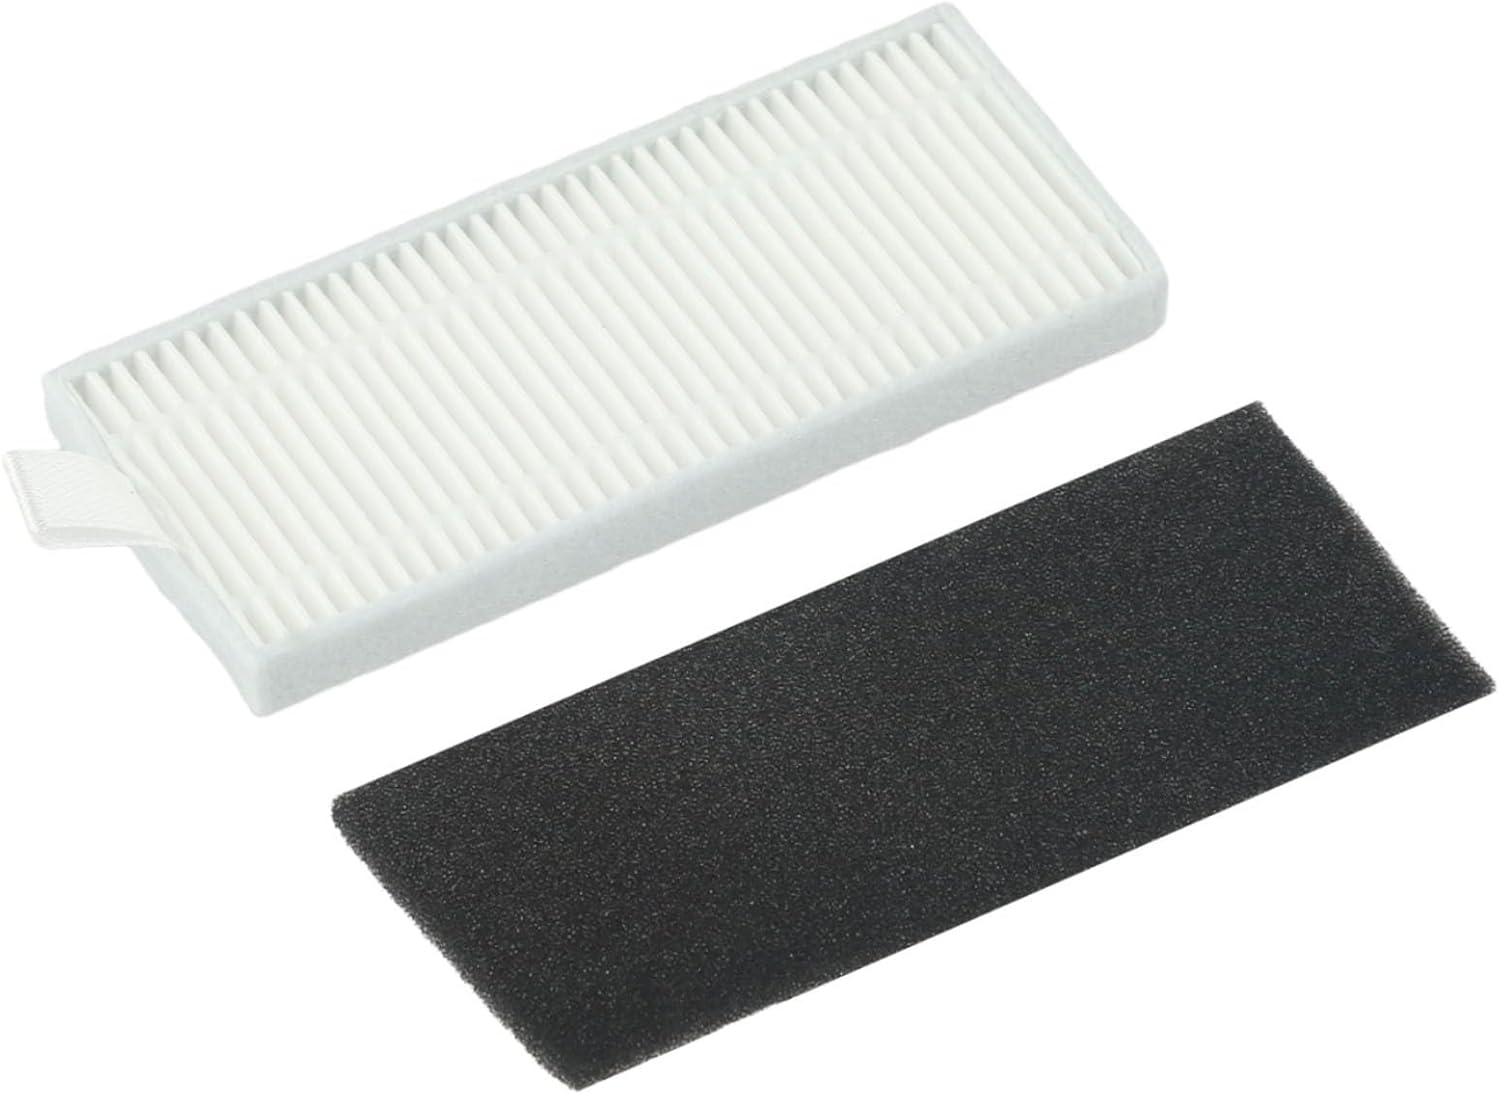
Image 4.2: New filter components ready for installation.
5. Operating Principles
The filters are an integral part of your robotic vacuum's cleaning system. As the vacuum operates, air containing dust and debris is drawn into the dustbin. The foam pre-filter captures larger particles, while the pleated filter captures finer particles, preventing them from being recirculated into the air or damaging the vacuum's motor. Regular replacement ensures the vacuum maintains its suction power and air purification capabilities.
6. Maintenance
To ensure optimal performance and longevity of your vacuum cleaner and filters:
- Regular Cleaning: It is recommended to clean the filters after every few cleaning cycles, or more frequently if you have pets or high dust levels. Tap the pleated filter gently against a trash can to dislodge accumulated dust. The foam pre-filter can be rinsed with water; ensure it is completely dry before reinstallation.
- Replacement Frequency: For best results, replace both the pleated filter and foam pre-filter every 2-3 months, or as indicated by your vacuum cleaner's maintenance schedule or a noticeable decrease in suction power.
- Avoid Water on Pleated Filter: Do not wash the pleated filter with water, as this can damage the filter material and reduce its effectiveness.
7. Troubleshooting
If you encounter issues after replacing the filters, consider the following:
- Filter Does Not Fit: Double-check the compatibility list in Section 3 and the dimensions provided. Ensure you have the correct filter model for your specific iHome vacuum. If the filter still does not fit, contact customer support.
- Reduced Suction Power: Ensure the filters are clean and properly seated in the dustbin. A clogged filter is a common cause of reduced suction. If the filters are new and correctly installed, check other components of your vacuum cleaner, such as the brushes or air ducts, for obstructions.
- Unusual Noises: Verify that the filters are installed correctly and not obstructing any moving parts. Incorrectly installed filters can sometimes cause rattling or other unusual sounds.
8. Specifications
| Attribute | Specification |
|---|---|
| Product Name | Filter Kit |
| Brand | VRTYVEYBB |
| Model Number | J71U5PS208B54Q3UHY3G8L9DWF16R8 |
| Material | Paper (pleated filter), Foam (pre-filter) |
| Color | White (pleated filter), Black (foam pre-filter) |
| Number of Pieces | 5 (5 pleated filters, 5 foam pre-filters) |
| Approximate Dimensions (each filter) | 7.87 x 3.94 x 1.97 inches (20 x 10 x 5 cm) |
| Compatible Devices | iHome Robotic Vacuums (Nova S1 Pro, etc.) |
9. Warranty and Support
For any questions, concerns, or support regarding your VRTYVEYBB filter replacement set, please contact the seller or manufacturer directly through the platform where the purchase was made. Please retain your proof of purchase for any warranty claims or support inquiries.