1. Introduction
Thank you for choosing the SZYUYU Wireless Switch Pro Controller. This manual provides detailed instructions for setting up, operating, and maintaining your controller. Please read it carefully to ensure optimal performance and a satisfying gaming experience.

Figure 1: SZYUYU Wireless Switch Pro Controller (Purple variant shown)
Key Features:
- 7-Color LED Lighting: Features illuminated control sticks with 3 adjustable lighting modes (Monochrome constant brightness, Breathing rune, Illusion).
- Wireless Bluetooth Technology: Stable connection within 26 feet, compatible with Nintendo Switch, Switch Lite, Switch OLED, Windows PC, and Android Phones.
- 800mAh Built-In Battery: Provides 8-12 hours of uninterrupted gameplay on a 2-3 hour charge via USB-C.
- 6-Axis Gyro Sensor: Enhances gaming experience with high-precision motion control.
- 4-Speed Dual Vibration: Adjustable vibration levels (100%, 70%, 30%, 0%) for immersive feedback.
- 3-Level Adjustable Auto Turbo: Customizable Turbo function for rapid firing.
- 2 Programmable Keys: "ML"/"MR" buttons on the back can map 1-16 combination functions.
2. Setup and Connection
2.1 Wireless Connection to Nintendo Switch/OLED/Lite
- From the HOME Menu, select "Controllers" > "Change Grip/Order".
- On the controller, press and hold the small button next to the USB-C charging port for 3-5 seconds to power it on. The indicator lights (lights 2 & 3) will blink rapidly, indicating it's in pairing mode.
- Once successfully connected, the first indicator light at the bottom of the controller will remain lit.
Video 1: Demonstrates how to connect the wireless controller to the Nintendo Switch console.
Video 2: Shows the Bluetooth connection process for the wireless controller.
2.2 Wired Connection to PC
- Connect the controller to your PC using the provided Type-C USB cable.
- The controller will automatically enter Xbox mode (lights 1 & 4 solid).
- If the controller does not connect, try holding the minus (-) and plus (+) buttons simultaneously to cycle through connection modes (Xbox, Dinput, Switch).
Video 3: Instructions for connecting the wireless controller to a PC via USB-C cable.
2.3 Joystick Calibration
- Ensure the controller is powered off.
- Press and hold the 'B' button, then the '-' (minus) button, and finally the 'HOME' button in quick succession. Keep holding the 'B' and '-' buttons until the 'HOME' button is pressed.
- The indicator lights will blink in a pattern (1 & 2 blink, then 3 & 4 blink), indicating calibration mode.
- Press and hold the left joystick, then slowly rotate it in full circles a few times. Repeat for the right joystick.
- Press the '+' (plus) button to exit calibration mode.
Video 4: Step-by-step guide for calibrating the wireless controller's joysticks.
3. Operating Instructions
3.1 LED Lighting Adjustment
The controller features 7-color LED illuminated control sticks with 3 lighting modes:
- Monochrome Constant Brightness: A single color remains steadily lit.
- Breathing Rune Effect: Colors fade in and out.
- Illusion Effect: Colors shift and blend.
- To switch between lighting modes, press the lighting button (located on the back) and the R3 button simultaneously.
- In Monochrome Constant Brightness mode, press the lighting button and L3 simultaneously to switch colors.
- In Illusion mode, press the lighting button and L3 simultaneously to stop the color change on a desired color.
- To directly switch to the fourth mode, Solid Breathing, hold both the L3 and R3 buttons for 3 seconds (do not release). In Solid Breathing mode, press the L3 button to switch colors, and press the R3 button to confirm the selected color.
- To turn the lighting on or off, press and hold the lighting button.
Video 5: Demonstrates how to adjust the lighting and vibration settings on the controller.
3.2 Vibration Adjustment
The controller features 4-speed dual vibration motors.
- To turn vibration on or off, press and hold the vibration button (located on the back).
- To adjust vibration intensity, hold the 'T' button and move the left joystick up or down. The four intensity levels are 100%, 70%, 30%, and 0%.

Figure 2: Controller features including 6-Axis Gyro Sensor and 3-Level Vibration.
3.3 Turbo Function
The controller supports 3-level adjustable auto turbo for rapid firing.
- To set the Turbo function: Press any action button (A/B/X/Y/L1/L2/R1/R2) and the 'T' (Turbo) key simultaneously. The Turbo light will flash.
- To activate Auto Turbo: Press the action button and 'T' key again. The Turbo light will flash continuously.
- To clear Turbo function for a single button: Press the action button and 'T' key a third time.
- To clear Turbo from all buttons: Hold the 'T' button for 5 seconds (do not release).
- To adjust Turbo speed: Hold the 'T' button and move the right joystick up/down.

Figure 3: Illustration of the 3 speeds of Turbo mode.
3.4 Programmable Keys (Macro)
The "ML" and "MR" buttons on the back of the controller can be programmed to map 1-16 combination function keys.
- To enter programming mode: Press and hold the programming key (small button below the right joystick) for 4 seconds. The joystick lights will blink, indicating macro programming mode is active.
- To record a macro: Input the button sequence you want to record.
- To confirm: Press either the "ML" or "MR" back button. The combo will be successfully assigned.
- To execute a macro: Press the assigned "ML" or "MR" button.
- To clear a macro: Enter programming mode (hold programming key for 4 seconds), but do not press any buttons. Instead, just tap the back key ("ML" or "MR") directly.
Note: The controller's triggers and analog stick movements cannot be recorded in macros.
Video 6: Explains how to use the combo and macro back programming keys.
4. Specifications
| Feature | Detail |
|---|---|
| Model Number | B0DLFTMKQ1 |
| Product Dimensions | 3.94 x 3.15 x 1.97 inches |
| Item Weight | 9.1 ounces |
| Battery | 800mAh (included) |
| Play Time | 8-12 hours |
| Charge Time | 2-3 hours (USB-C) |
| Connectivity | Wireless Bluetooth, USB-C |
| Compatibility | Nintendo Switch/OLED/Lite, Windows PC, Android Phones |
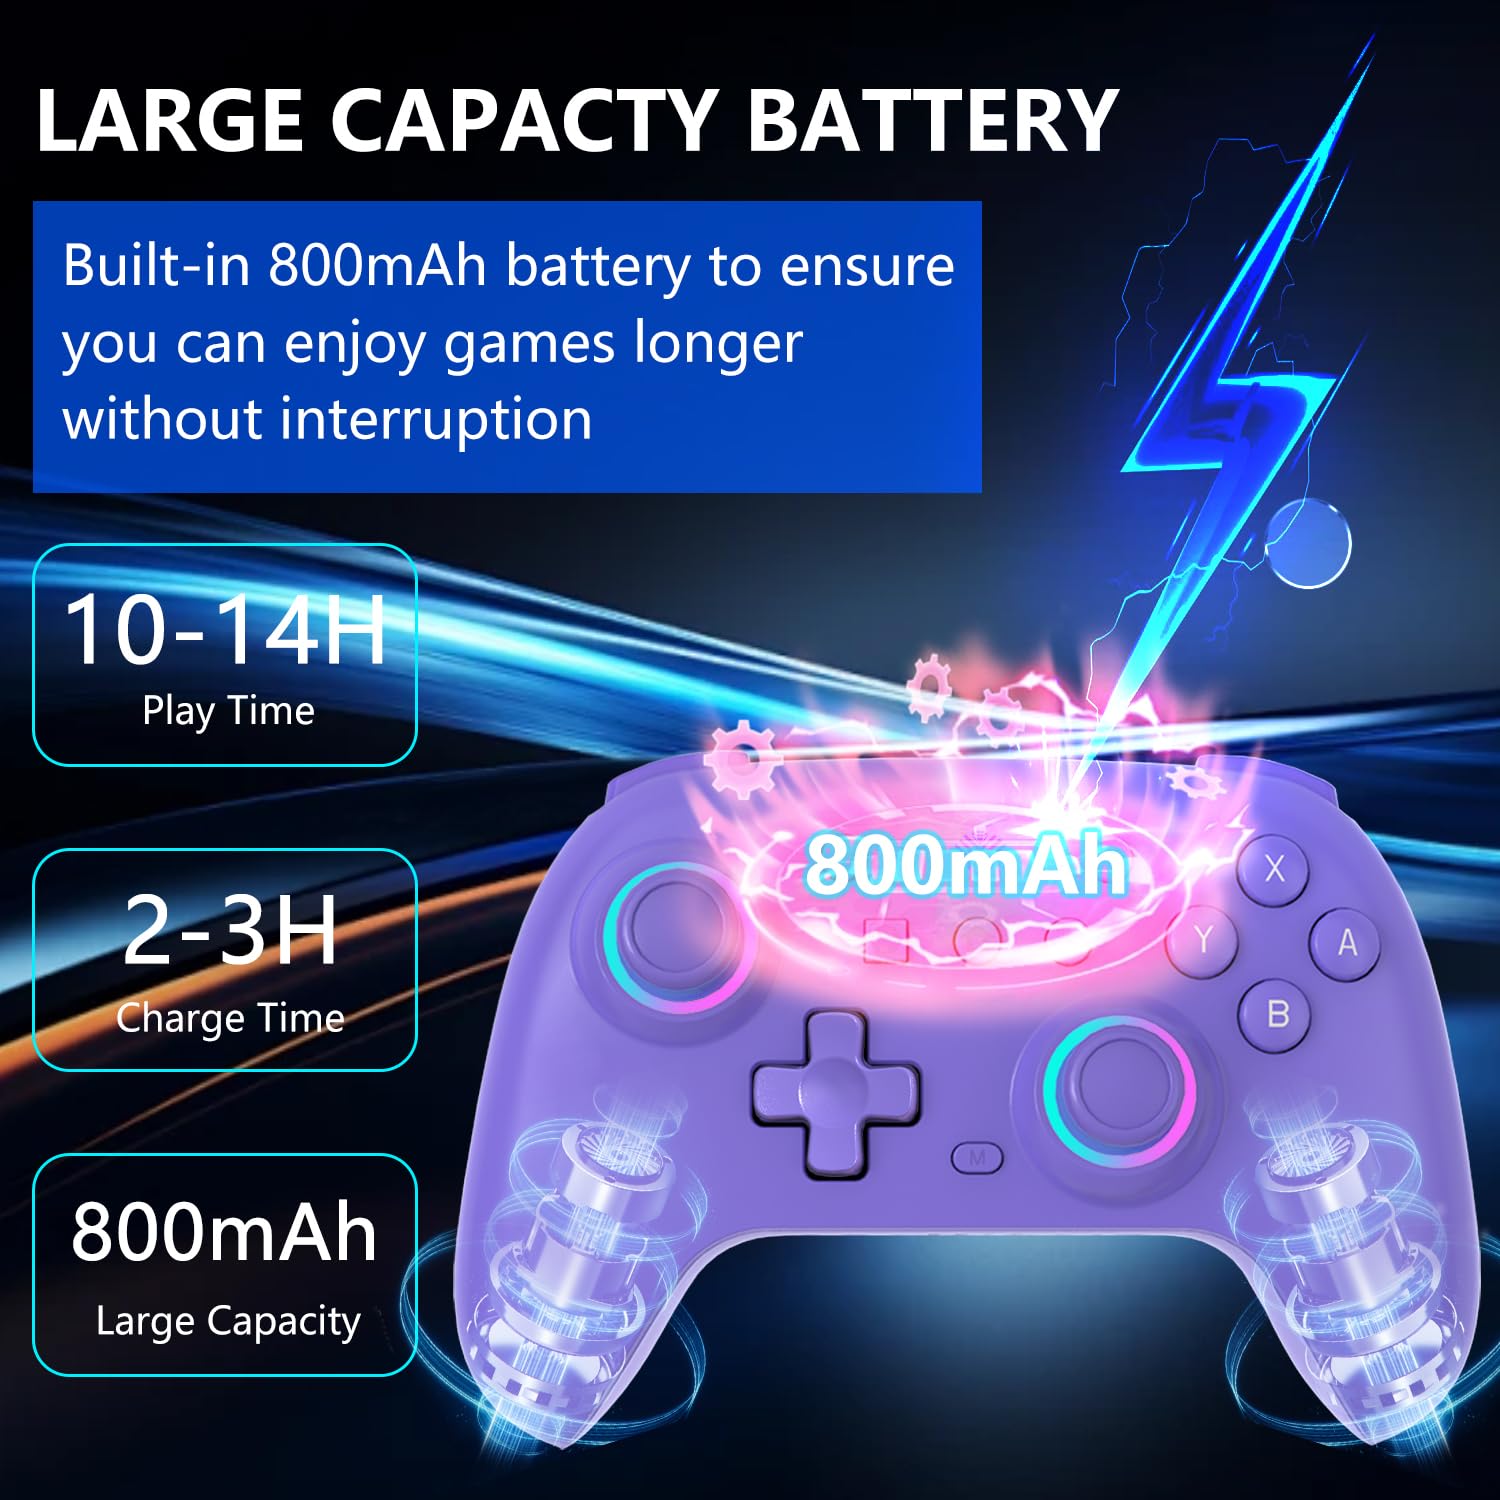
Figure 4: Battery specifications and charging details.

Figure 5: Front button layout and functions.

Figure 6: Back button layout and functions.
5. Troubleshooting
- Controller not connecting: Ensure the controller is fully charged. Follow the specific pairing instructions for your device (Nintendo Switch, PC, Android). Try resetting the controller by pressing the small button next to the charging port.
- Input lag or disconnection: Ensure the controller is within the 26-foot Bluetooth range. Minimize interference from other wireless devices. For PC, try a wired connection.
- Joystick drift: Perform the joystick calibration procedure as described in Section 2.3.
- Buttons not responding: Check if the Turbo function is active on the button. If a macro is programmed, ensure it's correctly set.
- Vibration not working: Ensure vibration is turned on by pressing and holding the vibration button on the back. Check vibration intensity settings.
- LED lights not working: Ensure the lighting is turned on by pressing and holding the lighting button on the back. Check lighting mode settings.
6. Warranty and Support
SZYUYU is committed to providing quality products and an excellent gaming experience. If you encounter any issues during use, please contact us via email. Our customer service team will assist you as soon as possible.
For further assistance or inquiries, please refer to the contact information provided with your purchase or visit the official SZYUYU store online.