1. Introduction
The GODIYMODULES SimpleFOC Shield BLDC Motor Controller (Model LC-SOFOC-001) is designed for precise control of brushless DC (BLDC) motors. This board is compatible with the SimpleFOC Shield V2.0.4 open-source project and can be directly integrated with Arduino UNO development boards as a shield. It features advanced gate drivers and current sensors to facilitate smooth and high-precision motor operation using the SimpleFOC library.
2. Key Features
- Advanced Gate Drivers: Utilizes three IR2104 gate drivers for efficient motor control.
- High-Precision Current Sensing: Incorporates two on-board INA240 current sensors for accurate A-B phase current measurement.
- BLDC Drive Circuit: Supports various encoder types including Hall sensors and magnetic sensors.
- Wide Power Supply Range: Operates with a DC power supply voltage of 12V to 35V.
- Arduino Compatibility: Directly plugs into Arduino UNO and other compatible development boards as a shield.
- IR2104 Power Supply Jumper: Features a jumper cap for configuring the IR2104 power supply voltage based on the main VCC (16V for VCC > 20V, or VCC for VCC ≤ 20V).
3. Setup Instructions
Follow these steps to set up your SimpleFOC Shield BLDC Motor Controller:
- Mounting: Carefully align the SimpleFOC Shield with the pin headers on your Arduino UNO or compatible development board and press firmly to ensure a secure connection.
- Power Connection: Connect your DC 12-35V power supply to the VCC and GND terminals on the shield. Ensure correct polarity.
- Motor Connection: Connect the three phases of your BLDC motor to the A, B, and C terminals on the shield.
- Encoder/Sensor Connection: If using Hall or magnetic sensors, connect them to the designated sensor interfaces on the shield. Refer to the schematics for pin configurations.
- IR2104 Power Jumper: Configure the IR2104 power supply jumper cap. If your main VCC is ≤ 20V, insert the jumper at the left end. If VCC is > 20V, insert the jumper at the right end to supply 16V to the IR2104.
- Software Setup: Install the SimpleFOC library in your Arduino IDE. Upload the appropriate example code for your motor and sensor configuration.
4. Operating Instructions
Once the hardware is connected and software is uploaded, you can begin operating your BLDC motor:
- Power On: Apply power to the shield. Observe any indicator LEDs for status.
- Motor Control: Use the SimpleFOC library functions within your Arduino sketch to command the motor. This typically involves setting target velocity, position, or torque.
- Monitoring: Utilize the current sensor readings (INA240) and encoder feedback to monitor motor performance and adjust control parameters as needed.
- Safety: Always ensure the motor is securely mounted and that no obstructions are present before operation. Disconnect power before making any wiring changes.
5. Maintenance
To ensure the longevity and optimal performance of your SimpleFOC Shield, consider the following maintenance guidelines:
- Regular Inspection: Periodically inspect the board for any signs of physical damage, loose connections, or overheating components.
- Cleaning: Keep the board clean and free from dust and debris. Use a soft, dry brush or compressed air for cleaning. Avoid using liquids.
- Environmental Conditions: Operate the shield within its specified environmental conditions (temperature, humidity) to prevent damage.
- Firmware Updates: Keep your SimpleFOC library and Arduino firmware updated to benefit from performance improvements and bug fixes.
6. Troubleshooting
If you encounter issues with your SimpleFOC Shield, consider these common troubleshooting steps:
- No Motor Movement:
- Verify power supply voltage and connections.
- Check motor phase connections (A, B, C).
- Ensure the IR2104 power jumper is correctly set for your VCC.
- Confirm the Arduino sketch is uploaded and running correctly.
- Check encoder/sensor connections and functionality if used.
- Erratic Motor Behavior:
- Review your SimpleFOC library configuration parameters (e.g., PID gains, sensor offsets).
- Ensure proper grounding of all components.
- Check for electrical noise or interference.
- Overheating:
- Ensure adequate ventilation around the board and motor.
- Verify that the motor current draw does not exceed the board's capabilities.
- Check for short circuits or incorrect wiring.
- Communication Issues:
- Confirm correct serial port selection and baud rate in Arduino IDE.
- Check USB cable connection to Arduino.
7. Specifications
| Specification | Value |
|---|---|
| Manufacturer | GODIYMODULES |
| Part Number | LC-SOFOC-001 |
| Item Weight | 32 g |
| Parcel Dimensions | 12.7 x 11.81 x 4.5 cm |
| Color | Black |
| Voltage | 12-35 Volts (DC) |
| Gate Drivers | 3 x IR2104 |
| Current Sensors | 2 x INA240 (A-B phase) |
| Compatibility | SimpleFOC Shield V2.0.4, Arduino UNO |
| Encoder Support | Hall, Magnetic, other encoders |
8. Product Visuals
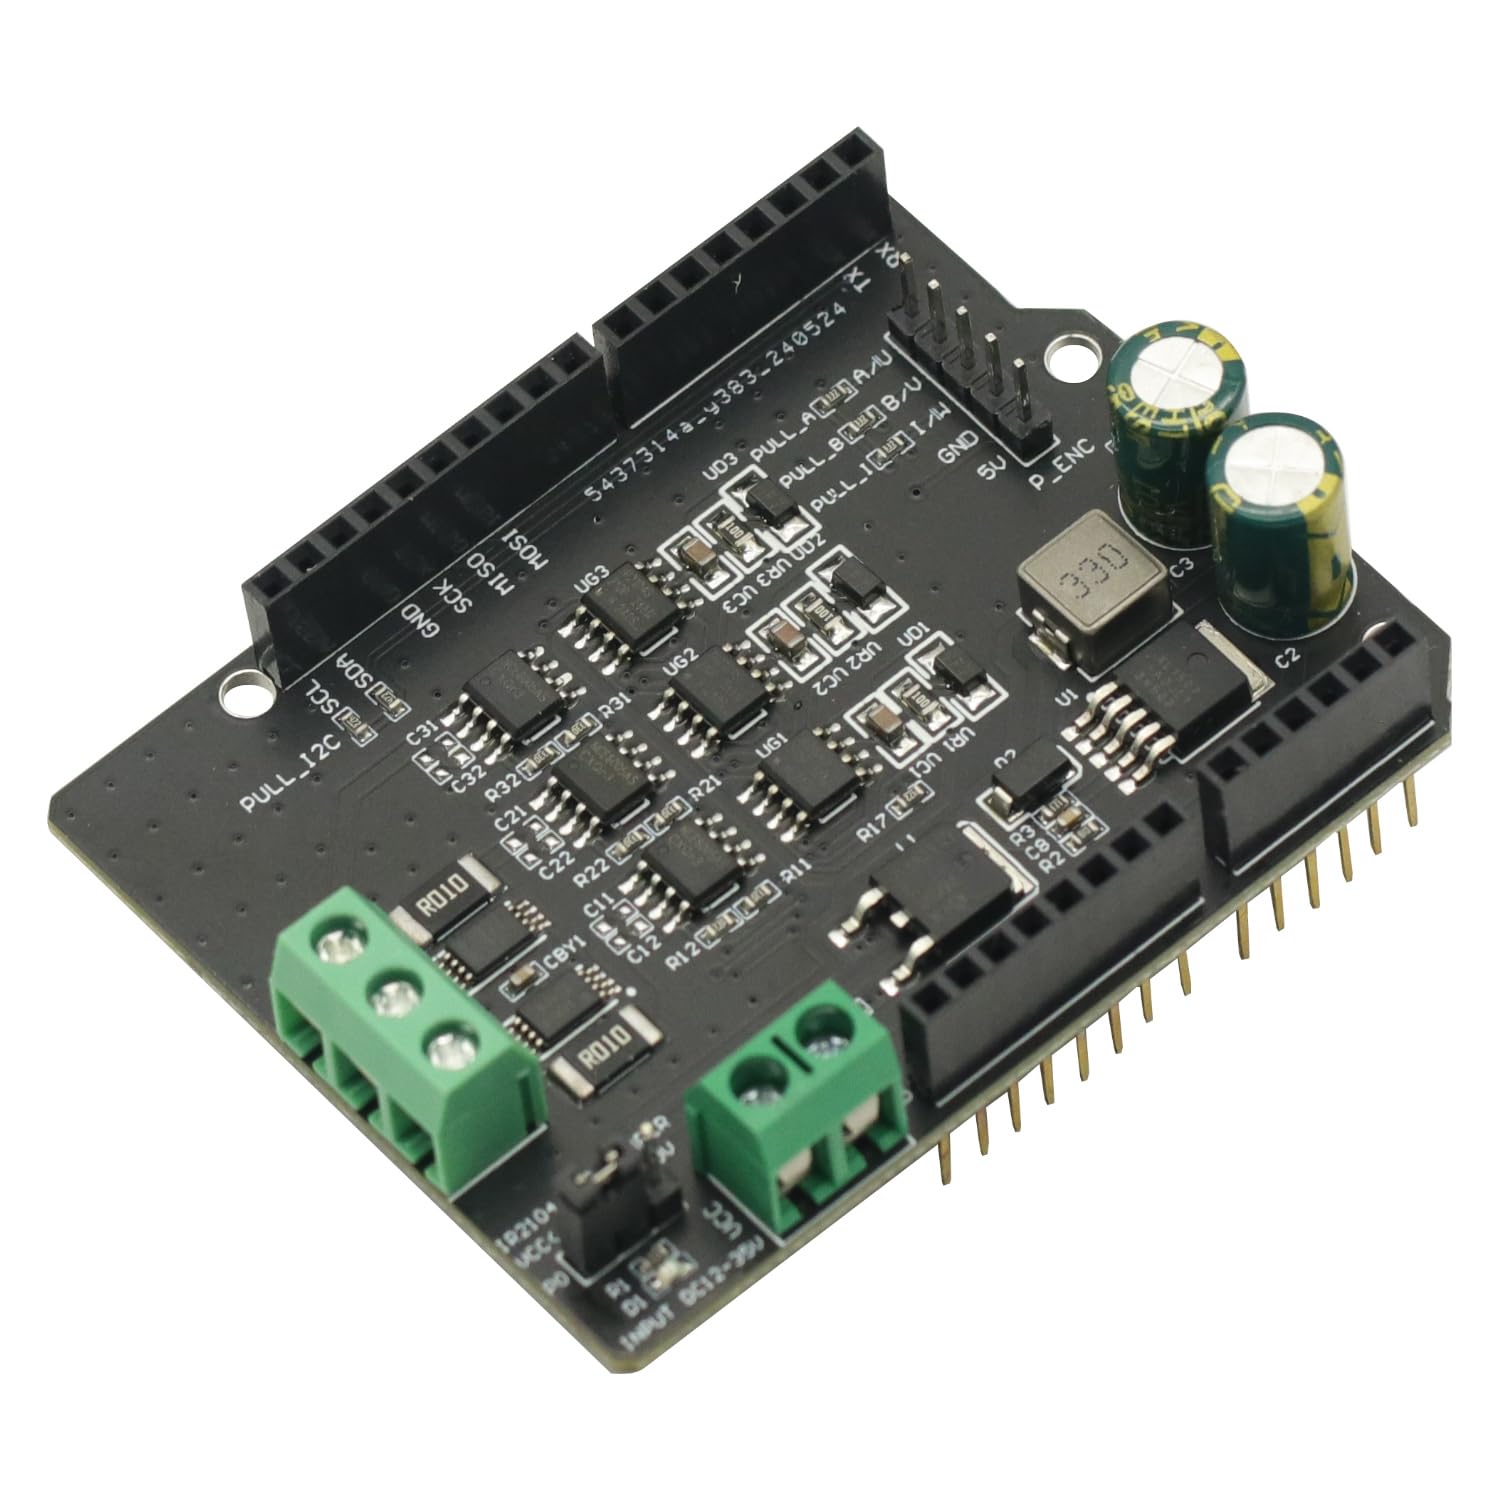
Figure 1: Top view of the SimpleFOC Shield BLDC Motor Controller, showing component layout and connection terminals.

Figure 2: Bottom view of the SimpleFOC Shield BLDC Motor Controller, illustrating the solder points and additional circuitry.

Figure 3: Angled perspective of the SimpleFOC Shield, highlighting the various connectors and integrated circuits.

Figure 4: Comprehensive schematic diagram providing an overview of the SimpleFOC Shield's internal connections and circuit blocks.

Figure 5: Detailed schematic focusing on the motor drive section and the L7808 voltage regulator circuit with enable/disable configuration.
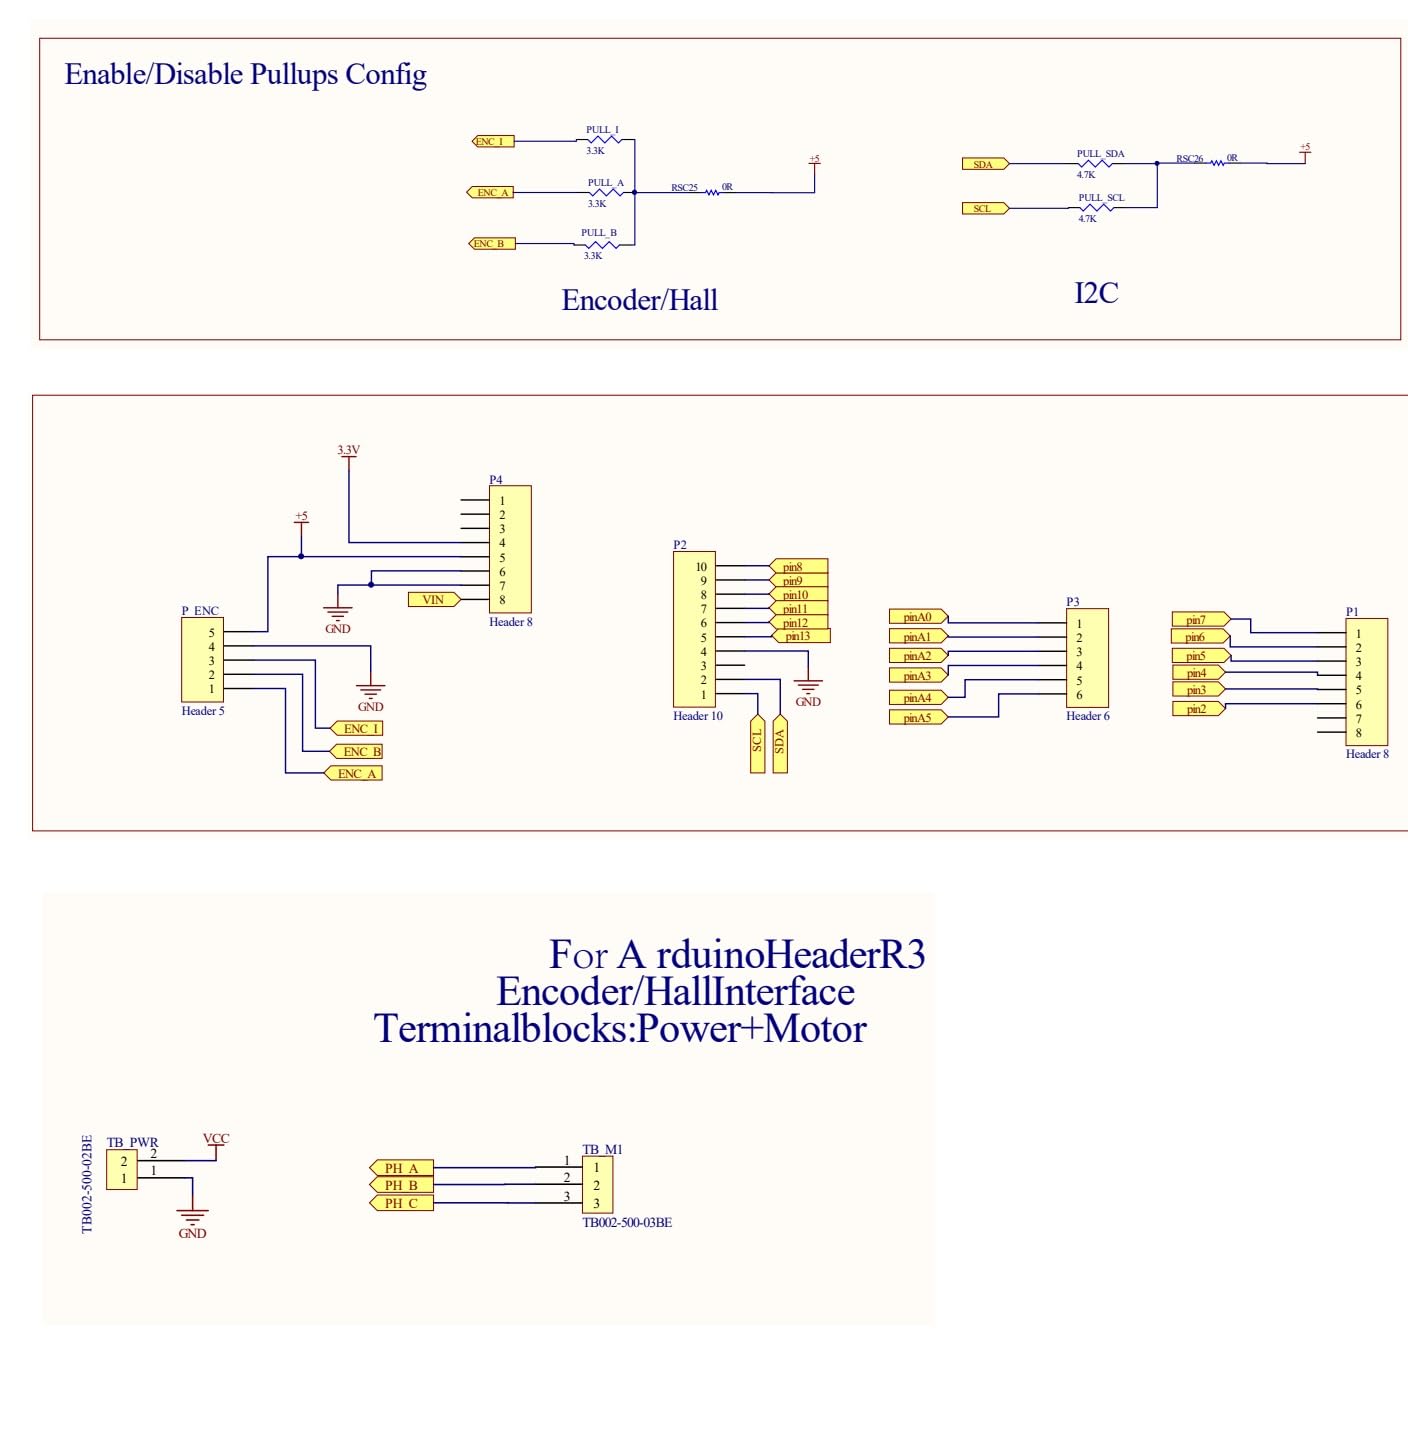
Figure 6: Detailed schematic illustrating the pin configurations for Encoder/Hall sensors and the I2C communication interface, including Arduino header connections.

Figure 7: Detailed schematic showing the power supply circuit for the IR2104 gate drivers and the INA240 current sense amplifier circuits, along with their respective pin configurations.
9. Warranty and Support
For warranty information, technical support, or further inquiries regarding the GODIYMODULES SimpleFOC Shield BLDC Motor Controller, please refer to the official GODIYMODULES website or contact their customer service directly. Keep your purchase receipt for warranty claims.


