1. Introduction
This manual provides comprehensive instructions for the assembly, operation, maintenance, and safety of your TEENFON Tall Storage Cabinet. Designed for vertical storage, this cabinet is suitable for various spaces including kitchens, bathrooms, living rooms, and entryways. Its slim profile allows it to fit into narrow areas, maximizing storage efficiency.
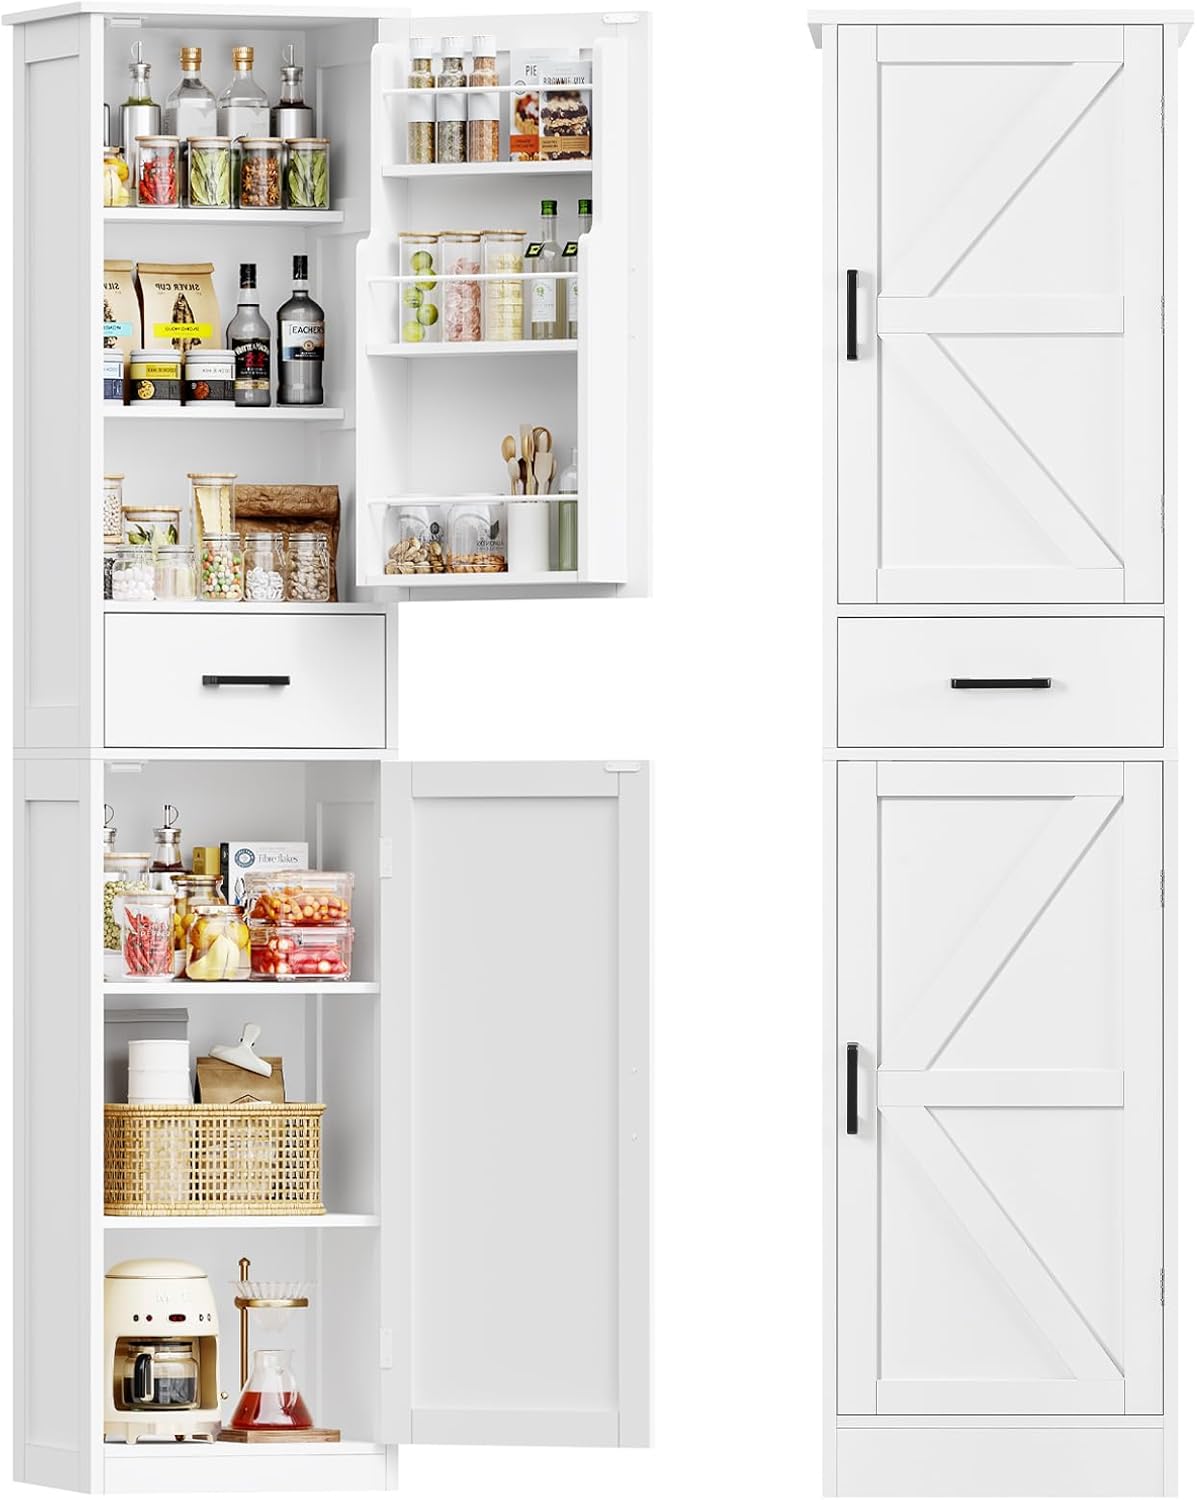
Image 1.1: The TEENFON Tall Storage Cabinet with its upper and lower doors open, showcasing the internal shelving and a central drawer. The cabinet is filled with various household items, demonstrating its storage capacity.

Image 1.2: The TEENFON Tall Storage Cabinet positioned in a living room, illustrating its adaptability as a storage solution in different home environments.
2. Included Components
Verify that all components are present before beginning assembly. The package includes:
- 1 x Storage Cabinet (disassembled parts)
- 1 x Hardware Bag (containing screws, dowels, cam locks, etc.)
- 1 x Instruction Manual (this document)
3. Product Specifications

Image 3.1: A diagram illustrating the precise measurements of the TEENFON Tall Storage Cabinet, including overall dimensions and internal shelf heights for both the main compartments and door shelves.
| Feature | Detail |
|---|---|
| Product Dimensions | 11.8"D x 15.7"W x 67"H |
| Material | Engineered Wood |
| Color | White |
| Number of Shelves | 9 (including door shelves) |
| Special Features | Adjustable Shelf, Anti-Tipping, Dustproof, Removable Shelf |
| Mounting Type | Floor Mount |
| Assembly Required | Yes |
4. Assembly Instructions
Assembly is required for this storage cabinet. Please follow the detailed schematic drawings and instructions provided in the included manual. All parts are accurately labeled to facilitate the assembly process. It is recommended to lay out all components and hardware before starting.
- Identify all parts and hardware using the provided list and diagrams.
- Assemble the main frame of the cabinet according to the step-by-step illustrations.
- Install the back panel, ensuring it is properly aligned and secured.
- Attach the drawer slides and assemble the drawer unit.
- Install the adjustable shelves in your desired positions.
- Attach the doors and adjust hinges for proper alignment.
- Secure the anti-tipping hardware to the cabinet and wall as instructed in the safety section.
Note: Extra hardware pieces are included in case any are misplaced during assembly.
5. Operating and Usage
The TEENFON Tall Storage Cabinet offers versatile storage options to organize various items efficiently.
Adjustable Shelves
The main compartments feature adjustable shelves, allowing you to customize the internal space to accommodate items of different heights, such as cereal boxes, jars, small appliances, or towels. To adjust a shelf, remove any items, lift the shelf, and reposition the shelf pegs into the desired holes.

Image 5.1: An infographic detailing the storage features of the cabinet, including adjustable shelves, door shelves, a drawer, and magnetic locks, highlighting its ample capacity.
Door Shelves
The upper cabinet door is equipped with three hanging shelves, ideal for storing smaller items like spices, seasonings, or toiletries, keeping them easily accessible and organized.
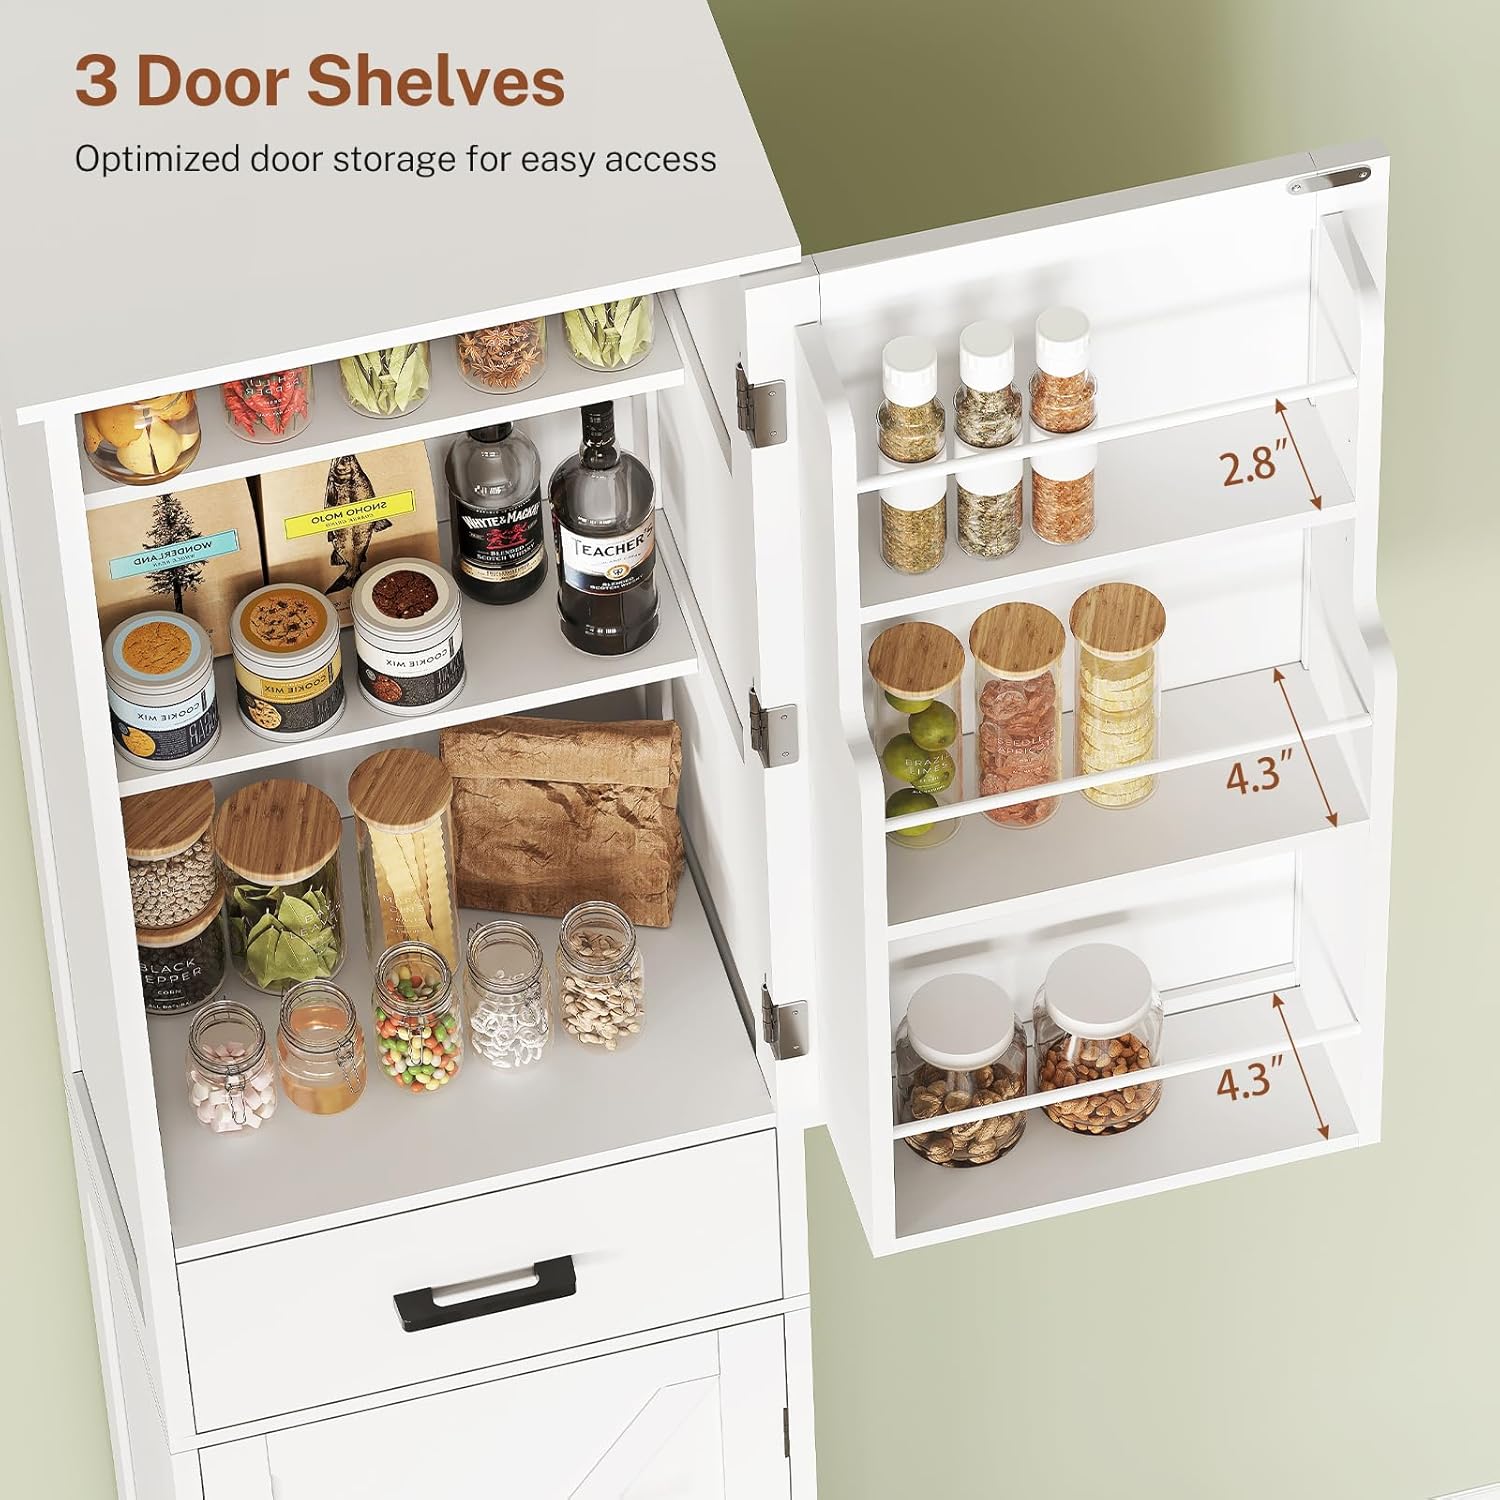
Image 5.2: A detailed view of the three door shelves, demonstrating their capacity for small items like spices and jars, optimizing storage space.
Drawer
A central drawer provides enclosed storage for items such as cans, cereal, honey, oatmeal, or other small kitchen gadgets, keeping them out of sight and protected.
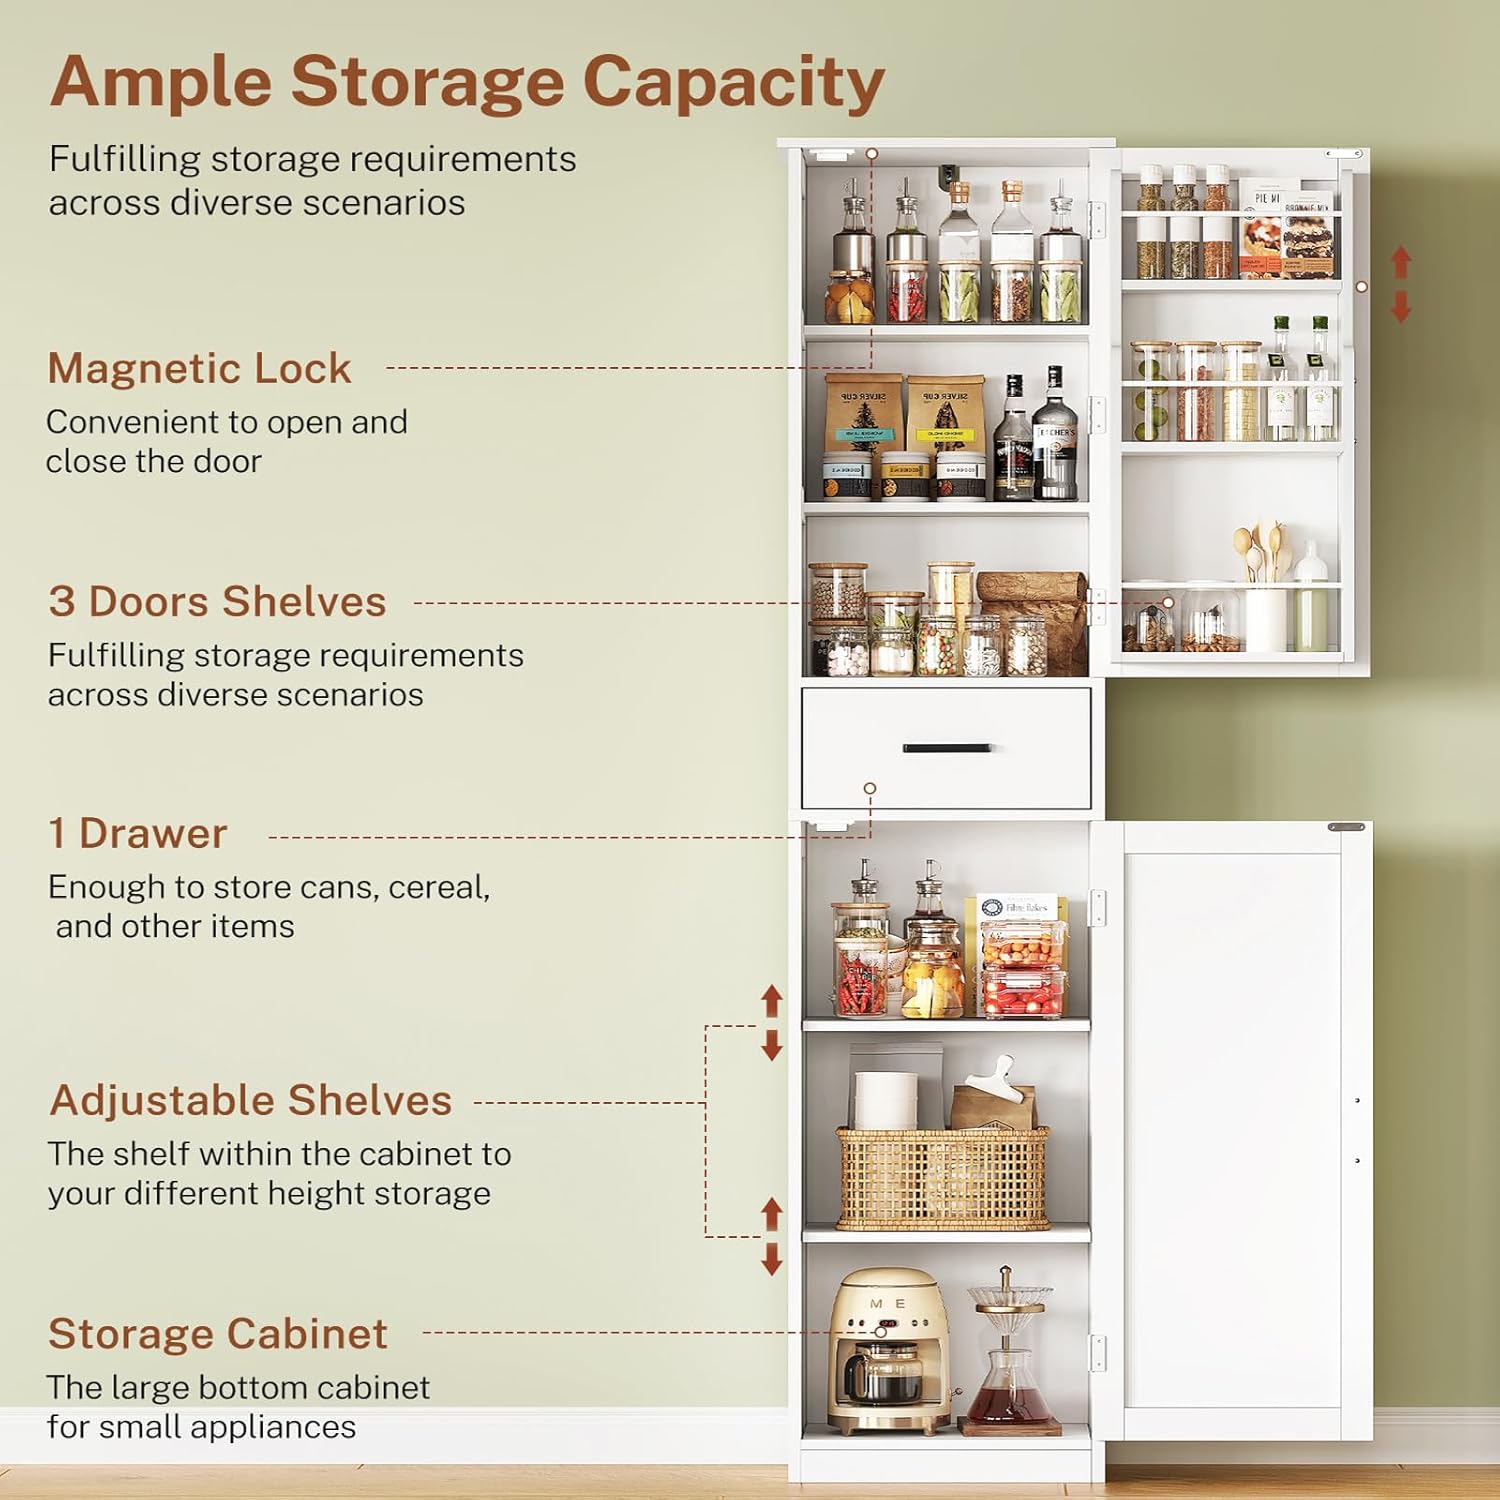
Image 5.3: The cabinet's drawer shown open, revealing its capacity for storing items such as rolling pins, coffee bags, and small containers.
6. Maintenance
To ensure the longevity and appearance of your TEENFON Tall Storage Cabinet, follow these simple maintenance guidelines:
- Cleaning: Wipe surfaces with a soft, damp cloth. Avoid abrasive cleaners or harsh chemicals, as these can damage the finish.
- Spills: Promptly clean up any spills to prevent staining or moisture damage to the engineered wood.
- Inspection: Periodically check all hardware and connections to ensure they remain tight. Tighten any loose screws as needed.
7. Safety Information
Your safety is important. This cabinet is designed with stability in mind, but it is crucial to install the included anti-tipping hardware to prevent accidents, especially in households with children or pets.
Anti-Tipping Kit Installation
The cabinet comes with anchor hardware to secure it to the wall. This prevents the cabinet from tipping over, enhancing safety and stability.
- Locate the anti-tipping strap and hardware in the package.
- Attach one end of the strap to the top rear of the cabinet using the provided screws.
- Position the cabinet in its desired location.
- Mark the wall where the other end of the strap will attach, ensuring the strap is taut.
- Drill a pilot hole in the wall at the marked spot (use appropriate drill bit for your wall type).
- Insert the wall anchor (if applicable) and secure the strap to the wall with the remaining screw.

Image 7.1: A visual guide demonstrating the importance and correct method of securing the cabinet to the wall using the anti-tip kit to prevent accidental tipping.
8. Troubleshooting
If you encounter any issues during assembly or use, please review the assembly instructions carefully. Ensure all parts are correctly oriented and securely fastened. For persistent problems or missing parts, please refer to the support section.
9. Warranty and Support
TEENFON is committed to customer satisfaction. If you have any questions, concerns, or require assistance with your product, please contact our customer service team. We are dedicated to providing support and resolving any issues you may experience.
For customer service inquiries, please visit the official TEENFON store page on Amazon or contact us through the platform where you purchased the product.