
1. Introduction
This manual provides detailed instructions for the installation, operation, and maintenance of your OPAXIS P816081BR Motion Sensor Outdoor Porch Light with GFCI Outlet. Please read this manual thoroughly before installation and use to ensure safe and efficient operation.
2. Safety Information
WARNING: Risk of electric shock. Installation requires knowledge of electrical wiring. If you are not qualified, do not attempt installation. Contact a qualified electrician.
- Always turn off power at the circuit breaker before installing, servicing, or replacing any part of this fixture.
- Ensure all electrical connections are made in accordance with local codes, ordinances, and the National Electric Code (NEC).
- The GFCI outlet provides protection against electrical shock. Test the GFCI outlet monthly to ensure proper function.
- Do not exceed the maximum power rating of the GFCI outlet (MAX power 15AWG, 1800W).
- Use only dimmable LED bulbs for optimal compatibility with the motion detector to prevent flickering. (Bulbs not included).
3. Package Contents
- OPAXIS P816081BR Outdoor Wall Light with GFCI Outlet (1 unit)
- Mounting Hardware
- Shade
- Bulb not included
4. Product Features
The OPAXIS P816081BR porch light combines illumination with practical power access and advanced motion sensing capabilities.
4.1. Integrated GFCI Outlets
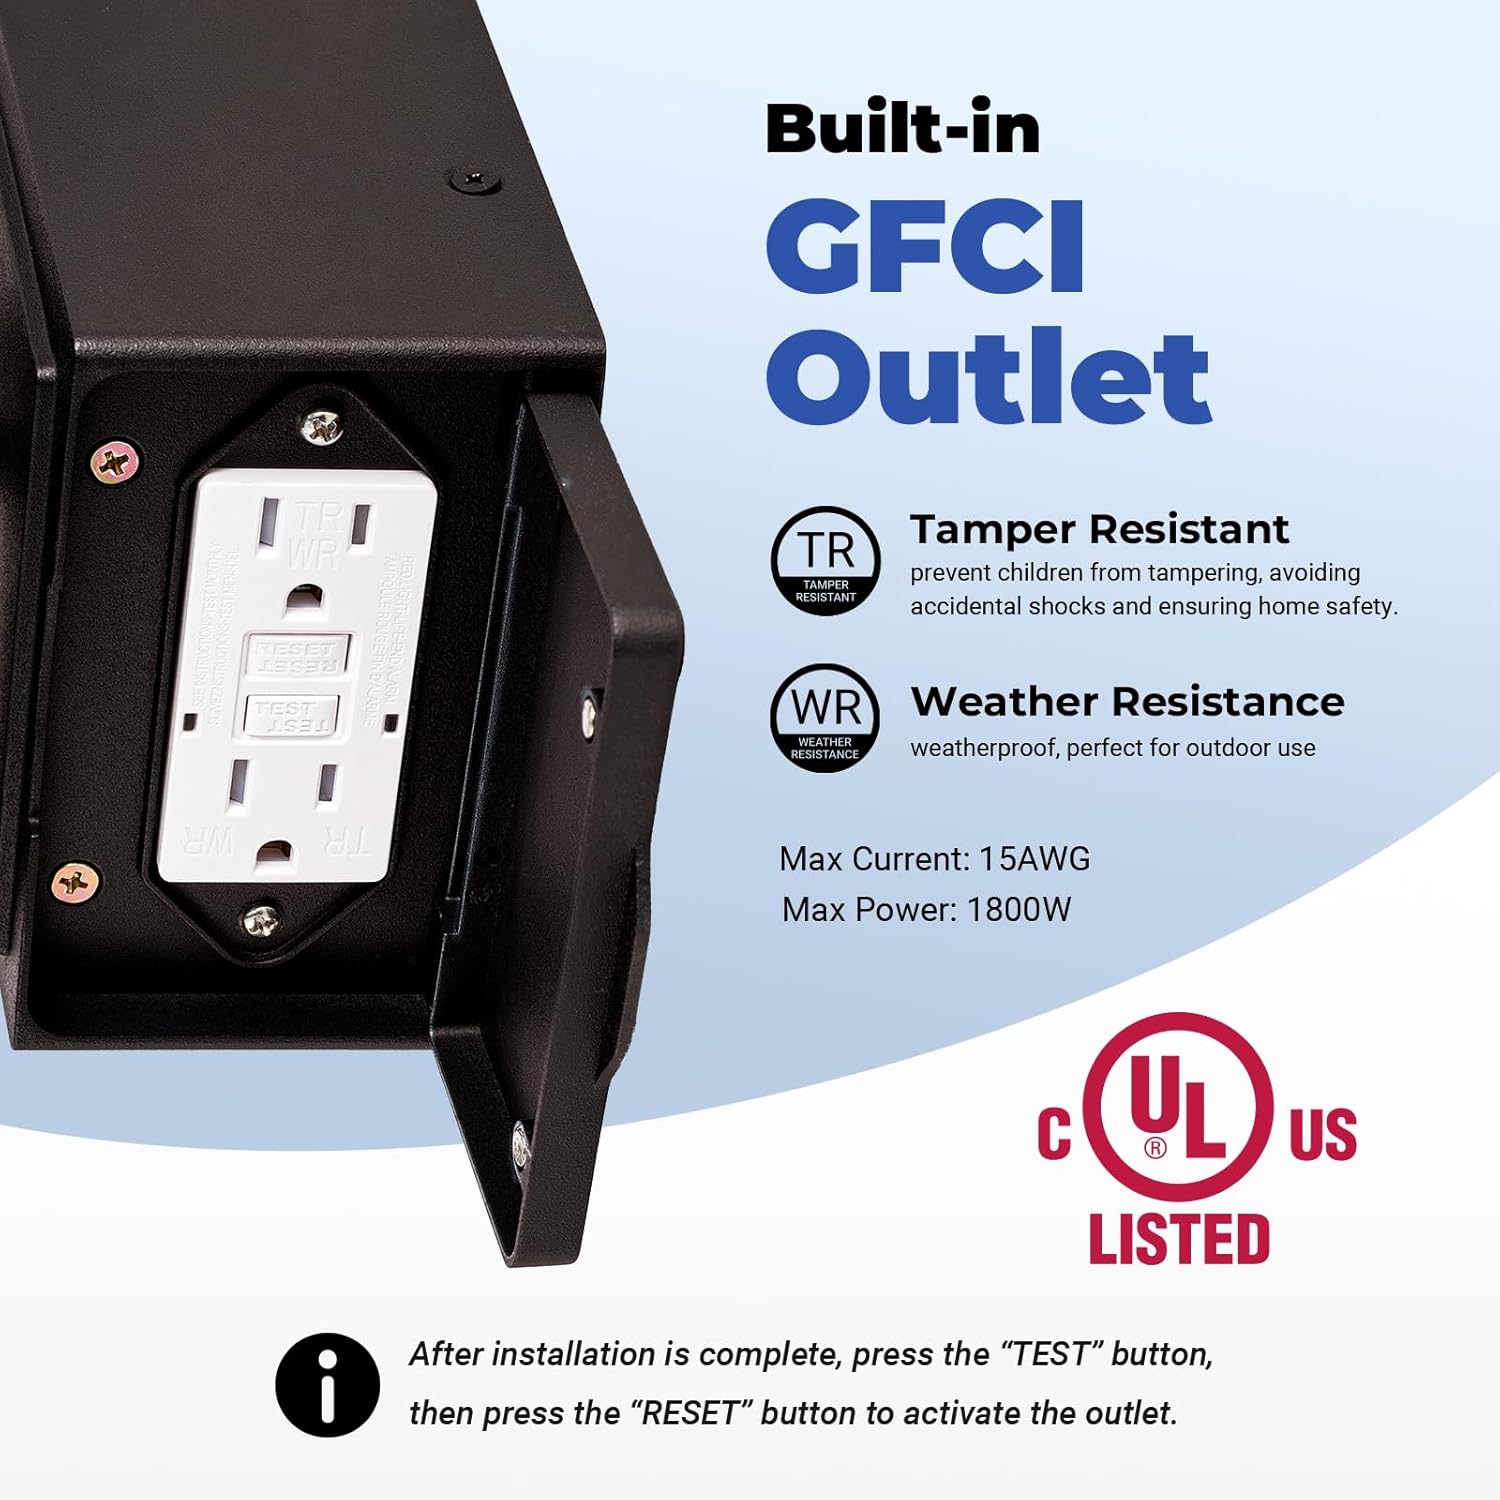
Figure 1: Built-in GFCI Outlet
This fixture includes two Ground Fault Circuit Interrupter (GFCI) outlets, suitable for 2-plug and 3-plug outdoor appliances. The outlets are Tamper-Resistant (TR) and Weather-Resistant (WR), designed to prevent accidental shocks and protect against short circuits and leakage. The downward-facing design enhances protection from rain. Maximum current is 15AWG, and maximum power is 1800W.

Figure 2: GFCI Outlet Details
After installation, press the "TEST" button, then the "RESET" button to activate the outlet. The green indicator light signifies normal operation, while a red light indicates a fault requiring a reset.
4.2. Advanced Motion Sensor with Multiple Modes

Figure 3: One-Press Mode Switch
The light features a new generation motion sensor with three primary working modes and an override mode:
- Dim Mode: At night, the light maintains 30% brightness. Upon motion detection, it switches to 100% brightness. After motion ceases, it returns to 30% brightness.
- ECO Mode: The light remains off at night. Upon motion detection, it illuminates at 100% brightness. After motion ceases, it turns off completely.
- D2D Mode (Dusk to Dawn): The light automatically turns on at 100% brightness at dusk and turns off at dawn. Motion detection is inactive in this mode.
- Override Mode: To activate, turn the light off and on within 2 seconds. The light will stay at 100% brightness for 8 hours, then return to the previously selected auto mode at dawn.

Figure 4: Motion Sensor Controls
4.3. Adjustable Settings
The motion sensor allows for customization of detection parameters:
- Sensitivity (SENS knob): Adjust the detection range to filter out false alarms from distant objects or passing vehicles. Maximum sensing distance is 40 feet with a 220° sensing angle.
- Lighting Duration (TIME knob): Customize how long the light stays on after motion is detected, from 20 seconds to 5 minutes. For continuous illumination, point the knob to "ON".
- Brightness (Built-in Dimmer): In Dim Mode, long-press the sensor button to adjust the initial dim brightness from 15% to 100%.

Figure 5: Adjustable Sensing Distance
4.4. Durable Construction

Figure 6: Weather-Resistant Construction
The fixture is constructed from 100% die-cast aluminum with an oil-rubbed bronze finish, providing anti-rust and corrosion resistance. The tempered seeded glass design enhances its waterproof and rust-resistant properties, making it suitable for various outdoor environments including rain, snow, and storms.
4.5. Easy Bulb Replacement
The convenient bottom-opening design allows for easy bulb replacement without the need for tools. The socket is compatible with any standard E26 bulb (max 100W). Please use DIMMABLE LED bulbs for optimal performance with the motion sensor.

Figure 7: Product Dimensions and Bulb Compatibility
5. Installation
This product comes fully assembled. Installation involves mounting the fixture and connecting it to your home's electrical wiring. It is recommended to consult a qualified electrician for installation if you are unfamiliar with electrical wiring.
5.1. Pre-Installation Steps
- Turn off power at the main circuit breaker.
- Carefully unpack the fixture and inspect for any damage.
- Identify the mounting location and ensure it is suitable for outdoor use.
5.2. Mounting the Fixture
Attach the mounting bracket to your electrical box using the provided hardware. Ensure the bracket is securely fastened. The light fixture then attaches to this bracket, typically secured with four screws (two on each side) for a strong hold.
Video 1: OPAXIS Motion Sensor Outdoor Wall Light with GFCI Outlet - Installation Overview. This video demonstrates the physical installation process of the light fixture, including mounting and wiring connections.
5.3. Electrical Wiring
Connect the fixture's wires to your household wiring:
- Connect the black wire (hot) from the fixture to the black wire from the electrical box.
- Connect the white wire (neutral) from the fixture to the white wire from the electrical box.
- Connect the green or bare copper wire (ground) from the fixture to the ground wire from the electrical box.
Secure all connections with wire nuts and ensure they are properly insulated.
5.4. Final Steps
- Once wiring is complete, carefully push the wires into the electrical box and secure the fixture to the mounting bracket.
- Install an E26 base bulb (not included) into the socket.
- Restore power at the circuit breaker.
- Activate the GFCI outlet by pressing the "TEST" button, then the "RESET" button.
6. Operating Instructions
The light features a single button on the motion sensor for mode switching and brightness adjustment.
6.1. Switching Modes
Press the sensor button to cycle through the three primary modes: Dim Mode, ECO Mode, and D2D Mode. The light will indicate the current mode (e.g., a brief flash or color change, refer to product specifics if available).

Figure 8: Dim Mode Operation

Figure 9: ECO Mode Operation

Figure 10: D2D Mode Operation
6.2. Adjusting Sensitivity and Duration
Use the "SENS" knob on the motion sensor to adjust the detection sensitivity. Turn it clockwise for higher sensitivity (longer range) and counter-clockwise for lower sensitivity (shorter range). Use the "TIME" knob to set the duration the light stays on after motion is detected (20 seconds to 5 minutes). For continuous light, set the "TIME" knob to "ON".
6.3. Adjusting Dim Brightness
In Dim Mode, long-press the sensor button to adjust the initial dim brightness level. The brightness will cycle through levels (e.g., 15%, 50%, 100%). Release the button when the desired brightness is reached.

Figure 11: Built-in Dimmer Adjustment
6.4. Using the GFCI Outlet
The GFCI outlets are located at the bottom of the fixture. They are protected by a magnetic cover. Simply remove the cover to access the outlets. Ensure the cover is replaced when not in use to maintain weather resistance.

Figure 12: Accessing the GFCI Outlet
7. Maintenance
7.1. Cleaning
To clean the fixture, ensure power is off at the circuit breaker. Wipe with a soft, damp cloth. Do not use abrasive cleaners or solvents, as these may damage the finish or glass.
7.2. Bulb Replacement
Turn off power at the circuit breaker. Access the bulb by opening the bottom of the fixture. Unscrew the old E26 bulb and replace it with a new one. Close the bottom securely. Remember to use dimmable LED bulbs for optimal performance.
7.3. GFCI Testing
Test the GFCI outlet monthly. Plug a small appliance (like a nightlight) into the GFCI outlet. Press the "TEST" button; the appliance should turn off. Press the "RESET" button; the appliance should turn back on. If it does not function as described, the GFCI may be faulty and should be replaced by a qualified electrician.
8. Troubleshooting
| Problem | Possible Cause | Solution |
|---|---|---|
| Light does not turn on. | No power; faulty bulb; incorrect mode; sensor malfunction. | Check circuit breaker. Replace bulb. Cycle through modes. Ensure sensor is clean and unobstructed. |
| Motion sensor not detecting. | Sensitivity too low; obstruction; incorrect mode. | Adjust "SENS" knob. Clear obstructions. Ensure not in D2D mode. |
| Light stays on continuously. | "TIME" knob set to "ON"; continuous motion; sensor malfunction. | Adjust "TIME" knob. Check for constant motion in sensor's range. |
| GFCI outlet not working. | GFCI tripped; no power; faulty GFCI. | Press "RESET" button. Check circuit breaker. Test GFCI as per maintenance section. |
| Light flickers. | Non-dimmable bulb used; incompatible bulb. | Replace with a dimmable LED bulb. |
9. Specifications
- Model Number: P816081BR
- Brand: OPAXIS
- Material: Aluminum (Fixture), Glass (Shade)
- Color: Oil-Rubbed Bronze
- Dimensions (L x W x H): 7" x 7" x 13.3"
- Power Source: Hardwired 120VAC
- Bulb Base: E26 (Bulb not included)
- Max Wattage: 100 watts
- Light Output: Up to 1600 Lumens (depending on bulb)
- Color Temperature: 3000 Kelvin (depending on bulb)
- Special Features: Motion Sensor, Dusk to Dawn Sensor, GFCI Outlet, Waterproof, Anti-Rust
- GFCI Outlet Max Power: 15AWG, 1800W
- Motion Sensor Range: Up to 40 ft, 220° angle
- Motion Sensor Time Adjustment: 20 seconds - 5 minutes
- Installation Type: Wall Mount, Flush Mount
- Certifications: ETL Listed
10. Warranty and Support
This OPAXIS product is covered by a one (1) year limited warranty from the date of purchase. This warranty covers defects in materials and workmanship under normal use. For warranty claims or technical support, please contact OPAXIS customer service through the retailer where the product was purchased or visit the official OPAXIS website for contact information.

Figure 13: 1 Year Limited Warranty
