CHWGLFGG JK542-A
CHWGLFGG 5D DIY Diamond Painting Kit Instruction Manual
Model: JK542-A
Introduction
Welcome to the world of diamond painting! This instruction manual provides a comprehensive guide for your CHWGLFGG 5D DIY Full Round Drill Diamond Painting Kit, Model JK542-A. Designed for adults and beginners, this kit allows you to create stunning, sparkling artwork. Follow these instructions carefully to ensure a successful and enjoyable crafting experience.

Image: A completed diamond painting showcasing a beautiful waterfall landscape with lush flora and butterflies.
What's in the Box
Your CHWGLFGG Diamond Painting Kit includes all the necessary components to begin your project. Please verify that all items listed below are present in your package.

Image: All components included in the diamond painting kit.
- HD Painting Canvas: A high-definition printed canvas with a sticky adhesive layer and clear symbols.
- Diamond Beads: Small, multi-faceted resin diamonds, sorted by color and symbol, with approximately 30% extra beads provided.
- Diamond Pen: A tool used to pick up and place diamond beads.
- Drill Tray: A grooved tray to hold and organize diamond beads, making them easier to pick up.
- Adhesive (Wax/Clay): A small square of wax or clay used with the diamond pen to pick up beads.
- Extra Bags (BagsX10): Small resealable bags for storing leftover diamonds.
Setup and Preparation
Before you begin, ensure you have a clean, flat, and well-lit workspace.
- Unroll the Canvas: Carefully unroll your HD painting canvas. If it has creases, you can place heavy books on it for a few hours or gently iron the back on a low setting (without steam) to flatten it.
- Identify Symbols: Each section of the canvas is marked with a symbol corresponding to a specific diamond color. Refer to the legend printed on the side of the canvas to match symbols with diamond bag numbers.
- Prepare Diamonds: Open the diamond bag corresponding to the symbol you wish to start with. Pour a small amount of these diamonds into the green drill tray. Gently shake the tray from side to side to make the diamonds settle with their flat side down, making it easier to pick them up.
- Prepare Diamond Pen: Peel back the protective film from the small square of adhesive (wax/clay). Dip the tip of your diamond pen into the adhesive to pick up a small amount. This will make the pen tip sticky, allowing it to pick up the diamonds.

Image: Detail of the canvas with clear symbols for diamond placement.
Operating Instructions (Diamond Placement)
Follow these steps to apply the diamonds to your canvas and bring your artwork to life.

Image: Step-by-step visual guide for diamond application.
- Expose Canvas Section: Peel back a small section of the protective film from the canvas. Do not remove the entire film at once, as the adhesive can dry out or collect dust. Work on one small area at a time.
- Pick Up Diamond: Use the diamond pen, with adhesive on its tip, to pick up a single diamond bead from the drill tray.
- Place Diamond: Carefully place the diamond onto the corresponding symbol on the canvas. The adhesive on the canvas will hold the diamond in place. Ensure the diamond is placed straight and snugly against its neighbors for a uniform look.
- Repeat: Continue picking up and placing diamonds until the section you are working on is complete. Then, cover the finished section with the protective film or a piece of parchment paper to protect it.
- Secure Diamonds: Once a significant area or the entire painting is complete, place a piece of parchment paper or the original protective film over the finished diamond area. Gently press down with a rolling pin or a heavy book to ensure all diamonds are firmly adhered to the canvas. This helps to flatten the painting and secure the diamonds.

Image: Demonstrating the precise placement of diamonds using the pen tool.
Maintenance and Storage
Proper care will ensure the longevity and beauty of your diamond painting.
- Sealing (Optional): To further protect your finished diamond painting from dust and to ensure diamonds remain securely in place, you can apply a diamond painting sealant. Follow the sealant product's instructions carefully.
- Cleaning: If your finished painting collects dust, gently wipe it with a soft, dry cloth. Avoid using water or harsh cleaning agents, as this may damage the diamonds or the adhesive.
- Storage: Store unfinished canvases flat or gently rolled with the diamond side facing outwards to prevent creasing. Keep unused diamond beads in their labeled bags to prevent mixing and loss. Store all components in a cool, dry place away from direct sunlight.
- Framing: Once complete, you can frame your diamond painting to display it. Ensure the frame size matches the canvas dimensions (13.7 x 13.7 inches).

Image: A close-up view of the completed diamond art, highlighting the sparkle and texture.
Troubleshooting
| Problem | Solution |
|---|---|
| Diamonds are not sticking to the pen. | Dip the pen tip deeper into the adhesive (wax/clay) to ensure it picks up enough sticky material. Replace the adhesive if it feels dry or ineffective. |
| Diamonds are not sticking to the canvas. | Ensure the protective film is fully peeled back from the area you are working on. If the canvas adhesive feels dry, it might be due to prolonged exposure to air. Work in smaller sections and keep the canvas covered when not in use. |
| Canvas has creases. | Place heavy books on the canvas for several hours or overnight. Alternatively, gently iron the back of the canvas on a very low heat setting without steam. |
| Missing diamonds. | The kit includes approximately 30% extra diamonds. If you still find you are missing a specific color, please contact customer support with your model number and the diamond color/symbol needed. |
| Diamonds are not straight/aligned. | Use a ruler or a straight edge to gently push and align rows of diamonds. You can also use tweezers (not included) for precise adjustments. |
Specifications
| Feature | Detail |
|---|---|
| Brand | CHWGLFGG |
| Model Name | JK542-A |
| Item Model Number | JK542 |
| Theme | Waterfall, Landscape, Butterfly, Flower |
| Canvas Dimensions (L x W) | 13.7 x 13.7 inches (35 x 35 cm) |
| Material | Acrylic (Diamonds), High-definition printed canvas |
| Drill Type | Full Round Drill |
| Item Weight | 0.11 Kilograms (3.84 ounces) |
| UPC | 721410879238 |
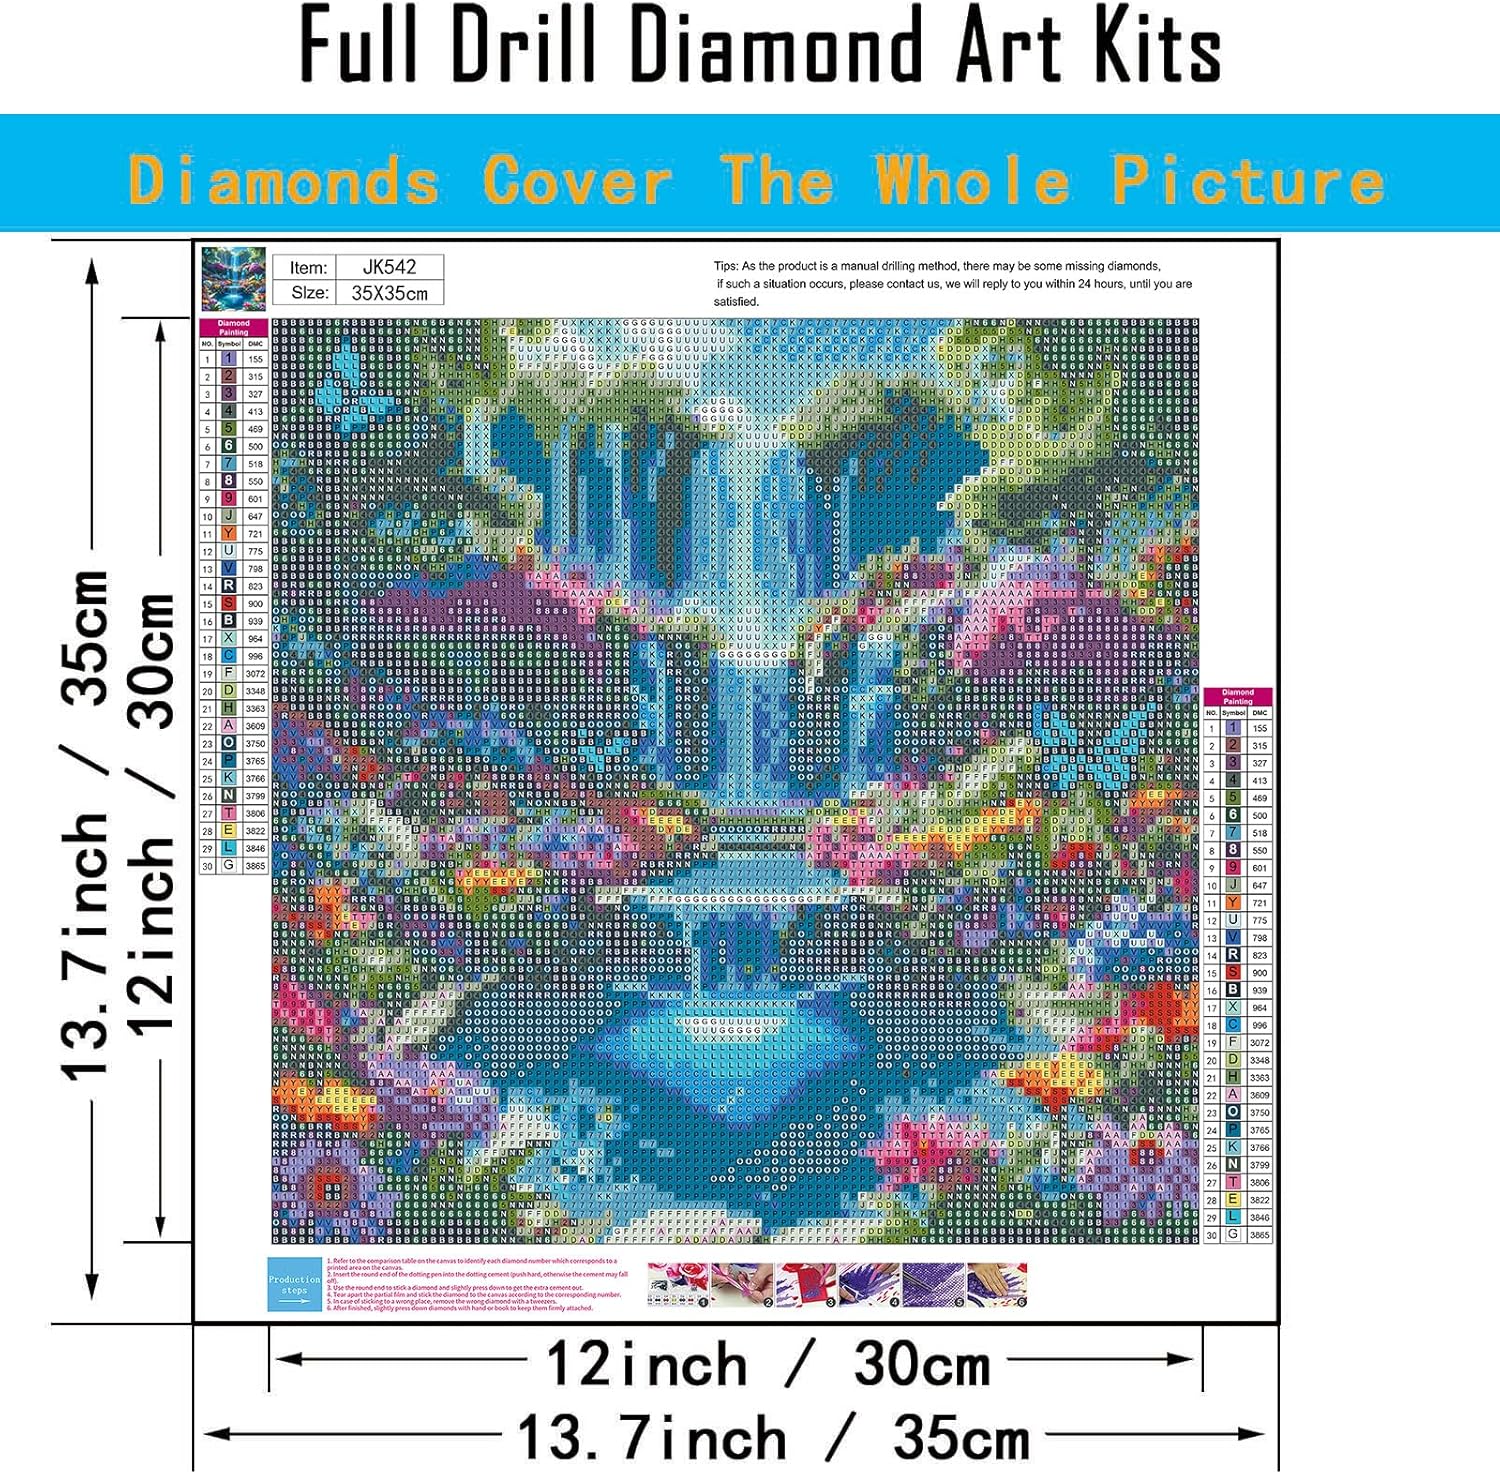
Image: Canvas dimensions and full drill coverage illustration.
Warranty and Support
CHWGLFGG is committed to providing high-quality products and customer satisfaction.
- After-Sales Service: If you encounter any issues such as missing diamonds or tools after receiving or during the use of your diamond painting kit, please contact our customer service. We are dedicated to ensuring your shopping experience is satisfactory and will provide a resolution, which may include sending a brand new kit.
- Contact Information: For support, inquiries, or to report missing components, please refer to the contact information provided on the product packaging or the seller's store page on Amazon.
Ask a question about this manual
Ask about setup, troubleshooting, compatibility, parts, safety, or missing instructions. Manuals+ will review the question and use this page’s manual context to help answer it.