
Introduction
Thank you for choosing the Bairth 6-Light Black Chandelier. This modern farmhouse light fixture is designed to provide ample illumination and enhance the aesthetic of various indoor spaces such as dining rooms, kitchens, entryways, hallways, living rooms, and bedrooms. This manual provides essential information for safe installation, operation, and maintenance of your new chandelier. Please read these instructions carefully before assembly and retain them for future reference.
Safety Information
- WARNING: To avoid the risk of electrical shock, always disconnect power at the main circuit breaker or fuse box before beginning installation or performing any maintenance.
- All electrical connections must be in accordance with local codes, ordinances, or the National Electric Code (NEC). Consult a qualified electrician if you are unfamiliar with electrical wiring.
- Use only E12 base bulbs with a maximum wattage of 40W per bulb. Exceeding the recommended wattage may cause overheating and damage to the fixture.
- Ensure the fixture is securely mounted to a structural ceiling component capable of supporting its weight.
- Do not connect this fixture to an ungrounded electrical system.
- Handle the fixture with care to prevent damage to the components.
- Keep flammable materials away from the light bulbs.
Package Contents
Verify that all components are present before beginning installation. If any parts are missing or damaged, contact customer support.
- Chandelier Frame (with 6 E12 lamp sockets)
- Adjustable Rods (various lengths for height customization)
- Mounting Canopy
- Mounting Hardware (screws, wire nuts, mounting bracket)
- User Manual

Figure 1: Chandelier Components Overview
Specifications
| Brand | Bairth |
| Model Number | D3201-06-BK |
| Color | Black |
| Material | Metal |
| Style | Modern Farmhouse, Industrial |
| Light Fixture Form | Chandelier |
| Number of Light Sources | 6 |
| Bulb Base | E12 |
| Max Wattage Per Bulb | 40 Watts |
| Voltage | 120 Volts |
| Adjustable Height Range | 20.5 inches to 61.8 inches |
| Dimensions (L x W x H) | 21.3"L x 21.3"W x 61.8"H (Max Height) |
| Mounting Type | Ceiling Mount (Flat, Sloped, Arched compatible) |
| Indoor/Outdoor Usage | Indoor |

Figure 2: Product Dimensions and Adjustable Height
Setup and Installation
Installation typically takes less than 20 minutes. However, if you lack wiring experience, it is recommended to consult a licensed electrician for safety.
Tools Required (Not Included):
- Phillips Head Screwdriver
- Wire Strippers
- Electrical Tape
- Safety Glasses
- Ladder
Installation Steps:
- Turn Off Power: Before starting, ensure the power to the circuit at the main breaker panel is completely off to prevent electrical shock.
- Prepare Mounting Bracket: Attach the mounting bracket to the junction box in your ceiling. Ensure it is securely fastened.
- Assemble Chandelier Frame: The chandelier frame may require minor assembly. Secure the arms to the central hub as instructed in the included accessory guide. Connect the internal wires of the arms to the main wires, ensuring all connections are tight.
- Determine Hanging Height: Select the appropriate number of adjustable rods to achieve your desired hanging height. The chandelier can be adjusted from 20.5 inches to 61.8 inches. Thread the fixture wires through the chosen rods and the canopy.
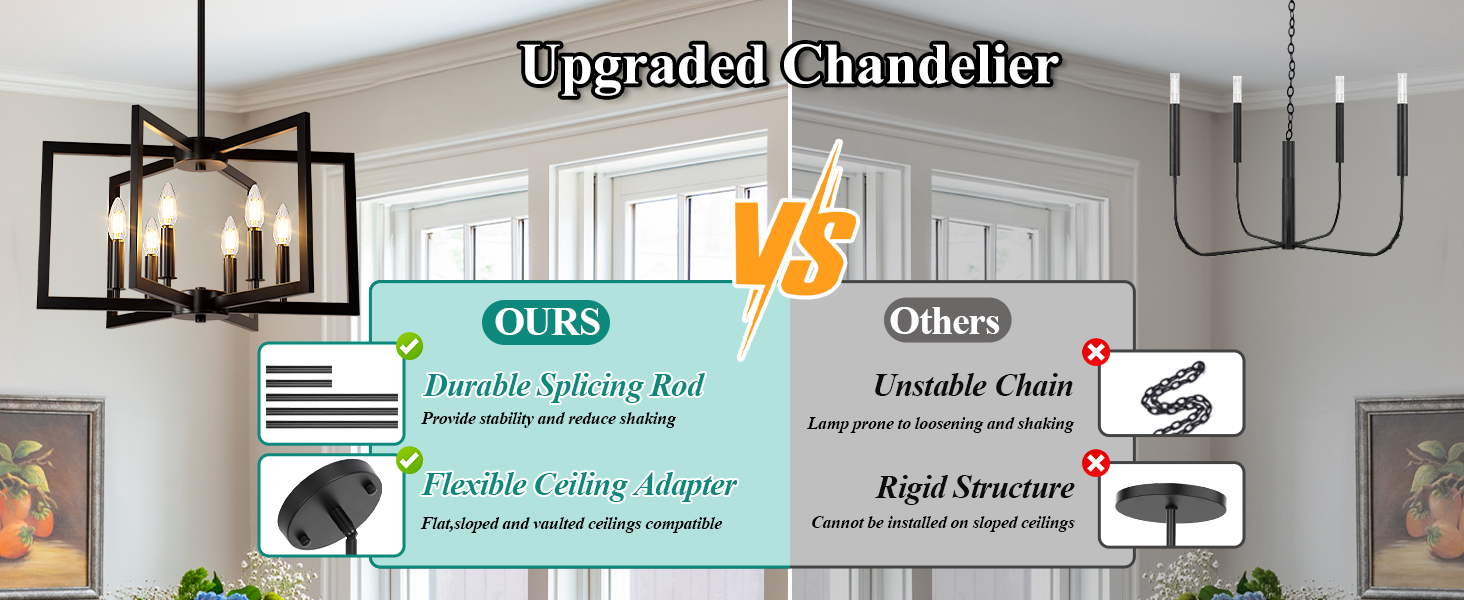
Figure 3: Customizing Chandelier Height
- Wire Connections: Connect the fixture wires to the house wires using wire nuts. Connect the black wire from the fixture to the black (live) wire from the ceiling, the white wire from the fixture to the white (neutral) wire from the ceiling, and the ground wire from the fixture to the ground wire from the ceiling. Secure connections with electrical tape.
- Mount Canopy: Carefully push the canopy up to the ceiling, covering the junction box, and secure it to the mounting bracket with the provided screws.
- Install Bulbs: Screw E12 base bulbs (not included, max 40W each) into the lamp sockets.
- Restore Power: Once installation is complete, restore power at the main circuit breaker.

Figure 4: Ceiling Type Compatibility
Video 1: Bairth 6 Lights Modern Geometric Chandelier Product Overview. This video provides a visual overview of the chandelier, its design, and features. While not a step-by-step installation guide, it offers context for the product.
Operating Instructions
Once installed and powered, the chandelier operates like any standard light fixture controlled by a wall switch. For enhanced functionality, consider the following:
- Dimmable Feature: This chandelier is fully dimmable when used with dimmable E12 bulbs and a compatible dimmer switch (both not included). Install a dimmer switch according to its manufacturer's instructions to control light intensity.
- Bulb Selection: The fixture supports various E12 base bulbs including LED, CFL, and Incandescent, up to 40W per socket. Choose bulbs that match your desired light color and brightness.

Figure 5: Dimmable Feature Overview

Figure 6: Daylight White vs. Warm White Bulb Effect
Maintenance
Regular maintenance ensures the longevity and optimal performance of your chandelier.
- Cleaning: Always turn off the power before cleaning. Use a soft, dry cloth to wipe the fixture. Avoid using harsh chemicals, abrasive cleaners, or polishes as they may damage the finish.
- Bulb Replacement: Ensure the power is off and bulbs have cooled before attempting to replace them. Unscrew the old bulb and screw in a new E12 base bulb (max 40W).
- Inspection: Periodically check all connections and mounting hardware to ensure they remain secure.
Troubleshooting
If you encounter issues with your chandelier, refer to the following common problems and solutions:
| Problem | Possible Cause | Solution |
|---|---|---|
| Light does not turn on | 1. Power is off 2. Loose wiring connection 3. Faulty bulb | 1. Check circuit breaker/fuse. 2. Verify all wire connections are secure (ensure power is off first). 3. Replace bulb with a new, working one. |
| Light flickers | 1. Loose bulb 2. Incompatible dimmer switch/bulb 3. Loose wiring | 1. Tighten bulb. 2. Ensure dimmable bulbs are used with a compatible dimmer switch. 3. Check wiring connections (ensure power is off first). |
| Fixture hums | 1. Incompatible dimmer switch/bulb 2. Loose components | 1. Ensure dimmable bulbs are used with a compatible dimmer switch. 2. Check for any loose parts and tighten them. |
If the problem persists after attempting these solutions, please contact customer support.
Warranty and Support
This Bairth chandelier comes with a 1-year limited warranty from the date of purchase. This warranty covers defects in materials and workmanship under normal use. If your lamp has any defects or stops working within this period, we will troubleshoot or send a replacement.
For warranty claims, technical assistance, or any questions regarding your product, please contact the seller, BrightHome USA, through your Amazon order details page. Please have your model number (D3201-06-BK) and purchase date available when contacting support.