1. Introduction
This manual provides detailed instructions for the installation, operation, and maintenance of your TIGERSECU Super HD 1080P 4 Channel DVR Security Recorder. This hybrid 6-in-1 digital video recording system is designed for use with up to 5MP HD TVI, AHD, CVI, RS485 PTZ cameras, and analog security cameras. For optimal performance, it is recommended to use this DVR with TIGERSECU security cameras.
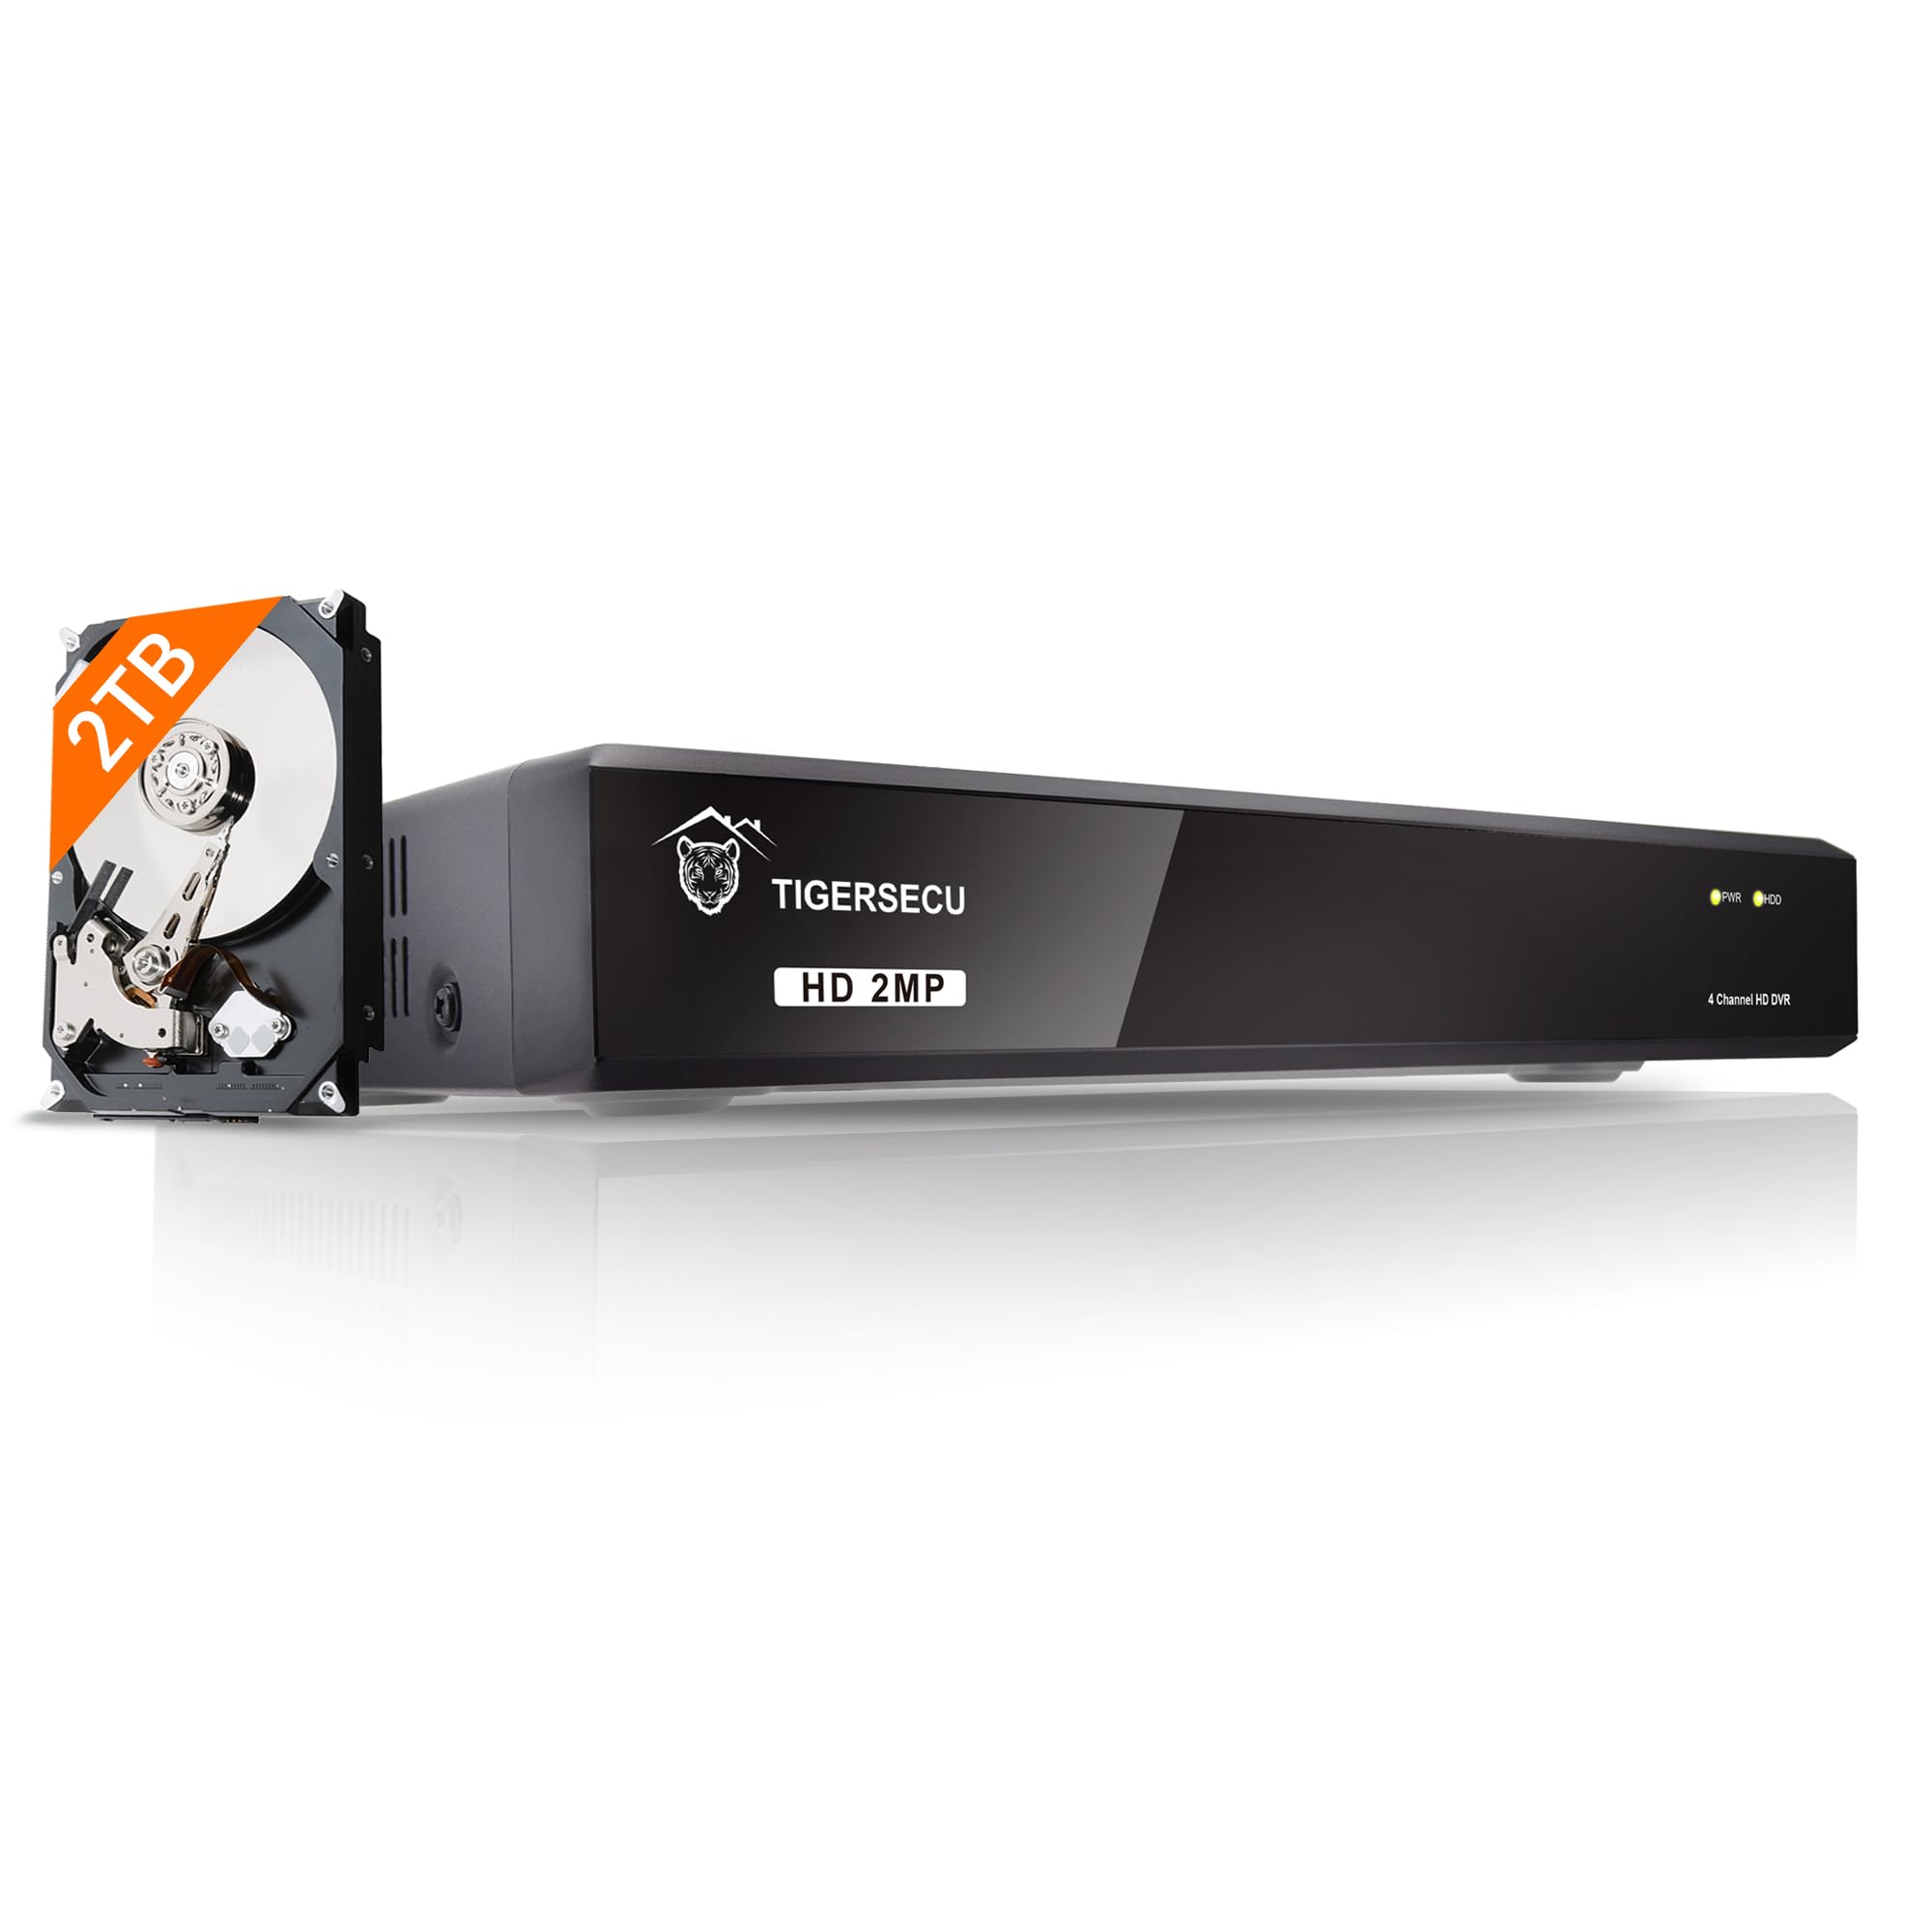
Figure 1: TIGERSECU Super HD 1080P 4 Channel DVR Security Recorder
2. What's in the Box
Verify that all items are present in the package:
- DVR power supply
- DVR remote control
- USB mouse
- CCTV Recorder with Pre-installed 2TB HDD
- User Manual
- Quick Guide
- Security Sticker
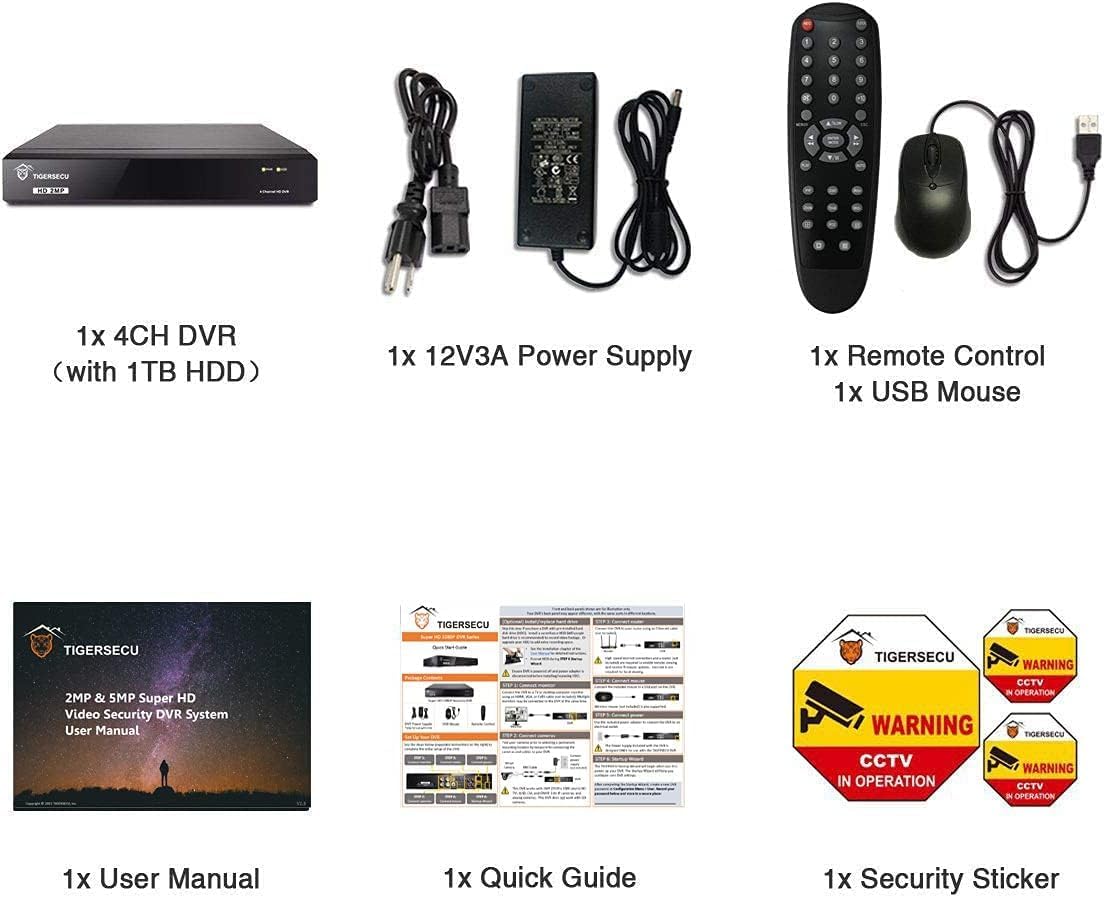
Figure 2: Package Contents
3. Product Overview
3.1. Hybrid 6-in-1 Compatibility
This TIGERSECU Super HD hybrid DVR supports various camera types, including 2MP and 5MP HD TVI, AHD, CVI, RS485 PTZ, and analog security cameras. This versatility allows for integration with a wide range of surveillance systems.
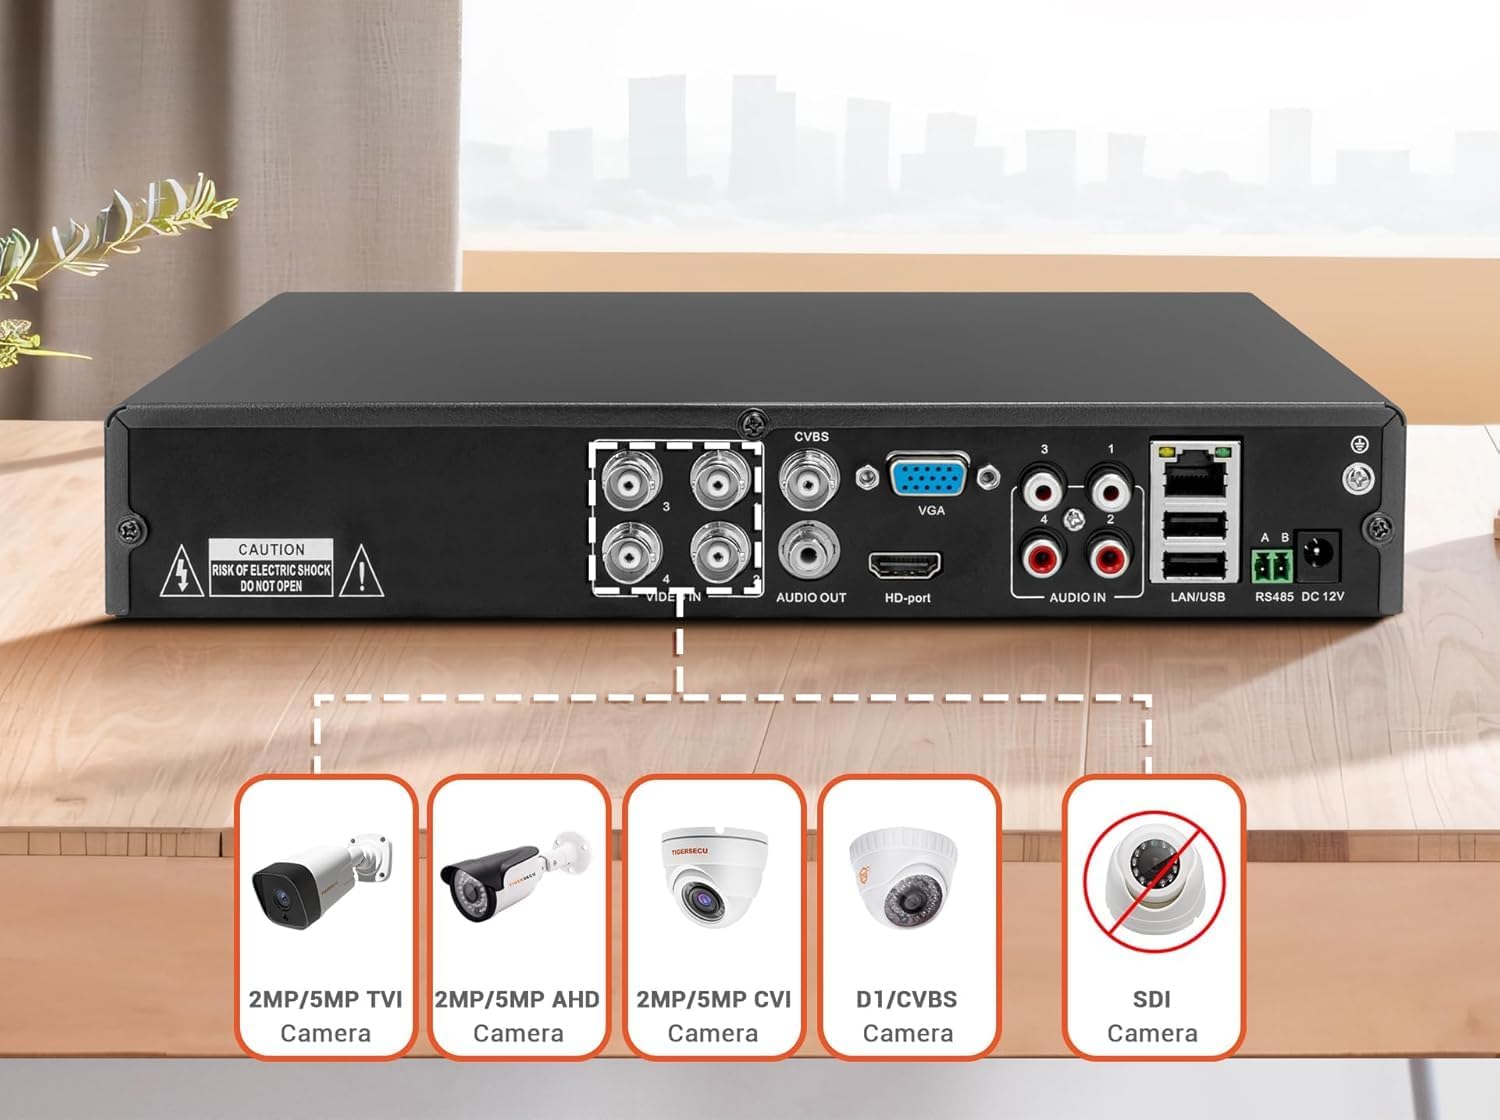
Figure 3: DVR Back Panel and Camera Compatibility
3.2. Connectivity and Outputs
The DVR features 4 audio inputs for 4 channels of audio recording. It offers three monitor connections through HD-port, VGA, and CVBS ports, supporting a 1920 x 1080 pixels DVR display resolution. It is compatible with TV and computer monitors that have a minimum 1080p resolution.

Figure 4: DVR Connected to a Monitor
3.3. Design and Dimensions
The DVR incorporates a unique heat sink fan technology for self-cooling, which helps prevent overheating and ensures a quieter system operation by eliminating fan noise.

Figure 5: Unique Heat Sink Technology
The product dimensions are 10.8 inches (L) x 8.5 inches (W) x 1.8 inches (H), with an item weight of 4.18 pounds.

Figure 6: DVR Dimensions
4. Setup Instructions
Follow these steps to set up your TIGERSECU DVR system:
- Connect Cameras and Power Supply: Connect your security cameras to the appropriate input ports on the back of the DVR. Ensure each camera receives sufficient power from its power supply. Then, connect the DVR power supply to the DVR and a power outlet.
- Download the TIGERSECU App: Download the free TIGERSECU HD Viewer app from the App Store (iOS) or Google Play (Android) on your mobile device.
- Watch Live Video: Once connected and the app is installed, you can view live video feeds from your cameras.
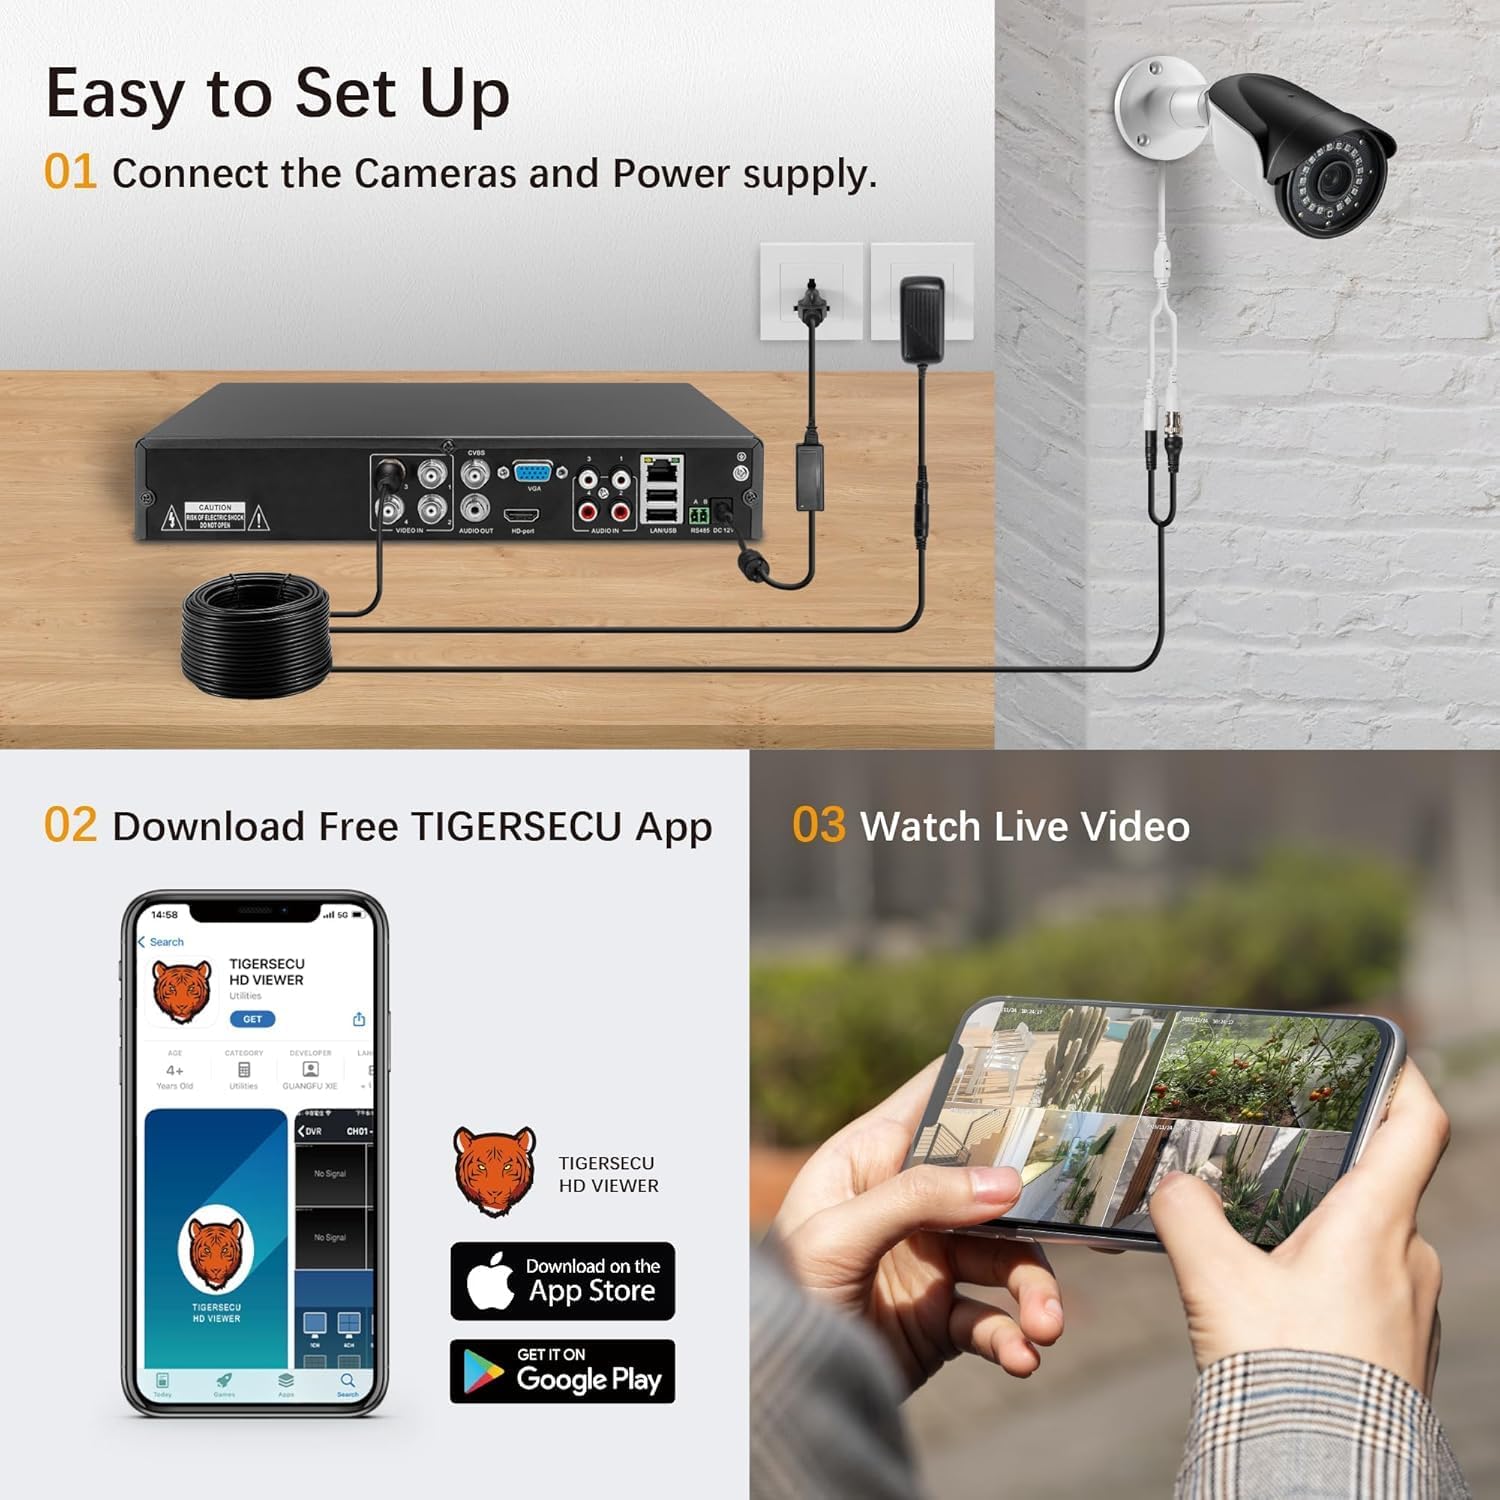
Figure 7: Easy Setup Guide
5. Operating Instructions
5.1. Remote Access
Remotely access and play surveillance footage and control the security DVR using TIGERSECU's HD Viewer app or CMS client for Mac & Windows. There are no contract or monthly fees for this service. A minimum recommended upload speed of 1Mbps per channel is required for remote connection; 4Mbps is recommended for 4-channels. The mobile app requires iOS 9.3 or later and Android 9 or later.

Figure 8: CMS Client for Remote Control
5.2. Recording and Playback
The DVR comes pre-installed with a 2TB surveillance hard disk drive, providing over 10 days of continuous local recording at the highest resolution. High-efficiency video compression allows for more footage storage within the same space. The system supports 4-channel live screen viewing and up to 32x playback speed.
Figure 9: Recording and Playback Interface
5.3. Motion Detection
Motion detection options allow you to record only when motion is detected, conserving hard drive space. You can customize motion detection areas to focus on specific zones of interest.

Figure 10: Customizable Motion Detection Areas
5.4. Alerts and Notifications
Receive email and app alerts when motion is detected, ensuring you are informed of any activity.

Figure 11: Email and App Alerts
6. Storage Management
The DVR includes a pre-installed 2TB surveillance hard drive. You have the option to replace the internal drive with a larger one, supporting up to 16TB for extended recording capacity.

Figure 12: Scalable Storage Capacity
Video 1: This video explains how the storage capacity of your TIGERSECU DVR can be upgraded, detailing that 4 and 8-channel systems support a single hard drive up to 16TB, while 16-channel systems support two hard drives, each up to 16TB. It also clarifies that the hard drive is solely for video storage and is not required for the DVR to operate, recommending Western Digital Purple hard drives.
7. Maintenance
Regular maintenance ensures optimal performance and longevity of your DVR system. Keep the DVR in a well-ventilated area to utilize its heat sink technology effectively. Periodically check cable connections for security and integrity. Ensure the hard drive has sufficient space for recordings; consider upgrading if needed.
8. Troubleshooting
8.1. Camera Not Showing Up on DVR
If your camera is not displaying on the DVR, and it is confirmed to be compatible with the system, the most common cause is an insufficient power supply to the camera. You can quickly check for a power supply issue by testing the night vision:
- Make the room as dark as possible to trigger the infrared night vision.
- You should be able to see a red glow on the face of the camera's lens.
- If you do not see a red glow, the camera is not receiving enough power. Changing to the correct power supply will typically resolve this issue.
Video 2: This video addresses a common issue where a camera is not showing up on the DVR. It explains that if the camera is compatible, the problem is often an insufficient power supply. The video demonstrates how to check this by observing if the camera's night vision (red glow) activates in a dark environment, and suggests replacing the power supply if it does not.
9. Specifications
| Feature | Detail |
|---|---|
| Product Dimensions | 10.8 x 8.5 x 1.8 inches |
| Item Weight | 4.18 pounds |
| ASIN | B0DL5QYRJZ |
| Item Model Number | TS-2MP-302T04-2TB |
| Connectivity Technology | CVBS, HDMI, VGA |
| Compatible Devices | Camera, Desktop, Laptop, Smartphone, Television |
| Brand | TIGERSECU |
| Memory Storage Capacity | 16 TB (Max) |
10. Warranty and Support
TIGERSECU products come with a 2-year guarantee, reflecting the brand's commitment to quality. For any inquiries or technical assistance, TIGERSECU offers a US-based support team ready to help. You can find contact information on the official TIGERSECU website or through your purchase platform.

