COSVALVE 1041901800
COSVALVE Portable Infrared Sauna User Manual
Model: 1041901800 | Brand: COSVALVE
Introduction
This manual provides comprehensive instructions for the safe and effective use of your COSVALVE Portable Infrared Sauna. Please read all instructions carefully before assembly and operation. Retain this manual for future reference.

Image: The COSVALVE Portable Infrared Sauna, featuring its gray tent design, remote control, heated foot pad, and a foldable chair. A person is shown next to the sauna for scale.
Important Safety Information
To reduce the risk of burns, fire, electric shock, or injury to persons, observe the following safety precautions:
- Read all instructions before using the sauna.
- Do not use the sauna if you are pregnant, have a heart condition, high blood pressure, or any other medical condition without consulting a physician.
- Ensure the sauna is placed on a flat, stable, and dry surface.
- Keep children and pets away from the sauna during operation.
- Do not operate the sauna if the power cord or plug is damaged.
- Avoid using the sauna for more than 60 minutes per session.
- Stay hydrated by drinking water before and after sauna use.
- Note: The smart controller has a built-in program that triggers an E1 reminder if the temperature sensor does not detect any change in temperature for more than 10 minutes. Ensure the temperature sensor is placed correctly next to the heating panel inside the pocket to prevent this error.
Product Components
Verify that all components are present before beginning assembly:
- Sauna Tent
- 4 x Heating Panels
- Folding Chair
- Foot Pad Heating Mat
- Stainless Steel Tubes (for frame)
- Connectors (for frame assembly)
- Remote Control and User Manual

Image: An illustration detailing all parts included with the sauna, such as the tent, heating elements, chair, foot pad, frame components, and remote control.
Setup Instructions
Follow these steps for quick and easy assembly:
- Step 1: Assemble the Frame. Connect the stainless steel tubes using the provided connectors to form the base and vertical structure of the sauna tent.
- Step 2: Position the Tent. Drape the sauna tent fabric over the assembled frame, ensuring it fits snugly.
- Step 3: Install Heating Panels. The heating panels are pre-installed in the sidewalls. Ensure they are properly aligned.
- Step 4: Connect Wiring. Connect the heating panel wires and the foot pad wires to the main connector. No pairing is required.
- Step 5: Place Foot Pad and Chair. Position the heated foot pad on the floor inside the sauna. Place the folding chair inside the tent.
- Step 6: Power Connection. Plug the sauna into a standard 110V electrical outlet.
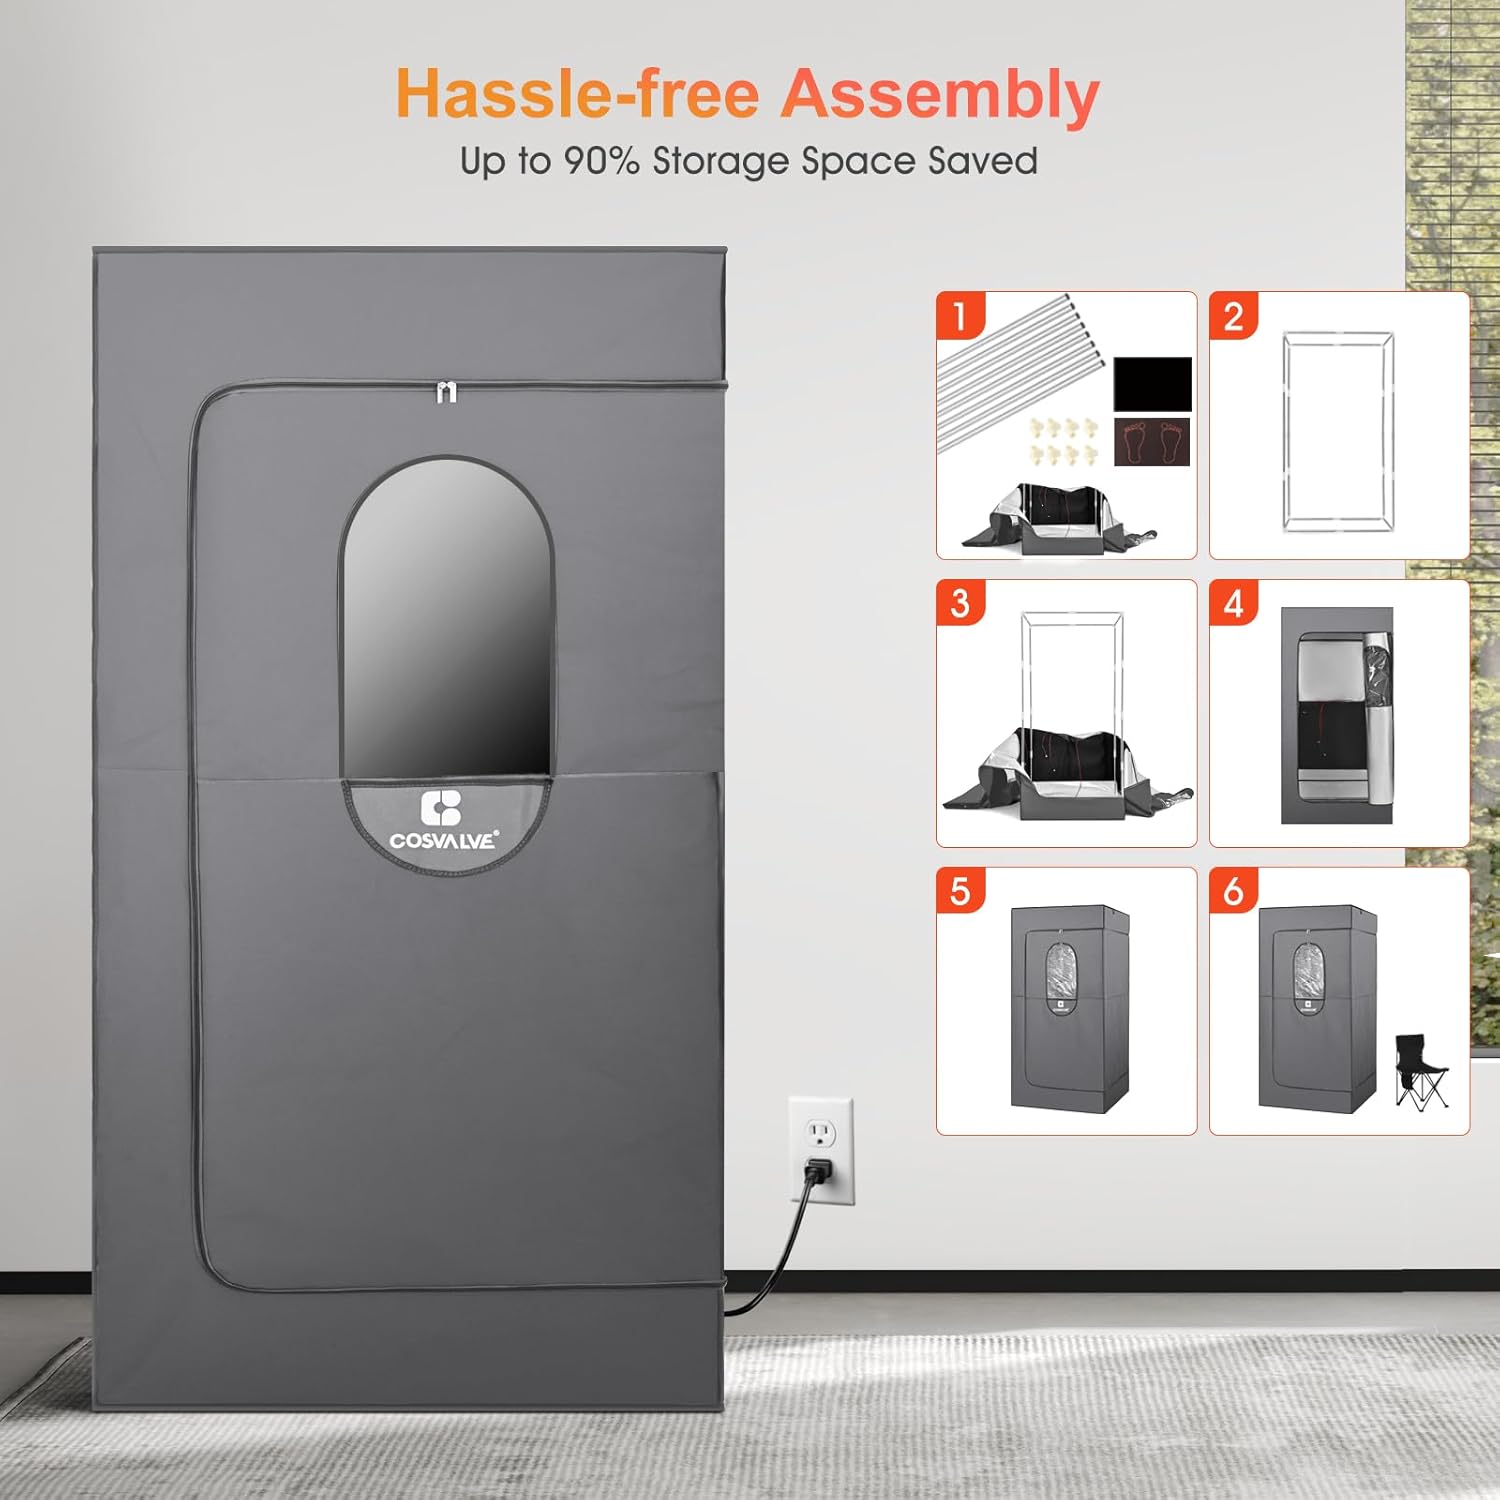
Image: A visual guide illustrating the six steps for assembling the portable infrared sauna, from frame construction to final power connection.
Operating Instructions
Powering On/Off
After connecting the sauna to power, use the remote control to turn the unit on or off. The remote control features a power button for easy access.
Temperature Control
The sauna features 4 carbon fiber heating panels. Use the remote control to adjust the temperature. The sauna can reach temperatures from 107℉ (41℃) to 140℉ (60℃). Allow approximately 12-15 minutes for the sauna to heat up to your desired temperature.

Image: An illustration demonstrating the internal heating elements and the range of temperatures achievable within the sauna.
Timer Settings
The remote control allows you to set the operating time from 0 to 60 minutes. It is recommended not to exceed 60 minutes per session.
Using the Foot Pad
The heated foot pad enhances comfort during your sauna session. Ensure it is properly connected to the main connector as per setup instructions.

Image: A composite image highlighting key operational components: the compact sauna size, the remote control for adjustments, the heated foot pad, and the electrical connector.
Maintenance
Cleaning
- Always unplug the sauna and allow it to cool completely before cleaning.
- Wipe the interior and exterior surfaces of the tent with a damp cloth and mild detergent. Avoid abrasive cleaners.
- The waterproof bottom ensures spill prevention and easy cleaning.
- Ensure all surfaces are dry before storing or next use.
Storage
- Disassemble the sauna by reversing the setup steps.
- Store all components in a dry, cool place away from direct sunlight.
- The compact design allows for space-saving storage.

Image: A visual representation of the sauna's construction materials, emphasizing the heavy-duty Oxford cloth exterior and the aluminum thermal insulated film interior for heat retention.
Troubleshooting
- E1 Error Message: If the smart controller displays an E1 error, it indicates that the temperature sensor has not detected a temperature change for over 10 minutes. Ensure the temperature sensor is correctly positioned next to a heating panel inside its designated pocket.
- Sauna Not Heating: Check if the power cord is securely plugged into a working outlet. Verify that all heating panel and foot pad wires are properly connected to the main connector. Ensure the sauna is powered on via the remote control.
- Zippers Not Functioning Smoothly: Apply a small amount of zipper lubricant or wax to the zipper teeth if they become stiff. Avoid forcing the zippers to prevent damage.
Product Specifications
| Feature | Specification |
|---|---|
| Product Dimensions (L x W x H) | 35.42 x 35.42 x 70.87 inches |
| Item Weight | 19.98 pounds |
| Max. Output Power | 1600W |
| Rated Voltage | 110V |
| Max. Temperature | 140℉ (60℃) |
| Adjustable Time Setting | 0 to 60 minutes |
| Heating Panels | 4 Carbon Fiber Heating Panels |
| Material | Aluminum insulated film with heavy-duty Oxford fabric |
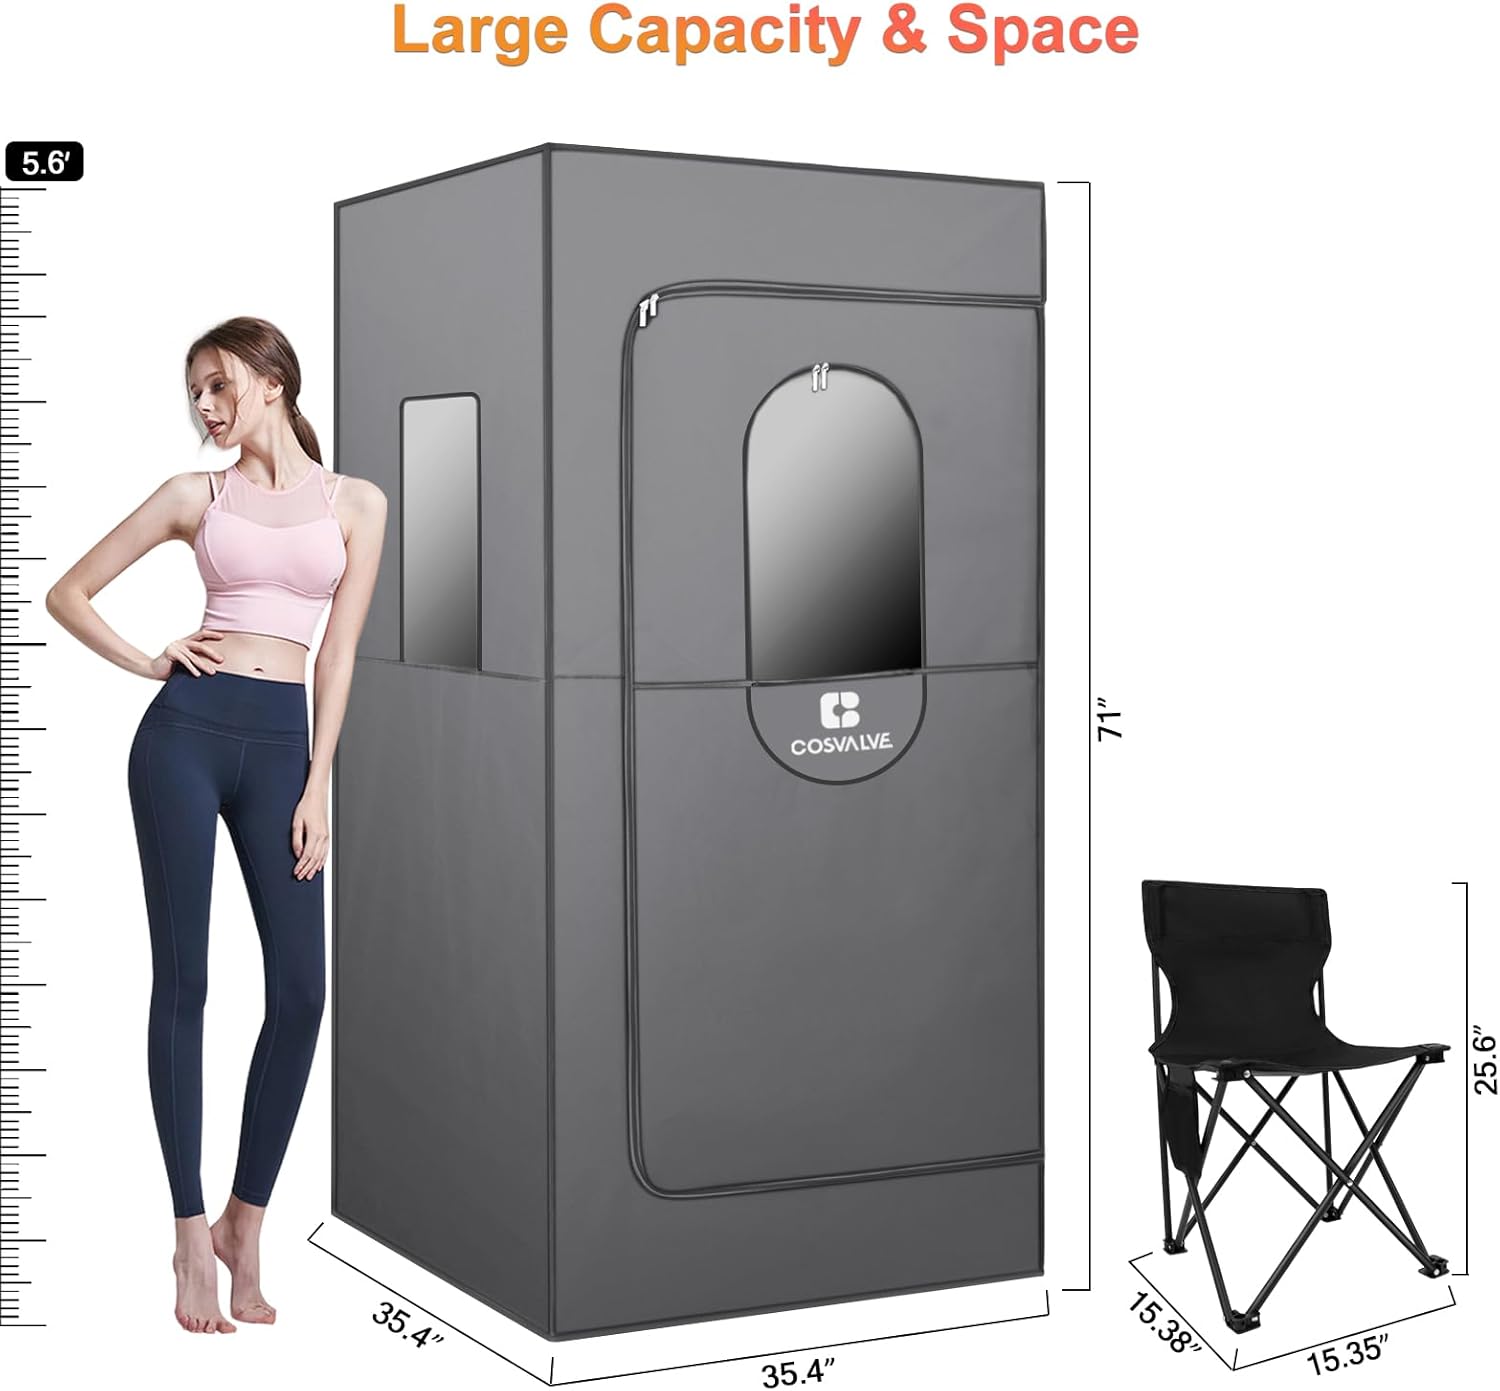
Image: A diagram illustrating the overall dimensions of the portable sauna tent and the included folding chair.
Warranty and Support
Warranty
The COSVALVE Portable Infrared Sauna comes with a 1-year warranty from the date of purchase. This warranty covers manufacturing defects and ensures peace of mind regarding product quality.
Customer Support
For any inquiries, concerns, or warranty claims, please contact our professional customer service team. We aim to assist you within 24 hours.
Contact information can typically be found on the product packaging or the official COSVALVE website.