Introduction
Thank you for purchasing the Generic TD92Pro Mini Projector. This manual provides essential information for setting up, operating, and maintaining your projector. Please read it thoroughly before use to ensure optimal performance and safety.
Important Safety Information
- Do not look directly into the projector lens when the lamp is on.
- Ensure proper ventilation around the projector to prevent overheating.
- Use only the power adapter supplied with the device.
- Keep the projector away from water or other liquids.
- Do not attempt to repair the projector yourself. Contact qualified service personnel.
- Keep out of reach of children.
Package Contents
Please check the package contents upon opening. If any items are missing or damaged, contact your retailer.

Image: Contents of the TD92Pro Mini Projector package. It includes the TD92Pro projector unit, a projector lens cover, a user guide, a remote control, and a power cable. All items are neatly packed in a box.
- TD92Pro Mini Projector x 1
- Projector Lens Cover x 1
- User Guide x 1
- Remote Control x 1
- Power Cable x 1 (EU, UK, AU, US Plug options provided)
Product Overview
Familiarize yourself with the projector's components and ports.

Image: Front and side view of the TD92Pro Mini Projector, showing the lens and a smartphone next to it for scale. The top surface has a fabric-like texture.
Front View
- Projection Lens: Emits the image.
- IR Receiver: For remote control signals.
Rear/Side Ports (Typical)
- HDMI Ports: For connecting external devices like laptops, gaming consoles.
- USB Ports: For connecting USB drives for media playback or peripherals.
- Audio Out (3.5mm Jack): For connecting external speakers or headphones.
- Power Input: For connecting the power adapter.
- Ventilation Grilles: For heat dissipation.
Setup Guide
1. Placement
Position the projector on a stable, flat surface. Ensure there are no obstructions to the lens or ventilation ports. The projection distance affects the screen size.

Image: Diagram illustrating recommended projection distances and corresponding screen sizes. For example, 1.03m for 30 inches, 2.1m for 60 inches, 3.5m for 100 inches (recommended for best view), and 4.2m for 120 inches.
- For a 100-inch screen, a projection distance of approximately 3.5 meters is recommended for optimal viewing.
- The projector supports screen sizes from 40 to 150 inches with distances ranging from 1 to 5 meters.
2. Power Connection
- Connect the power cable to the projector's power input port.
- Plug the other end of the power cable into a wall outlet.
- Press the power button on the projector or remote control to turn it on.
3. Focus and Keystone Correction
Adjust the image clarity and shape using the focus and keystone correction features.

Image: Demonstrates 6D Innovative Keystone Correction, Auto Focus, 50-100% Zoom, and 4-point trapezoidal adjustment features. The image shows how these adjustments correct a distorted projection into a perfect rectangle and sharpen the image.
- Auto Focus: The projector features auto-focus for quick image clarity.
- Keystone Correction: Use the remote control to adjust the image shape if it appears trapezoidal. The TD92Pro supports 6D innovative keystone correction and 4-point trapezoidal adjustment.
- Zoom Function: Adjust the projection size from 50% to 100% using the remote control without moving the projector.
Operating Instructions
1. Android 9.0 OS Navigation
The TD92Pro projector runs on Android 9.0 OS, providing a smart interface for various applications and media.

Image: The projector displaying the "Smart Android 9.0 OS" interface, showing various apps and media options like search, home, apps, video, and music settings. An Android robot character is also visible.
- Use the remote control to navigate the Android interface.
- Access the Play Store to download and install various applications.
- The home screen provides quick access to apps, video, and music settings.
2. Connectivity
Wi-Fi Connection (2.4G/5G/6G)
Connect the projector to your wireless network for online streaming and app access.

Image: Diagram illustrating the 5G+2.4G WiFi6 connection capability, showing a smartphone wirelessly connected to the projector. It highlights faster and seamless video streaming compared to 2.4G WiFi alone.
- Go to Settings > Network & Internet > Wi-Fi.
- Select your desired Wi-Fi network and enter the password.
- The projector supports 2.4G, 5G, and WiFi6 for stable and fast connections.
Bluetooth Connection
Connect external Bluetooth speakers, headphones, or other audio equipment for an enhanced sound experience.
- Go to Settings > Connected devices > Bluetooth.
- Turn on Bluetooth and search for available devices.
- Select your device to pair.
HDMI and USB Connections
Connect external devices such as laptops, gaming consoles, or USB drives.
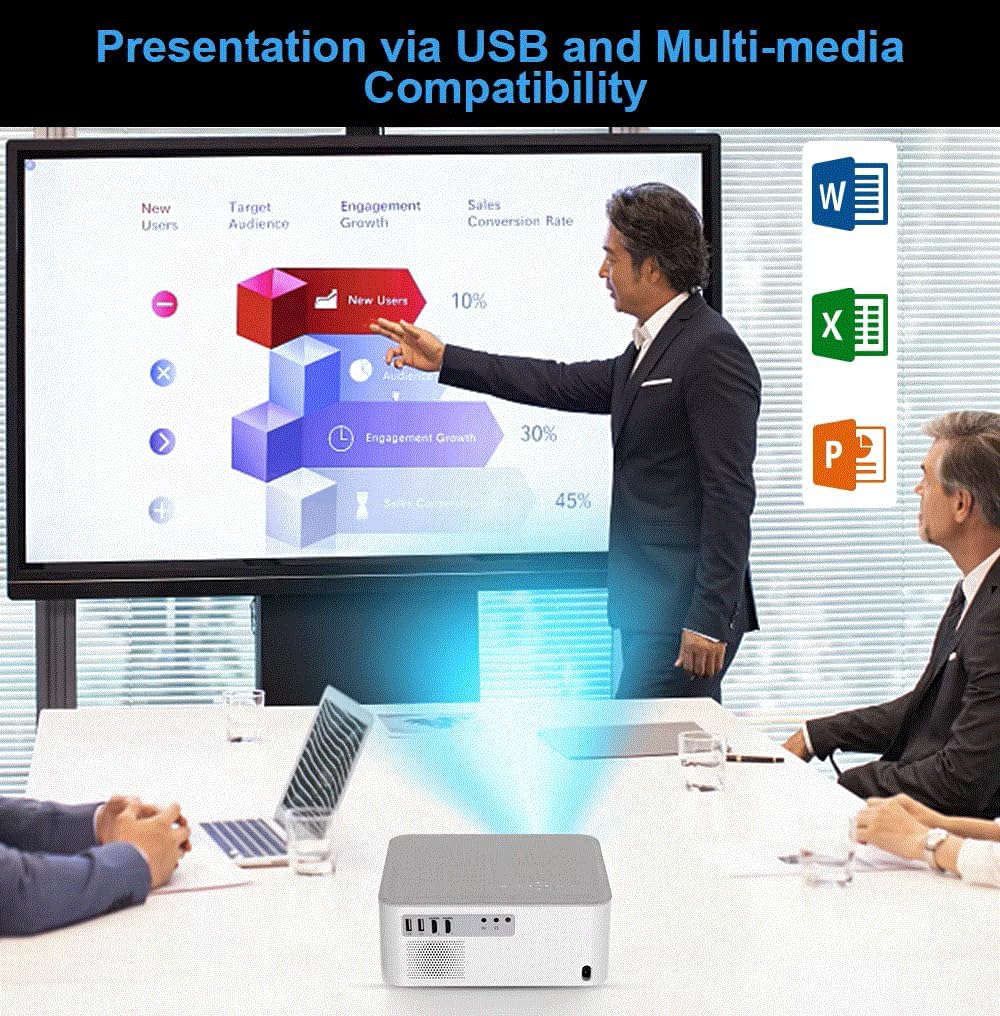
Image: A business presentation scenario showing the projector displaying a graph from a laptop, with icons for Word, Excel, and PowerPoint, indicating multi-media compatibility via USB.
- HDMI: Plug an HDMI cable from your source device into an HDMI port on the projector. Select the corresponding HDMI input from the projector's source menu.
- USB: Insert a USB flash drive into a USB port. The projector's media player will allow you to browse and play supported files (documents, videos, images).
3. Screen Mirroring (Airplay/WiFi-display)
Wirelessly mirror your Android or iOS phone screen to the projector.
- Ensure both your phone and the projector are connected to the same Wi-Fi network.
- On the projector, select the "Multiscreen" or "Screen Mirroring" option.
- On your phone, activate screen mirroring (e.g., AirPlay for iOS, Smart View/Cast for Android) and select the projector from the list of devices.
Maintenance
Cleaning the Lens
- Use a soft, lint-free cloth specifically designed for optical lenses.
- Do not use abrasive cleaners or solvents.
- Gently wipe the lens to remove dust or smudges.
Cleaning the Projector Body
- Wipe the exterior with a soft, dry cloth.
- Avoid spraying liquids directly onto the projector.
Storage
- When not in use, store the projector in a cool, dry place.
- Use the provided lens cover to protect the lens from dust and scratches.
Troubleshooting
| Problem | Possible Cause | Solution |
|---|---|---|
| No image on screen | Power cable disconnected, incorrect input source, lens cap on. | Check power connection, select correct input source (HDMI, USB), remove lens cap. |
| Blurry image | Out of focus, incorrect keystone adjustment. | Adjust the focus ring/auto-focus, perform keystone correction. |
| No sound | Volume too low, external audio device not connected, incorrect audio output selected. | Increase volume, check Bluetooth/3.5mm connection, select correct audio output in settings. |
| Remote control not working | Batteries low/dead, IR receiver blocked. | Replace batteries, ensure clear line of sight to the projector's IR receiver. |
| Wi-Fi connection issues | Incorrect password, out of range, router issues. | Verify password, move closer to router, restart router and projector. |
Specifications
| Model | TD92Pro |
| Brand | Generic |
| Display Resolution | Native 1920 x 1080P (Full HD), supports 4K input |
| Brightness | 12000 Lumens |
| Contrast Ratio | 10000:1 |
| Operating System | Android 9.0 OS |
| Connectivity Technology | Bluetooth 5.0, HDMI, USB, Wi-Fi (2.4G/5G/6G WiFi6) |
| Projection Size | 40 - 150 inches |
| Projection Distance | 1 - 5 meters (3.5m for 100 inches recommended) |
| Special Features | Full HD, Internet Built-In, Built-In Speakers, HIFI STEREO, Portable 3D Movie Viewer, Auto Focus, 6D Keystone Correction, 50-100% Zoom, Multiscreen Support (Airplay/Wifi-display) |
| Aspect Ratio | 16:9 |
| Noise Level | Approximately 40dB |
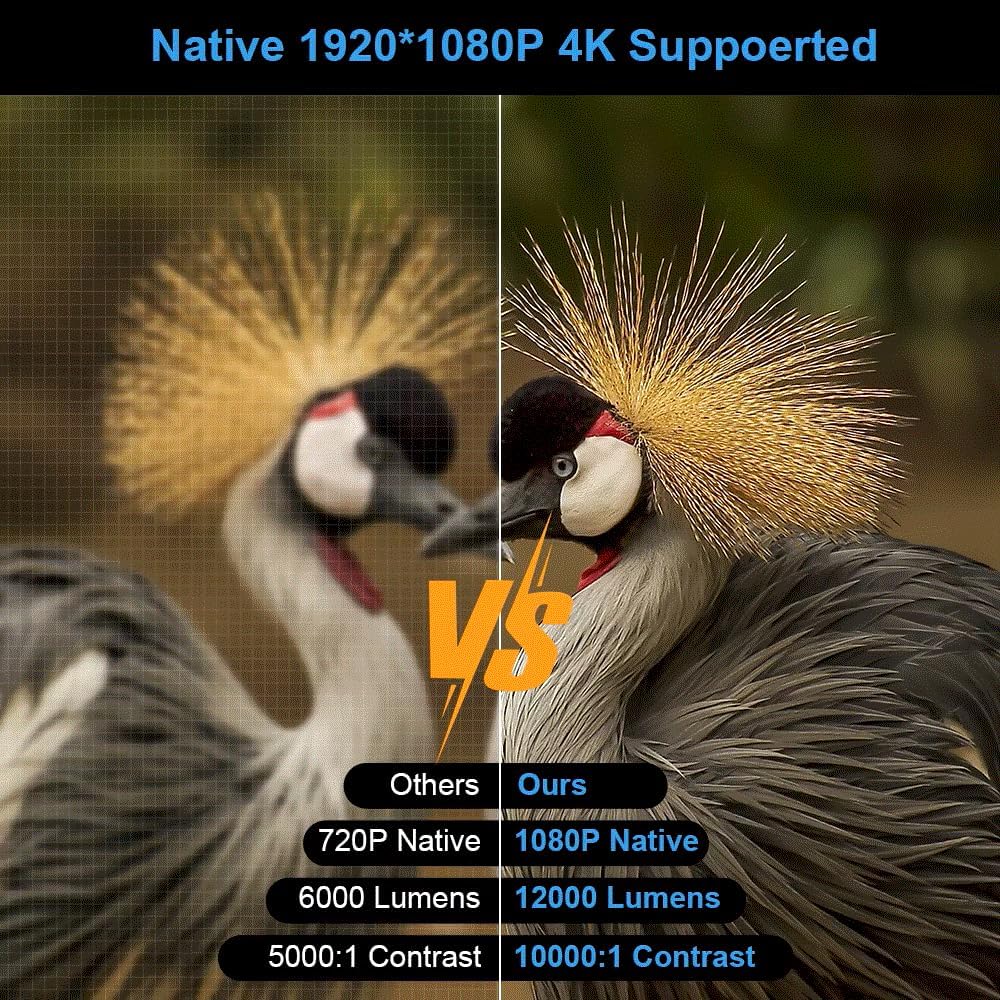
Image: A visual comparison between a 720P native projector (labeled "Others") and the TD92Pro's 1080P native resolution (labeled "Ours"), highlighting the superior clarity, brightness (12000 Lumens vs 6000 Lumens), and contrast (10000:1 vs 5000:1) of the TD92Pro.
Warranty and Support
For warranty information and technical support, please refer to the documentation provided with your purchase or contact the retailer. Keep your proof of purchase for warranty claims.