1. Introduction
This manual provides essential information for the safe assembly, operation, and maintenance of your AIYAPLAY Electric Bike, Model 370-378V91GN. Please read this manual thoroughly before initial use and retain it for future reference. This electric bike is designed for children aged 3 years and older.

Image 1.1: Child with the AIYAPLAY Electric Bike.
The AIYAPLAY Electric Bike offers an engaging riding experience with features such as a 3 km/h speed limit, approximately 1 hour of playtime on a full charge, and includes training wheels for stability. It is powered by a 6V battery system.

Image 1.2: Key features of the electric bike. Note: The product operates on a 6V battery system as per specifications.
2. Safety Information
For the safety of the child, please adhere to the following guidelines:
- Adult Supervision Required: Always use this product under the direct supervision of an adult.
- Weight Limit: Do not exceed the maximum load capacity of 30 kg (66 lbs).
- Age Recommendation: Suitable for children aged 3 years and older.
- Protective Gear: Ensure the child wears appropriate safety gear, including a helmet, knee pads, and elbow pads, during operation.
- Safe Environment: Operate the bike in safe, open areas away from traffic, steep inclines, swimming pools, or other hazards.
- Battery Safety: Do not allow charging time to exceed 20 hours to prevent battery damage.
- Compliance: This product conforms to safety standards EN71-1-2-3 and EN62115.
3. Package Contents
Please verify that all components are present before beginning assembly:
- 1 x AIYAPLAY Kids Electric Motorcycle
- Wheels (including training wheels)
- Seat
- Handlebars
- Instruction Manual (this document)
- Charger (not explicitly listed but implied for a battery-powered device)
4. Assembly Instructions
Assembly of the AIYAPLAY Electric Bike is required. Follow these general steps:
- Unpack Components: Carefully remove all parts from the packaging and lay them out.
- Install Training Wheels: Attach the training wheels to the rear axle of the motorcycle. Ensure they are securely fastened to provide stability.
- Attach Handlebars: Secure the handlebars to the front fork assembly. Make sure they are aligned correctly and tightened.
- Install Seat: Place the seat onto the designated area on the motorcycle frame and secure it.
- Connect Battery: Locate the battery compartment (usually under the seat) and connect any disconnected battery terminals. Ensure a secure connection.
- Final Checks: Before first use, inspect all screws, bolts, and connections to ensure they are tight and secure.

Image 4.1: Detail of training wheel attachment.

Image 4.2: Detail of the footrest.
5. Charging Instructions
Proper battery charging is crucial for performance and longevity:
- Battery Type: The electric bike uses a 6V 4.5A rechargeable battery.
- First Charge: For the initial charge, allow 8-12 hours.
- Subsequent Charges: Recharge for 8-12 hours after each use, or when the battery indicator shows low power.
- Do Not Overcharge: Never exceed a charging time of 20 hours. Overcharging can damage the battery and reduce its lifespan.
- Charger Use: Only use the charger provided with the product.
- Charging Location: Charge the battery in a dry, well-ventilated area, away from flammable materials.
- Working Time: A fully charged battery provides approximately 1 hour of continuous operation.
6. Operating Instructions
To operate the AIYAPLAY Electric Bike:
- Power On: Locate the power switch (if present) and turn the bike on.
- Start Riding: Press the designated push button switch (often on the handlebar) to engage the motor and move forward. Release the button to stop.
- Speed: The bike operates at a safe speed of 3 km/h.
- Realistic Sounds: Utilize the horn and cranking sound features for an enhanced riding experience.
- Suitable Surfaces: The bike is designed for smooth rides on flat surfaces such as cement roads, asphalt roads, and brick paths. Avoid uneven terrain, grass, or sand.
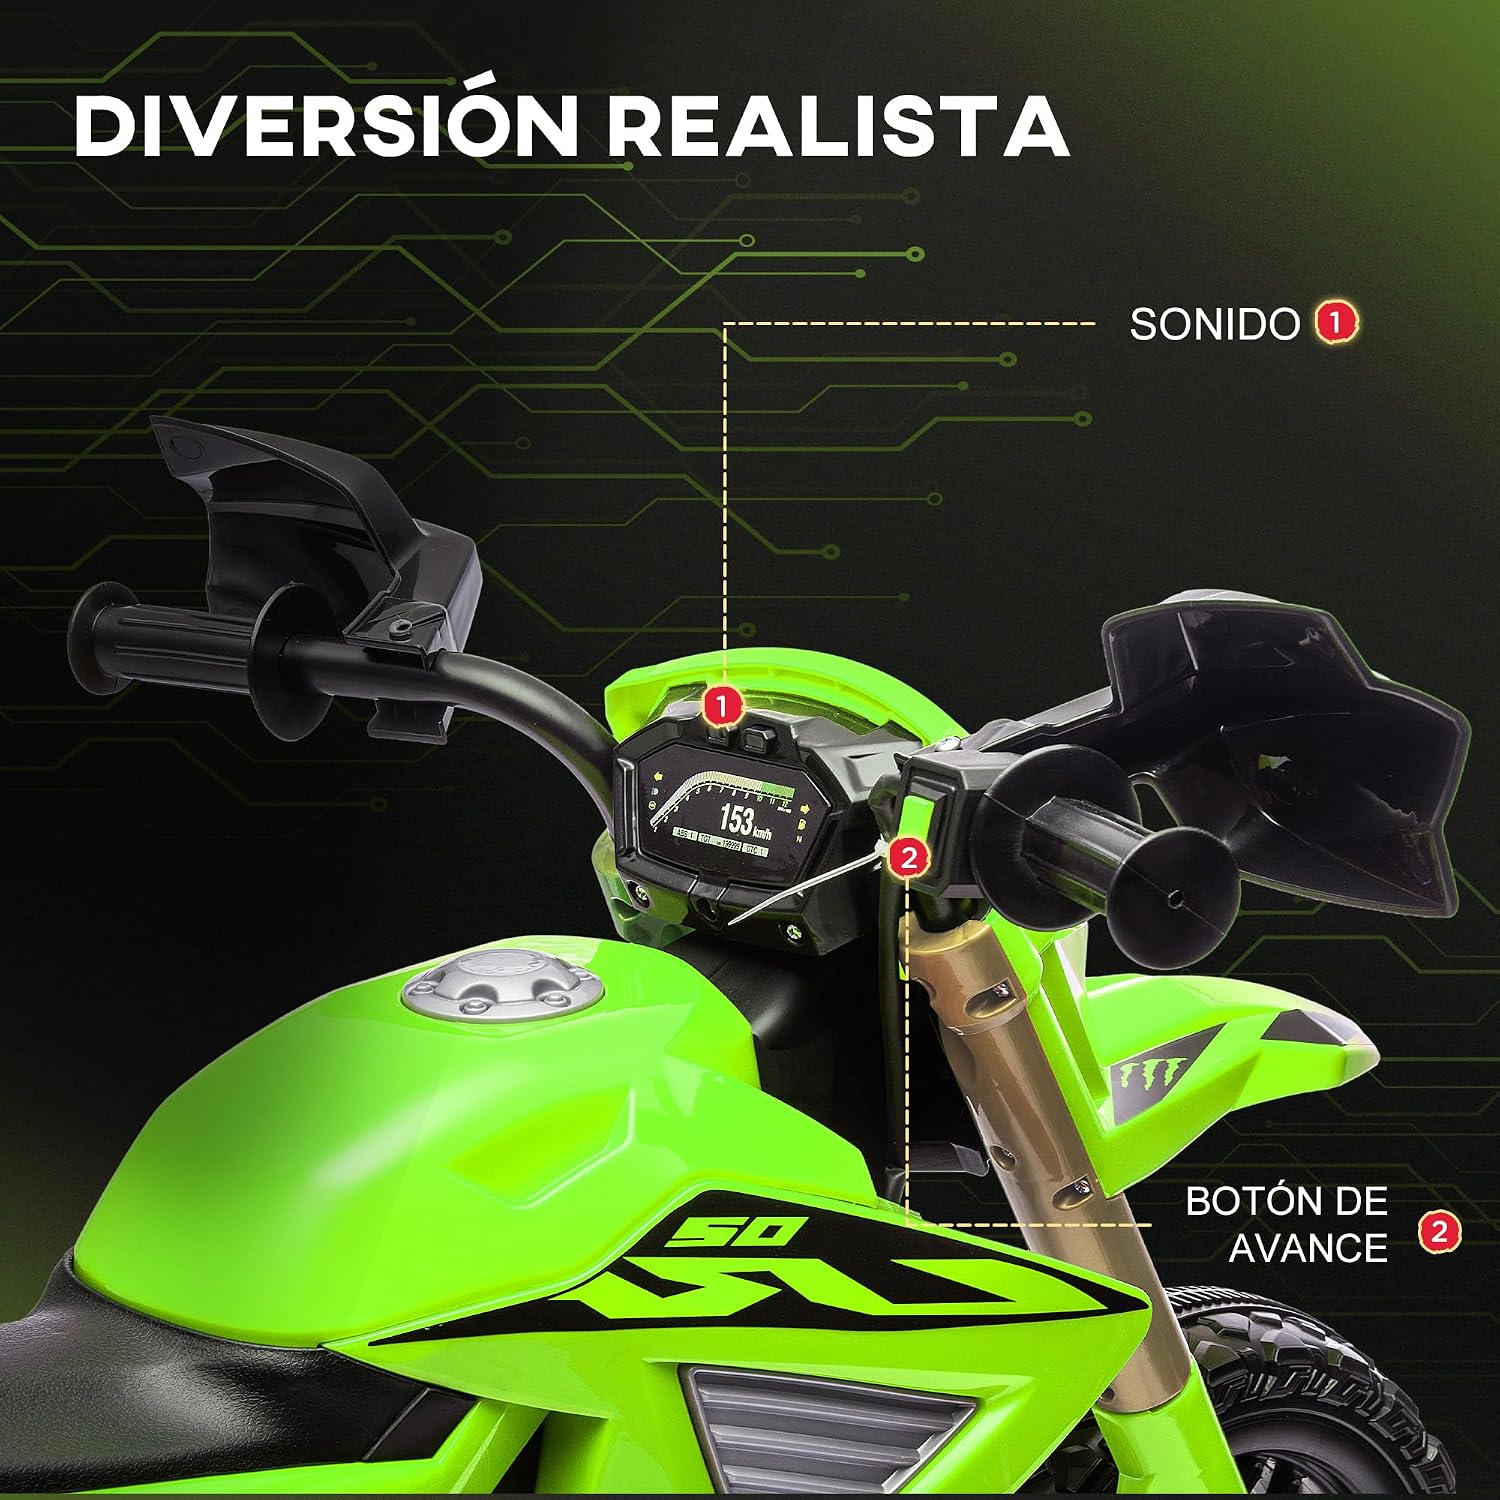
Image 6.1: Realistic features including sound and forward button.

Image 6.2: Recommended riding surfaces for a smooth experience.
7. Maintenance
Regular maintenance ensures the longevity and safe operation of your electric bike:
- Cleaning: Wipe the bike with a damp cloth to remove dirt and dust. Do not use harsh chemicals or abrasive cleaners. Avoid spraying water directly onto electrical components.
- Battery Care: Always recharge the battery after use. If storing the bike for an extended period, charge the battery fully every 30 days to maintain its health.
- Check Connections: Periodically inspect all electrical connections, screws, and bolts to ensure they are tight and secure.
- Tire Inspection: Check the tires for wear and tear. Ensure they are free from punctures or damage.
- Storage: Store the bike in a dry, cool place, away from direct sunlight and moisture.
8. Troubleshooting
If you encounter issues with your electric bike, consider the following common solutions:
- Bike Not Starting:
- Check if the battery is fully charged.
- Ensure all battery connections are secure.
- Verify the power switch is in the 'ON' position.
- Reduced Power/Speed:
- The battery may be low; recharge it fully.
- Ensure the bike is not overloaded beyond the 30 kg weight limit.
- Unusual Noises:
- Inspect for loose parts or foreign objects caught in the wheels or motor area.
- Ensure all assembly components are securely tightened.
If problems persist after attempting these solutions, please contact customer support.
9. Specifications
Detailed specifications for the AIYAPLAY Electric Bike, Model 370-378V91GN:
| Feature | Detail |
|---|---|
| Brand Name | AIYAPLAY |
| Model Number | 370-378V91GN |
| Manufacturer Part Number | ES370-378V91GN0731 |
| Recommended Age (Minimum) | 36 Months (3 Years) |
| Recommended Age (Maximum) | 96 Months (8 Years) |
| Total Dimensions (L x W x H) | 105 x 57 x 62 cm (41.34"L x 22.44"W x 24.41"H) |
| Seat Dimensions (L x W) | 23 x 12 cm |
| Seat Height (to ground) | 39 cm |
| Wheel Dimensions (Diameter x Width) | Ø30 x 8 cm |
| Speed | 3 km/h |
| Motor | 2 x 6V |
| Battery | 6V 4.5A |
| Charging Time | 8-12 hours |
| Working Time | Approx. 1 hour |
| Maximum Load | 30 kg (66 lbs) |
| Item Weight | 7.5 Kilograms |
| Material Type | Plastic |
| Assembly Required | Yes |
| Included Components | Wheels; Seat; Handles |

Image 9.1: Product dimensions overview.
10. Warranty and Support
For warranty information or technical support, please refer to the purchase documentation or contact the retailer/manufacturer directly. Keep your proof of purchase for any warranty claims.