1. Important Safety Instructions
When using electrical appliances, basic safety precautions should be followed, including the following:
- Read all instructions before using the appliance.
- To reduce the risk of fire, electric shock, injury to persons, or exposure to excessive microwave energy, read the specific precautions.
- Do not operate the oven if it is damaged. Contact qualified service personnel for repair.
- Do not heat liquids or other foods in sealed containers as they are liable to explode.
- Do not use corrosive chemicals or vapors in this appliance.
- Always ensure the turntable is properly seated before operation.
2. Product Overview
The RecPro High Pointe 24-inch Over-the-Range Microwave is designed for efficient and convenient cooking. It features a sleek stainless steel finish and a user-friendly interface.
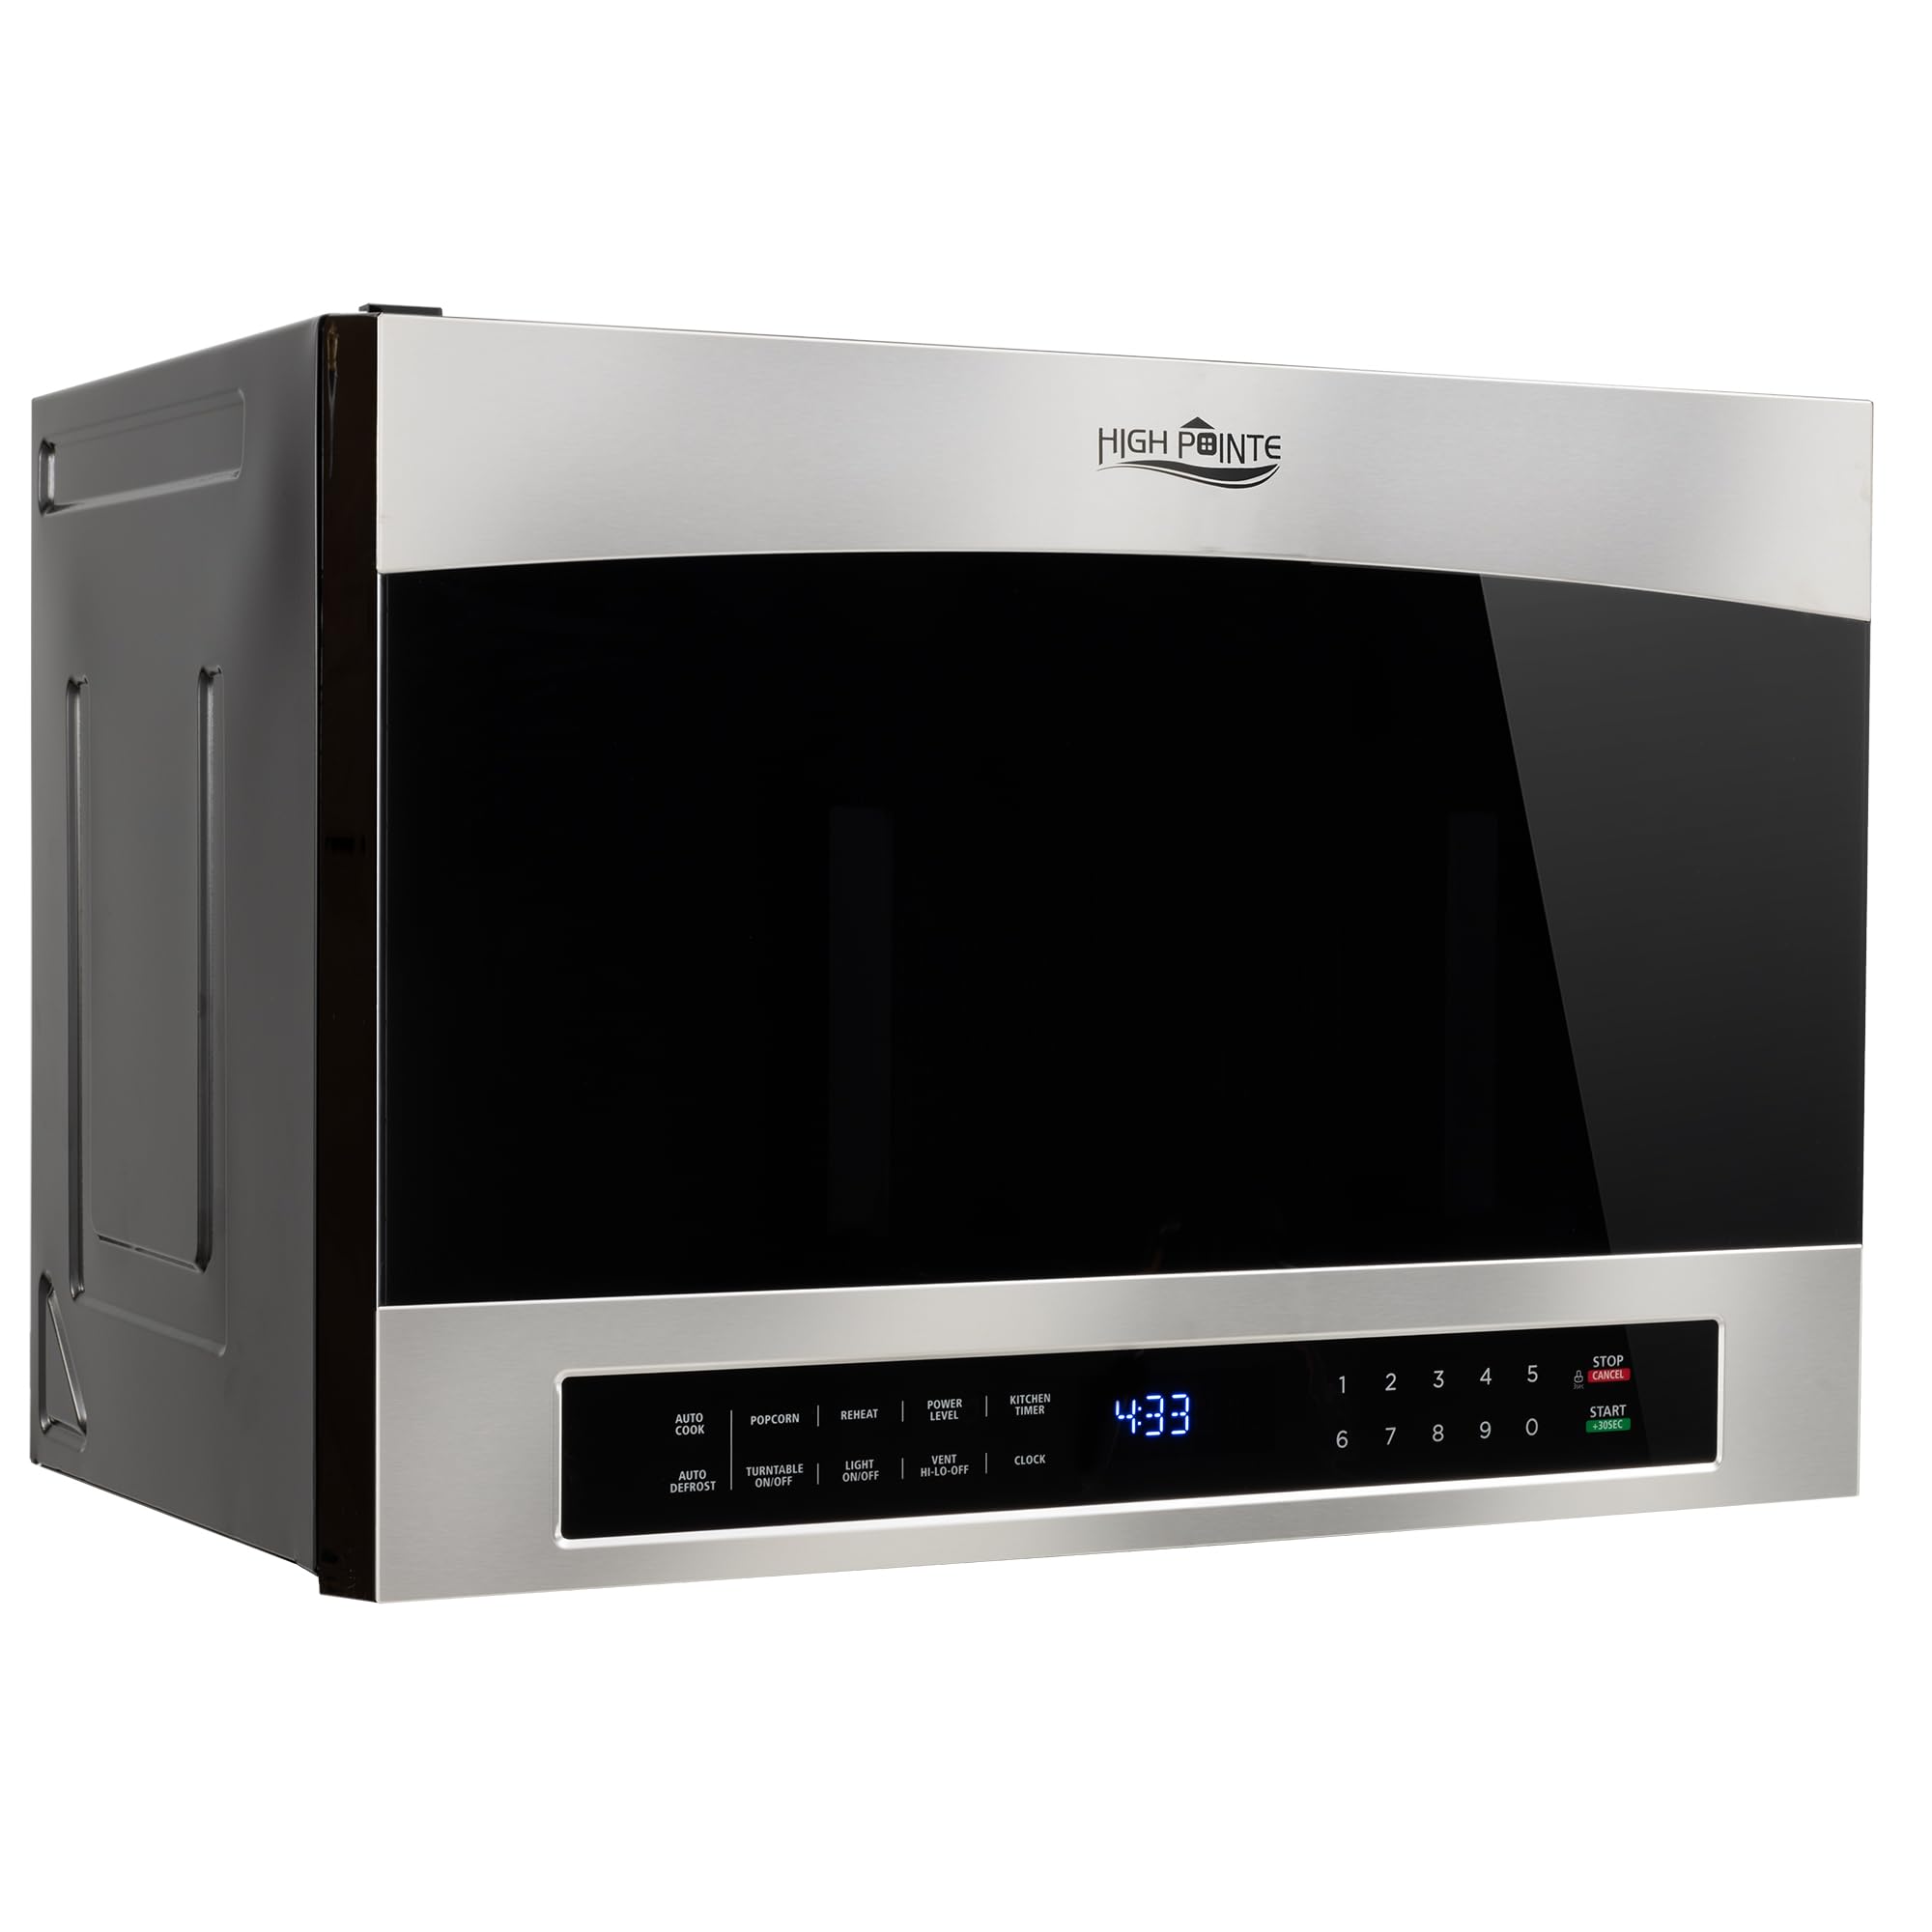
Figure 2.1: Front view of the RecPro High Pointe 24-inch Over-the-Range Microwave.
Key Features:
- Capacity: 1.4 Cubic Feet (38 Liters)
- Output Power: 1000 Watts
- Input Power: 1500 Watts
- Turntable: 13.5-inch diameter for even cooking
- Installation Type: Over-the-Range
- Control Type: Touchpad
- Defrost: Manual Defrost function
- Interior Material: Stainless Steel

Figure 2.2: Key features and specifications of the microwave.

Figure 2.3: Detailed view of the 13.5-inch turntable, multiple power levels for precise cooking, and the sleek stainless steel finish.
3. Setup & Installation
This microwave is designed for over-the-range installation. It requires 24 inches of width between cabinets and has a slim 16.75-inch height. All necessary mounting hardware is included for installation.
Installation Steps:
- Preparation: Ensure the installation area meets the required dimensions (16.5"D x 24.88"W x 17"H). Verify that the wall structure can support the microwave's weight (approximately 60 pounds).
- Mounting Plate: Secure the mounting plate to the rear wall using appropriate fasteners, ensuring it is level and attached to wall studs where possible.
- Cabinet Preparation: Drill holes in the upper cabinet for the power cord and mounting bolts as per the provided template.
- Positioning: With assistance, lift the microwave and hook the rear edge onto the mounting plate.
- Securing: Push the microwave against the wall and secure it to the upper cabinet using the provided bolts.
- Power Connection: Plug the microwave into a grounded electrical outlet.

Figure 3.1: Product dimensions and interior dimensions for installation planning.

Figure 3.2: Rear view of the microwave, highlighting mounting brackets and electrical connections.
4. Operating Instructions
The microwave features a touch control panel for easy operation. Ensure the door is securely closed before starting any cooking function.

Figure 4.1: Detailed view of the touch control panel.
Basic Functions:
- Express Cook (1-9 minutes): Press a number key (1-9) to instantly start cooking for that many minutes at full power.
- Start (+30 Sec): Press to start cooking for 30 seconds at full power, or to add 30 seconds to an ongoing cooking cycle.
- Stop/Clear: Press to stop cooking or clear current settings.
- Power Level: Adjust the microwave power level for different cooking needs.
- Auto Cook: Pre-programmed settings for common foods like popcorn, potato, and veggies.
- Auto Reheat: Optimized settings for reheating various dishes.
- Auto Defrost: Automatically defrosts food based on weight or time.
- Melt/Soften: Specific settings for melting butter or softening items.
- Turntable On/Off: Toggle the 13.5-inch turntable rotation.
- Light On/Off: Control the light for the cooking surface below the microwave.
- Vent Hi-Lo-Off: Adjust the exhaust fan speed (High, Low, Off) to remove smoke and odors.
- Kitchen Timer: Use as a standalone kitchen timer.
- Clock: Set the current time.

Figure 4.2: Interior of the microwave, featuring the glass turntable.
5. Maintenance
Regular cleaning and maintenance will ensure the longevity and optimal performance of your microwave.
Cleaning the Exterior:
- Wipe the exterior with a soft cloth and mild soap solution.
- For stainless steel surfaces, use a stainless steel cleaner and polish in the direction of the grain.
- Avoid abrasive cleaners or scouring pads that can scratch the surface.
Cleaning the Interior:
- Clean the interior cavity with a soft cloth, warm water, and mild soap.
- For stubborn food splatters, place a bowl of water with lemon slices inside and microwave for a few minutes to loosen residue, then wipe clean.
- The glass turntable can be removed and washed by hand or in a dishwasher.
Filter Maintenance:
- The grease filters located underneath the microwave should be cleaned regularly (monthly or as needed).
- Remove the filters, wash them in hot water with detergent, rinse thoroughly, and replace.
6. Troubleshooting
If you encounter any issues with your microwave, refer to the following common troubleshooting steps:
| Problem | Possible Cause | Solution |
|---|---|---|
| Microwave does not start | Door not closed properly; Power cord unplugged; Blown fuse/tripped circuit breaker | Ensure door is latched; Check power connection; Reset circuit breaker/replace fuse |
| Food not heating | Incorrect power level/cook time; Door not closed properly | Adjust settings; Ensure door is latched |
| Turntable not rotating | Turntable not properly seated; Turntable motor malfunction | Re-seat turntable; Contact customer support if issue persists |
| Excessive noise during operation | Loose parts; Food container touching walls | Check for loose items; Ensure proper placement of dishes |
For issues not listed here, please refer to the full user manual or contact customer support.
7. Specifications
| Specification | Detail |
|---|---|
| Brand | RecPro |
| Model Info | RPM-9-SS |
| Item Weight | 60 pounds |
| Product Dimensions | 16.5 x 24.88 x 17 inches (D x W x H) |
| Capacity | 1.4 Cubic Feet (38 Liters) |
| Installation Type | Over-the-Range |
| Special Features | Turntable |
| Oven Cooking Mode | Microwave Radiation |
| Color | Stainless Steel |
| Wattage | 1000 watts (Output) |
| Defrost | Manual Defrost |
| Inner Material Type | Stainless Steel |
| Included Components | Microwave, Turntable |
| Controller Type | Touch |
8. Warranty & Support
For warranty information, product support, or service inquiries, please refer to the official RecPro website or contact their customer service department. Keep your purchase receipt for warranty claims.
Customer Support: For assistance, please visit the RecPro Store on Amazon or consult the contact information provided in your product packaging.