
Taylor 5321801
Taylor Digital Wireless Deluxe Indoor Outdoor Thermometer
Model: 5321801
Introduction
This manual provides instructions for the setup, operation, and maintenance of your Taylor Digital Wireless Deluxe Indoor Outdoor Thermometer. This device is designed to monitor indoor and outdoor temperature and humidity, offering essential weather insights for your home, office, greenhouse, or nursery. The main unit displays indoor conditions, while a wireless remote sensor transmits outdoor data from up to 200 feet away.
What's in the Box
Verify that all components are present:
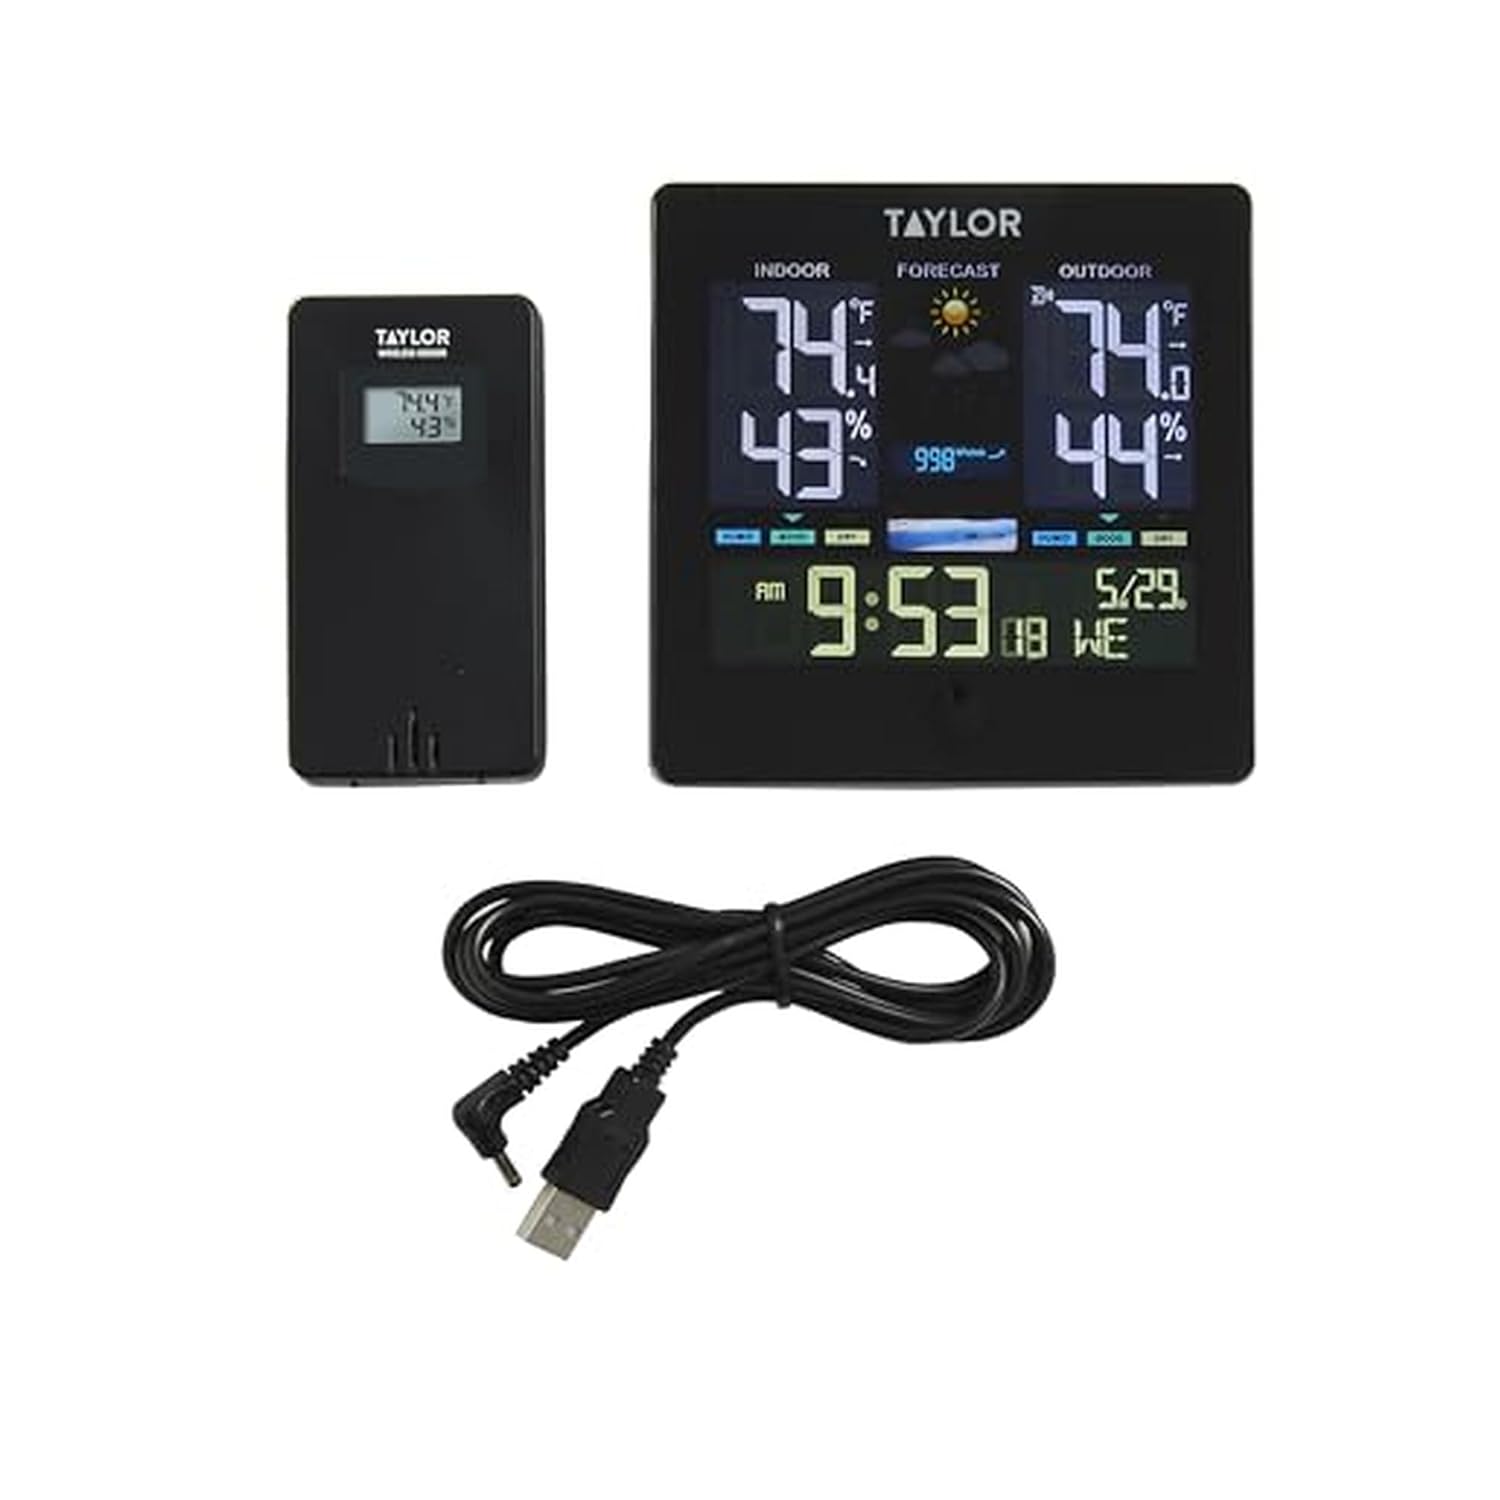
- Indoor Outdoor Thermometer (Main Unit)
- Remote Sensor
- Adapter Cord (for Main Unit)
Product Overview
The Taylor Digital Wireless Deluxe Thermometer consists of a main display unit and a remote wireless sensor. The main unit features a vibrant color LCD for clear readability of indoor and outdoor conditions, time, and date. The remote sensor is designed for outdoor placement to transmit environmental data wirelessly to the main unit.


Setup
- Powering the Remote Sensor: Open the battery compartment on the back of the remote sensor. Insert 2 AA batteries (not included), ensuring correct polarity. Close the compartment securely.
- Powering the Main Unit: The main unit can be powered by 2 AAA batteries (not included) for portability or by the included adapter cord and a wall plug (not included) for continuous operation. Insert batteries if desired, or connect the adapter cord to the main unit and a power source.
- Initial Synchronization: Once both units are powered, they should automatically synchronize. Allow a few minutes for the outdoor readings to appear on the main display. If synchronization does not occur, refer to the Troubleshooting section.
- Setting Time and Date: Use the buttons on the back of the main unit to set the current time, date, and 12/24-hour format preference.
- Temperature Unit Selection: Select between Fahrenheit (°F) and Celsius (°C) display using the appropriate button on the main unit.

Video: Indoor Outdoor Thermometer Wireless
This video provides a visual guide to the basic setup and display of a wireless indoor/outdoor thermometer, including battery installation and initial readings.
Operating Instructions
The main unit's color LCD vividly presents various data points:
- Indoor Temperature & Humidity: Displays current conditions within the main unit's location.
- Outdoor Temperature & Humidity: Displays current conditions reported by the remote sensor.
- Weather Forecast: Icons indicate anticipated weather conditions based on barometric pressure changes.
- Time & Date: Current time and calendar date are shown.
- Min/Max Records: The device tracks and displays the minimum and maximum temperature and humidity readings over a 24-hour period.
- Ice Alert: Provides timely alerts for potential icy conditions.


Video: Wireless Digital Indoor Outdoor Thermometer Review
This video demonstrates the features and functionality of the Taylor wireless indoor/outdoor thermometer, including its display and ease of use.
Placement Guidelines
- Main Unit: Place the main unit indoors in a central location, away from direct sunlight, heat sources, or drafts that could affect temperature readings. Ensure it is within the 200-foot wireless range of the remote sensor.
- Remote Sensor: Mount the remote sensor outdoors in a shaded area, protected from direct rain and sunlight. This ensures accurate outdoor temperature and humidity readings. Avoid placing it near metal objects or large electrical appliances that could interfere with the wireless signal.


Maintenance
- Cleaning: Wipe both units with a soft, damp cloth. Do not use abrasive cleaners or solvents.
- Battery Replacement: Replace batteries in both units when the low battery indicator appears on the display. Ensure correct battery type and polarity.
- Storage: If storing the device for an extended period, remove all batteries to prevent leakage.
Troubleshooting
| Problem | Solution |
|---|---|
| No outdoor reading on main unit | Ensure remote sensor batteries are fresh and correctly installed. Verify the sensor is within range (up to 200 feet) and not obstructed by large metal objects. Re-synchronize by removing batteries from both units, then reinserting them first into the remote sensor, then the main unit. |
| Inaccurate temperature/humidity | Ensure units are not in direct sunlight, near heat/cold sources, or in areas with extreme drafts. Allow 20-30 minutes for readings to stabilize after initial setup or relocation. |
| Display is dim or blank | Replace batteries in the main unit. If using the adapter, ensure it is securely connected and the power source is active. |
Specifications
- Model Number: 5321801
- Indoor Temperature Range: 14°F to 122°F (-9.9°C to 50°C)
- Outdoor Temperature Range: -40°F to 158°F (-40°C to 70°C)
- Indoor & Outdoor Humidity Range: 20-95% RH
- Temperature Accuracy: ±1°C
- Power Source (Main Unit): 2 AAA batteries (not included) or AC adapter (included)
- Power Source (Remote Sensor): 2 AA batteries (not included)
- Connectivity Technology: Wireless (433 MHz/868 MHz)
- Special Features: Alarm, Backlit, High Accuracy
- Included Components: Indoor Outdoor Thermometer, Remote Sensor and Base
Warranty and Support
For warranty information or technical support, please refer to the documentation included with your product or visit the official Taylor website. Keep your purchase receipt as proof of purchase.
Additional Resources
Video: Unboxing the Smart Weather Station with Color Display
This video provides an unboxing experience and initial overview of a similar weather station with a color display, which may offer additional insights into setup and features.
Video: Taylor - Life Measured
A brief brand video from Taylor, highlighting their commitment to accurate measurement products.
Related documents5321801


Ask a question about this manual
Ask about setup, troubleshooting, compatibility, parts, safety, or missing instructions. Manuals+ will review the question and use this page’s manual context to help answer it.