1. Introduction
This manual provides detailed instructions for the installation, operation, and maintenance of your litillbuly Android 13 Car Radio. This unit is designed for specific Dodge Ram models and features a 9-inch HD capacitive touch screen, Android 13 operating system, wireless CarPlay, Android Auto, GPS navigation, Bluetooth, and Wi-Fi connectivity. Please read this manual thoroughly before installation and use to ensure proper function and safety.

Image 1.1: The litillbuly Android 13 Car Radio unit with its 9-inch display and integrated control panel.
2. Product Overview and Features
The litillbuly Android 13 Car Radio offers a range of functionalities to enhance your driving experience:
- Operating System: Android 13 with 2GB RAM and 32GB ROM for smooth application performance.
- Display: 9-inch HD 1080P capacitive touch screen.
- Vehicle Compatibility: Specifically designed for Dodge Ram 1500, 2500, 3500 models from 2013-2019. Important: Only compatible with vehicles equipped with Manual AC controls.
- Smartphone Integration: Built-in Wireless CarPlay and Android Auto for seamless phone connectivity.
- Navigation: Supports both online and offline GPS navigation with preloaded North American maps.
- Audio: High-quality digital stereo FM/AM tuner (RDS), built-in microphone, and customizable EQ settings (Jazz, Rock, Pop, Classic).
- Connectivity: Bluetooth for hands-free calling and audio streaming, Wi-Fi/WLAN for internet access, and USB ports.
- Safety Features: Supports rear reversing camera input and steering wheel controls.
- Multimedia: Supports various multimedia playback methods, including online streaming and local files.
- Mirror Link: Compatible with Android and iOS mobile devices.
3. Setup and Installation
Proper installation is crucial for optimal performance. It is recommended that installation be performed by a qualified technician. Ensure the vehicle's battery is disconnected before beginning installation.
3.1. Package Contents
Your package should include:
- Android 13 Car Radio unit (pre-installed in replacement bezel)
- Vehicle power adapter cable with CAN-BUS module
- Fakra to DIN antenna adapter
- GPS antenna
- AV input/output cable
- Two USB cables (USB to USB-A)
- USB to MicroUSB cable
- Mini speaker unit
- Screwdriver and body panel pry tool
- External microphone
- Backup camera cable
- Backup camera (if included in your specific variant)
3.2. Compatibility Check
This unit is only compatible with Dodge Ram 1500, 2500, 3500 models from 2013-2019 that have Manual AC controls. It is not compatible with vehicles equipped with Automatic AC.

Image 3.1: Visual guide for identifying compatible manual AC controls versus incompatible automatic AC controls in Dodge Ram vehicles.
3.3. General Installation Steps
- Carefully remove the factory radio bezel and the existing radio unit from your vehicle's dashboard using the provided pry tool.
- Detach the OEM inner bezel and transfer the HVAC controls from the original bezel to the new replacement radio bezel.
- Install the new radio bezel, with the litillbuly unit, into the factory radio bezel.
- Connect the vehicle power adapter cable to the radio's black power socket. Connect the small speaker module to the socket on the power harness and secure it behind the radio cavity.
- Connect the radio's auxiliary sockets (white sockets) as appropriate; plugs are designed to fit only into their correct ports.
- Install the GPS antenna under the dashboard, away from any metal obstructions, using its self-adhesive pad.
- If desired, connect the external microphone. Route its long cord to a convenient location near the driver, such as on the dash or near the headliner.
- Use the USB to MicroUSB cable to retain the center console USB connector if applicable.
- For backup camera installation, refer to the specific instructions below.
- Once all connections are made, carefully reinstall the factory radio bezel, ensuring all wires are neatly tucked into the radio cavity.
3.4. Backup Camera Connection
The unit supports both aftermarket and original factory reversing cameras.
3.4.1. Aftermarket Camera Connection

Image 3.2: Wiring diagram for connecting an aftermarket backup camera. The red cable connects to the backup light's positive terminal, the black cable to ground, and the brown cable from the power harness connects to the reverse cable (pin 3) on the main connector.
Connect the included aftermarket camera as follows:
- Connect the red cable from the camera to the backup light's positive (+) terminal.
- Connect the black cable from the camera to a ground (GND) point.
- Locate pin number 3 (reverse cable) on the main power harness connector. Connect the brown cable from the power harness to this reverse cable.
- Connect the yellow RCA plug from the camera to the corresponding video input on the radio's AV harness.
3.4.2. Original Car Reversing Camera Connection
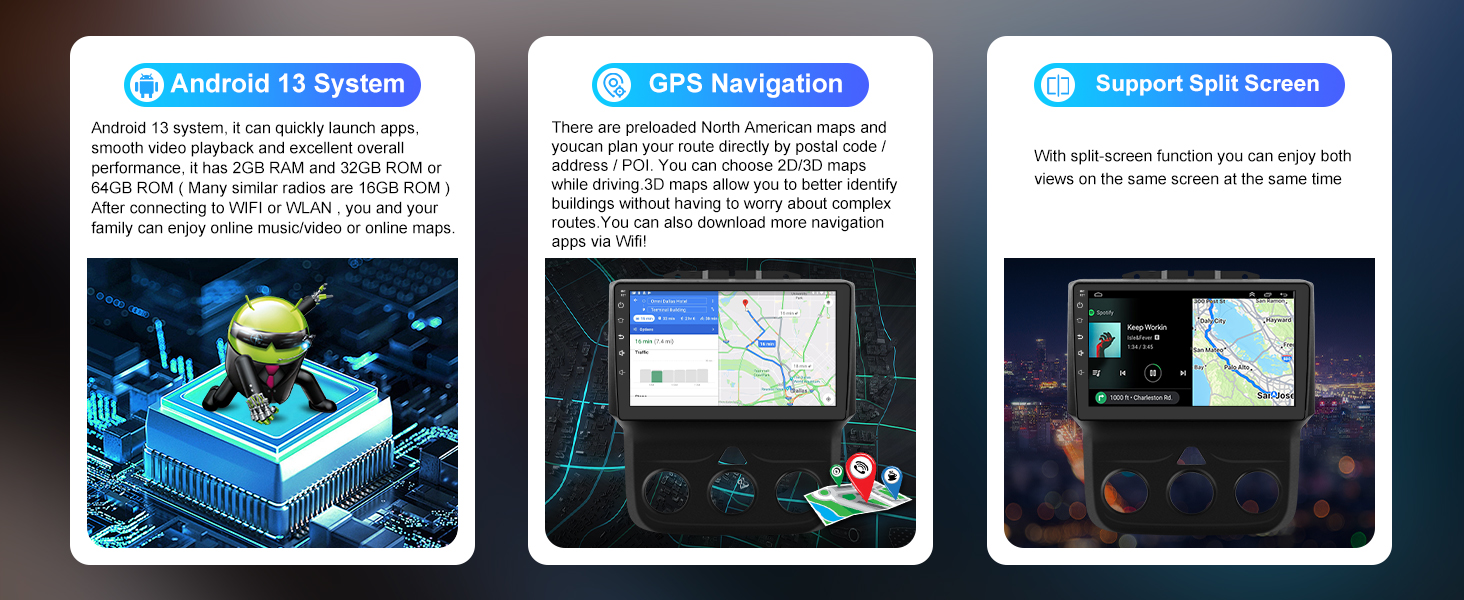
Image 3.3: Wiring diagram for connecting an original factory reversing camera. The yellow RCA plug from the power harness connects to the yellow plug on the white camera harness pigtail.
If your vehicle has an OEM backup camera, connect the yellow RCA plug from the power harness to the yellow plug on the white camera harness pigtail.
4. Operating Instructions
Once installed, the unit powers on with the vehicle's ignition. The Android 13 interface provides intuitive access to all functions.
4.1. Basic Navigation
The 9-inch touch screen allows for easy navigation through menus and applications. Swipe, tap, and pinch gestures are supported. The home screen provides quick access to frequently used functions like Phone, Music, Spotify, and Navigation.
4.2. Steering Wheel Controls (SWC)
If your vehicle is equipped with steering wheel controls, they will function automatically after installation. You can safely adjust volume, change tracks, and answer calls without taking your hands off the wheel. If your vehicle lacks built-in SWC, external controls can be connected using the Key1 and Key2 wires on the power harness.
5. Connectivity
5.1. Wireless CarPlay & Android Auto
Connect your iPhone or Android phone wirelessly via Bluetooth to access CarPlay or Android Auto. This allows you to use voice assistants, get directions, make calls, send messages, and enjoy music directly from your phone's interface on the car radio display.
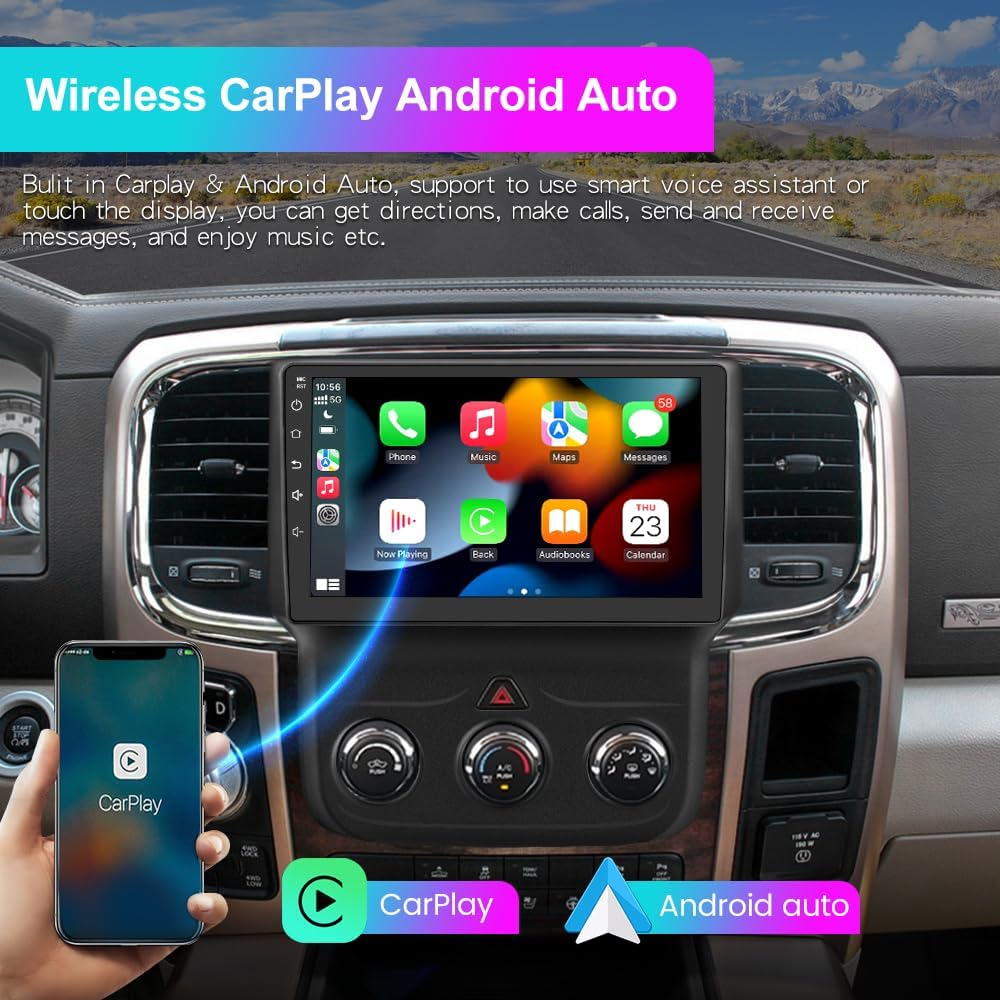
Image 5.1: The car radio displaying the Wireless CarPlay interface on the left and the Android Auto interface on the right, demonstrating smartphone integration.
5.2. Bluetooth Hands-Free
The built-in Bluetooth function supports hands-free calling for both Android and iOS phones. Pair your phone to make and receive calls safely. An external microphone is included to improve call clarity if needed.
5.3. Wi-Fi/WLAN Internet
Connect the unit to a Wi-Fi hotspot (e.g., from your smartphone) to access online features. This enables downloading apps like YouTube or Gmail from the Google Play Store, and using online navigation services.
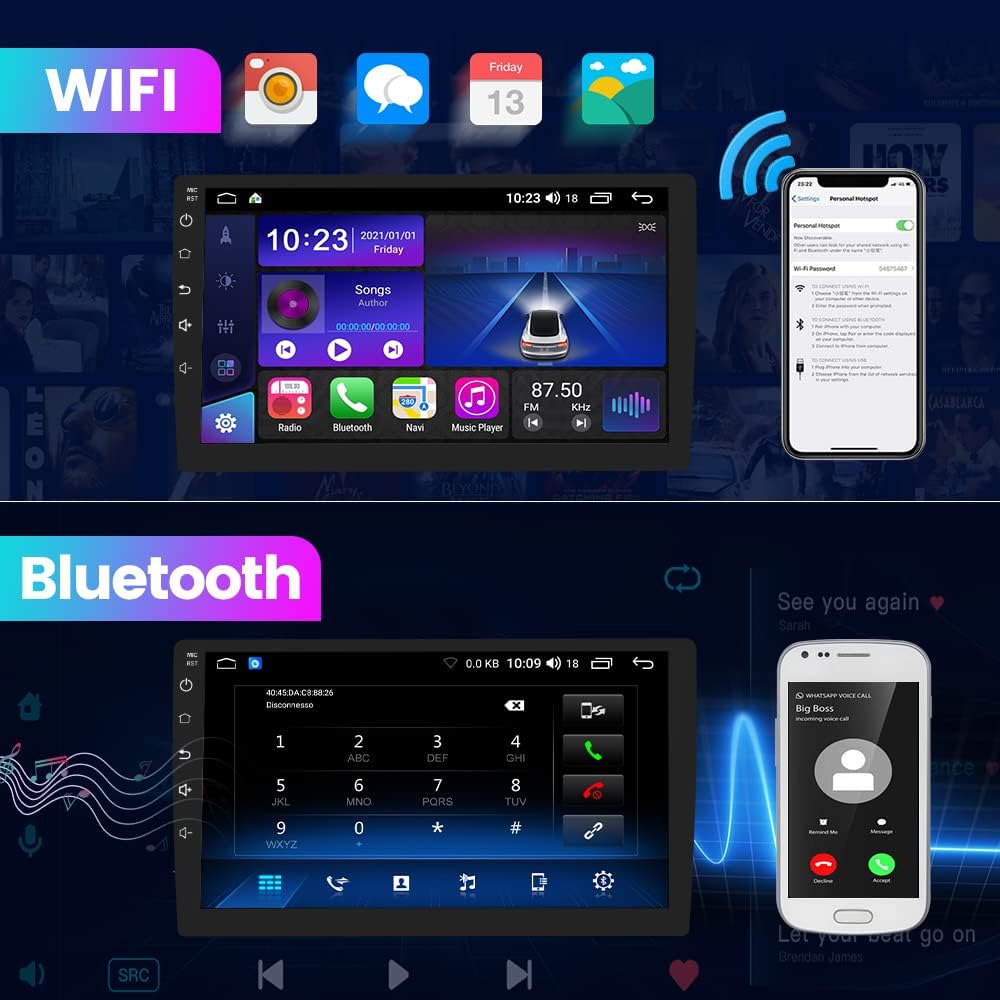
Image 5.2: The car radio displaying Wi-Fi connection settings and a Bluetooth hands-free call interface.
5.4. Mirror Link
The Mirror Link feature allows you to mirror your Android or iOS smartphone screen onto the car radio display.
6. Navigation (GPS)
The unit features a built-in GPS module and supports both online and offline navigation. After connecting the GPS antenna, you can plan routes using coordinates, postal codes, addresses, or Points of Interest (POI).
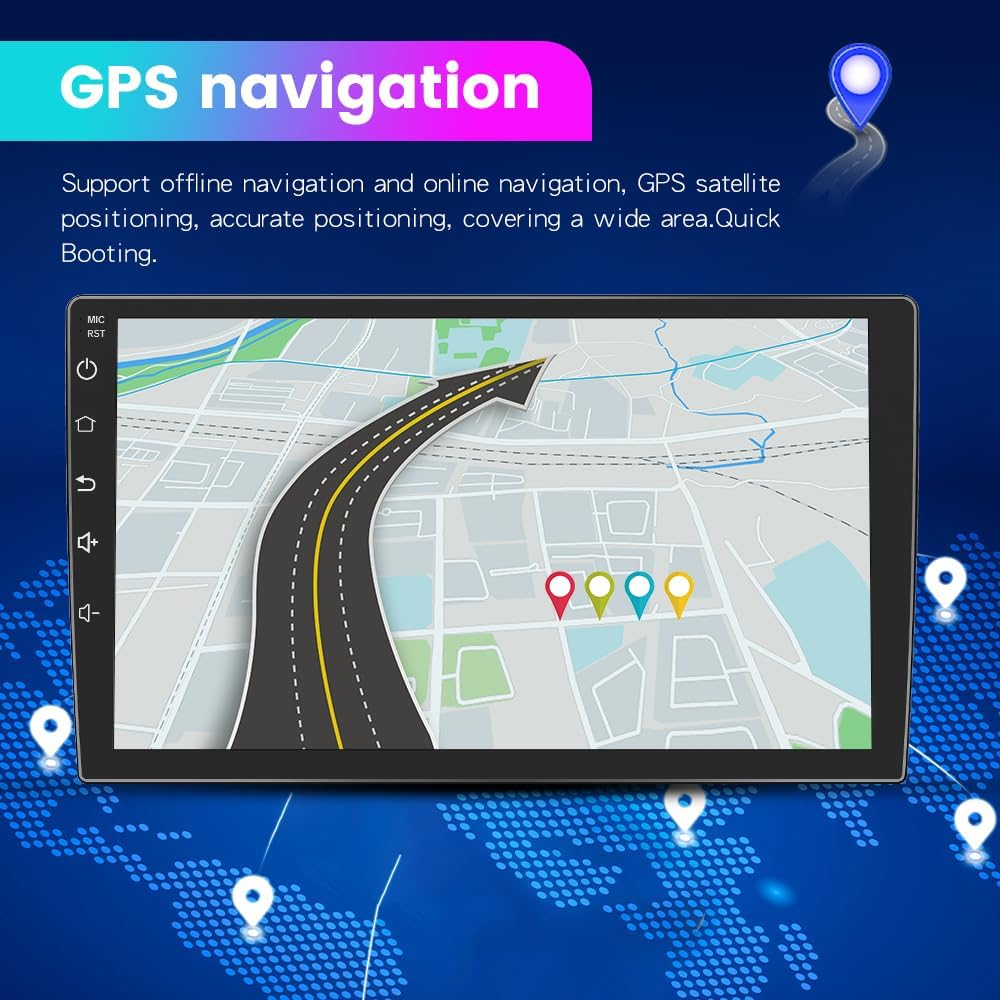
Image 6.1: The car radio displaying a detailed GPS navigation map with a planned route and various location markers.
For real-time traffic information, you can download online map applications from the Google Play Store when connected to Wi-Fi.
7. Media Playback
The car radio supports various media playback options:
- Radio Tuner: High-quality digital stereo FM/AM tuner with RDS. Stations can be searched automatically or semi-automatically, and presets are available.
- Audio Equalizer: Adjust audio output with preset EQ modes (Jazz, Rock, Pop, Classic) or customize settings for each speaker.
- USB Playback: Play multimedia files from connected USB devices.
- Online Streaming: Access music and video streaming services via Wi-Fi.
8. Reversing Assistance
The unit provides features to assist with reversing:
- Rear Camera Support: Connect a rear reversing camera for visual assistance when backing up. The display will automatically switch to the camera view when the vehicle is in reverse.
- Headrest Video Output: The unit supports transferring video output to headrest monitors, allowing rear passengers to view content.
9. Maintenance
To ensure the longevity and optimal performance of your car radio, follow these general maintenance guidelines:
- Cleaning: Use a soft, dry cloth to clean the screen and unit. Avoid abrasive cleaners or solvents.
- Temperature: Avoid exposing the unit to extreme temperatures.
- Software Updates: Periodically check for and install any available software updates to ensure the system runs efficiently and securely.
- Connections: Ensure all cables and connections remain secure.
10. Troubleshooting
If you encounter issues with your litillbuly car radio, refer to the following common problems and solutions:
| Problem | Possible Cause / Solution |
|---|---|
| Unit does not power on | Check power connections and vehicle's fuse box. Ensure the CAN-BUS module is correctly connected. |
| No sound or low volume | Check speaker connections. Adjust volume settings on the unit and steering wheel. Verify EQ settings. If using CarPlay/Android Auto, volume may differ from radio. |
| Wi-Fi disconnects frequently | Ensure the Wi-Fi hotspot is stable and within range. Check Wi-Fi settings on the unit. Restart the unit and hotspot. |
| Bluetooth connection issues | Ensure Bluetooth is enabled on both the unit and your phone. Delete previous pairings and re-pair. If multiple phones are used, manually select the desired device. |
| CarPlay/Android Auto not connecting or glitching | Ensure your phone's operating system is up to date. Restart both the phone and the car radio. Check for app updates for CarPlay/Android Auto. Ensure Zlink5 app is functioning correctly. |
| GPS signal weak or inaccurate | Ensure the GPS antenna is properly installed and positioned away from metal obstructions. Check GPS settings. |
| Backup camera image quality is poor | Verify camera connections. Ensure the camera lens is clean. Some cameras may have lower resolution. |
| Screen unresponsive or frozen | Perform a soft reset by pressing the RST button (if available) or by turning off the vehicle's ignition and restarting. |
11. Specifications
| Feature | Specification |
|---|---|
| Operating System | Android 13 |
| RAM | 2GB |
| ROM | 32GB |
| Display Size | 9 Inches |
| Resolution | 1920 x 1080 |
| Connectivity Technology | Bluetooth, Wi-Fi |
| Special Feature | Bluetooth, Wireless CarPlay, Android Auto, GPS |
| Audio Output Mode | Stereo |
| Mounting Type | Dashboard Mount |
| Item Weight | 3.76 pounds |
| Package Dimensions | 11.89 x 11.02 x 4.8 inches |
12. Warranty and Support
12.1. Warranty Information
This product comes with a 1-year warranty from the date of purchase, covering manufacturing defects. Please retain your proof of purchase for warranty claims.
12.2. Extended Protection Plans
Optional extended protection plans are available for purchase:
- 2-Year Protection Plan
- 3-Year Protection Plan
- Complete Protect (monthly plan covering eligible past and future purchases)
For details on these plans, please refer to the product's purchase page or contact your retailer.
12.3. Customer Support
For technical assistance, troubleshooting beyond this manual, or warranty inquiries, please contact litillbuly customer support through the retailer's platform or the official brand website.


