Introduction
The Massive Audio H84X is an 8-inch dual 4 Ohm subwoofer designed for high-performance car audio systems. It features an 800 Watts RMS power handling capability and a robust construction for accurate and powerful bass reproduction. Key components include a 2.5-inch voice coil wrapped on an anodized aluminum former, a 100oz double-stack motor, and a Kevlar Fiber reinforced non-pressed paper cone. This manual will guide you through the proper installation, operation, and care of your H84X subwoofer to ensure optimal performance and longevity.
Safety Information
Please read all instructions carefully before installing and operating your subwoofer. Failure to follow these guidelines may result in damage to the product, vehicle, or personal injury.
- Always disconnect the vehicle's battery before performing any electrical work.
- Ensure proper wiring and impedance matching to prevent damage to the amplifier and subwoofer.
- Mount the subwoofer securely to prevent movement during vehicle operation.
- Avoid exposing the subwoofer to excessive moisture or extreme temperatures.
- Seek professional installation if you are unsure about any steps.
Setup and Installation
Proper installation is crucial for the performance and durability of your H84X subwoofer. Consider the following steps for a successful setup.
1. Enclosure Design
The H84X subwoofer is designed to perform optimally in a sealed or ported enclosure. Consult a car audio specialist or use a reputable enclosure design calculator to determine the ideal volume and port tuning for your specific application and musical preferences. The subwoofer's robust construction, including its cast aluminum basket and dual Nomex spiders, is built to handle various enclosure types.

Image 1: Angled view of the Massive Audio H84X subwoofer, highlighting the Kevlar Fiber Non-Pressed Paper Cone, high-roll surround, and the heavy-duty wiring leads. This view demonstrates the subwoofer's robust build quality.
2. Mounting the Subwoofer
- Ensure the mounting surface is flat and free of obstructions.
- Cut a circular opening in the enclosure that matches the subwoofer's cutout diameter.
- Place the subwoofer into the opening, aligning the mounting holes.
- Secure the subwoofer using appropriate screws, ensuring even pressure around the frame. Do not overtighten.
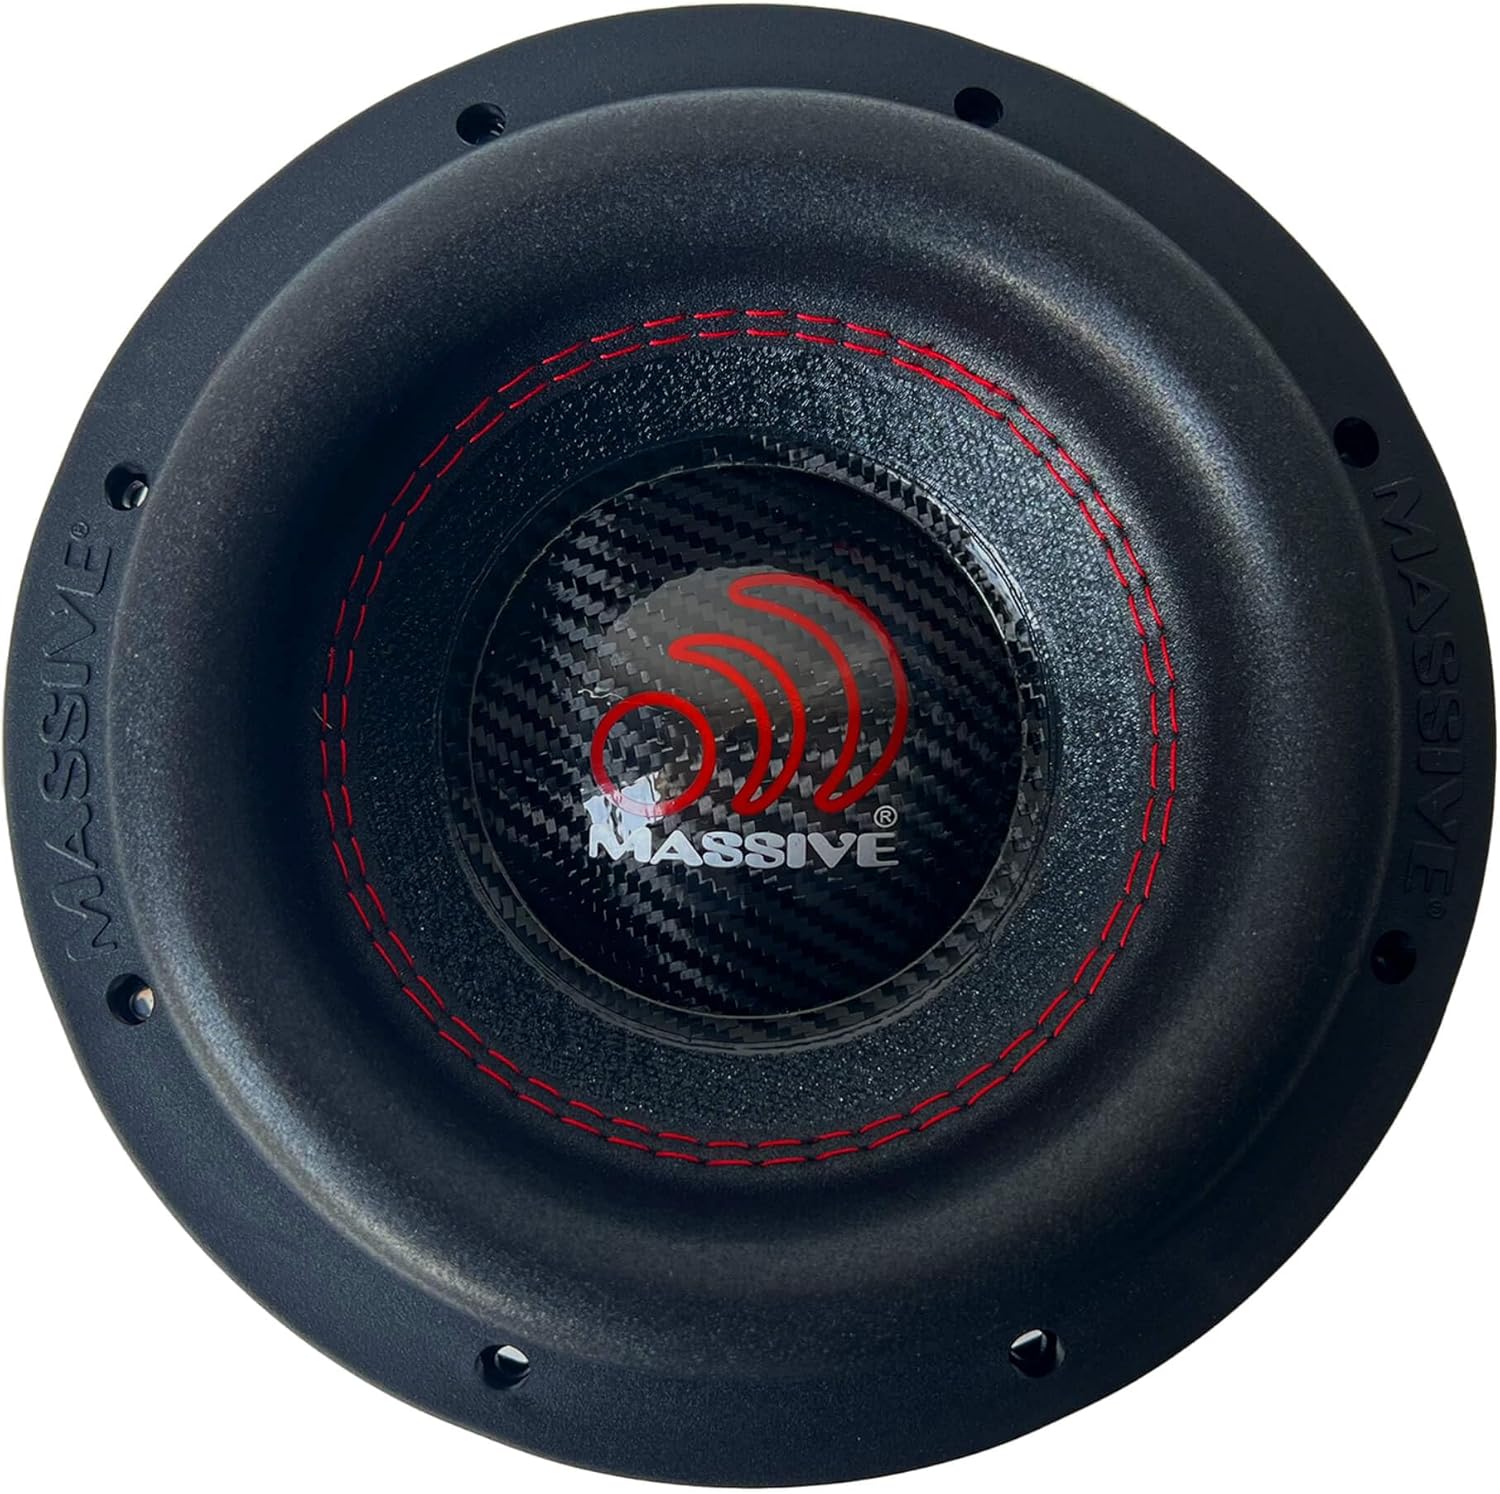
Image 2: Top view of the Massive Audio H84X subwoofer, showcasing the Kevlar Fiber Non-Pressed Paper Cone with the Massive Audio logo, the red-stitched surround, and the eight mounting holes on the cast aluminum basket.
3. Wiring Connections
The H84X features dual 4 Ohm voice coils. Proper wiring is essential for matching the subwoofer's impedance to your amplifier's output. Refer to your amplifier's manual for recommended wiring configurations.
- Parallel Wiring (2 Ohm Load): Connect the positive terminals of both voice coils together, and the negative terminals of both voice coils together. Then connect the combined positive to the amplifier's positive output and the combined negative to the amplifier's negative output.
- Series Wiring (8 Ohm Load): Connect the positive terminal of one voice coil to the negative terminal of the other voice coil. Then connect the remaining positive terminal to the amplifier's positive output and the remaining negative terminal to the amplifier's negative output.
Use high-quality speaker wire of appropriate gauge for the power levels involved. The subwoofer includes triple heavy-duty leads for reliable power transfer.
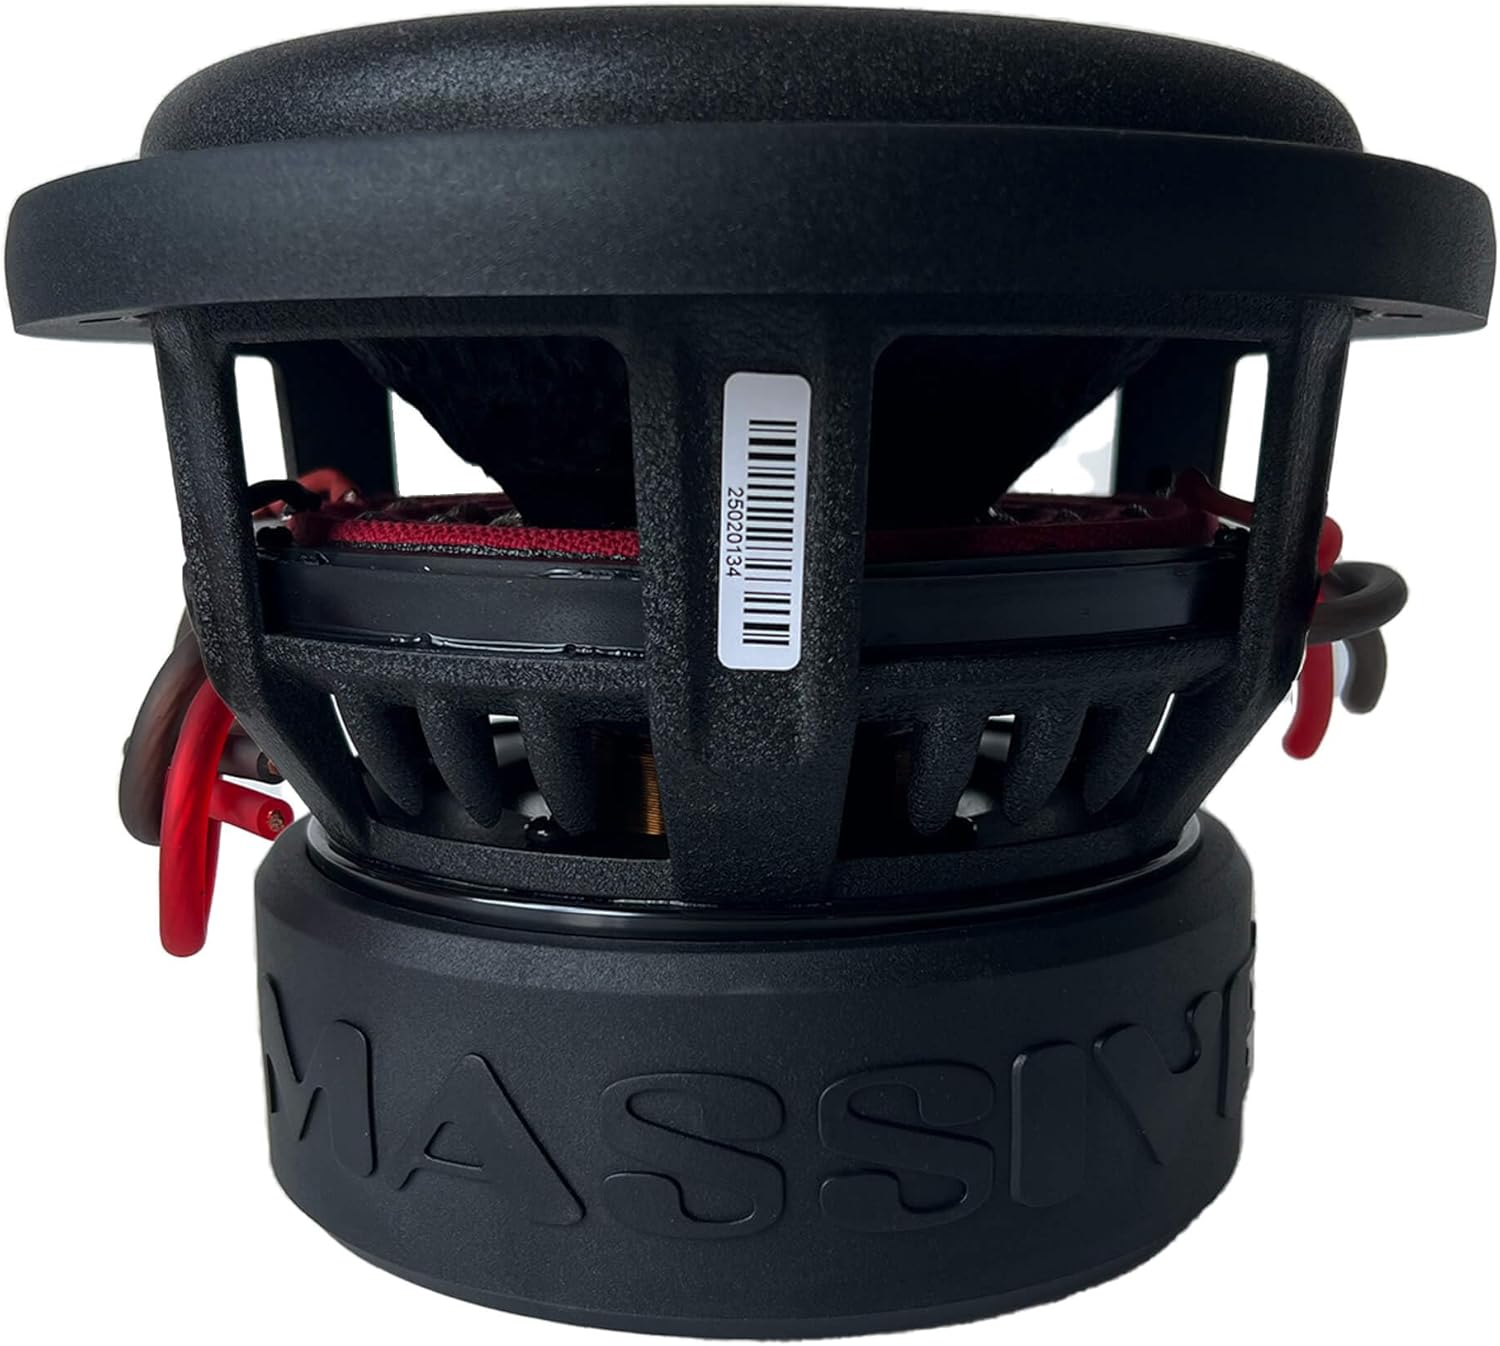
Image 3: Side view of the Massive Audio H84X subwoofer, illustrating the robust motor structure, the vented back plate for heat dissipation, and the barcode label (25020134) on the side of the basket.
Operating Your Subwoofer
Once installed, follow these guidelines for optimal operation and sound quality.
- Break-in Period: Allow a break-in period of approximately 20-30 hours of normal listening before operating the subwoofer at maximum power. This allows the suspension components to loosen and perform optimally.
- Amplifier Settings: Adjust your amplifier's gain, crossover, and bass boost settings carefully. Start with low settings and gradually increase them until the desired sound is achieved without distortion.
- Crossover Frequency: Set the low-pass filter (LPF) on your amplifier or head unit to a suitable frequency, typically between 60Hz and 100Hz, to ensure the subwoofer only reproduces low frequencies.
- Avoid Distortion: If you hear any distortion, reduce the volume or amplifier gain immediately. Prolonged operation with distortion can cause permanent damage to the subwoofer.
Maintenance
The H84X subwoofer requires minimal maintenance to ensure long-term performance.
- Cleaning: Periodically wipe the subwoofer cone and surround with a soft, dry cloth to remove dust and debris. Avoid using harsh chemicals or excessive moisture.
- Inspection: Regularly inspect the wiring connections for any signs of corrosion or loose terminals. Check the subwoofer's surround for any tears or damage.
- Environmental Protection: Protect the subwoofer from direct sunlight, extreme temperatures, and moisture, which can degrade materials over time.
Troubleshooting
If you experience issues with your H84X subwoofer, refer to the following common problems and solutions.
- No Sound:
- Check all wiring connections from the amplifier to the subwoofer.
- Verify the amplifier is powered on and receiving a signal.
- Ensure the head unit is sending an audio signal to the amplifier.
- Check amplifier fuses and vehicle fuses.
- Distorted Sound:
- Reduce the amplifier gain or head unit volume.
- Check for proper crossover settings; ensure the subwoofer is not playing frequencies too high for its design.
- Inspect the subwoofer cone and surround for physical damage.
- Ensure the amplifier is not clipping (indicated by a distortion light on some amplifiers).
- Weak Bass Output:
- Verify correct wiring for the desired impedance load (e.g., 2 Ohm parallel for maximum power).
- Check amplifier gain and bass boost settings.
- Ensure the enclosure is sealed properly (if applicable) and of the correct volume.
- Confirm the subwoofer is wired in phase with other speakers.
- Subwoofer Overheating:
- Reduce continuous high-power operation.
- Ensure the amplifier is not underpowered or overpowered for the subwoofer.
- Check for proper ventilation around the amplifier and subwoofer. The H84X features a vented back plate and basket to help dissipate heat, but proper airflow is still important.
If problems persist, contact Massive Audio customer support or a qualified car audio technician.
Specifications
The following table outlines the key specifications for the Massive Audio H84X Subwoofer.

Image 4: Bottom view of the Massive Audio H84X subwoofer, displaying the large magnet structure with the "MASSIVE" logo and the "H84X 800W RMS" specification label, along with the CEA-2031 compliance logo.
| Feature | Specification |
|---|---|
| Model Name | H84X |
| Speaker Type | Subwoofer |
| Speaker Maximum Output Power | 800 Watts RMS (1600W MAX) |
| Voice Coil | 2.5" Black Anodized, Dual 4 Ohm |
| Magnet Weight | 100oz Double-Stack Motor |
| Cone Material | Kevlar Fiber Non-Pressed Paper |
| Basket Type | Cast Aluminum |
| Product Dimensions | 10"D x 10"W x 9.2"H (Overall) |
| Item Weight | 17 pounds (272 Ounces) |
| UPC | 623169612039 |
Warranty Information
The Massive Audio H84X Subwoofer comes with a Limited Warranty. For specific terms, conditions, and duration of the warranty, please refer to the warranty card included with your product or visit the official Massive Audio website. Keep your proof of purchase for warranty claims.
Customer Support
For further assistance, technical support, or inquiries regarding your Massive Audio H84X subwoofer, please visit the official Massive Audio store or contact their customer service department.
Massive Audio Store: Visit Massive Audio on Amazon