1. Introduction
Thank you for purchasing the YGSKK Mini Projector. This manual provides essential information for the safe and efficient operation of your device. Please read it thoroughly before use and retain it for future reference.
2. Package Contents
Verify that all items listed below are included in your package:
- Projector
- Remote Control
- Power Cable
- HDMI Cable (if included)
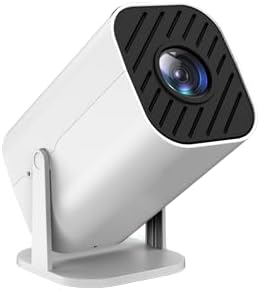
Image 1: The YGSKK Mini Projector. This image displays the compact, white projector unit with its lens and adjustable stand.
3. Initial Setup
- Placement: Position the projector on a stable, flat surface. Ensure adequate ventilation around the unit.
- Power Connection: Connect the power cable to the projector's power input and then plug it into a standard electrical outlet.
- Source Connection:
- HDMI: Connect an HDMI cable from your source device (e.g., laptop, streaming stick) to the HDMI port on the projector.
- USB: Insert a USB drive into the USB port for media playback.
- Power On: Press the power button on the projector or the remote control to turn on the device.
- Focus Adjustment: Rotate the focus ring near the lens until the projected image appears clear and sharp.
4. Operating Instructions
4.1 Powering On/Off
- To Power On: Press the power button on the projector or the remote control. The indicator light will turn on.
- To Power Off: Press the power button again. Confirm shutdown if prompted. Allow the projector to cool down before unplugging.
4.2 Input Source Selection
Use the "Source" button on the remote control or the projector's control panel to cycle through available input options (e.g., HDMI, USB).
4.3 Menu Navigation
Use the arrow buttons on the remote control to navigate through the on-screen menu. Press "OK" or "Enter" to select an option. Use the "Return" or "Exit" button to go back or close the menu.
4.4 Picture and Sound Settings
Access the "Picture" or "Sound" settings within the main menu to adjust parameters such as brightness, contrast, color, aspect ratio, and volume.
5. Care and Maintenance
- Cleaning the Lens: Use a soft, lint-free cloth specifically designed for optical lenses. Do not use abrasive cleaners or solvents.
- Cleaning the Exterior: Wipe the projector's casing with a soft, dry cloth. For stubborn marks, slightly dampen the cloth with water.
- Ventilation: Ensure the projector's ventilation ports are clear of obstructions to prevent overheating.
- Storage: When not in use for extended periods, store the projector in a cool, dry place, away from direct sunlight and excessive dust.
6. Troubleshooting Guide
Refer to the table below for common issues and their solutions:
| Problem | Possible Cause | Solution |
|---|---|---|
| No image displayed | Power cable loose, incorrect input source, source device off. | Check power connection, select correct input source, ensure source device is on. |
| Image is blurry | Focus not adjusted, projector too close/far from screen. | Adjust the focus ring, reposition the projector. |
| No sound | Volume too low, audio cable not connected, source device muted. | Increase projector volume, check audio connections, unmute source device. |
| Remote control not working | Batteries depleted, obstruction between remote and projector. | Replace batteries, ensure clear line of sight to the IR receiver. |
7. Technical Specifications
- Model: Mini projector
- Display Resolution: 1920 x 1080
- Connectivity Technology: HDMI, USB
- Special Features: High Brightness, Long Lamp Life, Portable
- Recommended Uses: Business Presentations, Classroom, Home Cinema
- Item Weight: 15.4 ounces
- Package Dimensions: 9 x 5 x 5 inches
8. Warranty and Customer Support
The YGSKK Mini Projector comes with a standard manufacturer's warranty. Please refer to the warranty card included in your package for specific terms and conditions. For technical assistance, troubleshooting beyond this guide, or warranty claims, please contact YGSKK customer support through the retailer where the product was purchased or visit the official YGSKK website for contact information.