1. Introduction
Thank you for purchasing the Audizio Vieste Digital DAB Radio. This manual provides essential information for setting up, operating, and maintaining your device. Please read it thoroughly before use to ensure proper functionality and to maximize your listening experience. The Vieste radio offers a blend of modern features and classic radio capabilities, including DAB+ and FM reception, Bluetooth streaming, USB playback, and an integrated subwoofer for rich audio.
2. What's in the Box
- Audizio Vieste Digital DAB Radio
- Remote Control
- User Manual
- Power Adapter
3. Product Overview
Familiarize yourself with the main components and controls of your Audizio Vieste radio.

Figure 3.1: Front View of the Audizio Vieste Radio. This image shows the main unit with its large color display, control buttons, and rotary knobs for power/volume and tuning/selection.

Figure 3.2: Stylish Design and Key Features. The radio features a modern, stylish design. It includes Bluetooth functionality for streaming, a USB port for media playback, and supports both DAB+ and FM radio.
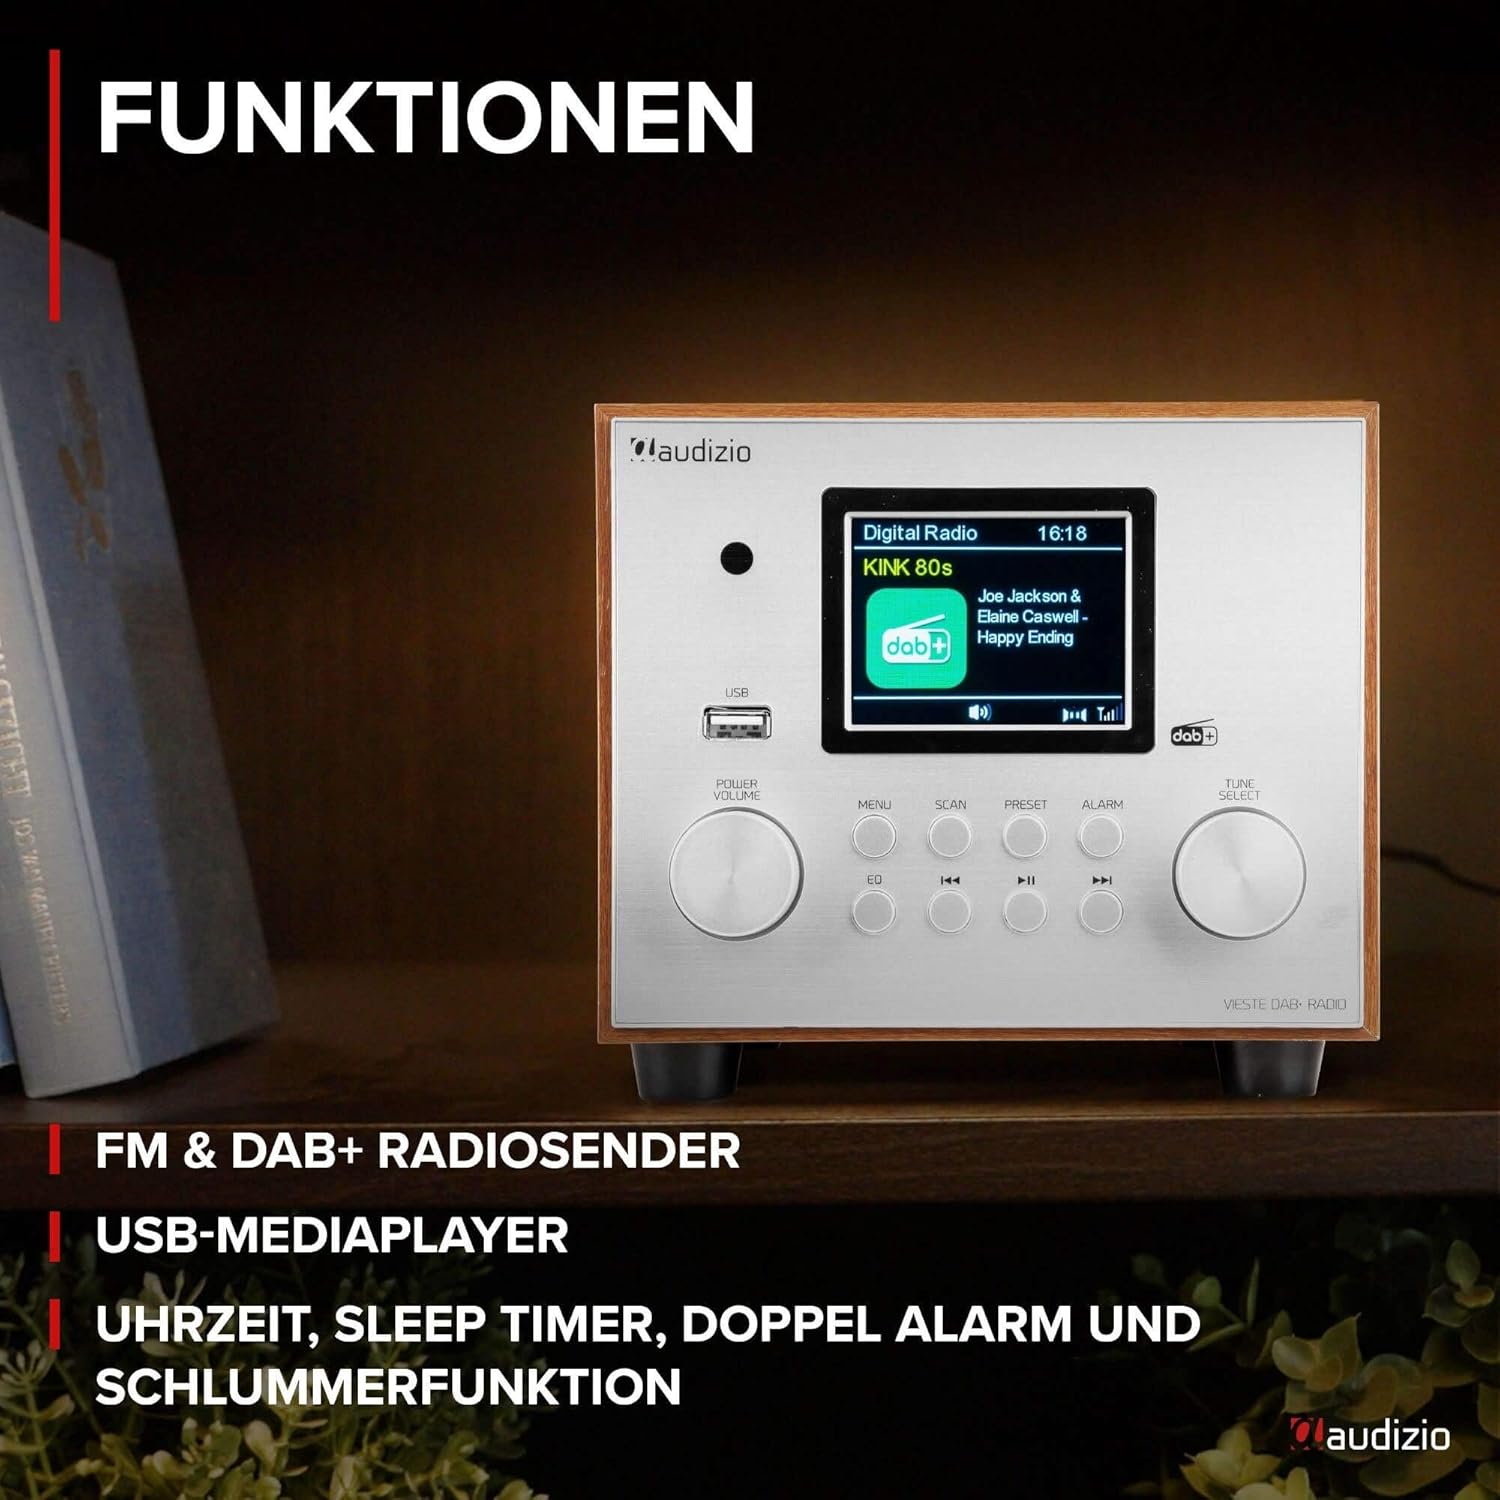
Figure 3.3: Comprehensive Functions. This view highlights the radio's various functions, including FM & DAB+ radio reception, USB media player capabilities, and integrated clock, sleep timer, dual alarm, and snooze functions.

Figure 3.4: Enhanced Audio Streaming. The Vieste radio supports audio streaming from smartphones, tablets, or laptops via Bluetooth. It also features an additional built-in subwoofer for powerful bass and rich sound quality.

Figure 3.5: User-Friendly Controls. The radio is designed for easy operation with a simple and clear button layout. It features a dimmable display for comfortable viewing and includes a remote control for convenient access to all functions.

Figure 3.6: Compact and Space-Saving Design. The Audizio Vieste boasts a compact and stylish design, making it ideal for various spaces. Dimensions are approximately 24.5 cm (length) x 16.5 cm (width) x 14.7 cm (height).
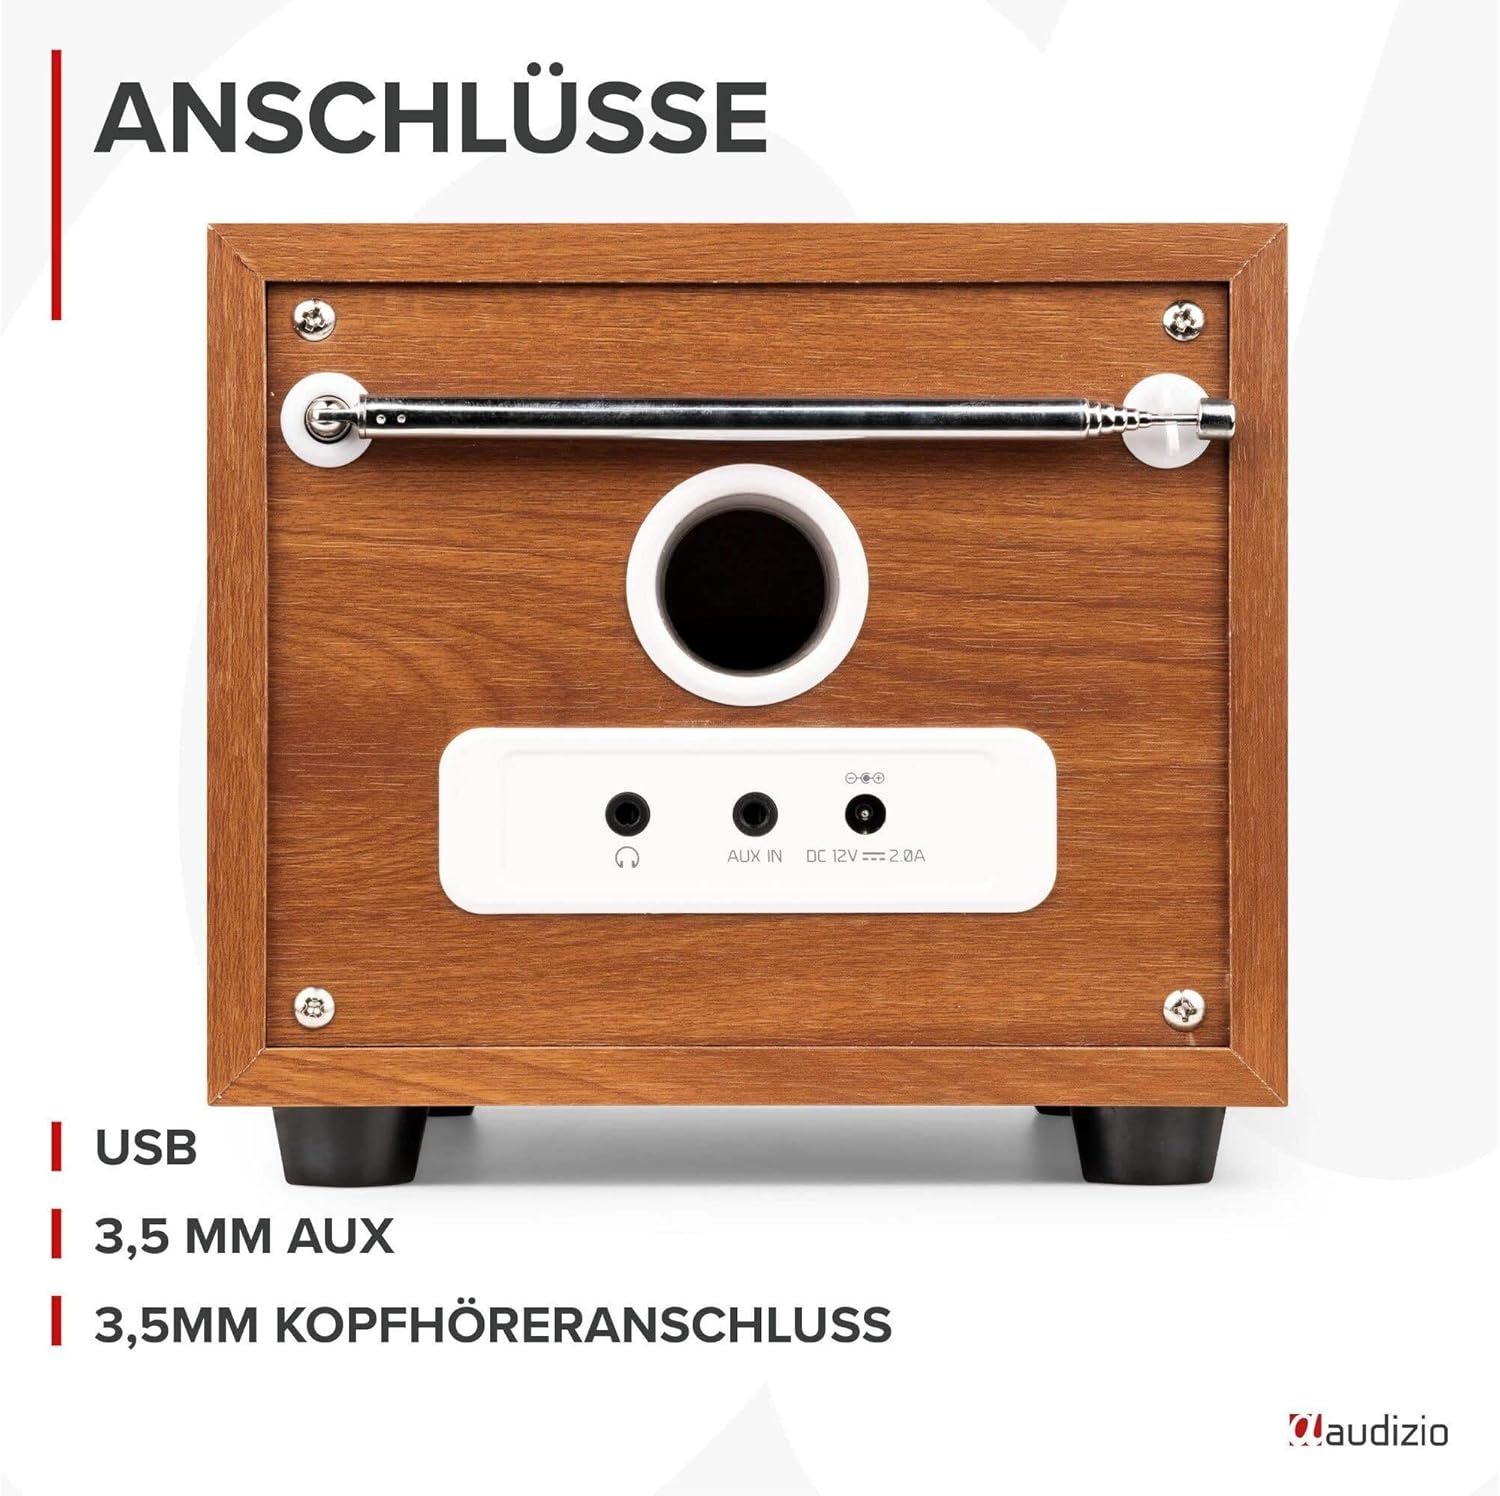
Figure 3.7: Rear Panel Connections. The back of the unit features essential connection ports, including a USB port for media playback, a 3.5mm AUX input for external audio devices, and a 3.5mm headphone jack for private listening.
4. Setup
4.1 Power Connection
- Connect the supplied power adapter to the DC IN port on the rear of the radio.
- Plug the power adapter into a standard wall outlet (220V).
4.2 Antenna Setup
Extend the telescopic antenna fully for optimal DAB+ and FM radio reception.
4.3 Initial Power-On
- Press the POWER/VOLUME knob to turn on the radio.
- The display will light up. Follow the on-screen prompts to select your preferred language.
- The radio will typically perform an automatic scan for DAB+ stations upon first use.
5. Operating Instructions
5.1 DAB+ Radio Mode
- Press the MODE button (on remote) or MENU button (on unit) to select DAB+ mode.
- If it's the first time or you want to rescan, press the SCAN button to initiate an automatic scan for available DAB+ stations.
- Once scanning is complete, rotate the TUNE/SELECT knob to browse through the station list. Press the knob to select a station.
- To save a preset, press and hold the PRESET button. Use the TUNE/SELECT knob to choose a preset number (1-20) and press to confirm.
5.2 FM Radio Mode
- Press the MODE button (on remote) or MENU button (on unit) to select FM mode.
- Press the SCAN button to auto-scan and save available FM stations. Alternatively, rotate the TUNE/SELECT knob for manual tuning.
- To save a preset, press and hold the PRESET button. Use the TUNE/SELECT knob to choose a preset number (1-20) and press to confirm.
5.3 Bluetooth Mode
- Press the MODE button (on remote) or MENU button (on unit) to select Bluetooth mode. The display will show "Bluetooth Pairing".
- On your smartphone or Bluetooth device, enable Bluetooth and search for "Audizio Vieste".
- Select "Audizio Vieste" to pair. Once connected, the display will show "Bluetooth Connected".
- You can now play audio from your device through the radio. Use the radio's controls or your device's controls for playback (play/pause, skip tracks).
5.4 USB Playback
- Insert a USB flash drive containing MP3 audio files into the USB port on the front of the radio.
- The radio will automatically switch to USB mode or you may need to select it via the MODE button.
- Use the navigation buttons (previous/next track, play/pause) to control playback.
5.5 AUX Input
- Connect an external audio device (e.g., MP3 player, CD player) to the 3.5mm AUX IN port on the rear of the radio using a 3.5mm audio cable (not included).
- Press the MODE button (on remote) or MENU button (on unit) to select AUX mode.
- Audio from the connected device will now play through the radio. Control playback from your external device.
5.6 Alarm and Timer Functions
The Audizio Vieste features dual alarms, a sleep timer, and a snooze function.
- Setting Alarms: Press the ALARM button. Use the TUNE/SELECT knob to configure Alarm 1 and Alarm 2 settings (time, source, volume, frequency).
- Sleep Timer: Press the SLEEP button (on remote) repeatedly to cycle through sleep timer options (e.g., 15, 30, 45, 60 minutes, OFF). The radio will automatically turn off after the selected duration.
- Snooze: When an alarm sounds, press the SNOOZE button (on remote) to temporarily silence the alarm for a few minutes.
6. Maintenance
6.1 Cleaning
- Always unplug the radio from the power outlet before cleaning.
- Use a soft, dry cloth to wipe the exterior surfaces.
- Do not use abrasive cleaners, waxes, or solvents as they may damage the finish.
6.2 Storage
If storing the radio for an extended period, ensure it is unplugged and kept in a cool, dry place away from direct sunlight and extreme temperatures.
7. Troubleshooting
| Problem | Possible Cause | Solution |
|---|---|---|
| No power | Power adapter not connected or outlet not working. | Ensure power adapter is securely connected and try a different outlet. |
| Poor radio reception (DAB+/FM) | Antenna not extended or weak signal. | Fully extend the telescopic antenna. Reposition the radio for better signal. Perform a new auto-scan. |
| Bluetooth device won't pair | Radio not in pairing mode or device too far. | Ensure radio is in Bluetooth mode and displaying "Pairing". Move device closer to the radio. Forget "Audizio Vieste" on your device and try pairing again. |
| USB playback not working | Unsupported file format or corrupted USB drive. | Ensure files are in MP3 format. Try a different USB drive. |
| No sound from AUX input | Cable not connected or incorrect mode selected. | Ensure AUX cable is securely connected to both devices. Select AUX mode on the radio. Check volume levels on both devices. |
8. Specifications
- Model: Vieste
- Brand: Audizio
- Dimensions (L x W x H): Approximately 24.5 cm x 16.5 cm x 14.7 cm (9.6 x 6.5 x 5.8 inches)
- Weight: 2.45 Kilograms (5.4 lbs)
- Power Input: 220 Volt (via power adapter)
- Connectivity: Bluetooth, USB, 3.5mm AUX IN, 3.5mm Headphone Out
- Supported Radio Bands: DAB+, FM
- Special Features: Integrated Subwoofer, TFT Color Display, Dual Alarm, Sleep Timer, Snooze, Dimmable Display, Remote Control
- Material: Plastic (with wood-look finish)
9. Warranty and Support
The Audizio Vieste Digital DAB Radio comes with a standard manufacturer's warranty. Please refer to the warranty card included in your packaging for specific terms and conditions. For technical support, troubleshooting assistance, or warranty claims, please contact your retailer or visit the official Audizio website for contact information.
Keep your purchase receipt as proof of purchase for any warranty-related inquiries.


