Introduction
This manual provides comprehensive instructions for the installation and maintenance of the Generic Replacement Dryer Rollers, Pulley, and Belt Kit. This kit is designed to restore optimal performance to compatible Kenmore Heavy Duty Dryers by replacing worn or damaged components.
Please carefully review all instructions and safety information before beginning any repair work. Ensure this kit is compatible with your specific dryer model before proceeding.
Package Contents:
- 4 x Dryer Drum Rollers
- 1 x Idler Pulley
- 1 x Dryer Drive Belt
- Associated hardware (e.g., washers, clips)
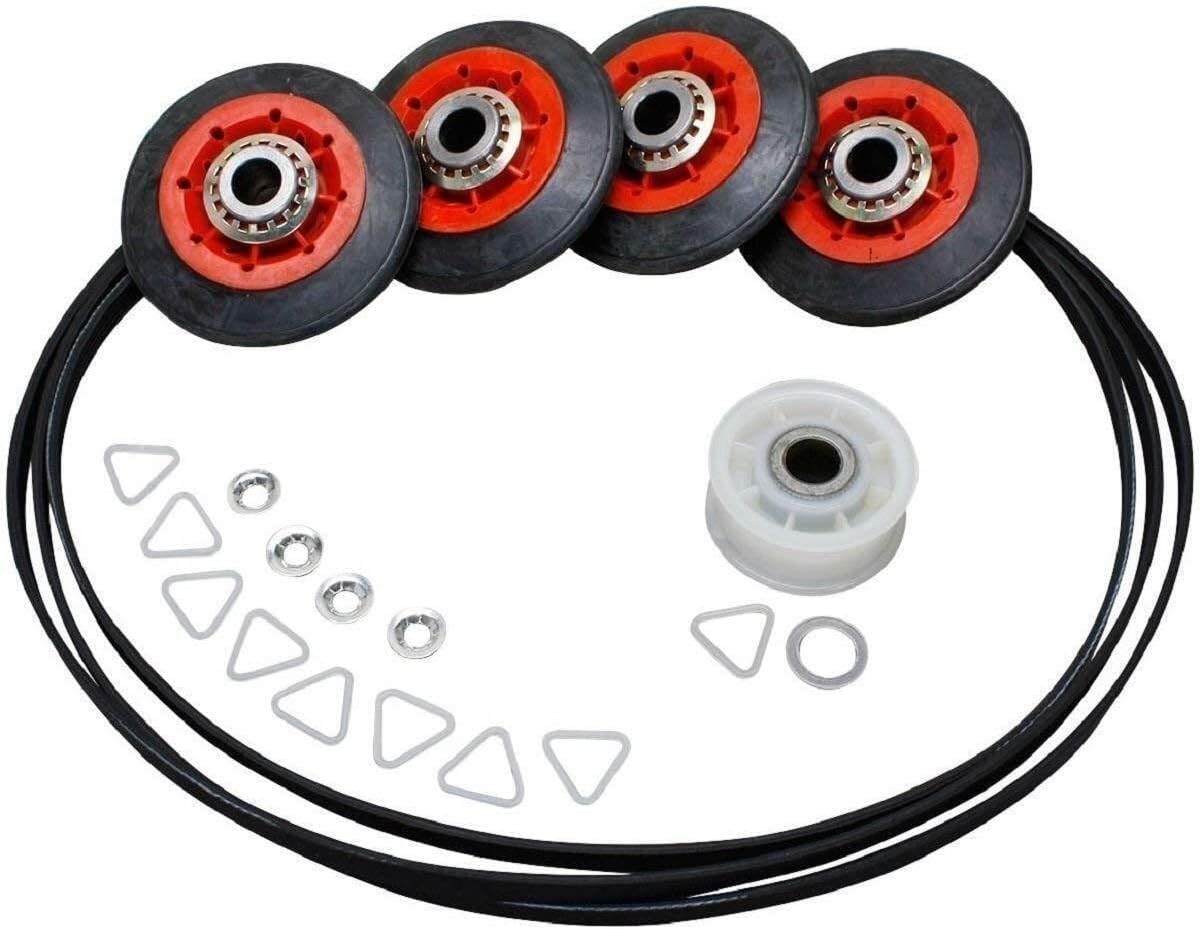
Image: The complete Generic Dryer Rollers, Pulley, and Belt Kit, including four black and red rollers, a white idler pulley, a black drive belt, and various small metal washers and triangular clips.
Safety Information
Always prioritize safety when performing appliance repairs. Failure to follow these safety guidelines may result in injury or damage to property.
- Disconnect Power: Before beginning any work, always unplug the dryer from its power source or turn off the circuit breaker to prevent electrical shock.
- Wear Protective Gear: Use work gloves to protect your hands from sharp edges and safety glasses to protect your eyes from debris.
- Ventilation: Ensure the work area is well-ventilated.
- Heavy Lifting: Dryers can be heavy. Seek assistance when moving or lifting the appliance to prevent injury.
- Follow Manufacturer Guidelines: Refer to your specific dryer's service manual for detailed disassembly and reassembly procedures, as these can vary by model.
Setup and Installation
This section outlines the general steps for replacing dryer rollers, the idler pulley, and the drive belt. Specific disassembly and reassembly procedures may vary depending on your dryer model. Consult your dryer's service manual for model-specific instructions.
Required Tools (Not Included):
- Screwdrivers (Phillips, Flathead)
- Nut drivers or socket set
- Pliers
- Work gloves
- Safety glasses
Installation Steps:
- Disconnect Power: Unplug the dryer from the wall outlet.
- Access Dryer Interior: Depending on your dryer model, this may involve removing the top panel, front panel, or rear panel. Carefully disconnect any wiring harnesses or components as needed, noting their original positions.
- Remove Old Components:
- Drive Belt: Release tension from the idler pulley and remove the old drive belt from the motor pulley and drum.
- Idler Pulley: Unbolt or unclip the old idler pulley from its mounting bracket.
- Drum Rollers: Remove the dryer drum. Access the roller shafts, typically located at the rear or front of the dryer base. Remove the retaining clips or bolts holding the old rollers in place.
- Install New Rollers: Place the new dryer rollers onto their shafts, ensuring any washers or spacers are correctly positioned. Secure them with the provided retaining clips or bolts. Ensure rollers spin freely.
- Install New Idler Pulley: Mount the new idler pulley onto its bracket, ensuring it is securely fastened and moves smoothly.
- Install New Drive Belt: Loop the new drive belt around the dryer drum. Route the belt around the motor pulley and the new idler pulley, ensuring proper tension. The ribbed side of the belt typically faces the drum.
- Reassemble Dryer: Carefully reassemble the dryer panels, reconnecting any wiring or components that were detached. Ensure all screws and fasteners are tightened.
- Test Operation: Plug the dryer back into the power outlet. Run a short cycle to ensure the drum tumbles smoothly and quietly. Check for any unusual noises or vibrations.
Post-Installation Check
After completing the installation, perform the following checks to ensure proper operation:
- Drum Rotation: Start the dryer on a no-heat or air-fluff cycle. Observe the drum to ensure it rotates smoothly and consistently without hesitation or grinding.
- Noise Level: Listen for any new or unusual noises such as squealing, thumping, or grinding. A properly installed kit should result in quieter operation if the old parts were worn.
- Belt Tension: While the dryer is off and unplugged, manually rotate the drum. The belt should feel taut but allow for smooth rotation.
- Lint Filter: Ensure the lint filter is clean and properly seated.
Maintenance
Regular maintenance helps extend the life of your dryer and its components.
- Lint Removal: Periodically clean the lint trap before or after every load. Additionally, every few months, inspect and clean the dryer's exhaust vent and ductwork to prevent lint buildup, which can restrict airflow and strain components.
- Component Inspection: Every 1-2 years, or if unusual noises occur, inspect the rollers, pulley, and belt for signs of wear, cracks, flat spots on rollers, or fraying on the belt. Replace components as needed.
- Keep Area Clear: Ensure the area around the dryer is free from obstructions to allow for proper airflow and prevent overheating.
Troubleshooting Common Issues After Installation
If you encounter issues after installing the kit, consider the following:
- Dryer Not Tumbling:
- Check if the drive belt is properly seated on the motor pulley, idler pulley, and drum.
- Ensure the idler pulley is correctly tensioning the belt.
- Verify that the motor is receiving power and operating.
- Squealing or Grinding Noises:
- Inspect the new rollers for proper installation and ensure they spin freely without obstruction.
- Check the idler pulley for smooth rotation.
- Ensure no foreign objects are trapped between the drum and the dryer housing.
- Dryer Overheating:
- While not directly related to these parts, ensure the dryer's exhaust vent is clear of lint and obstructions. Restricted airflow can cause overheating.
If issues persist, it is recommended to consult a qualified appliance technician.
Specifications
| Brand | Generic |
| Part Number (Kit) | pulpart#24101406 (Also commonly replaces 4392067) |
| Compatible Dryer Model | Kenmore Heavy Duty Dryer 110.77841600 and similar models |
| Item Package Quantity | 1 Set (includes 4 rollers, 1 pulley, 1 belt, hardware) |
| Date First Available | October 22, 2024 |
Warranty and Support
This product is covered by the manufacturer's standard warranty. Please refer to the product packaging or contact the seller for specific warranty terms and conditions.
For technical assistance or inquiries regarding this replacement kit, please contact your retailer or the manufacturer directly. Contact information is typically provided with your purchase documentation.