
1. Product Overview
The OEMIRY Stainless Steel Whole House Water Filter System is designed to provide clean and fresh water to every faucet in your home. This 2-stage filtration system effectively removes impurities, sediment, rust, and particles from your incoming water supply, enhancing water quality and extending the lifespan of water appliances. It features a durable 304 food-grade stainless steel housing, ensuring long-term reliability.

Figure 1.1: The OEMIRY Stainless Steel Whole House Water Filter System, showing the main unit, mounting bracket, and included installation accessories such as thread seal tape and connection fittings.

Figure 1.2: Detail of the 304 stainless steel housing, highlighting its robust properties including anti-corrosion, anti-freezing, crack prevention, and compression proof design, ensuring durability under various conditions.
2. Safety Information
Please read all safety instructions carefully before installation and operation to prevent injury or damage to the system.
- Ensure the main water supply is turned off before beginning any installation or maintenance.
- Relieve water pressure in the system before opening filter housings.
- Do not install the system in direct sunlight or in areas exposed to freezing temperatures below -22°F (-30°C).
- The system is designed for cold water use only. Do not exceed the maximum operating temperature of 140°F (60°C).
- Ensure all connections are properly sealed to prevent leaks.
- Keep children and pets away from the installation area.
3. Components List
Verify that all components are present and undamaged before proceeding with installation.
- Stainless Steel Filter Housing (2-stage)
- Mounting Bracket
- PP Sediment Filter Cartridge (10"x4.5")
- CTO Carbon Block Filter Cartridge (10"x4.5")
- 1" MNPT / 3/4" FNPT Screw Thread Fittings (2 included)
- Wrench for Filter Housing
- Screws and Wall Anchors for Mounting
- Thread Seal Tape

Figure 3.1: An exploded view illustrating the main components of the filter system, including the mounting bracket, the filter housings, and the 1" MNPT / 3/4" FNPT screw thread fittings for inlet and outlet connections.
4. Setup and Installation
4.1 Pre-Installation Checklist
- Confirm you have all necessary tools: pipe wrench, drill, measuring tape, marker.
- Select an appropriate installation location. The system dimensions are 12.2''x5.3''x15.0''. Ensure there is sufficient operation and maintenance space, such as in a well house or near the main water inlet pipe.
- Ensure the bottom of the filter system will be no less than 3 inches above the ground for proper clearance.
- Verify the water pressure is within the working range of 15-100 psi.
4.2 Installation Steps
- Turn off Water Supply: Locate the main water shut-off valve for your home and turn it off. Open a faucet to relieve pressure in the pipes.
- Mount the Bracket: Using the mounting bracket as a template, mark the drilling points on the wall. Drill holes and insert wall anchors. Securely attach the mounting bracket to the wall using the provided screws.
- Install Filter Cartridges: Unscrew the filter housings from the main manifold. Remove the protective wrapping from the PP Sediment filter and the CTO Carbon Block filter. Insert the PP Sediment filter into the first housing (inlet side) and the CTO Carbon Block filter into the second housing (outlet side). Ensure they are seated correctly.
- Attach Filter Housings: Carefully screw the filter housings back onto the manifold, ensuring the O-rings are properly seated to prevent leaks. Hand-tighten, then use the provided wrench for a snug fit, but do not overtighten.
- Connect Plumbing: Apply thread seal tape to the threads of the 1" MNPT / 3/4" FNPT fittings. Connect the inlet side of the filter system to your main water line and the outlet side to your home's plumbing. Ensure the flow direction (marked 'IN' and 'OUT' on the manifold) is correct.
- Check for Leaks: Slowly turn on the main water supply. Inspect all connections for leaks. If leaks occur, turn off the water, relieve pressure, and re-tighten the connections.
- Flush the System: Open a cold water faucet in your home and allow water to run for 10-15 minutes to flush out any carbon fines or air from the system. The water may appear cloudy initially; this is normal.

Figure 4.1: This diagram illustrates the critical dimensions of the OEMIRY water filter system (12.1" wide, 14.96" high, 5.31" deep) and emphasizes the requirement for at least 3 inches of clearance from the ground for proper installation and maintenance access.
5. Operating Instructions
Once installed, the OEMIRY Whole House Water Filter System operates automatically as water flows through your main supply line. The system utilizes a two-stage filtration process to purify your water.
- Stage 1: PP Sediment Filter (5 Microns): The first stage uses a polypropylene (PP) sediment filter to capture larger particles such as sediment, rust, sand, and grit. This protects the subsequent carbon filter and extends its lifespan.
- Stage 2: CTO Carbon Block Filter: The second stage employs a CTO (Chlorine, Taste, Odor) carbon block filter. This filter effectively reduces chlorine, unpleasant odors, and improves the taste of your water.
Important Note: This system will not reduce the Total Dissolved Solids (TDS) value of your water. For TDS reduction, a Reverse Osmosis (RO) system is required.
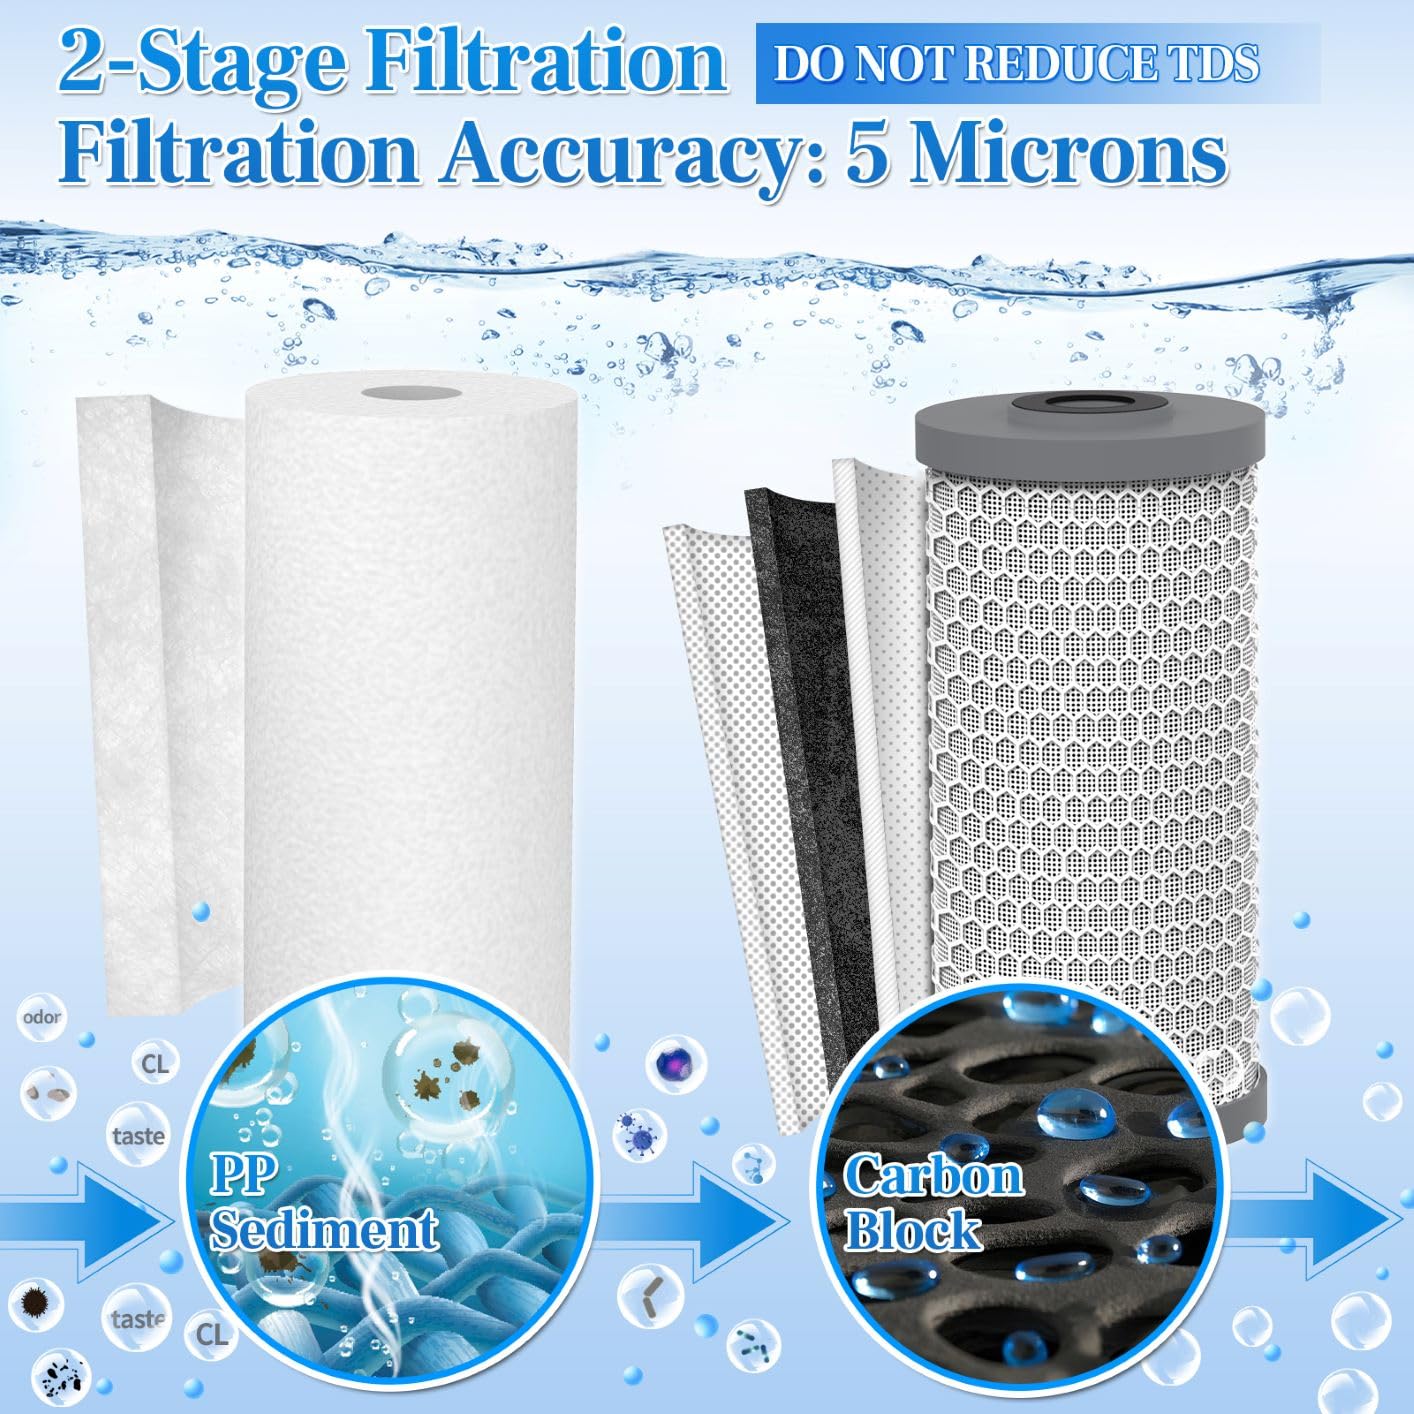
Figure 5.1: This diagram visually explains the two-stage filtration process. Water first passes through the PP Sediment filter, which removes larger particles, and then through the Carbon Block filter, which addresses odors, taste, and chlorine, resulting in cleaner water.
6. Maintenance
6.1 Filter Replacement
Filter cartridges should be replaced regularly to ensure optimal performance and water quality. The lifespan of the filters depends on your water quality and usage.
- Recommended Replacement Schedule: The 10"x4.5" replaceable whole house water filters can provide up to a full year of clean water (up to 6000 gallons) for a family of four. However, if you notice a decrease in water flow or a return of unpleasant tastes/odors, it is time to replace the filters sooner.
- Replacement Filter ASINs:
- PP Sediment Filter: B0F3HZQ5FW (Search: OEMIRY Replacement Cartridge Sediment Filter for Whole House Water Filter OM-UF04)
- CTO Carbon Block Filter: B0F3HZ4WC2 (Search: OEMIRY Replacement Cartridge CTO Filter for Whole House Water Filter OM-UF04)
6.2 Filter Replacement Procedure
- Turn off Water Supply: Turn off the main water supply to the filter system.
- Relieve Pressure: Open a nearby cold water faucet to relieve pressure in the system.
- Drain Housings: Place a bucket under the filter housings to catch any residual water.
- Unscrew Housings: Use the provided filter wrench to unscrew the filter housings.
- Remove Old Filters: Remove the old filter cartridges and dispose of them properly.
- Clean Housings: Clean the inside of the filter housings with warm, soapy water. Rinse thoroughly. Inspect and lubricate the O-rings if necessary.
- Insert New Filters: Unwrap new filter cartridges and insert them into the correct housings (PP Sediment in the first stage, CTO Carbon Block in the second stage). Ensure they are centered.
- Reattach Housings: Screw the housings back onto the manifold. Hand-tighten, then use the wrench for a snug fit. Do not overtighten.
- Restore Water Supply: Slowly turn on the main water supply. Check for leaks.
- Flush System: Open a cold water faucet and flush the system for 10-15 minutes to remove any air or carbon fines.
7. Troubleshooting
Refer to the table below for common issues and their solutions.
| Problem | Possible Cause | Solution |
|---|---|---|
| Water Leakage | Loose connections, damaged O-rings, cracked housing | Turn off water, relieve pressure, tighten connections, inspect/replace O-rings, check housing for damage. |
| Reduced Water Flow | Clogged filters, excessive sediment buildup | Replace filter cartridges. Flush system after replacement. |
| Unpleasant Taste/Odor Returns | Spent carbon filter | Replace the CTO Carbon Block filter. |
| Cloudy Water After Filter Change | Air in the system, carbon fines from new filter | Flush the system by running water for 10-15 minutes until clear. |
| System Not Filtering (e.g., sediment still present) | Incorrect filter installation, bypass valve open (if applicable) | Ensure filters are correctly seated. Check plumbing for bypass. |
8. Specifications
| Feature | Specification |
|---|---|
| Model Number | OM-UF04 |
| Dimensions (L x W x H) | 37L x 16W x 32H Centimetres (12.2''x 5.3''x 15.0'') |
| Material | 304 Food-Grade Stainless Steel |
| Inlet/Outlet Size | 1" or 3/4" (1"MNPT 3/4"FNPT Screw Thread * 2 included) |
| Working Pressure Range | 15-100 psi |
| Burst Pressure | 406 psi |
| Capacity | Up to 6000 Gallons |
| Filtration Stages | 2-Stage (PP Sediment & CTO Carbon Block) |
| Filtration Accuracy (Sediment) | 5 Microns |
| Upper Temperature Rating | 140 Degrees Fahrenheit (60 Degrees Celsius) |
| Supported Water TDS Level Maximum | 1000 PPM |
9. Warranty and Support
OEMIRY provides a limited replacement warranty for mechanical devices such as filter housings for a period of 5 years from the date of purchase.
If you encounter any issues before purchase or during use, please contact OEMIRY customer service via email. We are committed to providing a satisfactory response as soon as possible.
For further assistance or to purchase replacement filters, please refer to the ASINs provided in the Maintenance section or visit the OEMIRY official website.


