1. Introduction
Thank you for choosing the AYEASY Queen Size Wood Headboard. This manual provides essential information for the safe assembly, operation, and maintenance of your new headboard. Please read all instructions carefully before beginning assembly and retain this manual for future reference.
Safety Information
WARNING:
- Always follow the assembly instructions for safe wall mounting.
- Be cautious of pinch points when handling metal parts during assembly.
- Ensure all connections for the charging station are secure before use.
2. Package Contents
Verify that all components are present before starting assembly. If any parts are missing or damaged, please contact customer support.
- Wood Headboard Panels
- Upholstered Cushion
- Integrated Charging Station (with 2 AC outlets and 2 USB ports)
- LED Light Kit
- Assembly Hardware (screws, bolts, etc.)
- Assembly Tools (if included)
- Instruction Manual
3. Assembly Instructions
Assembly is designed to be straightforward. All necessary parts, tools, and numbered components are included. Follow the clear instructions provided in the separate assembly guide to complete the setup.
- Unpack all components and verify against the package contents list.
- Identify each part using the numbered labels.
- Follow the step-by-step diagrams in the assembly guide to connect the headboard panels.
- Install the upholstered cushion into its designated area.
- Integrate the charging station and LED light kit as instructed.
- Securely attach the headboard to your queen-size bed frame or wall, ensuring stability.

Image 3.1: Side view of the headboard, illustrating how it connects to a bed frame. This image helps visualize the headboard's profile and its integration with a standard bed setup.
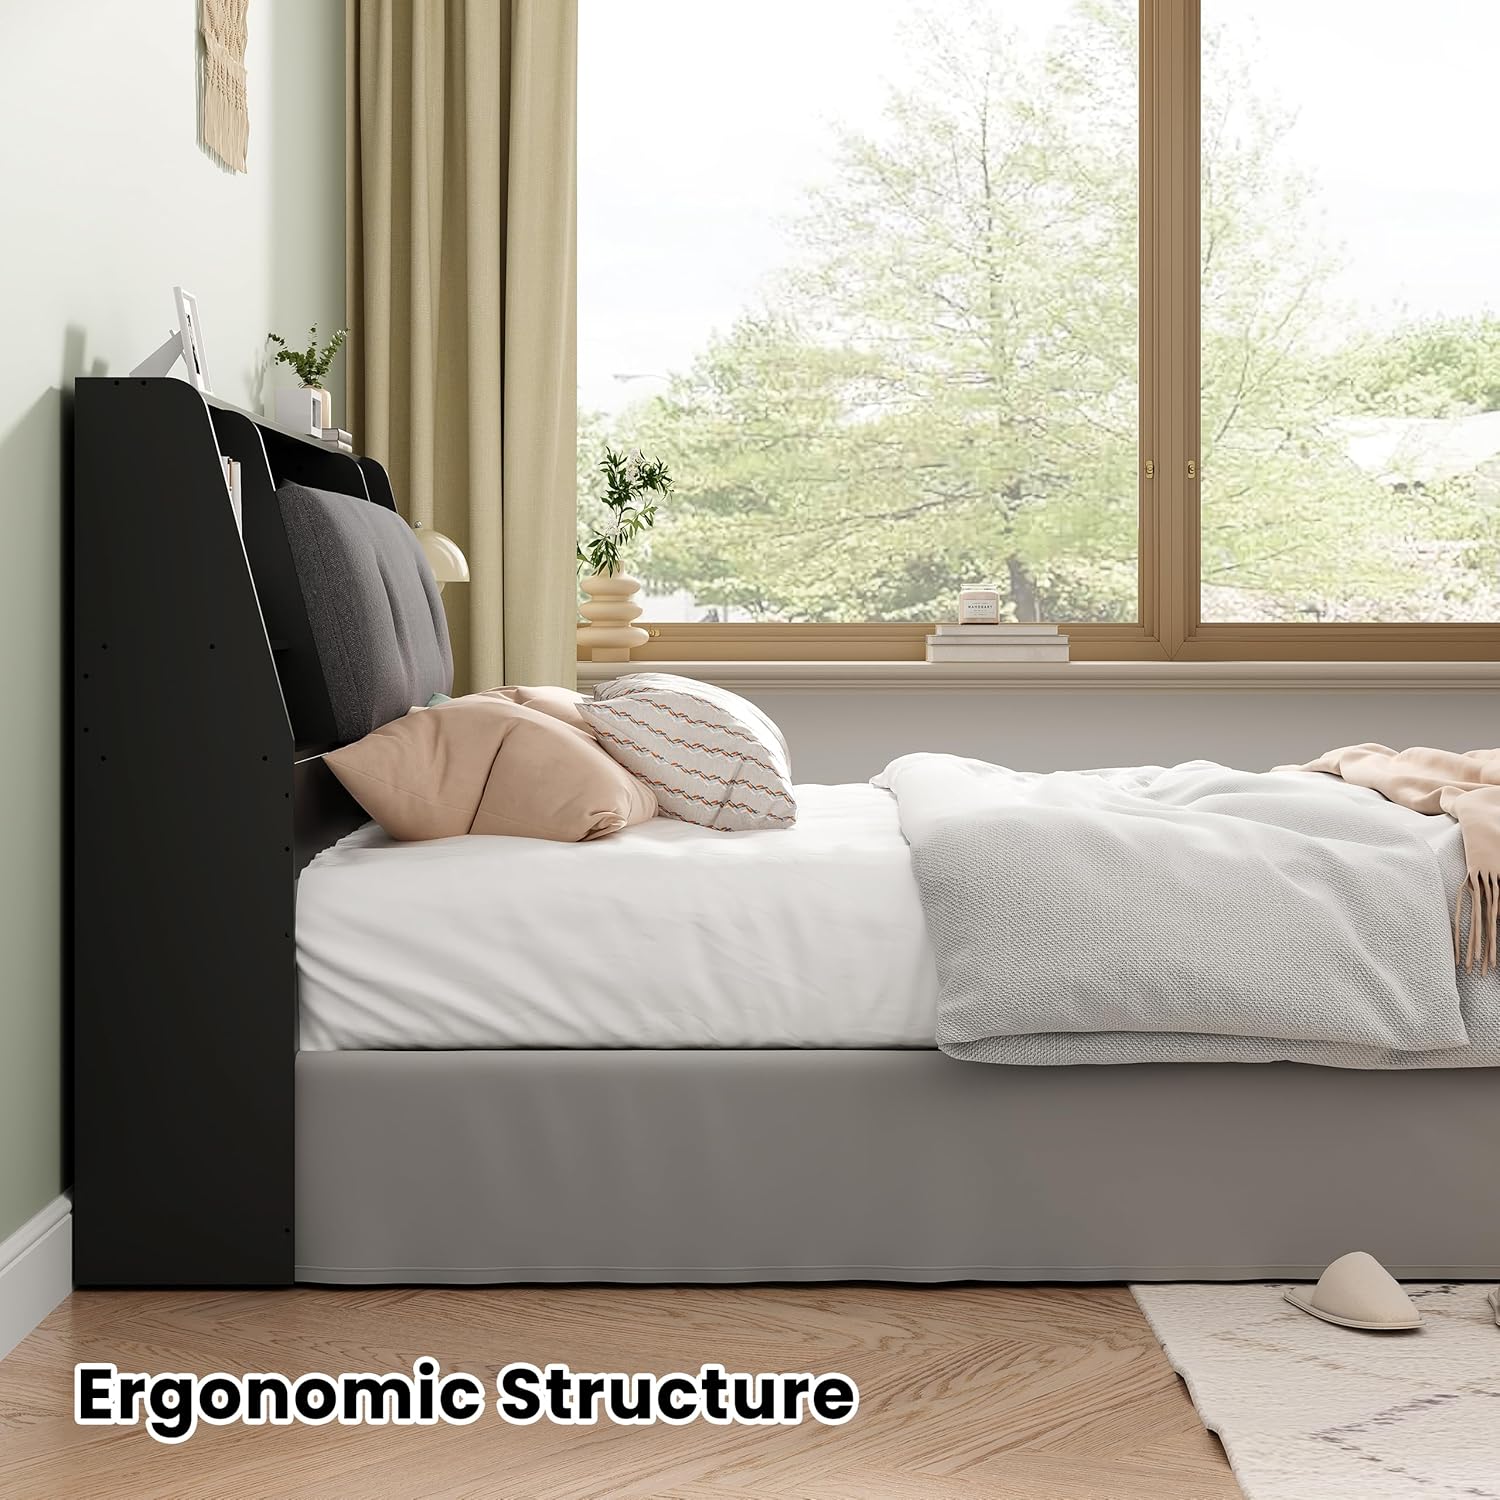
Image 3.2: A diagram highlighting the ergonomic structure of the headboard, emphasizing its design for comfort and stability. This view provides insight into the construction and support features.
4. Operating Instructions
4.1. Charging Station
The headboard features a built-in charging station for convenient power access. It includes two standard AC power outlets and two USB ports.
- Connect the headboard's power cord to a wall outlet.
- Plug in your electronic devices (phones, tablets, lamps, etc.) into the available AC outlets or USB ports.
- Ensure devices are compatible with the power output.

Image 4.1: A detailed view of the integrated charging station, showing the two AC outlets and two USB ports. This image clarifies the types of connections available for electronic devices.
4.2. LED Lights
The headboard is equipped with LED lights to provide soft illumination.
- The LED lights are typically controlled by a switch located on the headboard or via a remote (if included).
- Turn on the lights for reading or ambient lighting.

Image 4.2: A nighttime view of a bedroom featuring the headboard with its LED lights turned on, demonstrating the ambient lighting effect. This image illustrates the practical use of the integrated lighting.
4.3. Storage Compartments
The headboard offers various storage options to help keep your bedroom organized.
- Utilize the 1 shelf and 4 different-sized storage spaces for items like alarm clocks, books, glasses, and picture frames.
- The large storage space under the soft bag cushion is ideal for discreetly storing clothes or other personal items.

Image 4.3: An overall view of the headboard, showcasing its various storage compartments and the integrated charging station. This image provides a comprehensive look at the organizational features.
5. Maintenance
Proper care will extend the life and appearance of your headboard.
5.1. Cleaning
- Wood Surfaces: Wipe with a soft, damp cloth. Avoid harsh chemicals or abrasive cleaners.
- Upholstered Fabric: Spot clean with a mild fabric cleaner as needed. Test on an inconspicuous area first.
- Electrical Components: Ensure the headboard is unplugged before cleaning near the charging station. Use a dry cloth to wipe dust.
5.2. General Care
- Periodically check all assembly hardware and tighten if necessary to maintain stability.
- Avoid placing excessively heavy items on shelves or in storage compartments.
- Keep the headboard away from direct sunlight and excessive moisture to prevent damage to wood and fabric.

Image 5.1: This image emphasizes the comfortable and soft material of the headboard's upholstered cushion, indicating the quality of materials used for user comfort.
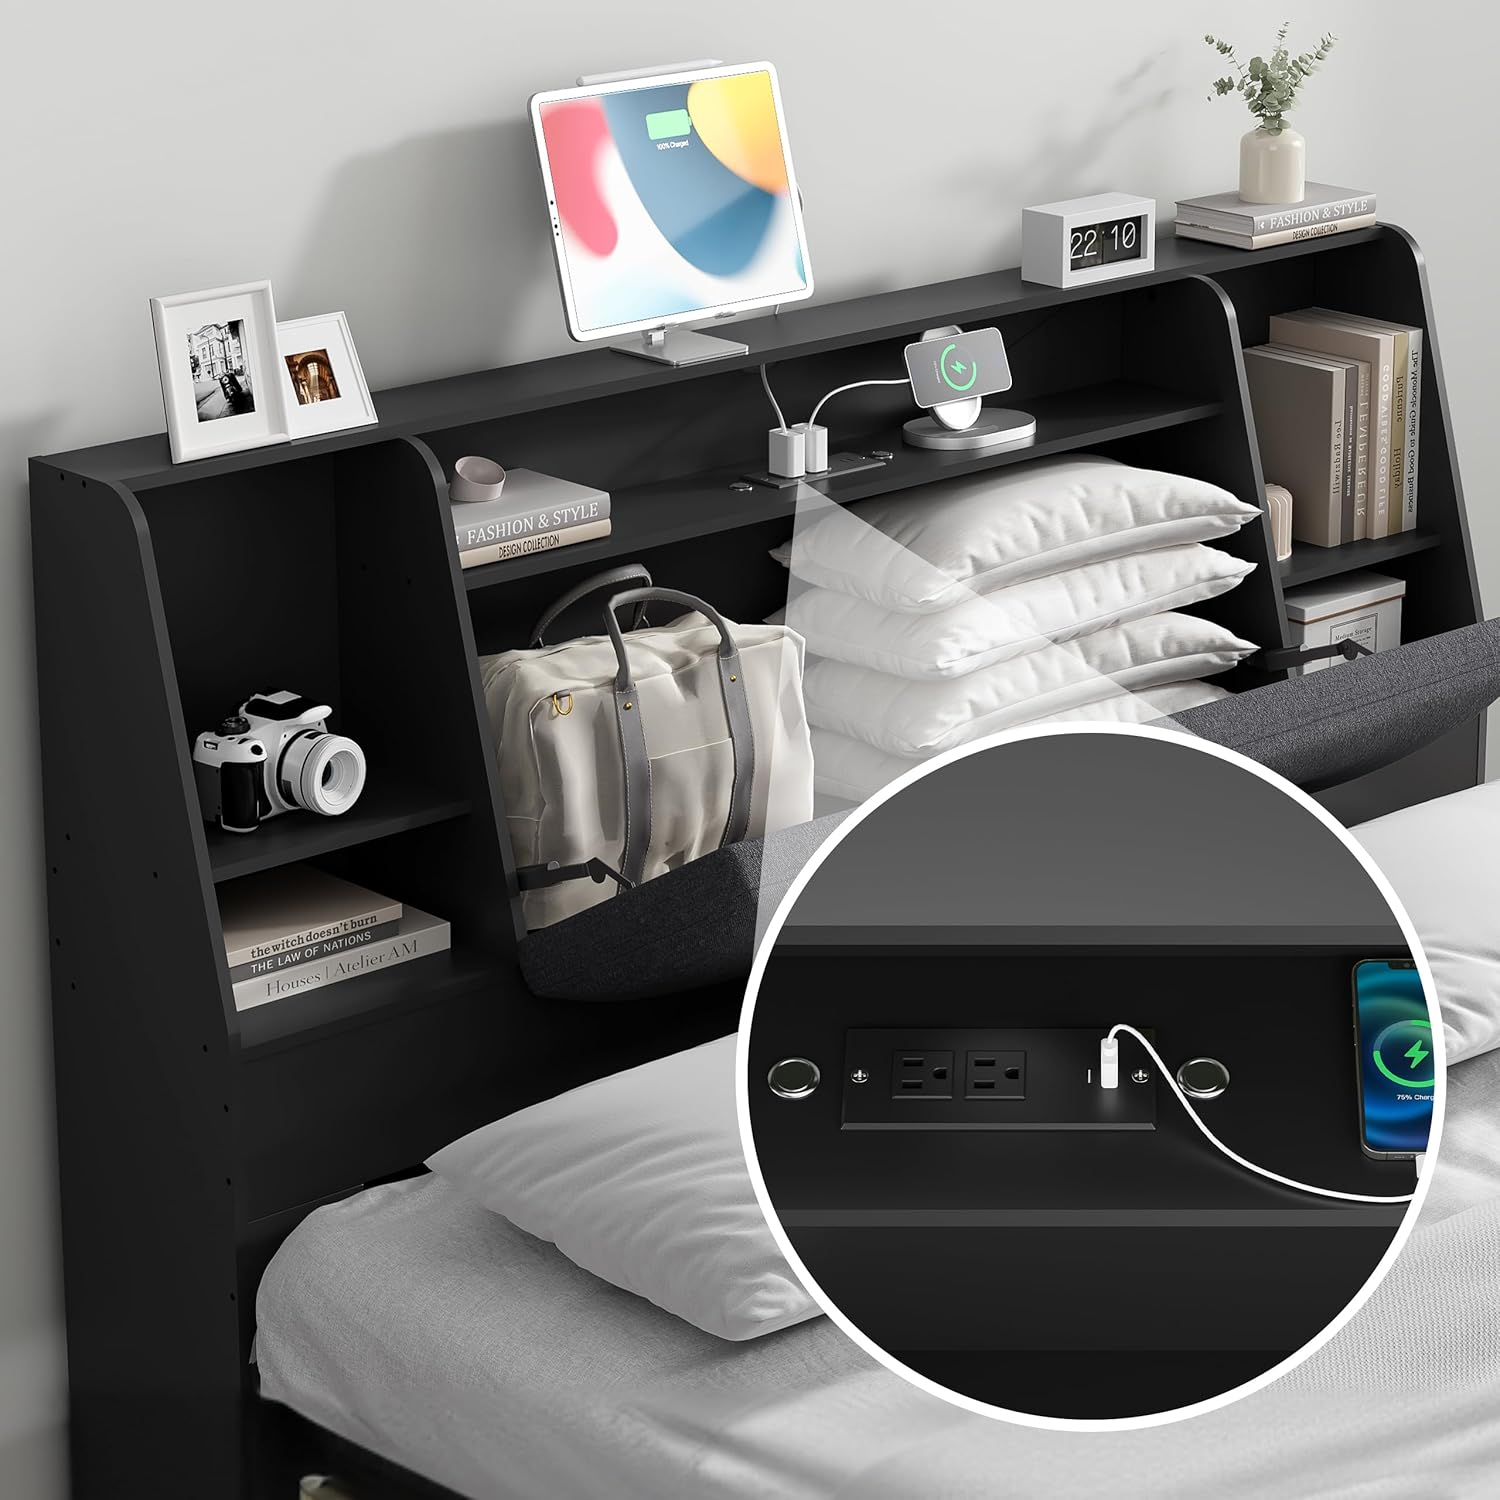
Image 5.2: This image illustrates key safety and durability features, including the sturdy construction, safe and odorless materials, and soft edges designed to prevent bumps.
6. Troubleshooting
If you encounter any issues with your headboard, please refer to the following common solutions:
| Problem | Possible Cause | Solution |
|---|---|---|
| Headboard feels unstable or wobbly. | Loose assembly hardware. | Check and tighten all screws and bolts according to the assembly guide. Ensure proper attachment to the bed frame or wall. |
| Charging station not working. | Power cord not plugged in; device not compatible; faulty outlet. | Ensure the headboard's power cord is securely plugged into a functional wall outlet. Test with a different device or outlet. |
| LED lights not turning on. | Power cord not plugged in; switch off; faulty connection. | Verify the headboard is powered. Check the light switch. If issues persist, contact customer support. |
7. Specifications
| Feature | Detail |
|---|---|
| Brand | AYEASY |
| Model | B0DKF7PVDK |
| Size | Queen |
| Color | Black |
| Material | Wood, Metal, Cotton (Upholstery) |
| Product Dimensions | 63"W x 42.5"H |
| Special Features | Storage Bookcase, Built-in Charging Station (2 AC outlets, 2 USB ports), LED Lights |
| Mounting Type | Wall Mount (or attached to bed frame) |

Image 7.1: A detailed diagram illustrating the key dimensions of the headboard, including width, height, and depth of storage areas. This helps users confirm compatibility with their space.
8. Warranty and Support
8.1. Warranty Information
AYEASY provides a warranty for this product. For any quality problems encountered within one year of purchase, we will offer free repair or replacement of the product.
8.2. Customer Support
For further assistance, troubleshooting not covered in this manual, or warranty claims, please contact AYEASY customer support through the retailer where the product was purchased or visit the official AYEASY store online.
Online Store: AYEASY Store
