
Introduction
This manual provides detailed instructions for the setup, operation, and maintenance of your KeeKit Digital Travel Alarm Clock. This compact and portable device features a large LCD display, showing time, date, day of the week, and temperature. It includes an alarm with nine selectable ringtones, a snooze function, a 6-second backlight, and a countdown timer. The clock supports both 12-hour and 24-hour time formats, and temperature display in Celsius or Fahrenheit.
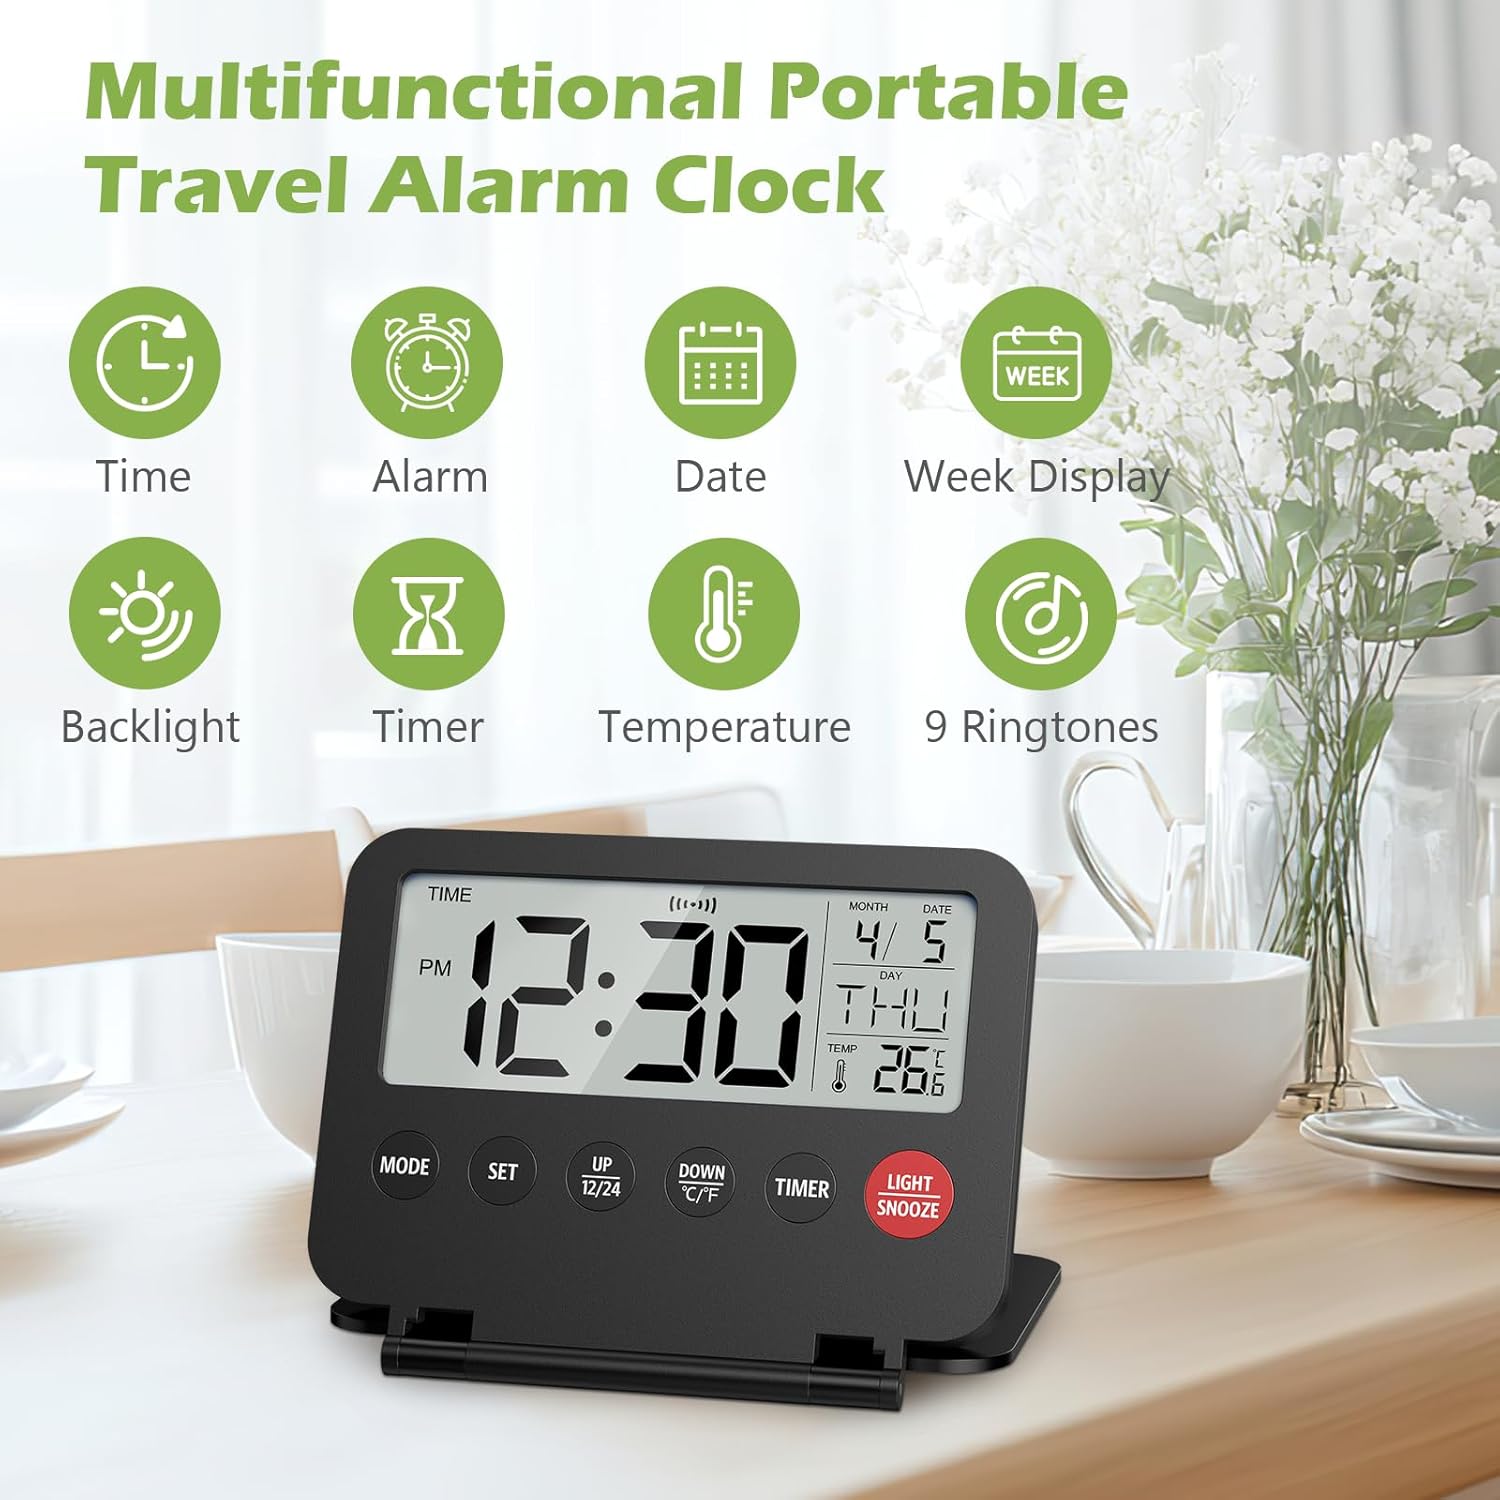
Image: Overview of the clock's main functions, including time, alarm, date, week display, backlight, timer, temperature, and nine ringtones.
Product Overview
Components and Controls

Image: Front view of the KeeKit Digital Travel Alarm Clock, displaying the LCD screen and control buttons.
The clock features the following control buttons:
- MODE: Cycles through Time, Alarm, and Timer display modes.
- SET: Enters setting mode for the currently selected function (Time, Alarm, Date). Confirms selections.
- UP / 12/24: Increases values during setting. Toggles between 12-hour and 24-hour time formats.
- DOWN / ℃/℉: Decreases values during setting. Toggles between Celsius and Fahrenheit temperature display.
- TIMER: Activates and controls the countdown timer function.
- LIGHT / SNOOZE: Activates the backlight for 6 seconds. Activates the snooze function when the alarm is sounding.
Setup
Battery Installation
The KeeKit Digital Travel Alarm Clock requires two (2) AAA batteries (not included) for operation.
- Locate the battery compartment cover on the back of the clock.
- Slide the cover open.
- Insert two new AAA batteries, ensuring correct polarity (+ and -).
- Close the battery compartment cover securely.

Image: The back of the clock with the battery compartment open, showing where to insert AAA batteries.
Operating Instructions
Setting Time and Date
- Press the MODE button until the clock displays the current time.
- Press and hold the SET button for a few seconds until the hour digit flashes.
- Use the UP / 12/24 or DOWN / ℃/℉ buttons to adjust the hour.
- Press SET to confirm the hour and move to the minute setting.
- Repeat steps 3 and 4 to set the minutes, year, month, and day. The day of the week will adjust automatically.
- After setting the day, press SET to exit the time/date setting mode.
12/24 Hour Format Selection
While in time display mode, press the UP / 12/24 button to switch between 12-hour (with AM/PM indicator) and 24-hour formats.

Image: The clock display showing both 12-hour (PM 10:30) and 24-hour (22:30) time formats.
Setting the Alarm
- Press the MODE button until the alarm time is displayed (usually indicated by an alarm icon).
- Press and hold the SET button until the alarm hour digit flashes.
- Use the UP / 12/24 or DOWN / ℃/℉ buttons to adjust the alarm hour.
- Press SET to confirm the hour and move to the minute setting.
- Repeat steps 3 and 4 to set the alarm minutes.
- After setting the minutes, press SET to enter the alarm sound selection. Use UP / 12/24 or DOWN / ℃/℉ to cycle through the 9 available ringtones.
- Press SET to confirm the alarm sound and exit alarm setting mode.
- To activate/deactivate the alarm, press the DOWN / ℃/℉ button while in alarm display mode (not setting mode). An alarm icon will appear/disappear on the display.

Image: The clock display showing an alarm time and indicating the selection of one of nine alarm sounds.
Snooze Function
When the alarm sounds, press the LIGHT / SNOOZE button to temporarily silence the alarm. The alarm will sound again after the set snooze duration. The snooze duration can be set from 0 to 60 minutes during alarm setting.

Image: The clock display showing the snooze function activated, indicated by a 'Zzz' icon.
Backlight Operation
To illuminate the display in low-light conditions, press the LIGHT / SNOOZE button. The backlight will activate for approximately 6 seconds and then automatically turn off.

Image: The clock display with its backlight illuminated, showing clear visibility in the dark.
Temperature Display
The clock displays the ambient temperature. To switch between Celsius (℃) and Fahrenheit (℉), press the DOWN / ℃/℉ button while the clock is in time display mode.

Image: The clock display showing temperature readings, with an option to switch between Celsius and Fahrenheit.
Countdown Timer
- Press the MODE button until the timer display is shown.
- Press the TIMER button to enter timer setting mode. The minute digits will flash.
- Use the UP / 12/24 or DOWN / ℃/℉ buttons to set the desired countdown minutes.
- Press TIMER again to confirm the minutes and move to seconds setting.
- Use the UP / 12/24 or DOWN / ℃/℉ buttons to set the desired countdown seconds.
- Press TIMER to start the countdown.
- To pause/resume the countdown, press the TIMER button.
- When the countdown reaches zero, an alert will sound. Press any button to stop the alert.

Image: The clock display showing a countdown timer set to 30:00, with a family in the background.
Maintenance
Cleaning
To clean the clock, use a soft, dry cloth. Avoid using abrasive cleaners, solvents, or chemical sprays, as these may damage the display or casing.
Battery Replacement
Replace the AAA batteries when the display becomes dim or the clock's functions become unreliable. Follow the battery installation steps outlined in the Setup section.
Storage
If the clock will not be used for an extended period, remove the batteries to prevent leakage and potential damage to the device. Store the clock in a cool, dry place away from direct sunlight and extreme temperatures.
Troubleshooting
Common Issues and Solutions
- Display is blank or dim:
Check if the batteries are installed correctly. Replace with fresh AAA batteries. - Alarm not sounding or too quiet:
Ensure the alarm is activated (alarm icon visible on display). Verify the alarm time is set correctly. The alarm volume is fixed and cannot be adjusted. - Backlight not working:
Ensure the batteries have sufficient power. The backlight activates for 6 seconds per press. - Incorrect time or date:
Re-enter the time and date settings following the instructions in the "Setting Time and Date" section.
Specifications
Product Specifications
| Brand | KeeKit |
| Model | B0DKDW9DH5 |
| Display Type | Digital LCD |
| Color | Black |
| Power Source | 2 x AAA Batteries (not included) |
| Product Dimensions | 3.15"W x 0.7"H (80mm x 18mm) |
| Frame Material | Plastic |
| Special Features | Date, Temperature (℃/℉), Snooze, Backlight, Countdown Timer, 9 Alarm Sounds, 12/24 Hour Format |

Image: The clock displaying its compact dimensions, suitable for travel.
Warranty and Support
Warranty Information
- 1-Year Warranty: Your KeeKit Digital Travel Alarm Clock is covered by a 1-year warranty from the date of purchase.
- 30-Day Return Guarantee: Enjoy a 30-day return guarantee for your peace of mind.
- 90-Day Replacement Guarantee: A 90-day replacement guarantee is provided for eligible products.
Customer Support
KeeKit is committed to providing excellent customer service.
- 24/7 Online Customer Support: Assistance is available around the clock.
- Lifetime Technical Support Service: Receive ongoing technical support for your product.
For further assistance, troubleshooting, or warranty claims, please visit the official KeeKit Store on Amazon or contact our customer service team directly.