Product Overview
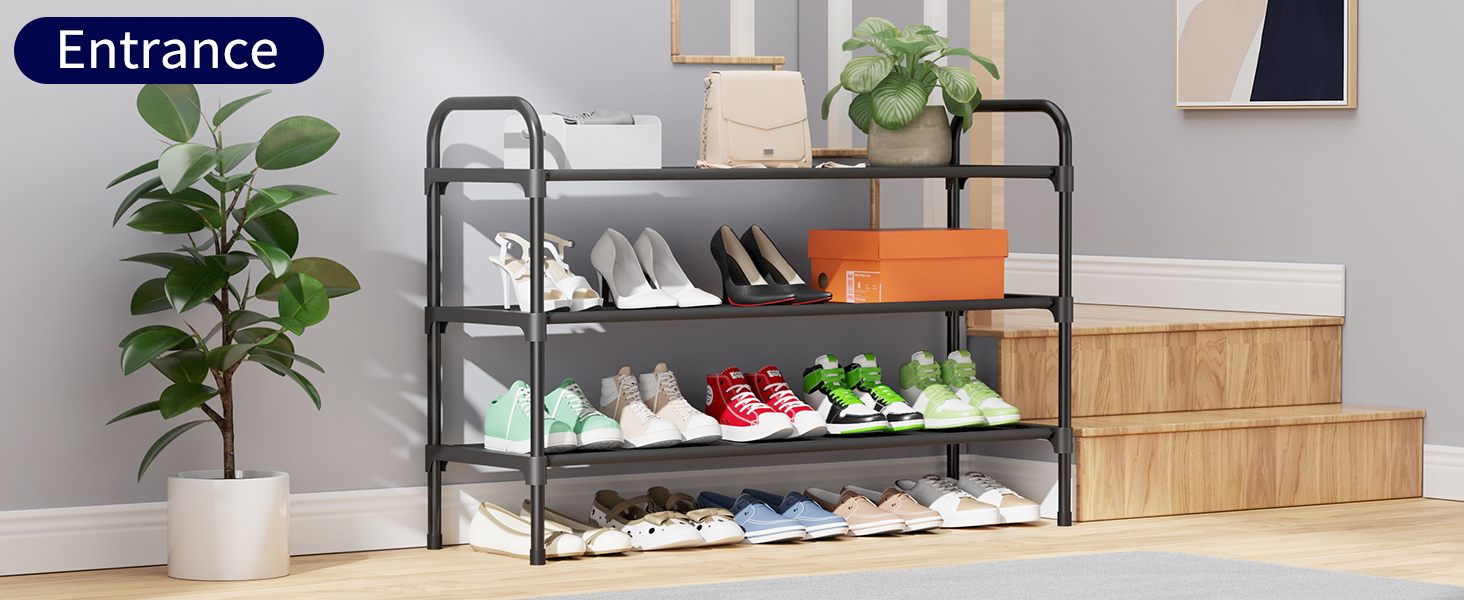
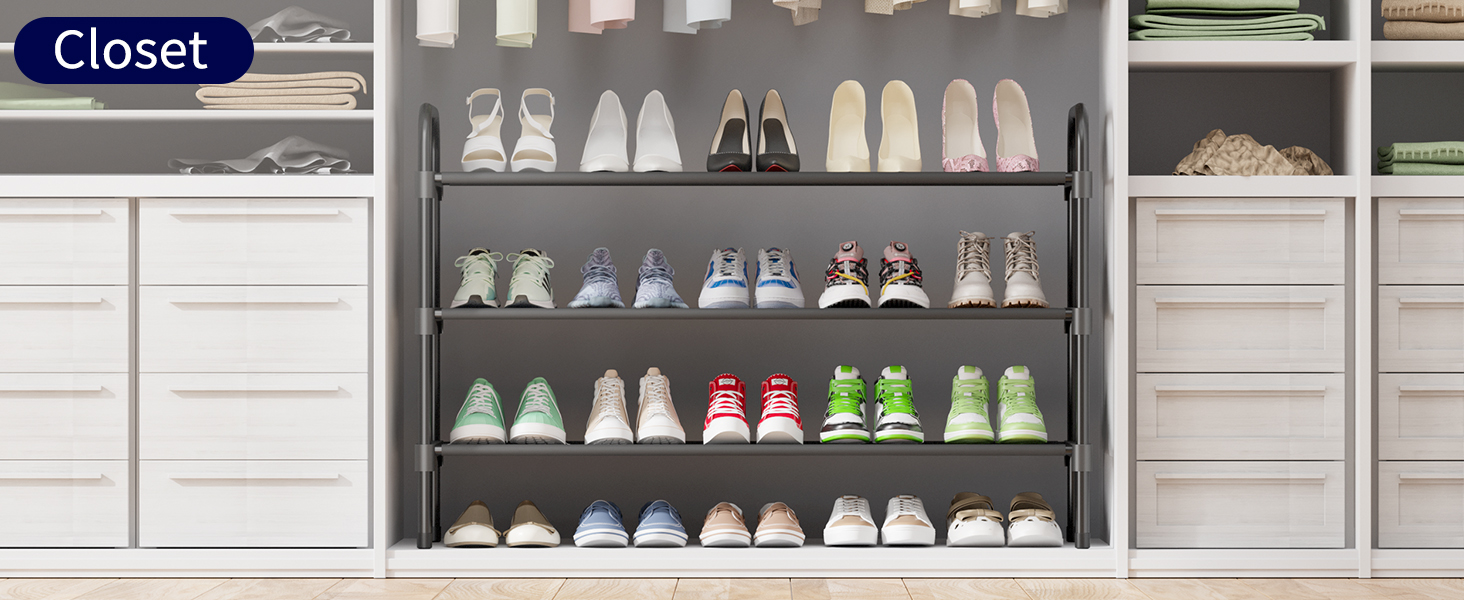
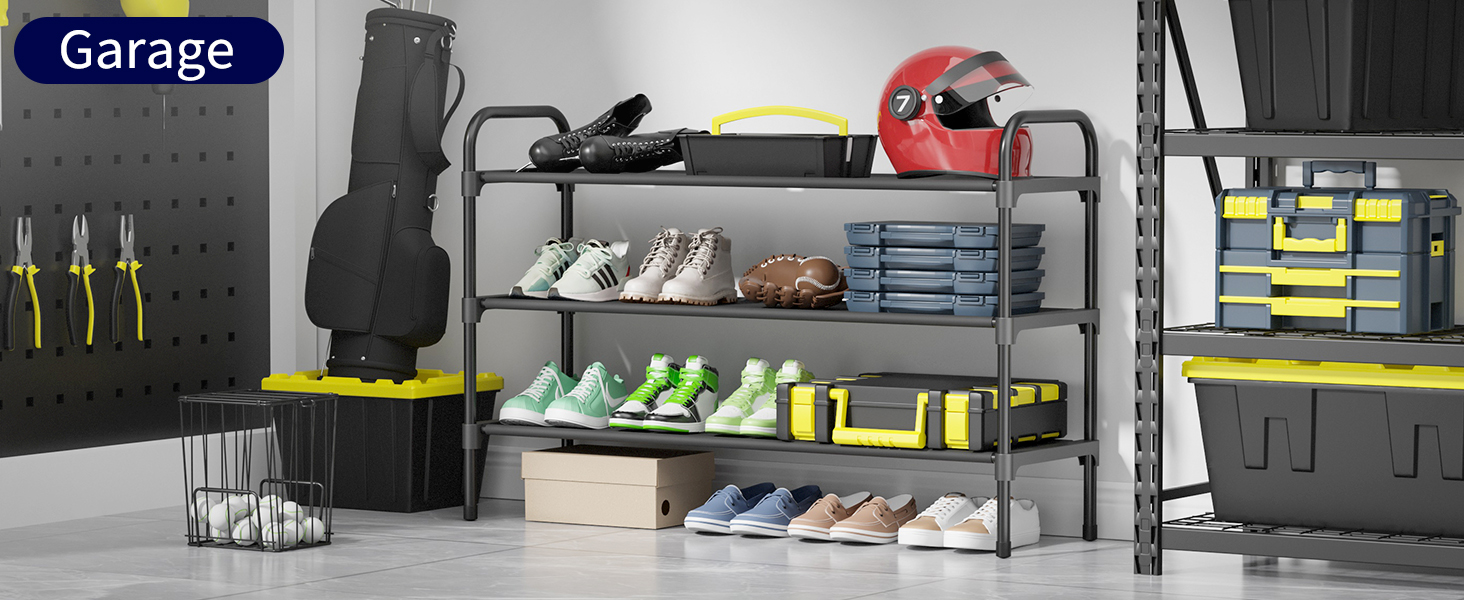
The Kitsure Extra-Long 3-Tier Shoe Rack is designed to provide spacious and organized storage for your footwear. Measuring 39.0" x 11.8" x 23.2", this rack offers ample space, with its bottom tier specifically designed to accommodate flat shoes or slippers. Each tier can hold approximately 4 pairs of men's shoes or 5 pairs of women's shoes.
Constructed with high-grade, water-repellent, and rust-proof materials, this shoe rack features a strong and stable structure with crack-resistant U-shaped connectors, ensuring durability and ease of maintenance. Its flexible design allows for vertical stacking to maximize space or detaching tiers to fit into compact areas. The fabric layers can also be removed to accommodate taller items like boots.
Assembly is user-friendly and requires no tools, making setup quick and straightforward. The versatile design makes it suitable for various locations, including entryways, closets, garages, or living rooms, helping to keep your shoe collection tidy and accessible.

Included Components
Please ensure all the following components are present before beginning assembly:
- Nonwoven Fabric (A) x 3
- Long Rod 1 (B) x 12
- Long Rod 2 (C) x 6
- Short Rod 1 (D) x 8
- Short Rod 2 (E) x 4
- Plastic Holder (F) x 6
- Leg Cover (G) x 4
- U-Shaped Rod (H) x 2

Assembly Instructions
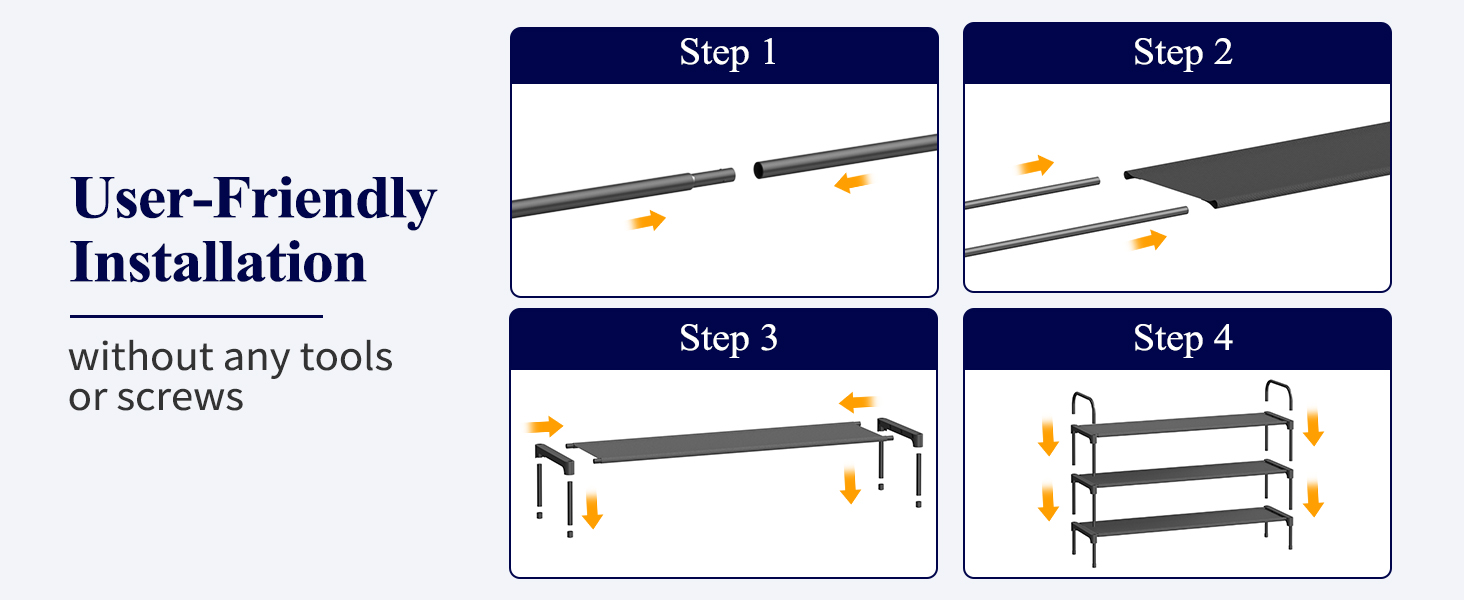
No tools are required for assembly. Follow these steps for quick and easy setup:
- Step 1: Prepare Long Rods. Connect two Long Rod 1 (B) pieces to one Long Rod 2 (C) piece to create a single long rod. Repeat this process six times to obtain six long rods.
- Step 2: Attach Fabric Layers. For each nonwoven fabric layer (A), insert two of the assembled long rods through the two side sleeves of the fabric. Repeat this for all three fabric layers.
- Step 3: Secure Fabric Layers. Firmly slot the two ends of each long rod (with the fabric attached) into the holes on the plastic holders (F). Complete this for all three fabric layers.
- Step 4: Link Layers. Use four Short Rod 1 (D) pieces to connect the plastic holders of the first two assembled layers. Repeat this process to link the second and third layers.
- Step 5: Install Side Supports. Slot one end of each Short Rod 2 (E) into a leg cover (G) and the other end into a plastic holder (F). Repeat this four times for all corners.
- Step 6: Attach U-Shaped Rods. Insert the two U-shaped rods (H) onto the top corners of the assembled shoe rack to complete the structure.
Operating Instructions
To use your Kitsure shoe rack:
- Placing Shoes: Arrange shoes neatly on each tier. The extra-long design accommodates multiple pairs per shelf.
- Bottom Tier Use: Utilize the space beneath the lowest fabric tier for flat shoes, slippers, or smaller items.
- Stacking: For increased storage capacity, additional Kitsure shoe racks can be stacked vertically. Ensure proper alignment and stability when stacking.
- Detaching Tiers: To fit the rack into smaller spaces or to store tall boots, individual tiers can be detached by carefully disassembling the connecting rods and plastic holders.
Maintenance
To ensure the longevity and appearance of your Kitsure shoe rack:
- Cleaning: Wipe down the metal frame and fabric layers with a damp cloth. For stubborn dirt, a mild soap solution can be used. Ensure the fabric is dry before placing shoes back on the rack.
- Dusting: Regularly dust the rack to prevent accumulation.
- Inspection: Periodically check all connections to ensure they remain firm and secure.
Troubleshooting
- Instability: If the rack feels wobbly, ensure all rods are fully inserted into the plastic holders and that the U-shaped rods are securely attached. Check that the rack is placed on a flat, even surface.
- Insufficient Space: If you require more storage, consider purchasing an additional Kitsure shoe rack to stack vertically. Alternatively, utilize the detachable tier feature to customize height for taller items.
- Damaged Components: If any part is damaged or missing, please contact Kitsure customer support for assistance.
Specifications
| Feature | Detail |
|---|---|
| Brand | Kitsure |
| Model Number | 4322 |
| Product Dimensions | 11.8"D x 39"W x 23.2"H |
| Number of Tiers | 3 |
| Item Weight | 3.19 pounds (1.45 Kilograms) |
| Color | Black |
| Material | Metal frame, Non-woven fabric layers |
| Special Features | Durable, Portable, Rust Proof, Space Saving, Weather Resistant, Detachable, Stackable |
| Assembly Required | Yes (Tool-free assembly) |
| Installation Type | Freestanding |


Safety Information
Warning: Keep the shoe rack away from flames and fire to prevent damage or hazards.
Do not overload the shelves beyond their intended capacity to maintain stability and prevent collapse.
Warranty and Support
For warranty information, product support, or to inquire about replacement parts, please refer to the contact details provided with your purchase or visit the official Kitsure website. Please retain your proof of purchase for any warranty claims.