SONGMICS ULGR414B01
SONGMICS Heavy-Duty Rolling Clothes Rack User Manual
Brand: SONGMICS | Model: ULGR414B01
1. Introduction
This manual provides detailed instructions for the assembly, operation, and maintenance of your SONGMICS Heavy-Duty Rolling Clothes Rack (Model ULGR414B01). Please read this manual thoroughly before assembly and use to ensure proper function and safety.
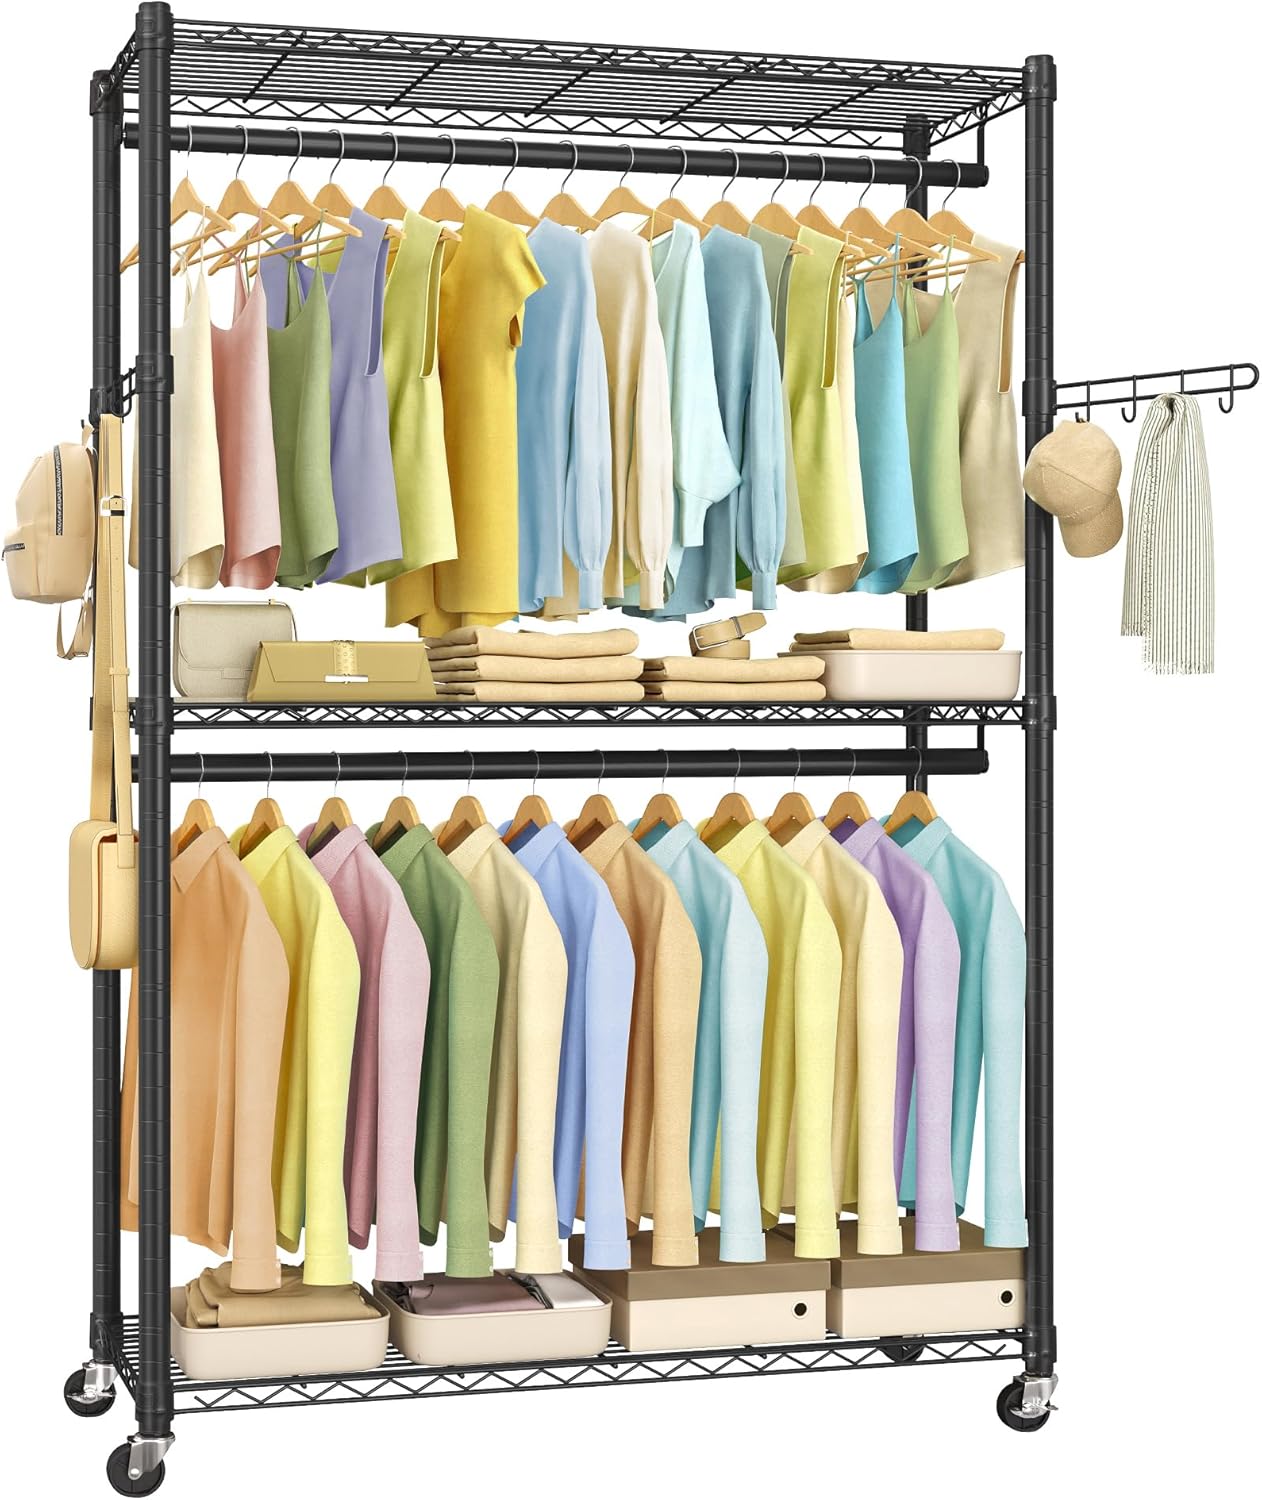
Image 1.1: Fully assembled SONGMICS Heavy-Duty Rolling Clothes Rack with clothes and accessories.
2. Safety Information
- Secure the clothes rack to the wall using the included anti-tip kit to prevent accidental tipping.
- Distribute weight evenly across shelves and hanging rails.
- Do not exceed the stated maximum load capacities for any component. Refer to the Specifications section for details.
- Follow all assembly instructions carefully and ensure all connections are secure before use.
- Keep children and pets away from the product during assembly.

Image 2.1: Illustration of the anti-tip kit and the multi-layered steel construction for stability and safety.
3. Package Contents
Verify that all components listed below are present and undamaged before beginning assembly. If any parts are missing or damaged, please contact customer support.
- 1 x Portable Clothes Rack (main frame components)
- 1 x Accessory Kit (includes small parts like cone sleeves, hooks, wheels)
- 1 x Anti-Tip Kit
- 1 x Instructions Manual (this document)
4. Assembly Instructions
The SONGMICS Heavy-Duty Rolling Clothes Rack features a 0-screw, 0-tool assembly design, utilizing a cone sleeve locking mechanism for quick and easy setup. All parts are labeled for straightforward identification.

Image 4.1: Visual representation of the 1-inch increment adjustability and the cone sleeve locking mechanism.
Assembly Steps:
- Unpack and Identify Parts: Carefully remove all components from the packaging. Lay them out and identify each part using the labels and the parts list provided in the separate instruction sheet.
- Attach Wheels: Screw the four wheels into the bottom of the main vertical poles. Ensure the two wheels with brakes are positioned on the same side for easy access.
- Install Bottom Shelf: Slide the cone sleeves onto the vertical poles at the desired height for the bottom shelf. Ensure the narrow end of the cone sleeve faces upwards. Press the shelf corners firmly onto the cone sleeves until securely locked.
- Install Lower Hanging Rail: Attach the lower hanging rail to the vertical poles above the bottom shelf using the cone sleeves. Adjust to your preferred height.
- Install Middle Shelf: Repeat step 3 for the middle shelf, positioning it above the lower hanging rail.
- Install Upper Hanging Rail: Attach the upper hanging rail above the middle shelf using the cone sleeves.
- Install Top Shelf: Install the top shelf at the very top of the vertical poles, ensuring it is securely locked into place.
- Attach Hooks and Hook Arm: Secure the four individual hooks and the extra hook arm to the side poles as desired.
- Install Anti-Tip Kit: Follow the instructions provided with the anti-tip kit to securely fasten the rack to a wall. This is crucial for stability and safety.
- Final Check: Verify that all shelves, rails, and hooks are securely attached and stable. Ensure the wheels are functioning correctly and the brakes engage properly.
5. Operating Instructions
Adjusting Shelves and Rails:
The shelves and hanging rails can be adjusted up or down in 1-inch increments to accommodate various item sizes and storage needs. To adjust, gently lift the shelf/rail, release the cone sleeves, reposition them at the desired height, and then firmly press the shelf/rail back onto the sleeves until they lock into place.

Image 5.1: Detail of a mesh shelf, designed for ventilation and visibility.
Using Hanging Rails:
Utilize the two hanging rails for organizing garments such as shirts, dresses, and coats. Ensure clothes are hung evenly to maintain balance and prevent excessive strain on the rails.

Image 5.2: Detail of a hanging rail, suitable for various clothing items.
Utilizing Hooks:
The four individual hooks and one extra hook arm provide additional storage for accessories like bags, scarves, hats, or belts. Distribute items across the hooks to prevent overloading any single point.

Image 5.3: Detail of the hook arm for accessory storage.
Moving and Locking the Rack:
The rack is equipped with four smooth-rolling wheels for easy mobility. Two of these wheels have brakes. To move the rack, ensure both brakes are disengaged. To secure the rack in place, engage the brakes on the two locking wheels by pressing down on the lever.

Image 5.4: Detail of a locking wheel, showing its mobility and securing function.
6. Maintenance
To maintain the appearance and longevity of your clothes rack, follow these simple care instructions:
- Cleaning: Wipe the entire rack with a dry, soft cloth to remove dust and dirt. Avoid using abrasive cleaners or harsh chemicals, as these may damage the powder-coated finish.
- Inspection: Periodically check all connections, especially the cone sleeves, to ensure they remain tight and secure. Re-tighten if necessary.
- Wheel Care: Keep the wheels free of debris to ensure smooth rolling. If wheels become stiff, clean them and apply a small amount of silicone-based lubricant if needed.
7. Troubleshooting
- Rack feels wobbly: Ensure all cone sleeves are firmly pressed into place and all poles are fully inserted. Check that the anti-tip kit is correctly installed and secured to the wall. Distribute weight evenly.
- Wheels not rolling smoothly: Check for debris (hair, lint) caught in the wheels. Clean thoroughly. Ensure wheel brakes are disengaged.
- Difficulty adjusting shelves/rails: Ensure the cone sleeves are properly released before attempting to move the shelf/rail. If they are stuck, gently wiggle the component while applying upward pressure.
- Missing or damaged parts: Refer to the Package Contents section. If parts are missing or damaged upon arrival, do not proceed with assembly. Contact SONGMICS customer support for assistance.
8. Specifications
| Feature | Detail |
|---|---|
| Model Number | ULGR414B01 |
| Material | Alloy Steel (Powder-Coated) |
| Color | Ink Black |
| Product Dimensions (L x W x H) | 43.3 x 15.8 x 78.3 inches (110 x 40 x 199 cm) |
| Item Weight | 20.6 pounds (9.3 kg) |
| Maximum Recommended Load Capacity | 357 pounds (162 kg) total |
| Max. Load per Hanging Rail | 66 pounds (30 kg) |
| Max. Load per Shelf | 66 pounds (30 kg) |
| Max. Load per Hook | 3.3 pounds (1.5 kg) |
| Adjustability | Shelves and rails adjustable in 1-inch increments |
| Wheels | 4 wheels, 2 with brakes |
| Assembly | Tool-free, cone sleeve locking design |

Image 8.1: Detailed dimensions and load capacity specifications.
9. Warranty and Support
SONGMICS products are designed for quality and durability. For warranty information, product support, or to report missing/damaged parts, please refer to the contact information provided with your purchase or visit the official SONGMICS website. Please have your model number (ULGR414B01) and purchase details ready when contacting support.
Ask a question about this manual
Ask about setup, troubleshooting, compatibility, parts, safety, or missing instructions. Manuals+ will review the question and use this page’s manual context to help answer it.