Kubohogar 60"H-Square
Kubohogar 60" Tall Metal Pantry Cabinet User Manual
Model: 60"H-Square
1. Introduction
Thank you for choosing the Kubohogar 60" Tall Metal Pantry Cabinet. This manual provides essential information for the safe assembly, operation, and maintenance of your new storage cabinet. Please read these instructions thoroughly before beginning assembly and retain them for future reference.
2. Safety Information
WARNING:
- Always use the provided wall anchor kit to secure the cabinet to the wall. This prevents accidental tipping, especially in households with children or pets.
- Do not overload shelves beyond their stated capacity of 180 lbs per shelf. Overloading can compromise stability and lead to structural failure.
- Be cautious of pinch points when assembling or disassembling the metal cabinet, particularly around door hinges and moving parts.
- Always use appropriate safety gear, such as gloves, when handling heavy or sharp objects during assembly or relocation.
- Ensure the cabinet is placed on a level surface to maintain stability. Adjust the leveling feet as necessary.
3. Package Contents
Before assembly, verify that all components are present and undamaged. If any parts are missing or damaged, please contact customer support.
- Cabinet Panels (various sizes)
- Adjustable Shelves (4 included)
- Golden Handles (2 included)
- Assembly Hardware (screws, bolts, shelf clips, anti-tipping device)
- Instruction Manual
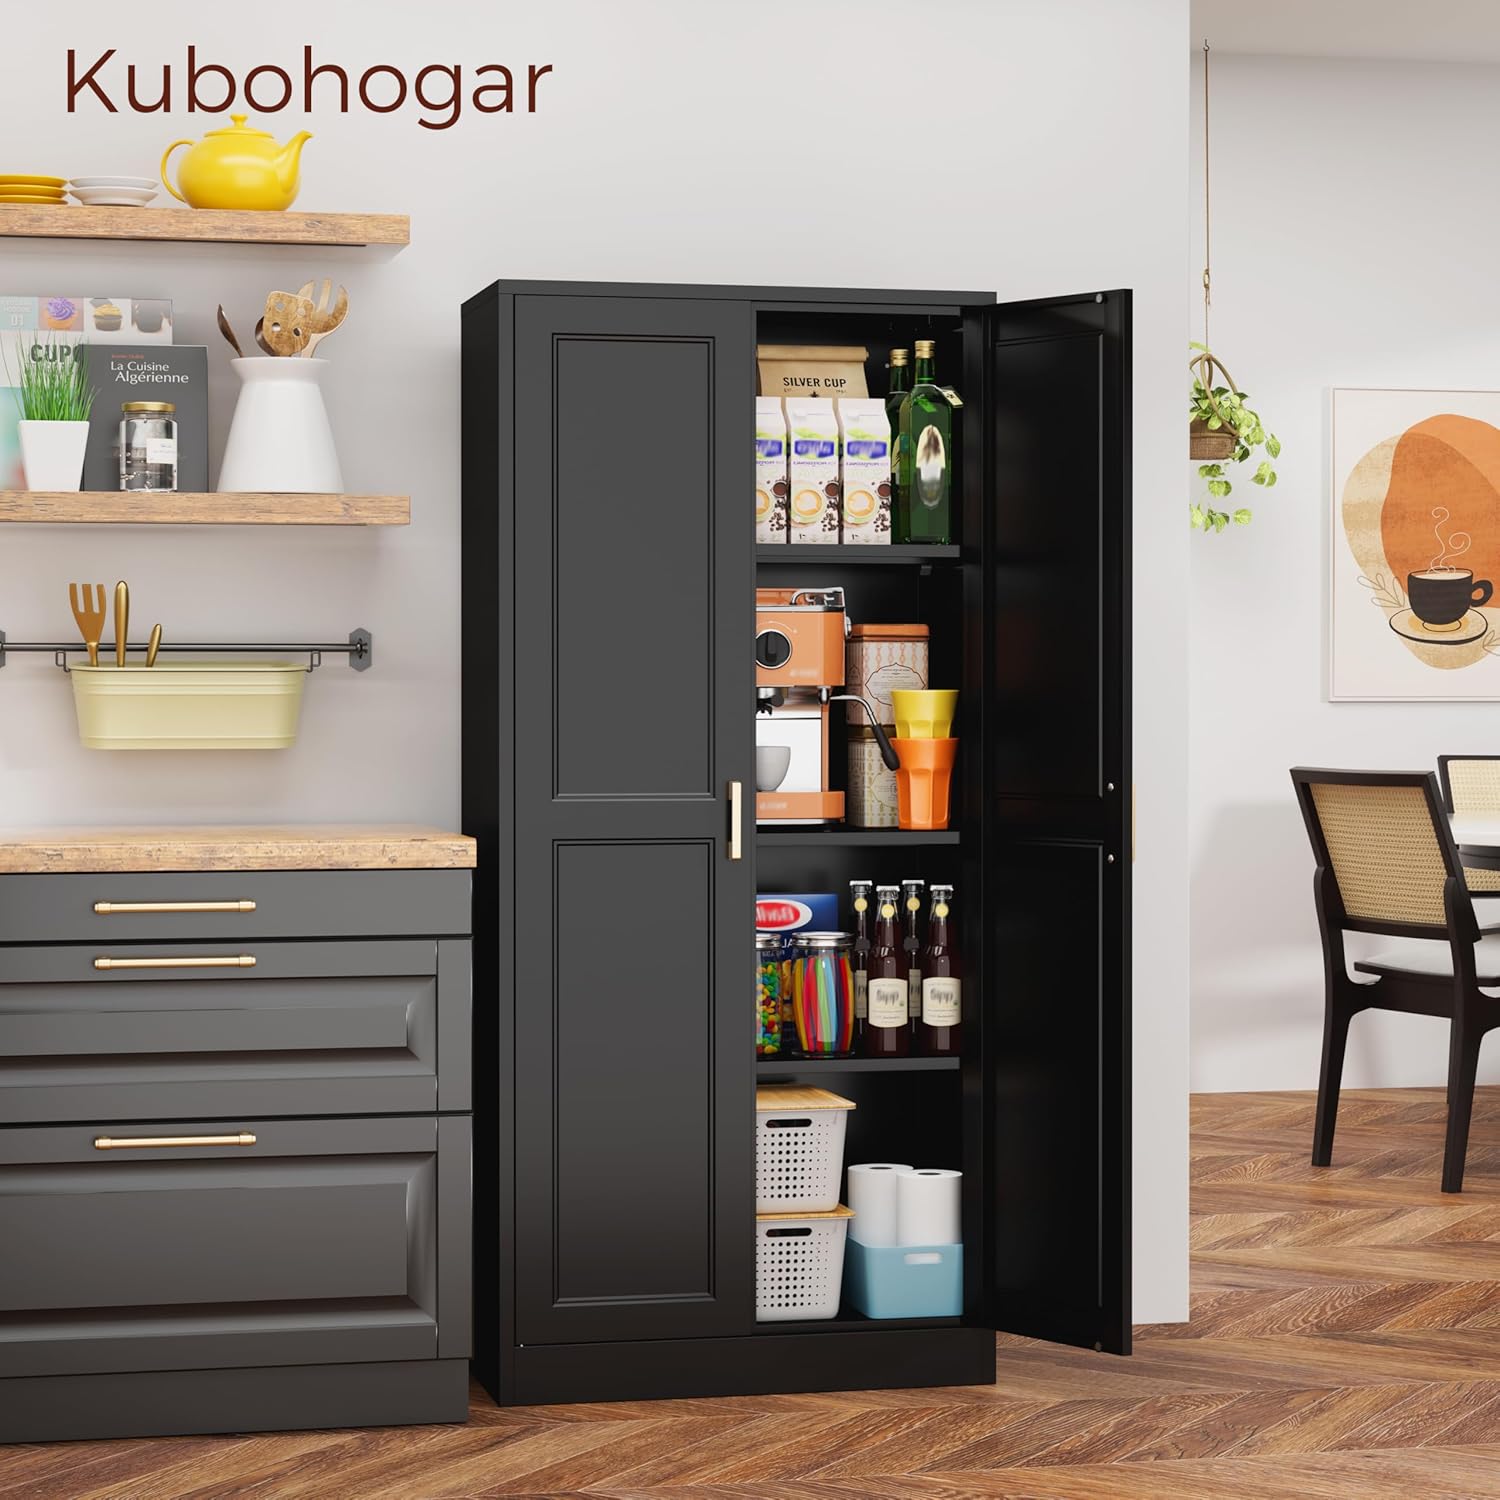
Figure 3.1: All components included in the package. Ensure all parts are present before proceeding.
4. Assembly Instructions
Assembly is straightforward with clearly labeled parts and step-by-step instructions. An electric screwdriver is recommended for faster assembly. Two people are recommended for certain steps to ensure stability and ease of construction.
4.1 Tools Required
- Phillips Head Screwdriver (manual or electric)
- Hammer (optional, for wall anchors)
- Level (optional, for final placement)
4.2 Step-by-Step Guide
- Unpack and Identify Parts: Lay out all panels and hardware. Each part is labeled with a letter for easy identification. Refer to the package contents diagram (Figure 3.1).
- Assemble Base: Attach the bottom panel to the side panels using the designated screws. Ensure the adjustable feet are installed at this stage.
- Attach Back Panel: Secure the back panel to the assembled sides and base.
- Install Top Panel: Fasten the top panel to complete the main frame of the cabinet.
- Insert Shelf Clips: Place the shelf clips into the desired slots on the side panels. The shelves are adjustable to accommodate various item heights.
- Place Shelves: Carefully slide the four adjustable shelves onto the installed clips. Each shelf can support up to 180 lbs.
- Attach Doors: Mount the two doors to the cabinet frame using the provided hinges. Ensure they open and close smoothly.
- Install Handles: Secure the golden handles to the exterior of the doors.
- Install Anti-Tipping Device: For safety, attach the anti-tipping device to the top rear of the cabinet and secure it to a wall stud using the wall anchor kit.

Figure 4.1: Product details highlighting metal handles, anti-tip design, magnetic door stopper, and adjustable feet.
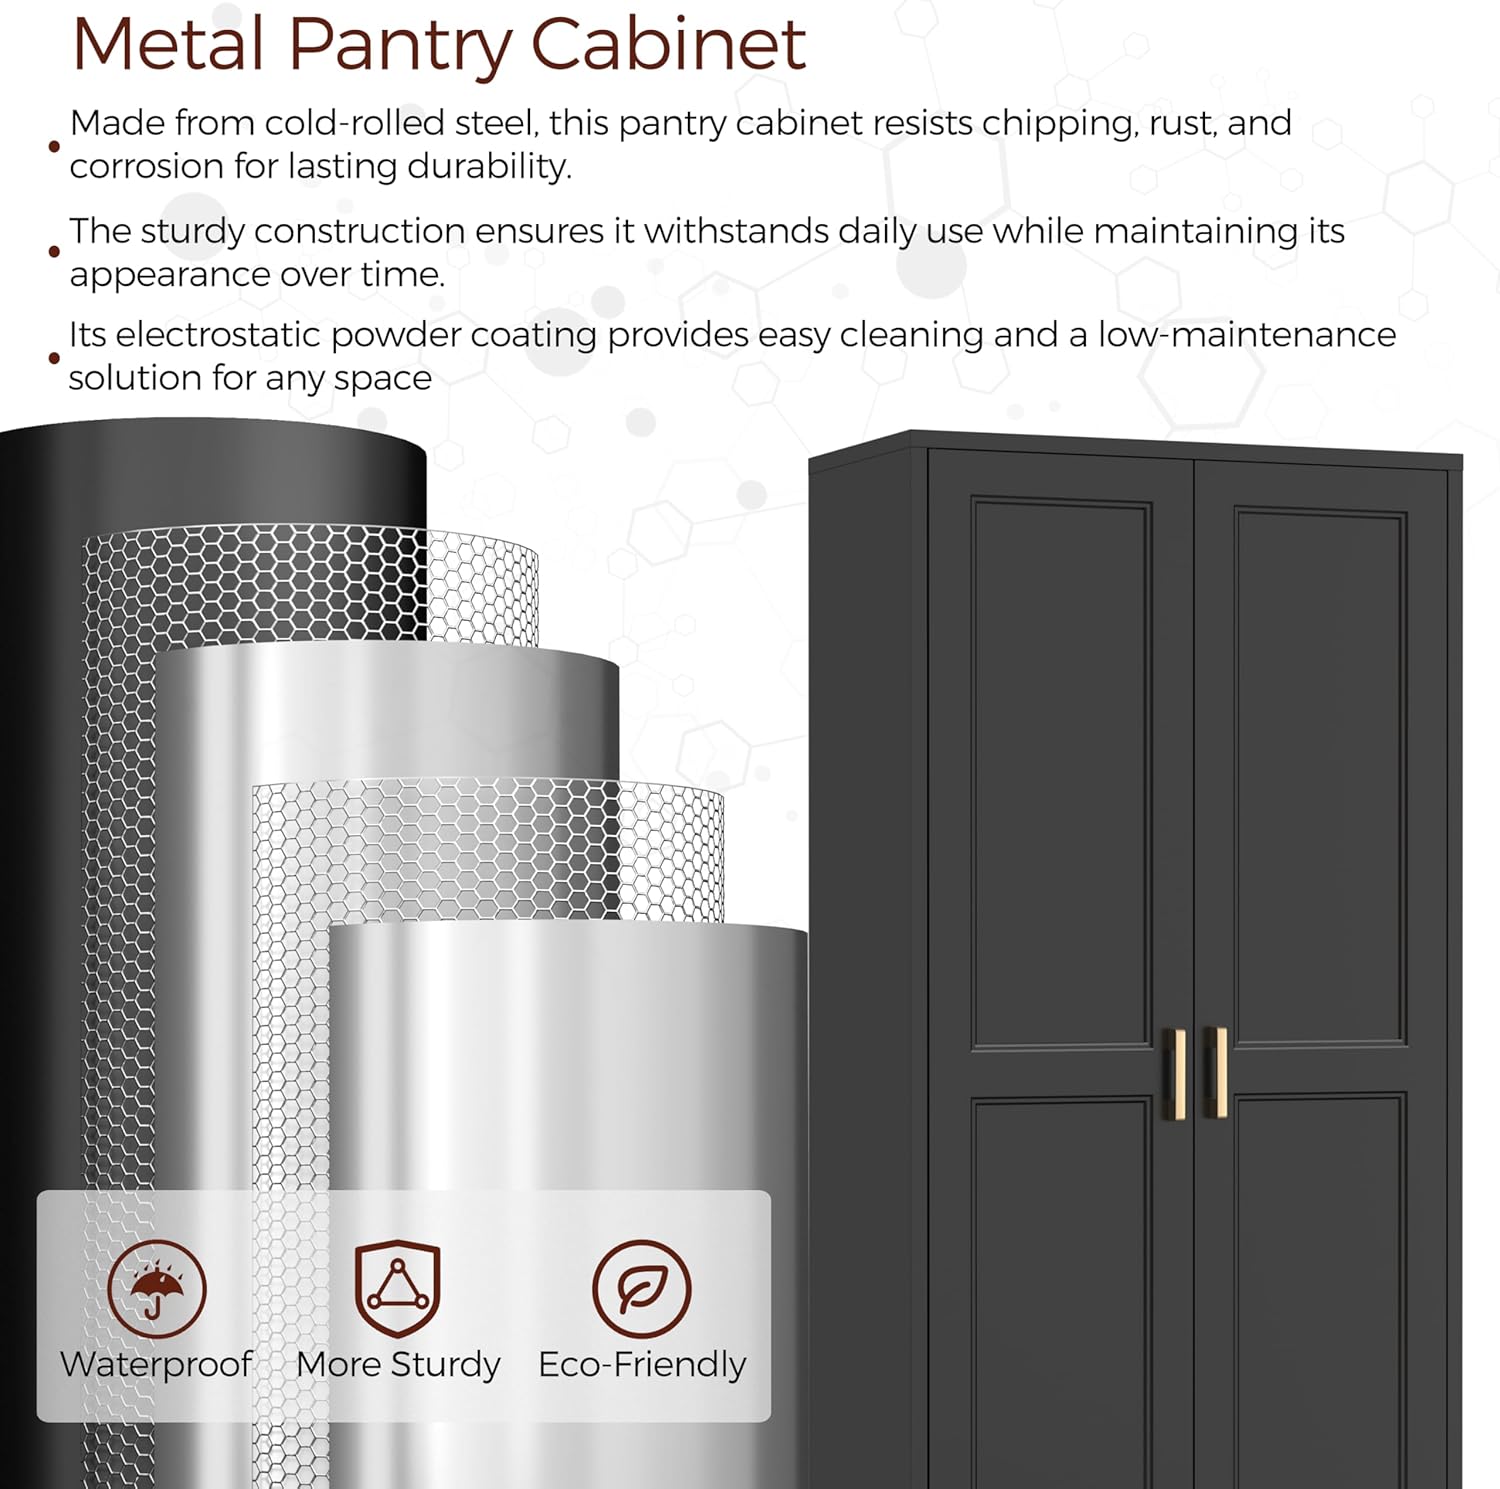
Figure 4.2: Illustration of adjustable and removable shelves, demonstrating how to customize storage space.

Figure 4.3: Depiction of the cold-rolled steel construction, emphasizing durability, rust resistance, and easy cleaning.

Figure 4.4: Visual representation of the easy assembly process, indicating that a paper manual and installation video are available.
4.3 Assembly Video
Video 4.1: Official Kubohogar Pantry Cabinet Assembly Video. This video provides a visual guide to the assembly process, demonstrating key steps and tips for efficient setup.
Video 4.2: Kubohogar Kitchen Pantry Cabinet, Metal Storage Cabinet. This video showcases the cabinet's features and assembly in a kitchen setting, offering practical insights.
Video 4.3: 71-Inch Pantry Cabinet Video. While this video features a slightly different size (71-inch), the assembly principles and features are largely applicable to the 60-inch model.
5. Usage and Operation
The Kubohogar Metal Pantry Cabinet is designed for versatile storage in various rooms.
5.1 Adjusting Shelves
To adjust a shelf, carefully remove all items from the shelf. Lift the shelf slightly and remove the four shelf clips from their current positions. Reinsert the clips into the desired slots at the new height, ensuring they are securely seated. Then, place the shelf back onto the clips.
5.2 Recommended Uses
- Kitchen: Store cookware, cutlery, plates, pots, tableware, utensils, and pantry items.
- Dining Room: Display decorative items or store dining essentials.
- Living Room: Organize books, media, or other household items.
- Bathroom: Store cleaning supplies, towels, and toiletries.
- Office: File documents, store office supplies, or organize equipment.

Figure 5.1: The Kubohogar 60" Tall Metal Pantry Cabinet shown both closed and open, displaying its storage capacity for various kitchen items.

Figure 5.2: The cabinet utilized in a laundry room, demonstrating its suitability for storing cleaning supplies and folded linens.

Figure 5.3: The cabinet integrated into an office environment, showcasing its use for organizing files and office equipment.
6. Maintenance
To ensure the longevity and appearance of your Kubohogar Metal Pantry Cabinet, follow these maintenance guidelines:
- Cleaning: Wipe surfaces with a soft, damp cloth and a mild detergent. Avoid abrasive cleaners or harsh chemicals, as these can damage the electrostatic powder coating.
- Dusting: Regularly dust the cabinet with a dry, soft cloth to prevent buildup.
- Inspection: Periodically check all screws and connections to ensure they remain tight. Retighten if necessary.
- Shelf Capacity: Adhere to the maximum weight capacity of 180 lbs per shelf to prevent warping or damage.
7. Troubleshooting
If you encounter any issues with your cabinet, refer to the following common problems and solutions:
| Problem | Possible Cause | Solution |
|---|---|---|
| Cabinet is wobbly/unstable. | Uneven floor; loose connections; anti-tipping device not installed. | Adjust leveling feet. Tighten all screws. Install the anti-tipping device securely to the wall. |
| Doors do not close properly. | Misaligned hinges; magnetic door stopper not engaging. | Check and adjust hinge alignment. Ensure the magnetic door stopper is correctly positioned and functional. |
| Shelves sag or bend. | Overloaded shelf; incorrect shelf clip installation. | Reduce weight on the shelf. Reinstall shelf clips, ensuring they are fully seated in the slots. |
If the problem persists or if you encounter an issue not listed here, please contact Kubohogar customer support for assistance.
8. Specifications
| Feature | Detail |
|---|---|
| Brand | Kubohogar |
| Model | 60"H-Square |
| Product Dimensions | 14"D x 28"W x 60"H |
| Material | Cold-Rolled Steel |
| Color | Black |
| Number of Shelves | 4 (Adjustable) |
| Weight Limit per Shelf | 180 lbs |
| Total Weight Limit | 720 lbs |
| Mounting Type | Floor Mount (with anti-tipping device for wall anchoring) |
| Assembly Required | Yes |
9. Warranty and Support
For any questions, missing parts, or assistance with assembly, please contact Kubohogar customer support. Refer to the contact information provided with your purchase or on the official Kubohogar website.
Information regarding product warranty is typically included with your purchase documentation. Please retain your proof of purchase for warranty claims.
- Customer Support: Refer to your product packaging or the Kubohogar website for contact details.
- Online Resources: Additional assembly videos and FAQs may be available on the Kubohogar official website.