
1. Introduction
This manual provides detailed instructions for the proper use and maintenance of your TKWSER Z095-M1 Night Vision Device. This device is designed for observation in low light conditions or complete darkness, featuring 4K video recording, 36MP photo capture, 8X digital zoom, and a 600m viewing range. Please read this manual thoroughly before operating the device to ensure optimal performance and longevity.
2. Package Contents
Verify that all items listed below are present in your package:
- 1 x TKWSER Z095-M1 Night Vision Binoculars
- 1 x Neck Strap
- 1 x Carrying Bag
- 1 x 32GB TF Card
- 1 x Card Reader
- 1 x USB Charging Cable
- 1 x User Manual (this document)
3. Product Overview
Familiarize yourself with the main components of your TKWSER Z095-M1 Night Vision Device.
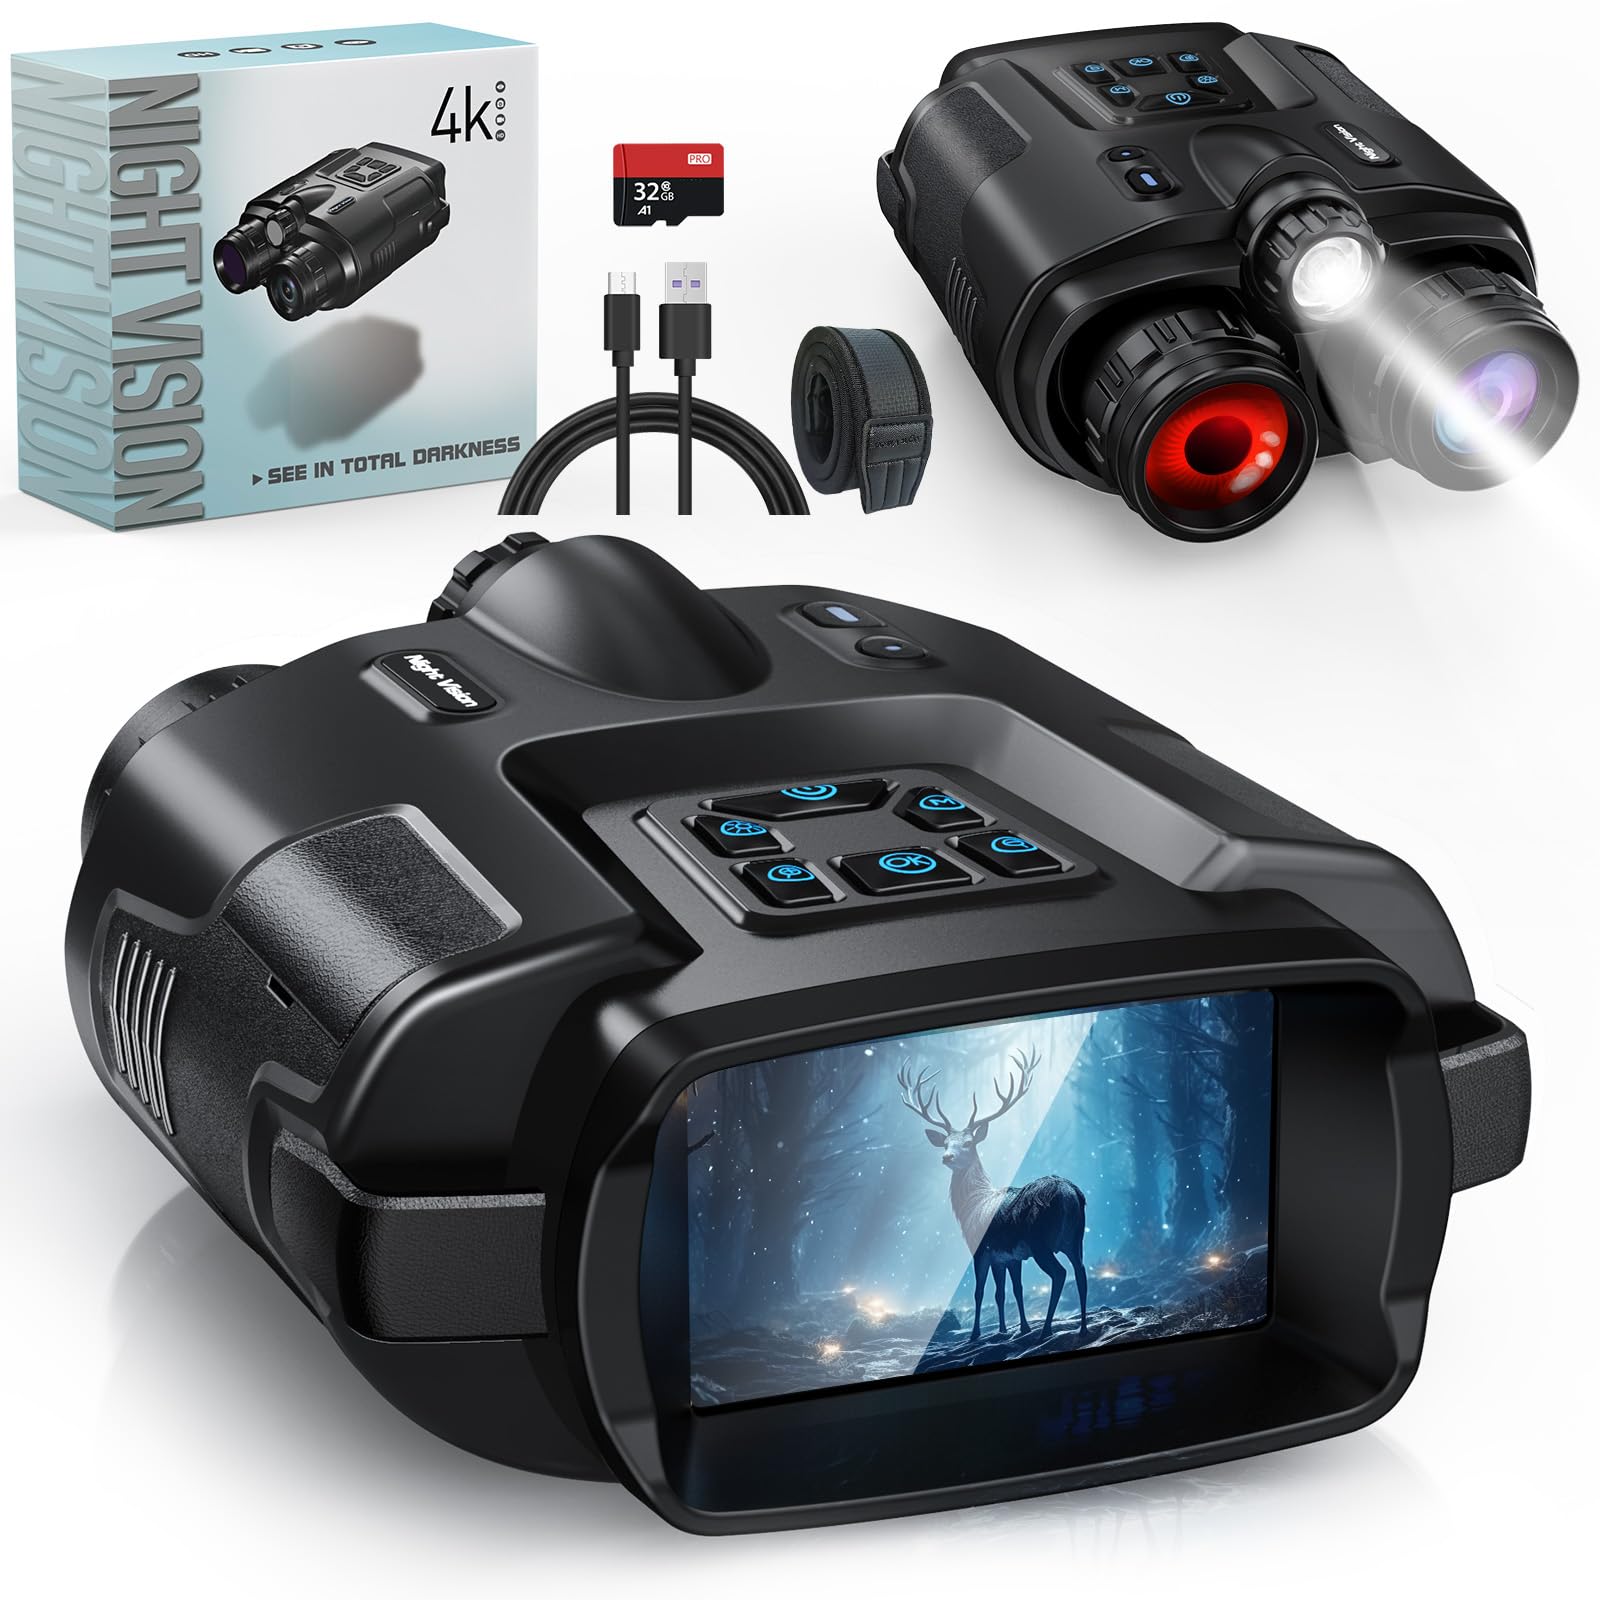
Figure 3.1: Front view of the TKWSER Z095-M1 Night Vision Device. This image shows the objective lenses, infrared illuminator, and the general ergonomic design of the binoculars.
Key Components:
- Objective Lenses: Collect ambient light and infrared light.
- Infrared (IR) Illuminator: Provides invisible light for enhanced viewing in complete darkness.
- Eyepiece/Display Screen: 3-inch HD screen for viewing images and videos.
- Control Buttons: Power, IR level adjustment, Zoom, Menu, Photo/Video capture.
- Battery Compartment/Charging Port: Houses the 5000mAh rechargeable battery and USB charging port.
- TF Card Slot: For inserting the 32GB TF card to store photos and videos.
- Tripod Mount: 1/4-inch threaded mount for attaching to a tripod.
4. Setup
4.1 Charging the Device
- Locate the USB charging port on the device.
- Connect the provided USB charging cable to the device and a compatible USB power adapter (not included) or computer USB port.
- The charging indicator light will illuminate. A full charge typically takes several hours.
- Once fully charged, the indicator light will change or turn off. Disconnect the charging cable.
Note: The device features a 5000mAh rechargeable battery for extended use.
4.2 Inserting the TF Card
- Ensure the device is powered off.
- Locate the TF card slot, usually protected by a rubber cover.
- Gently insert the included 32GB TF card into the slot with the gold contacts facing the correct direction (refer to the diagram on the device if available).
- Push the card in until it clicks into place. To remove, push it again until it springs out.
Important: Always power off the device before inserting or removing the TF card to prevent data corruption.
4.3 Attaching the Neck Strap
- Thread the neck strap through the designated attachment points on the sides of the device.
- Secure the strap firmly to prevent accidental drops.
5. Operating Instructions
5.1 Powering On/Off
- To Power On: Press and hold the Power button for approximately 3 seconds until the screen illuminates.
- To Power Off: Press and hold the Power button again for approximately 3 seconds until the screen turns off.
5.2 Adjusting Focus and Zoom
- Focus: Rotate the objective lens ring (if applicable) or the eyepiece diopter adjustment to achieve a clear image.
- Digital Zoom: Use the dedicated Zoom buttons (often marked with '+' and '-') to adjust the 8X digital magnification.
5.3 Day and Night Mode Operation
- The device automatically adjusts to ambient light conditions.
- In low light or complete darkness, activate the Infrared (IR) illuminator by pressing the IR button. Multiple levels of IR intensity may be available; cycle through them to find the optimal setting for your environment.
- The IR illuminator provides clear vision up to 600 meters in total darkness.
5.4 Capturing Photos and Videos
- Switching Modes: Use the Mode button to toggle between Photo mode and Video recording mode.
- Taking Photos: In Photo mode, press the Shutter button to capture a 36MP image.
- Recording Videos: In Video mode, press the Record button to start recording 4K HD video. Press it again to stop recording.
- All captured media will be saved to the inserted 32GB TF card.
5.5 Menu Navigation
- Press the Menu button to access settings such as resolution, date/time, language, and format TF card.
- Use the navigation buttons (often the zoom buttons or dedicated arrow keys) to scroll through options.
- Press the OK/Enter button to select an option or confirm a setting.
- Press the Menu button again to exit the menu.
6. Maintenance
6.1 Cleaning the Lenses and Body
- Use a soft, lint-free cloth specifically designed for optical lenses to clean the objective lenses and eyepiece.
- For stubborn smudges, a small amount of lens cleaning solution can be applied to the cloth (never directly to the lens).
- Wipe the device body with a soft, damp cloth. Avoid harsh chemicals or abrasive materials.
6.2 Battery Care
- Charge the device regularly, even if not in frequent use, to maintain battery health.
- Avoid completely draining the battery before recharging.
- Do not expose the device to extreme temperatures, as this can affect battery performance and lifespan.
6.3 Storage
- Store the device in its carrying bag in a cool, dry place away from direct sunlight and moisture.
- Ensure the lens caps are on to protect the lenses from dust and scratches.
6.4 Water Resistance
The TKWSER Z095-M1 is rated IP65 for water resistance, meaning it is protected against dust ingress and low-pressure water jets from any direction. It is not designed for submersion. Avoid exposing the device to heavy rain or submerging it in water.
7. Troubleshooting
| Problem | Possible Cause | Solution |
|---|---|---|
| Device does not power on. | Battery is depleted. | Charge the device fully using the provided USB cable. |
| Poor image quality / Blurry image. | Incorrect focus adjustment; Dirty lenses; Insufficient IR illumination. | Adjust the focus ring. Clean the lenses. Increase IR intensity or ensure IR is active in dark conditions. |
| Cannot record photos/videos. | TF card is full; TF card is not inserted correctly; TF card is corrupted. | Delete unnecessary files or replace the TF card. Reinsert the TF card. Format the TF card via the device menu (this will erase all data). |
| IR illuminator not working. | IR function is not activated; Battery low. | Press the IR button to activate/cycle through IR levels. Charge the device. |
8. Specifications
| Feature | Detail |
|---|---|
| Model Name | Z095-M1 |
| Brand | TKWSER |
| Color | Grey |
| Dimensions (L x W x H) | 17.8L x 7.5W x 13.7H cm |
| Material | Plastic |
| Max Magnification | 8X (Digital Zoom) |
| Objective Lens Diameter | 30 mm |
| Night Vision Capability | Yes, Infrared (IR) |
| Viewing Range (Darkness) | Up to 600 meters |
| Battery Capacity | 5000 mAh (Rechargeable) |
| Video Resolution | 4K HD |
| Photo Resolution | 36 MP |
| Display Screen | 3-inch HD |
| Water Resistance | IP65 |
| Storage | Supports TF card (32GB included) |
| Tripod Mount | 1/4 inch |
| UPC | 768904687115 |
9. Warranty and Support
9.1 Product Warranty
The TKWSER Z095-M1 Night Vision Device comes with a 2-year warranty from the date of purchase. This warranty covers manufacturing defects and malfunctions under normal use. It does not cover damage caused by misuse, accidents, unauthorized modifications, or natural disasters. Please retain your proof of purchase for warranty claims.
9.2 Customer Support
For technical assistance, troubleshooting, or warranty inquiries, please contact TKWSER customer support. Refer to the contact information provided on the product packaging or the official TKWSER website for the most up-to-date support channels.