1. Introduction
The waveshare ESP32-S3 1.85-inch Round Touch Display Development Board is a versatile microcontroller development board featuring 2.4GHz WiFi and Bluetooth BLE 5 support. It integrates high-capacity Flash and PSRAM, along with a 1.85-inch LCD display capable of running GUI programs like LVGL. This board is designed for rapid development of Human-Machine Interface (HMI) and other ESP32-S3 applications, offering various peripheral interfaces and an optional capacitive touch function.
2. Key Features
- Equipped with a high-performance Xtensa 32-bit LX7 dual-core processor, operating up to 240MHz.
- Supports 2.4GHz Wi-Fi (802.11 b/g/n) and Bluetooth 5 (LE) with an onboard antenna.
- Built-in 512KB SRAM and 384KB ROM, with onboard 16MB Flash and 8MB PSRAM.
- Features a 1.85-inch IPS LCD display with 360×360 resolution and 262K colors.
- Optional capacitive touch function controlled via I2C interface, with interrupt support for flexible operation.
- Adapts UART, I2C, and various GPIO interfaces for peripheral expansion.
- Includes an onboard audio decoder, Microphone, QMI8658 6-axis sensor, RTC sensor, TF card slot, and battery recharge management module.
- Supports accurate control for flexible clock and multiple power modes to achieve low power consumption.
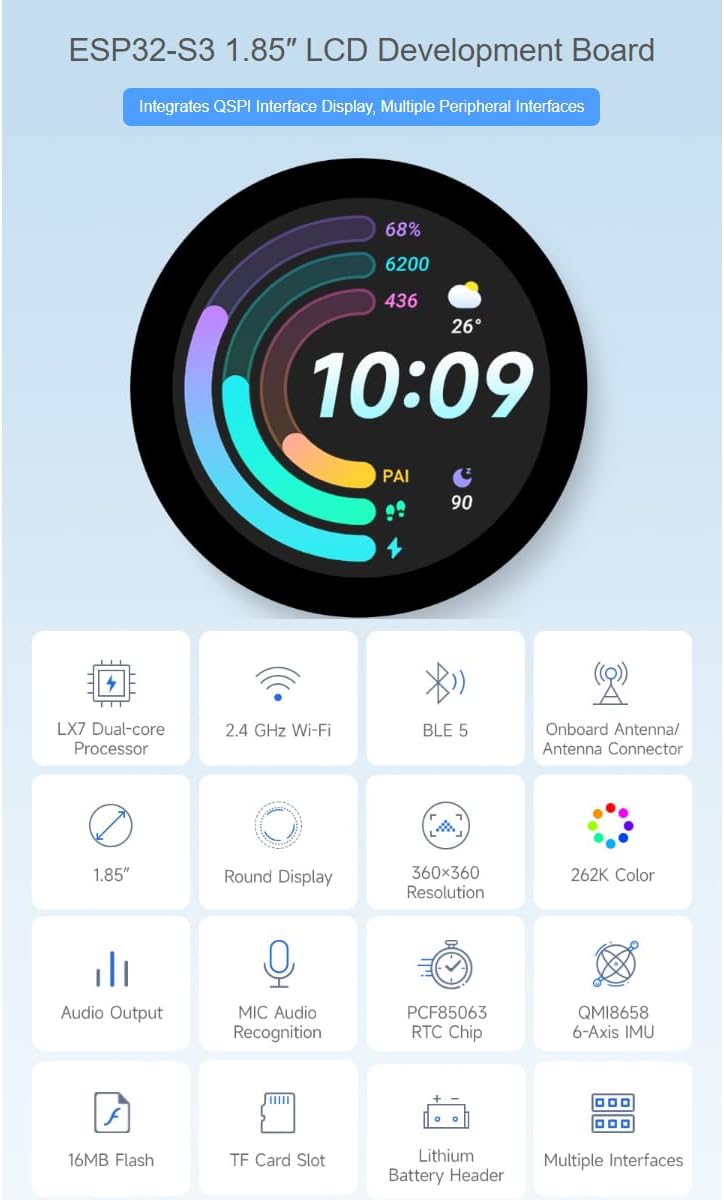
Figure 2.1: Overview of the ESP32-S3 1.85-inch LCD Development Board's main features, including LX7 Dual-core Processor, 2.4 GHz Wi-Fi, BLE 5, Onboard Antenna, 1.85-inch Round Display, 360x360 Resolution, 262K Color, Audio Output, MIC Audio Recognition, PCF85063 RTC Chip, QMI8658 6-Axis IMU, 16MB Flash, TF Card Slot, Lithium Battery Header, and Multiple Interfaces.
3. Product Overview: What's On Board
This section details the components and interfaces available on the ESP32-S3 1.85-inch Round Touch Display Development Board.

Figure 3.1: Labeled diagram of the ESP32-S3 1.85-inch LCD Development Board components.
- ESP32-S3R8: Dual-core processor, up to 240MHz operating frequency.
- 16MB Flash: For program storage.
- QMI8658 6-axis sensor: Includes a 3-axis gyroscope and a 3-axis accelerometer.
- TCA9554PWR: GPIO expander chip.
- PCM5101 audio decoder.
- Amplifier chip.
- Battery recharge management.
- ME6217C33MG5G: Low dropout regulator, 800mA output (Max.).
- PCF85063 RTC chip.
- Onboard ceramic antenna.
- IPEX1 connector: For switching to external antenna via resoldering an onboard resistor.
- TF card slot.
- Speaker header: Connects with 8Ω 2W 2030 speaker.
- Volume adjustment knob.
- Microphone.
- UART header: Only available when UART Type-C port is not connected.
- Power indicator.
- USB Type-C port.
- RTC battery header: For connecting rechargeable RTC battery.
- Charge indicator: Lithium battery charge indicator. Lights up when charging, off when fully charged (the light status is uncertain when the battery is not connected).
- I2C header: Connecting with internal chip, only supports the I2C peripherals and cannot be mapped to other functions.
- RESET button.
- BOOT button.
- MX1.25 battery header: MX1.25 2PIN connector, for 3.7V Lithium battery, supports charging and discharging.
- Battery power supply control button.
4. Setup Instructions
To begin using your ESP32-S3 development board, follow these general setup guidelines:
4.1. Initial Connection
- Connect the development board to your computer using a USB Type-C cable via the onboard USB Type-C port (18).
- Ensure your computer recognizes the device. You may need to install appropriate USB drivers for the ESP32-S3 if not automatically detected.
- The power indicator (17) should illuminate, indicating the board is receiving power.
4.2. Peripheral Expansion
The board supports the expansion of multiple peripherals via GPIO and I2C interfaces. Refer to the pinout diagram for specific connections.

Figure 4.1: Diagram illustrating peripheral connection points on the ESP32-S3 development board, including GND, 3V3, SDA (GPIO11), SCL (GPIO10), RXD (GPIO44), and TXD (GPIO43).
- I2C Interface: Use the I2C header (21) for connecting I2C-compatible sensors or modules. Note that this header is primarily for internal chip communication and may not support mapping to other functions.
- UART Interface: The UART header (16) is available for serial communication, provided the USB Type-C port is not actively used for UART.
- Audio: Connect the provided 8Ω 2W speaker to the speaker header (13) for audio output.
- TF Card: Insert a TF card into the TF card slot (12) for additional storage.
- Battery: Connect a 3.7V Lithium battery to the MX1.25 battery header (24) for portable operation. Ensure the battery power supply control button (25) is in the correct position.
4.3. Development Environment
To program the board, you will need to set up a suitable development environment. This typically involves:
- Installing the ESP-IDF (Espressif IoT Development Framework) or Arduino IDE with ESP32-S3 board support.
- Referencing the official waveshare documentation and examples for specific programming instructions and library usage.
5. Operating Instructions
The ESP32-S3 development board is designed for various applications, particularly those requiring a compact display and touch interface.
5.1. Application Scenarios
The board's capabilities make it suitable for diverse projects:

Figure 5.1: Examples of application scenarios for the ESP32-S3 development board, including image and audio outputs, multiple inputs, and human-machine interface.
- Image and Audio Outputs: Utilize the display and audio capabilities for information output, such as displaying graphics, data, or playing sound.
- Multiple Inputs: Integrate touch, button, and voice recognition for interactive control of equipment.
- Human-Machine Interface (HMI): Develop intuitive user interfaces for various devices, transforming internal system information into a user-friendly format.
5.2. Capacitive Touch Function
For models equipped with the capacitive touch function, interaction is intuitive and responsive.
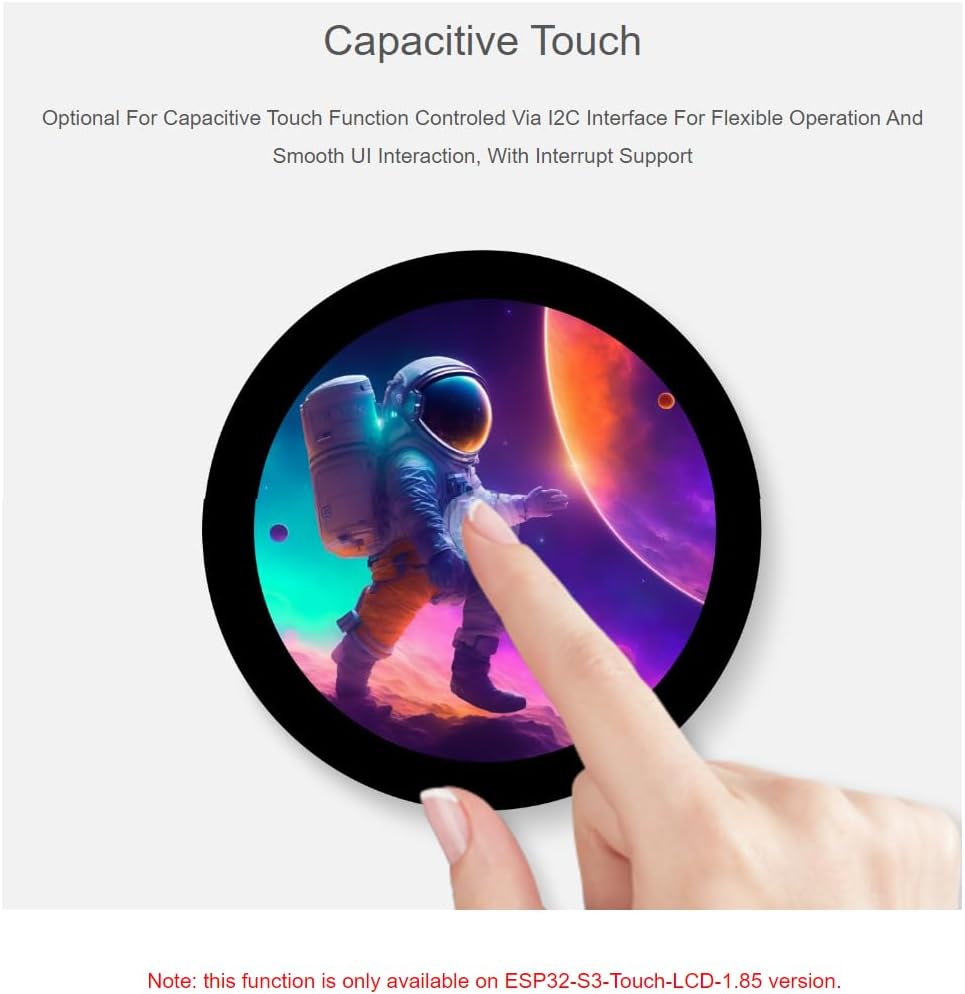
Figure 5.2: Illustration of the capacitive touch functionality on the ESP32-S3 1.85-inch Round Touch Display. This feature is optional and available on the ESP32-S3-Touch-LCD-1.85 version.
- The touch function is controlled via the I2C interface and supports interrupt-driven events.
- This allows for flexible operation and smooth user interface interactions.
- Note: This function is only available on the ESP32-S3-Touch-LCD-1.85 version of the board.
5.3. LVGL GUI Development
The board is well-suited for developing graphical user interfaces using LVGL, a free and open-source graphics library.
- LVGL provides tools for creating embedded GUIs with visual effects and low memory requirements.
- Refer to the official LVGL documentation and waveshare examples for guidance on integrating LVGL with the ESP32-S3.
6. Technical Specifications
| Feature | Specification |
|---|---|
| Brand | waveshare |
| Model Name | ESP32-S3 1.85inch Round Touch Display Development Board |
| Processor | Xtensa 32-bit LX7 Dual-core |
| CPU Speed | 240 MHz |
| RAM Memory Installed Size | 512 KB (SRAM) |
| Memory Storage Capacity | 16 MB (Flash), 8 MB (PSRAM) |
| Display Size | 1.85 inches |
| Display Resolution | 360×360 pixels |
| Display Color Depth | 262K Color |
| Display Control Chip | ST77916 |
| Connectivity Technology | Wi-Fi 802.11 b/g/n, Bluetooth 5 (LE) |
| Operating System Support | Linux (for development environment) |
| Sensors | QMI8658 6-axis sensor (gyroscope, accelerometer), RTC sensor |
| Interfaces | UART, I2C, GPIO, USB Type-C (1 port), TF Card Slot |
| Audio | Onboard audio decoder, Microphone, Speaker header |
| Power Management | Battery recharge management module, MX1.25 battery header |
| Item Weight | 0.03 Kilograms |
| UPC | 788046389180 |
| ASIN | B0DK6NH6T |
7. Maintenance
Proper care and maintenance will ensure the longevity and optimal performance of your development board.
- Handling: Always handle the board by its edges to avoid touching sensitive components, which can be damaged by static electricity or oils from your skin.
- Cleaning: Use a soft, dry brush or compressed air to remove dust from the board. For stubborn dirt, a lint-free cloth lightly dampened with isopropyl alcohol can be used, ensuring the board is powered off and completely dry before re-powering.
- Storage: Store the board in an anti-static bag when not in use, in a cool, dry environment away from direct sunlight and extreme temperatures.
- Power Supply: Use only recommended power sources (e.g., USB Type-C or 3.7V Lithium battery) to prevent damage.
- Firmware Updates: Regularly check the waveshare official website or community forums for firmware updates that may improve performance or add new features.
8. Troubleshooting
If you encounter issues with your ESP32-S3 development board, consider the following troubleshooting steps:
- Board Not Powering On:
- Ensure the USB Type-C cable is securely connected to both the board and your computer/power adapter.
- Verify the power source is functional.
- If using a battery, ensure it is charged and properly connected to the MX1.25 header, and the battery power supply control button (25) is engaged.
- Computer Not Recognizing Board:
- Try a different USB Type-C cable and port on your computer.
- Install or update the necessary USB-to-serial drivers (e.g., CP210x or CH340 drivers, depending on the onboard chip).
- Restart your computer.
- Code Not Compiling/Uploading:
- Ensure your development environment (ESP-IDF, Arduino IDE) is correctly configured for the ESP32-S3 board.
- Check that all required libraries are installed and up to date.
- Verify the correct COM port is selected in your IDE.
- Press and hold the BOOT button (23) while pressing and releasing the RESET button (22) to enter bootloader mode for flashing, then release BOOT.
- Display Issues:
- Confirm that the display initialization code in your program is correct.
- Check for any loose connections if the display is not integrated directly.
- Capacitive Touch Not Responding:
- Ensure your board version supports capacitive touch (ESP32-S3-Touch-LCD-1.85).
- Verify the I2C communication and touch controller initialization in your code.
- Lack of Documentation: While this manual provides an overview, for in-depth programming and specific examples, it is recommended to consult the official waveshare product page, their Wiki, and community forums.
9. Outline Dimensions
The physical dimensions of the ESP32-S3 1.85-inch Round Touch Display Development Board are provided below for integration and enclosure design purposes.

Figure 9.1: Detailed outline dimensions of the ESP32-S3 1.85-inch Round Touch Display Development Board, with measurements in millimeters (mm).
10. Warranty and Support
For warranty information, technical support, and additional resources, please refer to the official waveshare website or contact their customer service directly. Detailed documentation, example code, and community forums are often available to assist with development and troubleshooting.
Manufacturer: Waveshare
Contact: Please visit the waveshare Store on Amazon or their official website for support.