1. Introduction
Thank you for choosing the equlup Bikes Pedal Extender. This product is designed to enhance your cycling comfort and performance by increasing the distance between your pedals and crank arms. This can help prevent knee strain and reduce friction between your knees and the bike frame or rear wheel, making your rides more enjoyable, especially for riders who require a wider stance.
This manual provides detailed instructions for the proper installation, usage, and maintenance of your pedal extenders. Please read it carefully before installation and retain it for future reference.
2. Product Overview and Components
The equlup Bikes Pedal Extenders are crafted from durable titanium alloy, ensuring a long service life and resistance to wear. Each extender provides an additional 16mm (0.6 inches) of pedal shaft length.
Package Contents:
- 1 x Left Pedal Extender (Shaft Core)
- 1 x Right Pedal Extender (Shaft Core)
- 2 x Protective Gaskets (Washers)

Image 2.1: Overview of the equlup pedal extenders and accompanying washers. Note the 'L' and 'R' markings for left and right pedals.
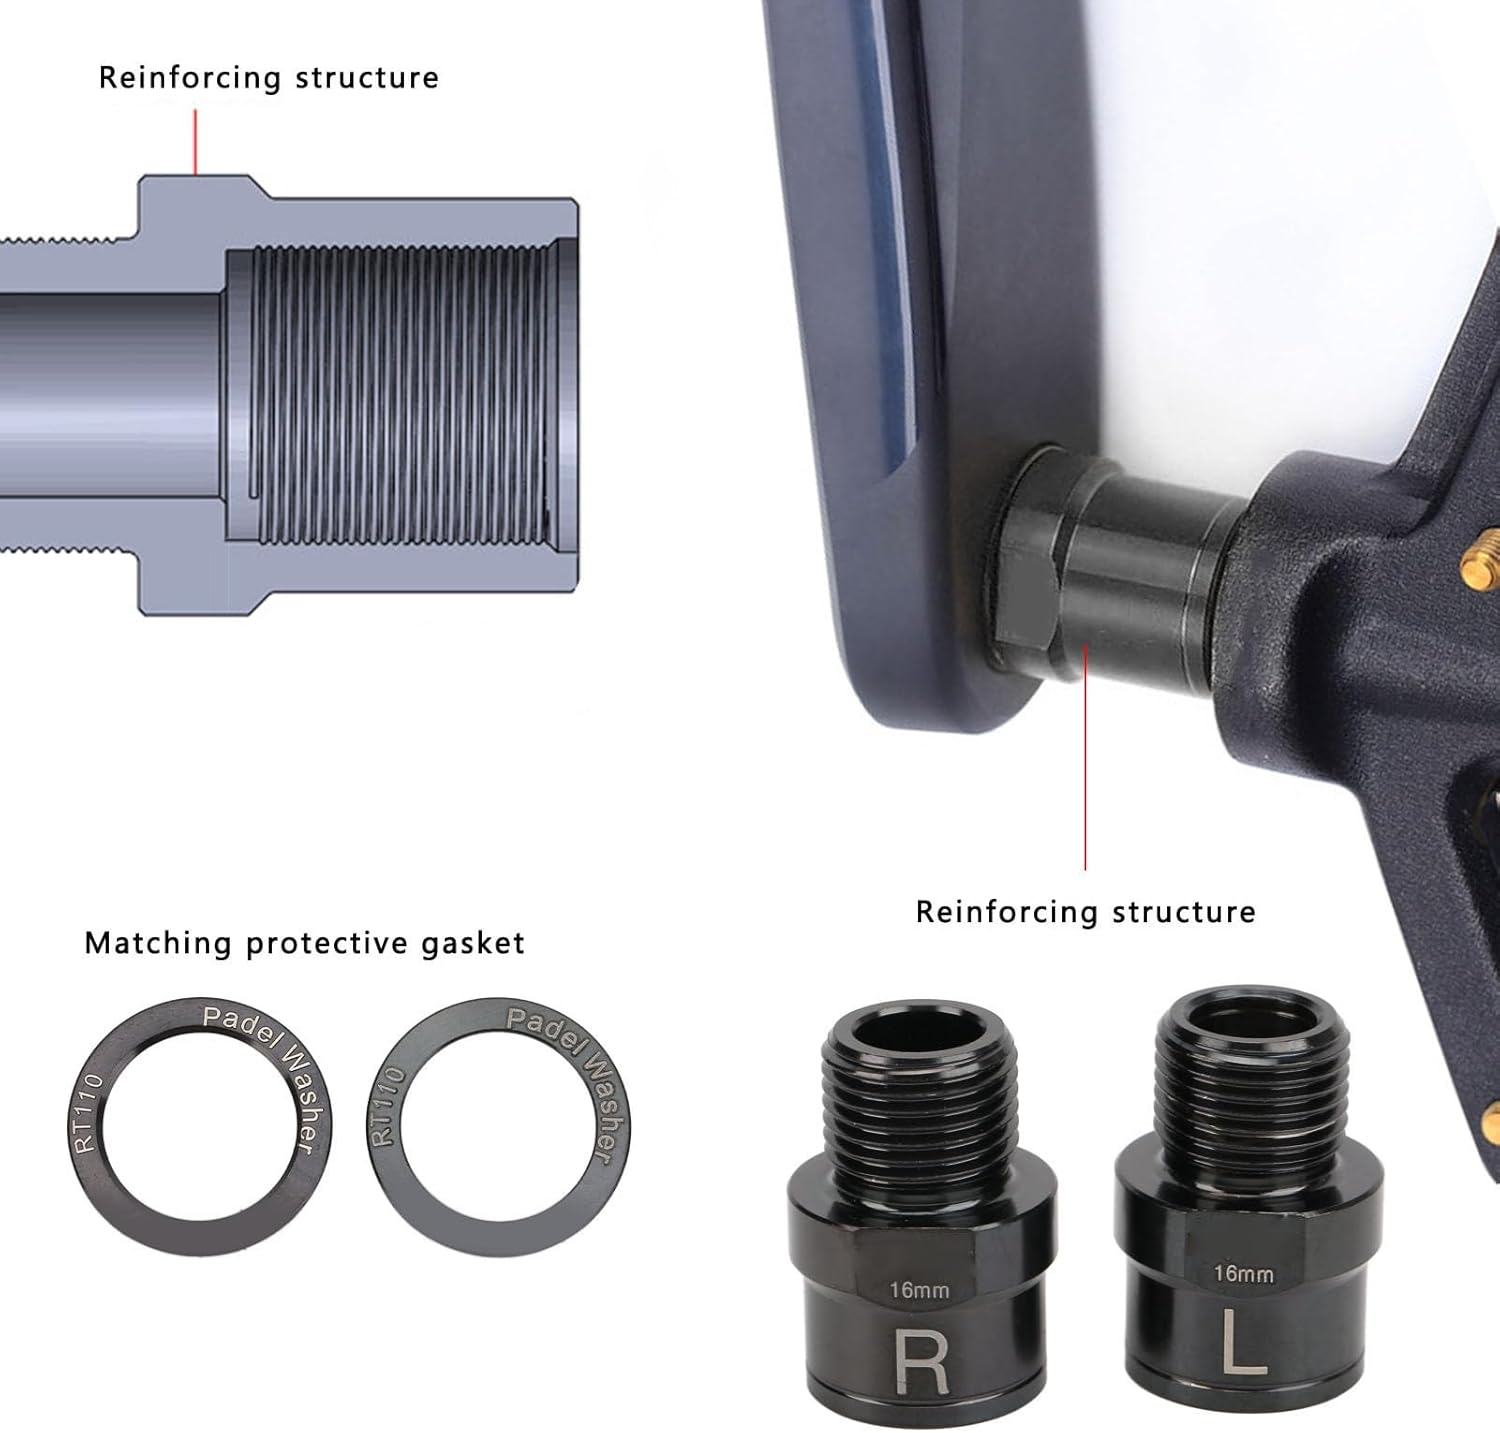
Image 2.2: Diagram illustrating the internal reinforcing structure of the pedal extender and the matching protective gasket, designed to prevent thread wear.
3. Setup and Installation
Proper installation is crucial for the safety and performance of your pedal extenders. Please follow these steps carefully.
Tools Required:
- 18mm fixed wrench or adjustable wrench
Installation Steps:
- Identify Left and Right Extenders: Each extender is clearly marked with an 'L' for Left and 'R' for Right. The 'L' extender is for the left crank side, and the 'R' extender is for the right crank side.
- Prepare the Crank Arm: Ensure the pedal threads on your bike's crank arms are clean and free of debris.
- Install the Extenders:
- For the Left crank arm: Thread the 'L' extender into the left crank arm. Tighten it counter-clockwise using an 18mm wrench.
- For the Right crank arm: Thread the 'R' extender into the right crank arm. Tighten it clockwise using an 18mm wrench.
Note: Pedal threads are typically reverse-threaded on the left side. Always ensure you are turning in the correct direction to avoid cross-threading.
- Install the Protective Gaskets (Washers): Place one protective gasket onto the threaded end of each pedal extender. These washers help prevent thread wear and reduce abnormal noise.
- Attach Pedals: Thread your bike pedals into the newly installed pedal extenders. Ensure the left pedal goes into the left extender and the right pedal into the right extender. Tighten them securely using the appropriate pedal wrench.

Image 3.1: The pedal extenders clearly marked 'L' for left and 'R' for right, along with the protective washers.

Image 3.2: Diagram showing the boss mounting position and clarifying that 'L' (crank side) is tightened counter-clockwise and 'R' (crank side) is tightened clockwise.
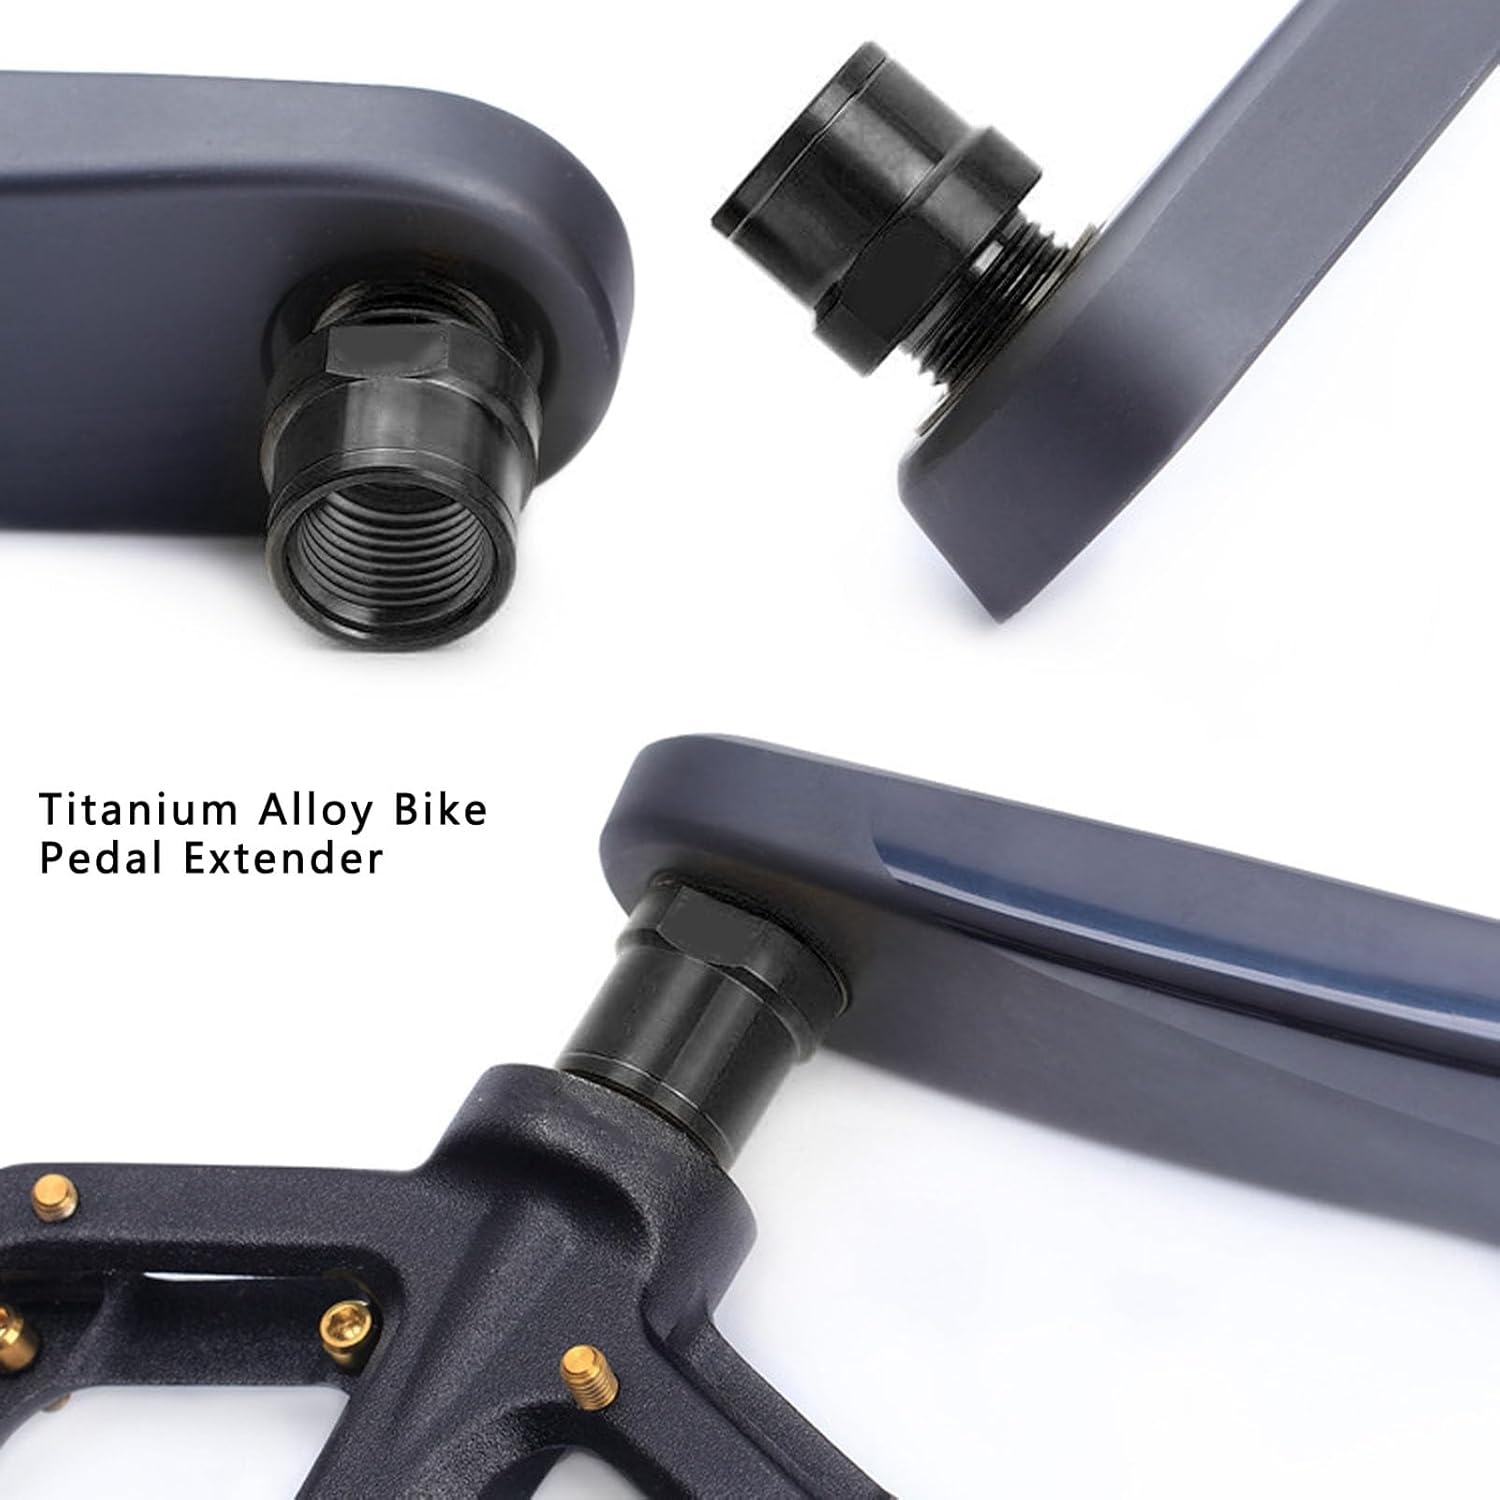
Image 3.3: A close-up view of the pedal extender securely installed between the crank arm and the pedal.
4. Operating and Usage
Once installed, the pedal extenders provide a wider pedal stance, offering several benefits:
- Reduced Knee Strain: By moving your feet further from the crank arms, the extenders can help align your knees more naturally, reducing stress and discomfort during long rides.
- Improved Comfort: A wider stance can lead to a more comfortable and efficient pedaling motion for some riders.
- Prevention of Rubbing: They prevent your knees or shoes from rubbing against the crank arms or bike frame.
These pedal extenders are universally compatible with most mountain bikes and road bikes.
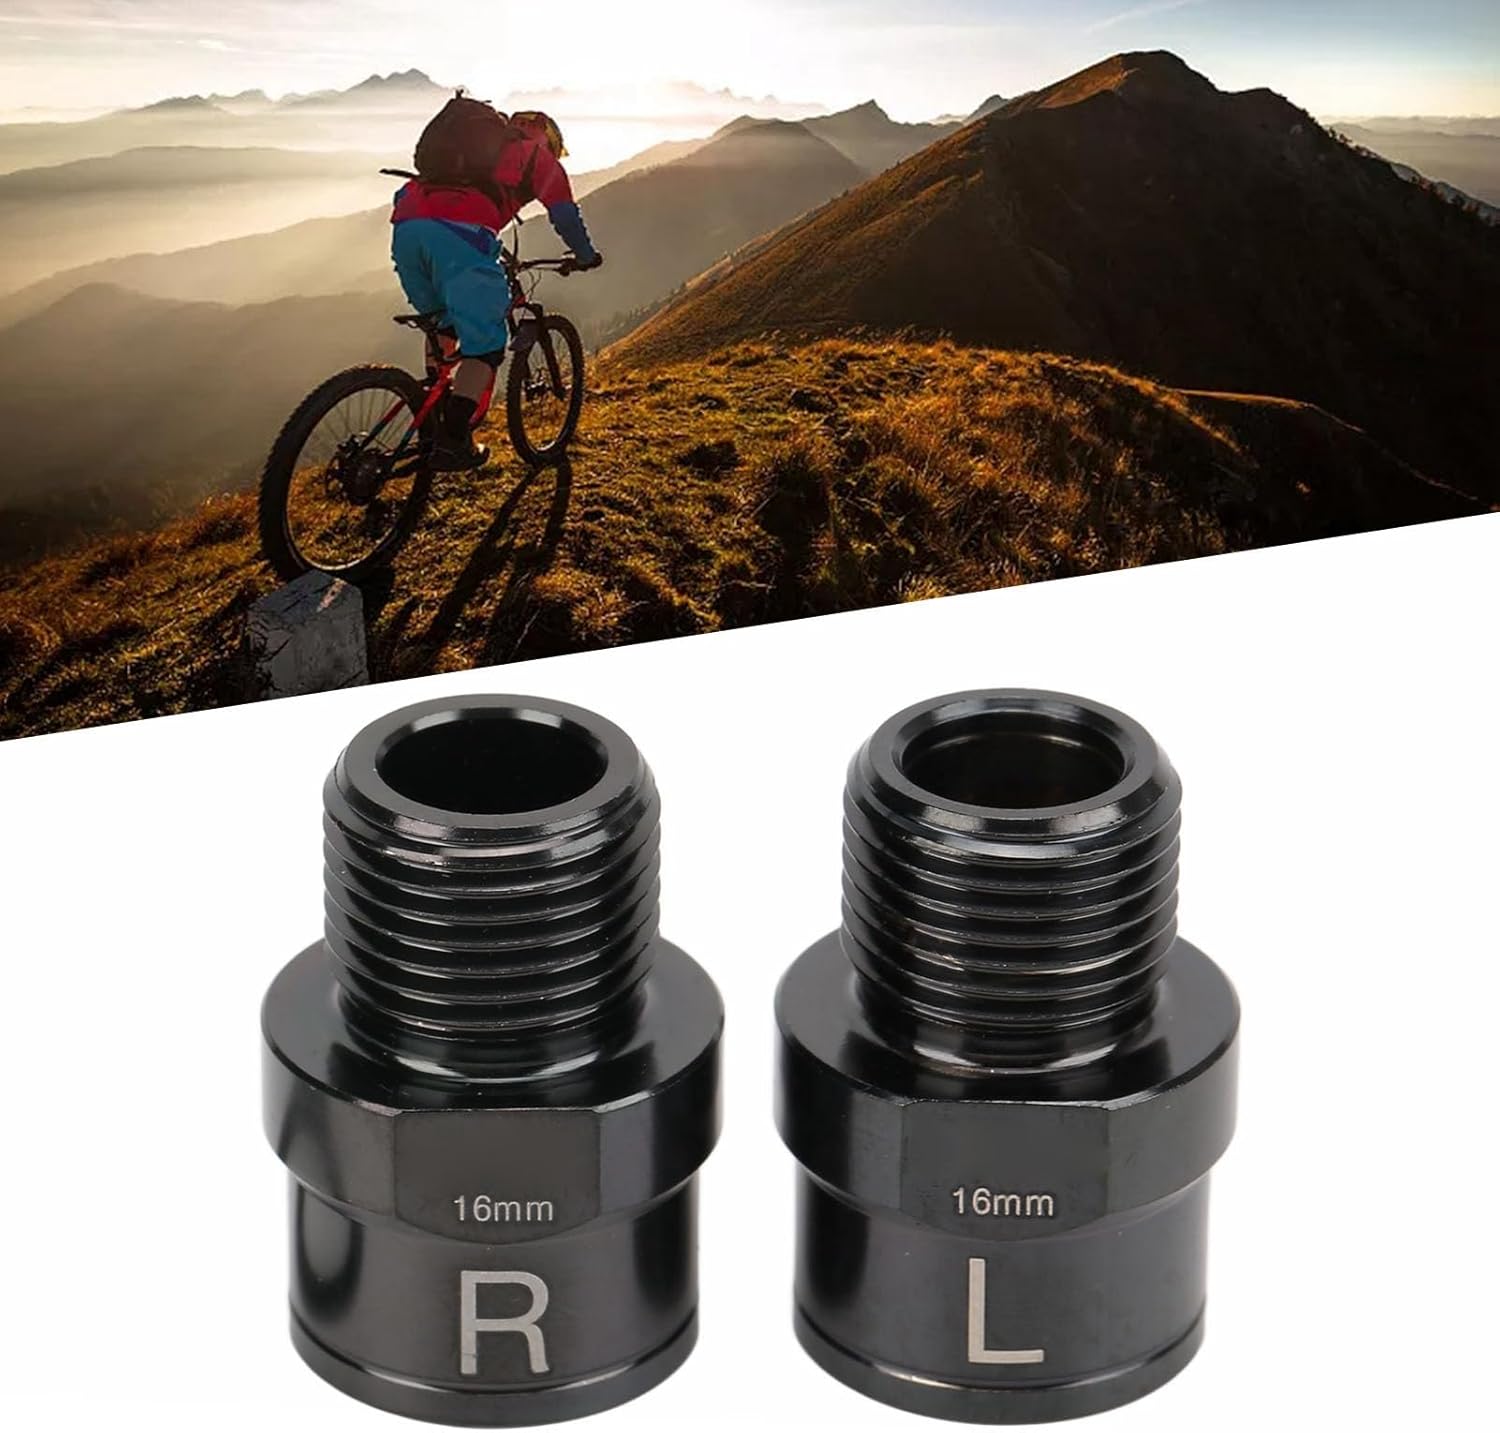
Image 4.1: A cyclist riding a mountain bike, demonstrating the practical application of pedal extenders in various terrains.

Image 4.2: Another view of a cyclist on a challenging rocky trail, highlighting the versatility of the pedal extenders for different riding conditions.
5. Maintenance
To ensure the longevity and optimal performance of your equlup pedal extenders, follow these simple maintenance guidelines:
- Regular Inspection: Periodically check the extenders and pedals for any signs of looseness or damage. Ensure they are securely tightened to the crank arms.
- Cleaning: Clean the extenders with a damp cloth to remove dirt and grime. Avoid harsh chemicals that could damage the titanium alloy finish.
- Lubrication: While not strictly necessary for the extenders themselves, ensure your pedal threads and crank arm threads are adequately greased during installation to prevent seizing and facilitate future removal.
6. Troubleshooting
- Abnormal Noise: If you hear clicking or creaking noises, check that both the pedal extenders and your pedals are securely tightened to the correct torque. Ensure the protective gaskets are in place.
- Difficulty Installing: Double-check that you are using the correct 'L' and 'R' extenders for the corresponding crank arms and that you are turning in the correct tightening direction (left pedal/extender counter-clockwise, right pedal/extender clockwise).
7. Specifications
| Feature | Specification |
|---|---|
| Product Material | Titanium Alloy |
| Extension Length | 16mm (0.6 inches) |
| Weight (Package) | Approx. 57 Grams |
| Application | Universal for Mountain Bikes, Road Bikes |
| Required Wrench Size | 18mm |

Image 7.1: Detailed dimensions of the pedal extender, showing the 16mm extension length.
8. Warranty Information
This product comes with a manufacturer warranty for 90 days from the date of purchase. Please retain your proof of purchase for any warranty claims. The warranty covers defects in materials and workmanship under normal use. It does not cover damage resulting from improper installation, misuse, accidents, or unauthorized modifications.
9. Support
For further assistance, technical support, or warranty inquiries, please contact the seller or manufacturer through the platform where the product was purchased. Provide your model number (equlup3unaog5w10-11) and a detailed description of your issue for prompt service.