
Introduction
This manual provides comprehensive instructions for the safe and efficient operation and maintenance of your AMERISUN 24-Inch Gas Snow Blower. Please read all instructions carefully before assembly, operation, or maintenance to ensure proper use and prevent injury.
Important Safety Information
Operating a snow blower requires caution. Failure to follow safety instructions can result in serious injury or death. Always prioritize safety.
- Always operate the snow blower in a well-ventilated area to avoid carbon monoxide poisoning.
- Wear appropriate protective gear, including gloves and eye protection, when operating the machine.
- Be aware of the rotating parts and keep hands and other body parts away from them.
- Always turn off the engine and allow the machine to cool before refueling.
- Store the snow blower and its fuel in a safe, secure location away from heat sources and children.
- Never operate the snow blower without proper guards, covers, or other safety protective devices in place.
- Clear the area of foreign objects that may be thrown by the auger.
Setup
Unboxing and Initial Assembly
Carefully remove all components from the packaging. The main unit, wheels, handle, auger, and control panel are included, along with necessary hardware. Ensure all parts are present before beginning assembly.

The assembly process involves attaching the handle, wheels, and chute controls. Refer to the detailed steps below and the accompanying video for visual guidance.
Video: Assembly Overview
This video demonstrates the assembly process for the AMERISUN Gas Snow Blower, including attaching the handle, wheels, and chute. It highlights key connection points and ensures proper setup.
Installing the Wheels
Attach the 13-inch snow tires to the main unit using the provided hardware. These tires are designed to provide excellent traction on slippery and uneven surfaces.

Attaching the Handle and Controls
Secure the handle assembly to the main unit. Connect all control cables for the auger, drive, and chute. Ensure all connections are firm and allow for smooth operation of the controls.

Fuel and Oil Preparation
Before starting, ensure the engine has the correct type and amount of oil and fuel. This model features a separate oil reservoir, and a container of oil is typically included for initial setup. Use a funnel and pour oil slowly to prevent overflow. Always use fresh, clean gasoline.
Operating Instructions
Starting the Engine
Your AMERISUN snow blower offers two starting methods: recoil start and electric start.

- Recoil Start: Ensure the fuel valve is open and the choke is set appropriately for cold starting. Pull the recoil cord firmly until the engine starts.
- Electric Start: For quick and easy ignition, especially in cold weather, connect an extension cord to the electric start port and press the start button.
Video: Starting and Operation
This video demonstrates the starting procedure and general operation of the AMERISUN Two-Stage Gas Snow Blower, showcasing its performance in clearing snow.
Clearing Snow
The 24-inch clearing width allows for efficient snow removal on medium to large driveways and walkways. The powerful 212cc OHV engine and heavy-duty steel auger and impeller are designed to handle various snow conditions, including deep, wet, and heavy snow, up to an ideal depth of 20 inches.
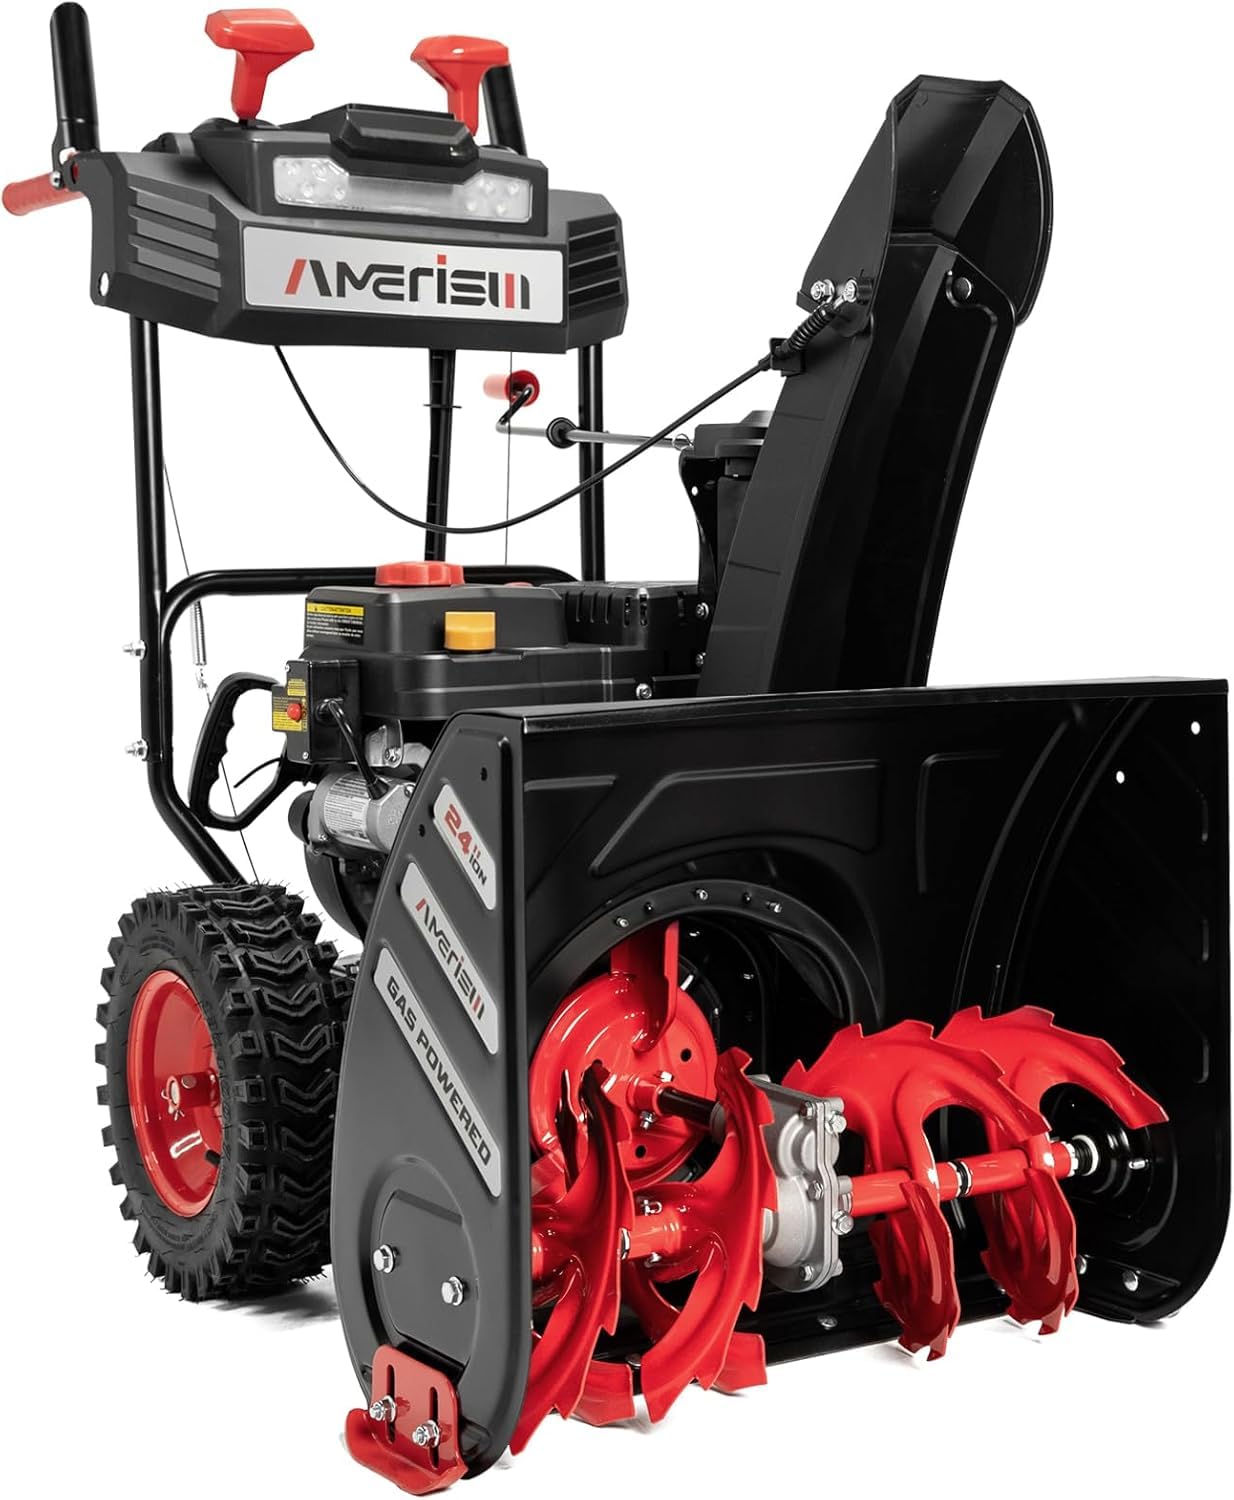

The self-propelled system reduces physical effort, allowing you to focus on steering. The 180-degree rotating chute enables precise control over the snow throwing direction, with a throwing distance of up to 40 feet.
Video: Snow Clearing Performance
This video showcases the AMERISUN 24-Inch Snow Blower's performance in various snow conditions, demonstrating its self-propelled feature and effective snow throwing capabilities.
Speed Control
Utilize the gear selector on the control panel to choose from 6 forward speeds and 2 reverse speeds, allowing you to adjust the snow blower's pace to match the snow conditions and your comfort level.
Maintenance
Regular maintenance ensures the longevity and optimal performance of your snow blower. Always turn off the engine and disconnect the spark plug wire before performing any maintenance.
- Engine Oil: Check the engine oil level before each use and change it according to the manufacturer's recommendations (typically after the first 5 hours, then every 25-50 hours).
- Fuel System: Use fresh, stabilized fuel. Drain the fuel system at the end of the season or if storing for extended periods.
- Spark Plug: Inspect and clean the spark plug annually. Replace if necessary.
- Auger and Impeller: Regularly inspect the auger and impeller for wear or damage. Replace worn shear pins as needed.
- Chute: Keep the discharge chute clear of debris. Lubricate moving parts of the chute control.
- General Cleaning: Clean the snow blower after each use to prevent snow and ice buildup, which can affect performance and cause corrosion.
Troubleshooting
This section addresses common issues you might encounter with your snow blower.
- Engine Not Starting: Check fuel level, oil level, spark plug connection, and ensure the choke is set correctly. For electric start, verify the extension cord is properly connected and powered.
- Snow Chute Clogging: If the chute becomes clogged with wet or heavy snow, immediately turn off the engine and use the provided plastic clean-out tool to clear the obstruction. NEVER use your hands.
- Reduced Snow Throwing Distance: This can indicate a worn impeller or a partially clogged chute. Inspect and clear as necessary.
- Machine Not Moving: Check the drive belt and ensure the drive engagement lever is fully activated.
Specifications
| Brand | AMERISUN |
| Model Number | AM7109A |
| Power Source | Gas Powered |
| Engine Type | 4-Cycle OHV |
| Engine Displacement | 212 Cubic Centimeters |
| Clearing Width | 24 Inches |
| Ideal Snow Depth | 20 Inches |
| Wheel Size | 13 Inches |
| Product Dimensions | 48.7"D x 24.8"W x 44.2"H |
| Item Weight | 142 Pounds |
| UPC | 840432707593 |
Warranty and Support
For specific warranty details, please refer to the documentation included with your product at the time of purchase. For customer support, technical assistance, or to inquire about replacement parts, please contact AMERISUN customer service through their official channels. Contact information can typically be found on the product packaging or the AMERISUN website.