
Introduction
This manual provides comprehensive instructions for the setup, operation, and maintenance of your SoulBay Automatic Plant Waterer. This system is designed to provide consistent, automated watering for up to 15 potted plants, making it ideal for indoor use and ensuring plant care during vacations.

Image: The SoulBay Automatic Plant Waterer system in operation, demonstrating its capability to water up to 15 potted plants from a single charge lasting approximately 30 days.
Package Contents
Please verify that all items listed below are included in your package.
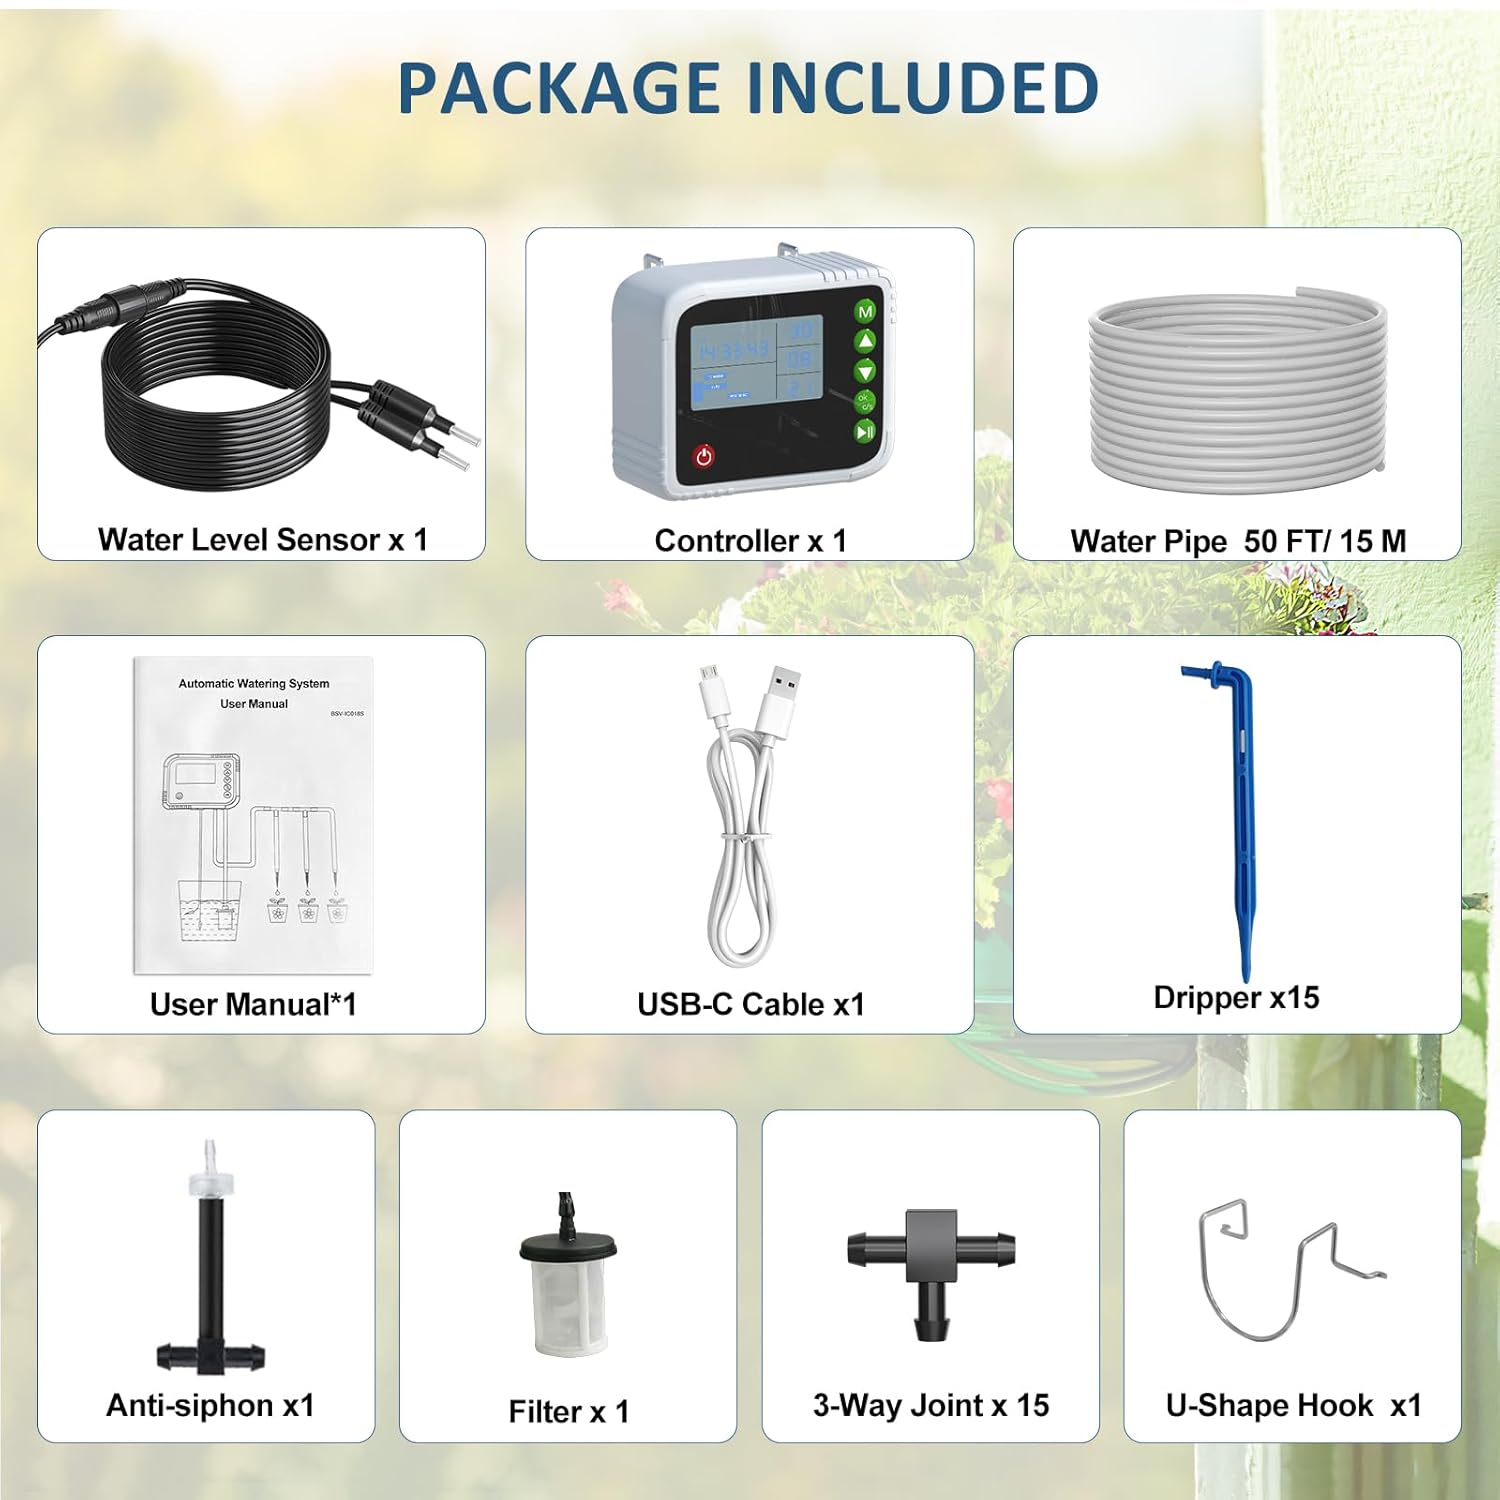
Image: A visual representation of all components included in the SoulBay Automatic Plant Waterer kit. These include the controller, water level sensor, 50 ft (15 m) water pipe, USB-C cable, user manual, 15 drippers, anti-siphon device, filter, 15 3-way joints, and 1 U-shape hook.
- 1 x Controller
- 1 x Water Level Sensor
- 1 x Water Pipe (50 FT / 15 M)
- 1 x USB-C Cable
- 1 x User Manual
- 15 x Drippers
- 1 x Anti-siphon Device
- 1 x Filter
- 15 x 3-Way Joints
- 1 x U-Shape Hook
Product Overview
The SoulBay Automatic Plant Waterer consists of a main control unit with an LCD display and various accessories for drip irrigation. Understanding the controller's functions is key to effective operation.
Controller Features and Button Definitions

Image: A diagram illustrating the dimensions and button functions of the automatic watering system controller. The controller measures approximately 11cm (4 inches) wide, 9cm (3.5 inches) high, and 5cm (2 inches) deep. Numbered buttons correspond to specific functions.
| No. | Function |
|---|---|
| 1 | Long press to turn the device on or off. |
| 2 | Press to switch between different setting items on the LCD display. |
| 3 | Press to change the numerical value for the selected setting. |
| 4 | In setting mode, a short press confirms the selection. In working mode, a short press displays the "1st watering time", and another short press displays the "clock" (timer mode). |
| 5 | In working mode, a short press enters pause mode (LCD shows "PAUSE", watering stops). Press again to exit pause mode and resume the schedule. |
Setup Instructions
Step 1: Prepare the Water Source
Place a bucket or container of water near your plants. Ensure the container is large enough to hold sufficient water for your desired watering duration and frequency.
Step 2: Connect the Water Level Sensor
Insert the water level sensor into your water source container. Connect the sensor cable to the designated port on the controller.
Step 3: Install the Tubing and Drippers

Image: A diagram illustrating the installation of the automatic watering system. It shows the controller (1) connected to a water source via a water level sensor (6) and inlet pipe (7). The controller's outlet pipe (3) branches out using tees (4) to individual drippers (5) placed in potted plants. An anti-siphon device (8) is also shown in the main line.
- Cut the water pipe to the desired lengths to reach each plant.
- Use the 3-way joints (tees) to create branches for individual plants.
- Insert a dripper into the end of each branch and place it into the soil of your potted plant.
- Ensure the anti-siphon device is installed correctly in the main water line to prevent backflow.
Step 4: Position the Controller
Place the controller in a stable location. It can be hung using the integrated hook design.
Step 5: Initial Charge
Connect the USB-C cable to the controller and a power source to fully charge the internal battery before first use. A full charge typically lasts 30-50 days.
Operating Instructions
Power On/Off
Long press button 1 (power button) to turn the device on or off.
Setting Watering Parameters
Use button 2 (M button) to switch between different setting items on the LCD display.
Use button 3 (up/down arrows) to change the numerical values for each setting.
Watering Duration
Set the duration for each watering cycle (e.g., 10 seconds to 30 minutes). This determines how long water is dispensed to the plants during a single cycle.
Watering Frequency
Set the interval between watering cycles (e.g., 1 hour to 15 days). This determines how often the system waters your plants.
Confirmation and Timer Mode
In setting mode, a short press of button 4 acts as a confirmation button. In working mode, a short press of button 4 will display the "1st watering time", and another short press will show the "clock" (timer mode).
Pause Mode
In working mode, short press button 5 to enter pause mode. The LCD will display "PAUSE", and the current watering schedule will be temporarily suspended. Press button 5 again to exit pause mode and resume the schedule.
Water Shortage Protection

Image: An illustration showing the automatic watering system detecting a low water level in the reservoir. The controller displays "NO Water" and emits an audible alert (buzzer sounds twice a minute) to indicate a water shortage.
The system is equipped with water shortage protection. If the water level in your reservoir is too low, the LCD will display "NO Water" and the buzzer will sound twice a minute to alert you. Refill the water reservoir promptly.
Maintenance
Filter Cleaning
Regularly check and clean the filter located at the end of the inlet pipe in your water source. This prevents debris from clogging the system and ensures optimal water flow.
Battery Recharging
The internal lithium-ion battery provides 30-50 days of operation on a single charge. Recharge the battery using the provided USB-C cable when the battery indicator on the LCD is low.
Anti-Siphon Device
Ensure the anti-siphon device is clean and functioning correctly. This device prevents water from flowing back into the reservoir from the plant pots, which could contaminate your water source.
Troubleshooting
Uneven Watering
- Check for kinks or blockages in the tubing.
- Ensure all drippers are securely inserted into the soil and are not clogged.
- Verify that the water source is elevated or the pump is functioning correctly to provide adequate pressure to all drippers.
- Note that plants further from the base unit may receive slightly less water due to pressure drop. Adjust plant placement or watering duration if necessary.
No Water Flow
- Check if the water reservoir is empty.
- Ensure the water level sensor is properly submerged and connected.
- Verify the filter is not clogged.
- Check if the pump is operating (listen for a faint hum). If not, ensure the device is charged and turned on.
"NO Water" Alert
- Refill the water reservoir immediately.
- Check the water level sensor for proper placement and connection.
System Not Turning On
- Ensure the battery is charged. Connect the USB-C cable to charge.
- Long press the power button (button 1) to ensure it's not just in standby.
Specifications
| Feature | Detail |
|---|---|
| Model Name | OD091 |
| Brand | SoulBay |
| Power Source | Battery Powered |
| Special Features | Automatic Watering, Digital Timer, Leak Resistant, Programmable, Weather Resistant |
| Fit Type | Flexible Tubing |
| Set Capacity | 15-plant set |
| Item Weight | 1.61 pounds |
| Package Dimensions | 8.43 x 6.97 x 2.8 inches |
| Batteries | 1 Lithium Ion battery (included) |
| Material | Plastic, Rubber |
Warranty and Support
For warranty information and technical support, please refer to the official SoulBay website or contact their customer service directly. The product typically includes a standard manufacturer's warranty. Please retain your proof of purchase for warranty claims.