1. Introduction
This manual provides essential information for the safe and efficient operation, maintenance, and troubleshooting of your VEVOR Commercial Beverage Dispenser. Please read these instructions thoroughly before initial use and retain them for future reference. This appliance is designed for commercial use in dispensing cold beverages.

Image 1.1: The VEVOR Commercial Beverage Dispenser, showcasing its three transparent tanks and stainless steel base.
2. Safety Instructions
- Ensure the appliance is placed on a stable, level surface away from direct sunlight and heat sources.
- Connect the dispenser to a grounded power outlet with the correct voltage as specified on the rating label.
- Do not immerse the appliance or its electrical components in water or other liquids.
- Unplug the dispenser before cleaning, maintenance, or if it will be unused for an extended period.
- Keep children and unauthorized personnel away from the appliance during operation.
- Do not operate the dispenser with a damaged power cord or plug. Contact qualified service personnel for repairs.
- Allow the unit to stand upright for at least 24 hours after transportation before plugging it in to allow the refrigerant to settle.
3. Product Components and Features
The VEVOR Commercial Beverage Dispenser is constructed with durable, food-grade materials for reliable performance.
Key Components:
- Beverage Tanks: Three 12-liter (12.7 QT) transparent PC (Polycarbonate) tanks for holding beverages.
- Stainless Steel Base: Thickened SUS stainless steel shell providing stability and corrosion resistance.
- Dispensing Spouts: Enlarged diameter spouts with stainless steel press switches for easy dispensing, even with beverages containing small pulp particles.
- Stirring Rods: Located within each tank to ensure uniform beverage temperature and prevent sedimentation.
- Cooling System: Includes a powerful compressor, high-efficiency condenser, and 304 food-grade stainless steel evaporator for rapid and consistent cooling.
- Water Receiving Trays: Large capacity trays at the base to catch drips and maintain cleanliness.
- Control Switches: Independent buttons for activating cooling and stirring functions.

Image 3.1: Material construction details, showing food-grade PC tanks and stainless steel components.

Image 3.2: User-friendly design elements including the press switch, enlarged spout, drip tray, and sealing ring.
4. Setup
- Unpacking: Carefully remove the dispenser from its packaging. Inspect for any shipping damage.
- Placement: Position the dispenser on a sturdy, level counter or table. Ensure adequate ventilation around the unit, especially at the sides and rear where air vents are located.
- Initial Cleaning: Before first use, thoroughly clean all parts that will come into contact with beverages. Refer to the 'Cleaning and Maintenance' section for detailed instructions.
- Refrigerant Settling: After transportation, allow the unit to stand upright and unplugged for a minimum of 24 hours. This allows the refrigerant to stabilize, preventing potential damage to the compressor.
- Assembly: Ensure the tanks are correctly seated on the base, and the dispensing spouts are securely attached. Verify that all sealing rings are properly in place to prevent leaks.
- Power Connection: Plug the dispenser into a dedicated, grounded electrical outlet that matches the voltage requirements of the unit.
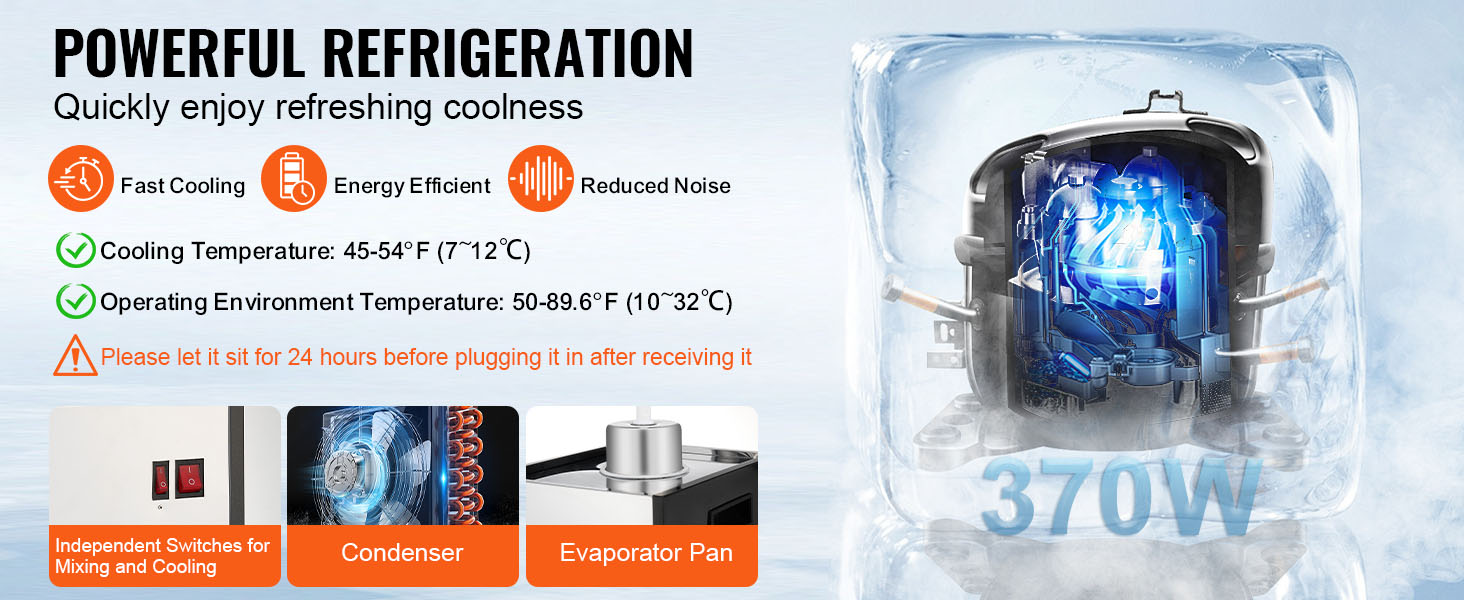
Image 4.1: Important note regarding the 24-hour waiting period after transport for refrigerant settling.
5. Operating Instructions
- Fill Tanks: Open the lids of the beverage tanks and pour your desired cold beverages into each tank. Do not overfill beyond the maximum fill line.
- Activate Cooling: Press the 'Cooling' switch to turn on the refrigeration system. The unit will begin to cool the beverages to the optimal temperature range of 45-54°F (7-12°C).
- Activate Stirring: If your beverage requires continuous mixing (e.g., juice with pulp, milkshakes), press the 'Stirring' switch. The internal stirring rods will rotate to maintain a consistent temperature and prevent sedimentation.
- Dispensing: Place a cup under the desired dispensing spout. Press the stainless steel press switch to release the beverage. Release the switch to stop dispensing.
- Monitoring: Regularly check beverage levels and refill as needed. Ensure the drip trays are emptied periodically to prevent overflow.
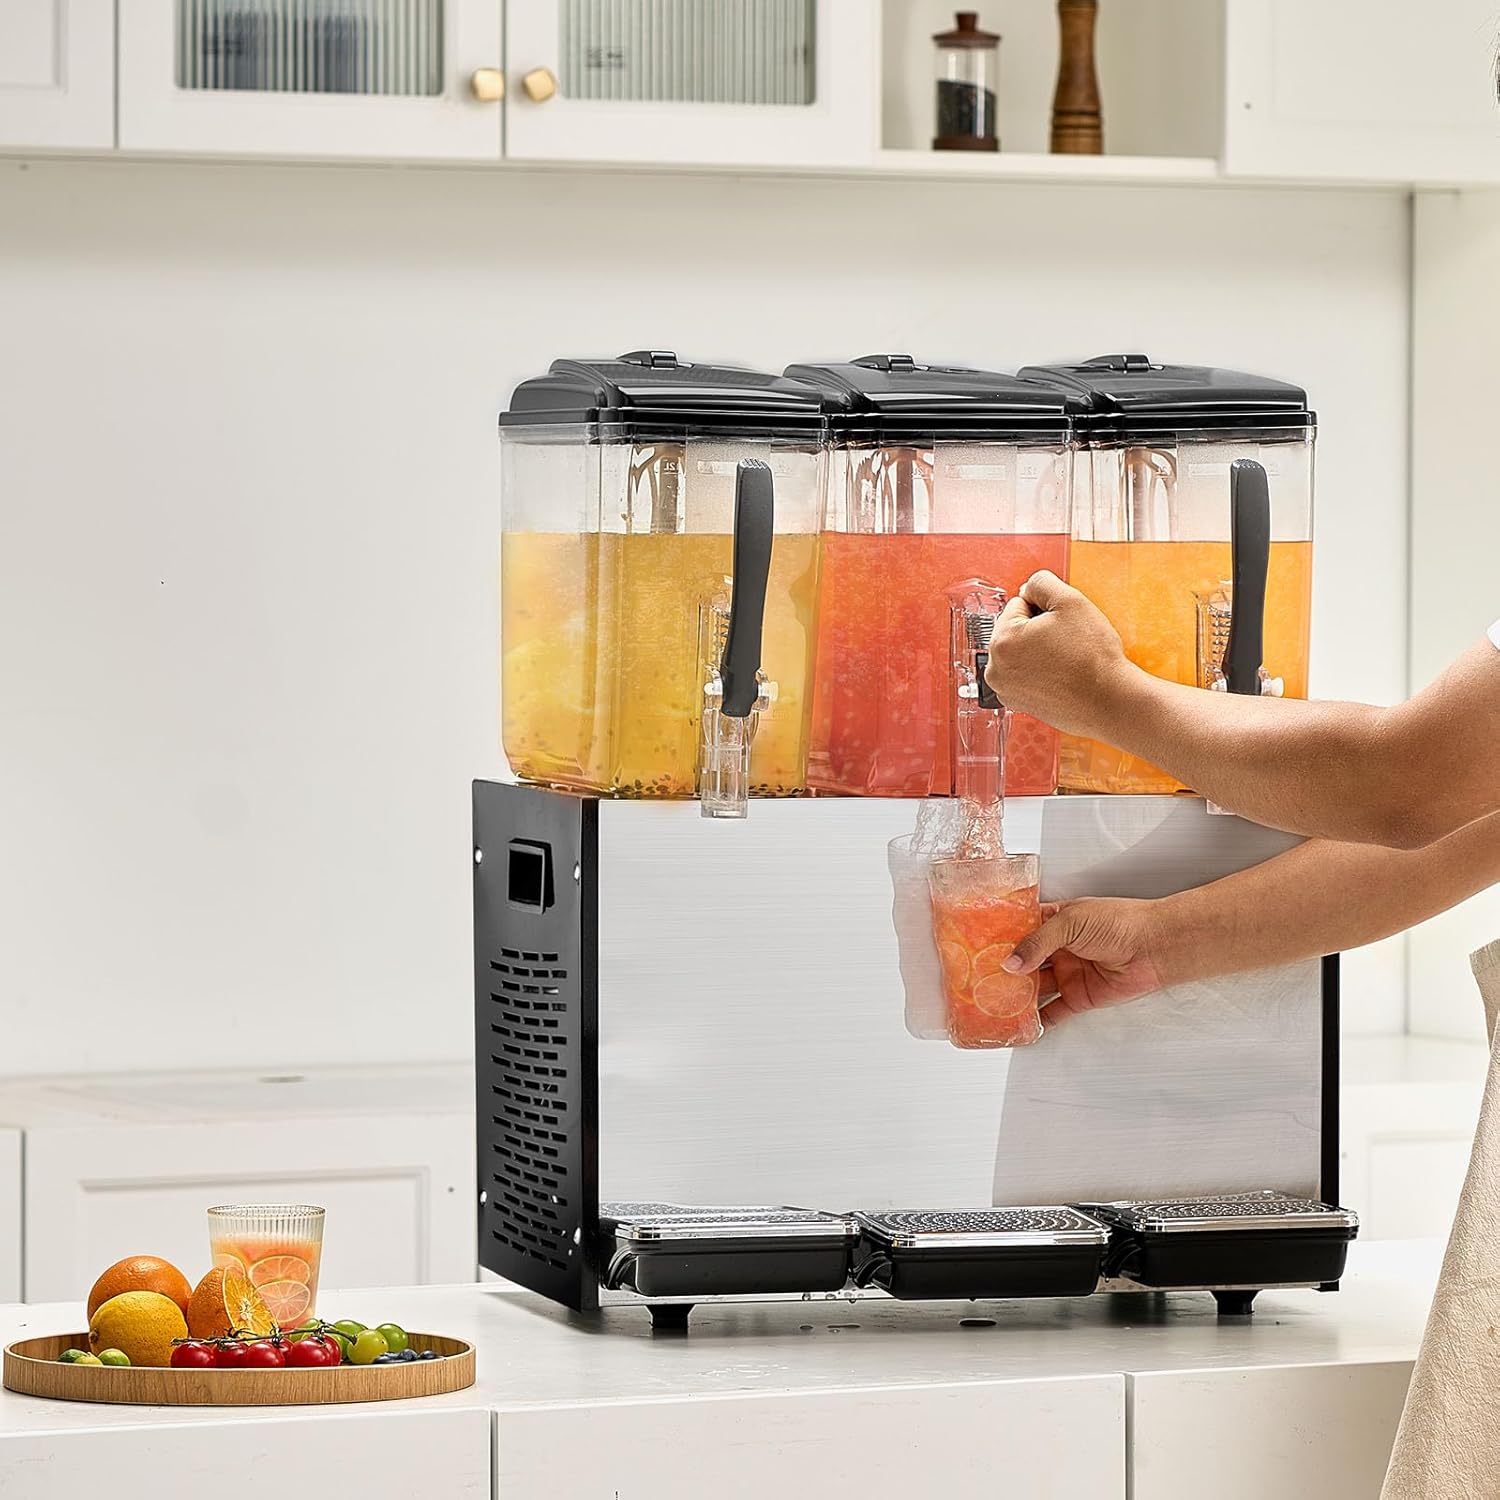
Image 5.1: Demonstrating the dispensing process using the press switch.
6. Cleaning and Maintenance
Regular cleaning and maintenance are crucial for hygiene and extending the lifespan of your beverage dispenser.
Daily Cleaning:
- Power Off: Turn off both the cooling and stirring switches, then unplug the unit from the power outlet.
- Empty Tanks: Drain any remaining beverages from the tanks.
- Disassemble: Carefully remove the tanks, lids, stirring rods, and dispensing spouts.
- Wash Components: Wash all removable parts with warm, soapy water. Use a soft brush for thorough cleaning. Rinse thoroughly with clean water.
- Clean Base: Wipe down the stainless steel base with a damp cloth and mild detergent. Do not use abrasive cleaners or immerse the base in water.
- Dry: Ensure all components are completely dry before reassembly to prevent bacterial growth.
- Empty Drip Trays: Remove and empty the water receiving trays, then wash and dry them.
Periodic Maintenance:
- Inspect sealing rings for wear and tear. Replace if necessary to prevent leaks.
- Ensure the ventilation grilles on the sides and back of the unit are free from dust and debris to maintain efficient cooling.
- The provided Vaseline can be applied sparingly to rubber seals to maintain their flexibility and extend their lifespan.
7. Troubleshooting
| Problem | Possible Cause | Solution |
|---|---|---|
| Unit does not power on | No power supply; Power cord loose; Fuse blown | Check power outlet; Ensure cord is securely plugged in; Check circuit breaker/fuse. |
| Beverages not cooling | Cooling switch off; Insufficient ventilation; Refrigerant issue | Turn on cooling switch; Ensure adequate space around unit; Contact service technician. |
| Beverages not stirring | Stirring switch off; Motor malfunction | Turn on stirring switch; Contact service technician. |
| Leakage from tanks/spouts | Sealing rings improperly seated or damaged; Spout not tightened | Check and adjust sealing rings; Tighten spouts; Replace damaged seals. |
| Excessive noise | Unit not level; Internal component issue | Ensure unit is on a level surface; Contact service technician if noise persists. |
8. Technical Specifications
| Feature | Specification |
|---|---|
| Model Number | LYJ12LX3 |
| Power | 370W ± 10% |
| Rated Capacity | 3 x 12 Liters (3 x 12.7 QT) |
| Cooling Temperature Range | 45-54°F (7-12°C) |
| Product Dimensions (L x W x H) | 21.5 x 17.3 x 26.8 inches (545 x 440 x 680 mm) |
| Net Weight | 66.0 lbs / 29.9 kg |
| Material (Tanks) | Food-Grade PC (Polycarbonate) |
| Material (Base/Food Contact) | 304 Stainless Steel |
| Material (Shell) | Thickened SUS Stainless Steel |

Image 8.1: Product dimensions and a list of included accessories.
9. Included Accessories
The following items are included with your VEVOR Commercial Beverage Dispenser:
- 1 x Commercial Beverage Dispenser Unit
- 1 x Instruction Manual
- 3 x Tank Seal Rings
- 3 x Nozzles
- 6 x O-Ring Seals
- 3 x Water Catchment Boxes
- Vaseline (for rubber seals)
10. Warranty and Support
For warranty information, technical support, or service inquiries, please refer to the contact details provided in your purchase documentation or visit the official VEVOR website. Keep your purchase receipt as proof of purchase for warranty claims.