Introduction
This manual provides detailed instructions for the assembly, operation, and maintenance of your YILQQPER Narrow Dresser with Charging Station and LED Light. Please read this manual thoroughly before assembly and use to ensure proper function and safety. Keep this manual for future reference.
Safety Instructions
- Keep all small parts and packaging materials away from children.
- Ensure all connections are secure before use.
- Do not overload the drawers or shelves.
- Use only the provided power adapter for the charging station and LED lights.
- Avoid exposing the unit to excessive moisture or direct sunlight.
- For stability, place the dresser on a flat, level surface.
- If any parts are missing or damaged, contact customer support immediately.
Package Contents
Please verify that all components listed below are present before beginning assembly.
- Metal Frame Components
- Wood Top Panel
- Fabric Drawers (3 units)
- LED Light Strip with Remote Control
- Charging Station (2 USB ports, 2 AC outlets)
- Adjustable Feet (4 units)
- Side Hooks (2 units)
- Assembly Hardware (screws, wrench, etc.)
- Instruction Manual (this document)
Assembly Instructions
Follow these steps carefully for proper assembly. It is recommended to assemble the dresser on a soft, clean surface to prevent scratches.
Step 1: Assemble the Metal Frame
Connect the vertical and horizontal metal frame components using the provided screws. Ensure all connections are tightened securely.
Video: This video demonstrates the assembly process, starting with connecting the metal frame pieces and showing the installation of drawers and LED lights.
Step 2: Attach the Top Panel and Shelves
Secure the wood top panel to the assembled metal frame. Insert the internal shelf for the LED light compartment.

Image: A diagram illustrating the overall dimensions of the dresser (22.8"D x 11.8"W x 23.9"H) and the internal dimensions of a single drawer (9.4"W x 15.4"D x 4.8"H).
Step 3: Install Fabric Drawers
Unfold the three fabric drawers and insert the bottom panels. Slide the assembled drawers into their respective slots in the frame. Attach the knobs to the drawers.

Image: The dresser with its three fabric drawers partially pulled out, demonstrating their capacity for storing various items like toiletries, baby clothes, and toys.
Step 4: Attach Adjustable Feet and Side Hooks
Screw the adjustable feet into the bottom of the metal frame. Attach the two side hooks to the designated points on the frame.

Image: A close-up view of the adjustable feet, showing how they can be rotated to adjust the dresser's height and stability on uneven floors.

Image: A close-up view of the side hooks, demonstrating their use for hanging small items like keys or headphones.
Operating Instructions
Charging Station
The dresser is equipped with a charging station featuring 2 USB ports (5V/2A) and 2 AC outlets (120V/12A).
- Connect the dresser's power cord to a standard wall outlet.
- Use the USB ports to charge compatible devices such as smartphones and tablets.
- Use the AC outlets to power small appliances or charge devices requiring an AC adapter.

Image: A top-down view of the dresser's surface, highlighting the integrated charging station with two USB ports and two AC outlets, along with a phone charging wirelessly.
LED Light System
The dresser features a multi-color LED light strip with 70,000+ RGB colors, 28 flashing modes, and 15 levels of brightness.
- Connect the LED light strip to the designated power port.
- Use the included remote control or a compatible smartphone app to adjust colors, modes, and brightness.
- The LED lights can be set with a timing function.
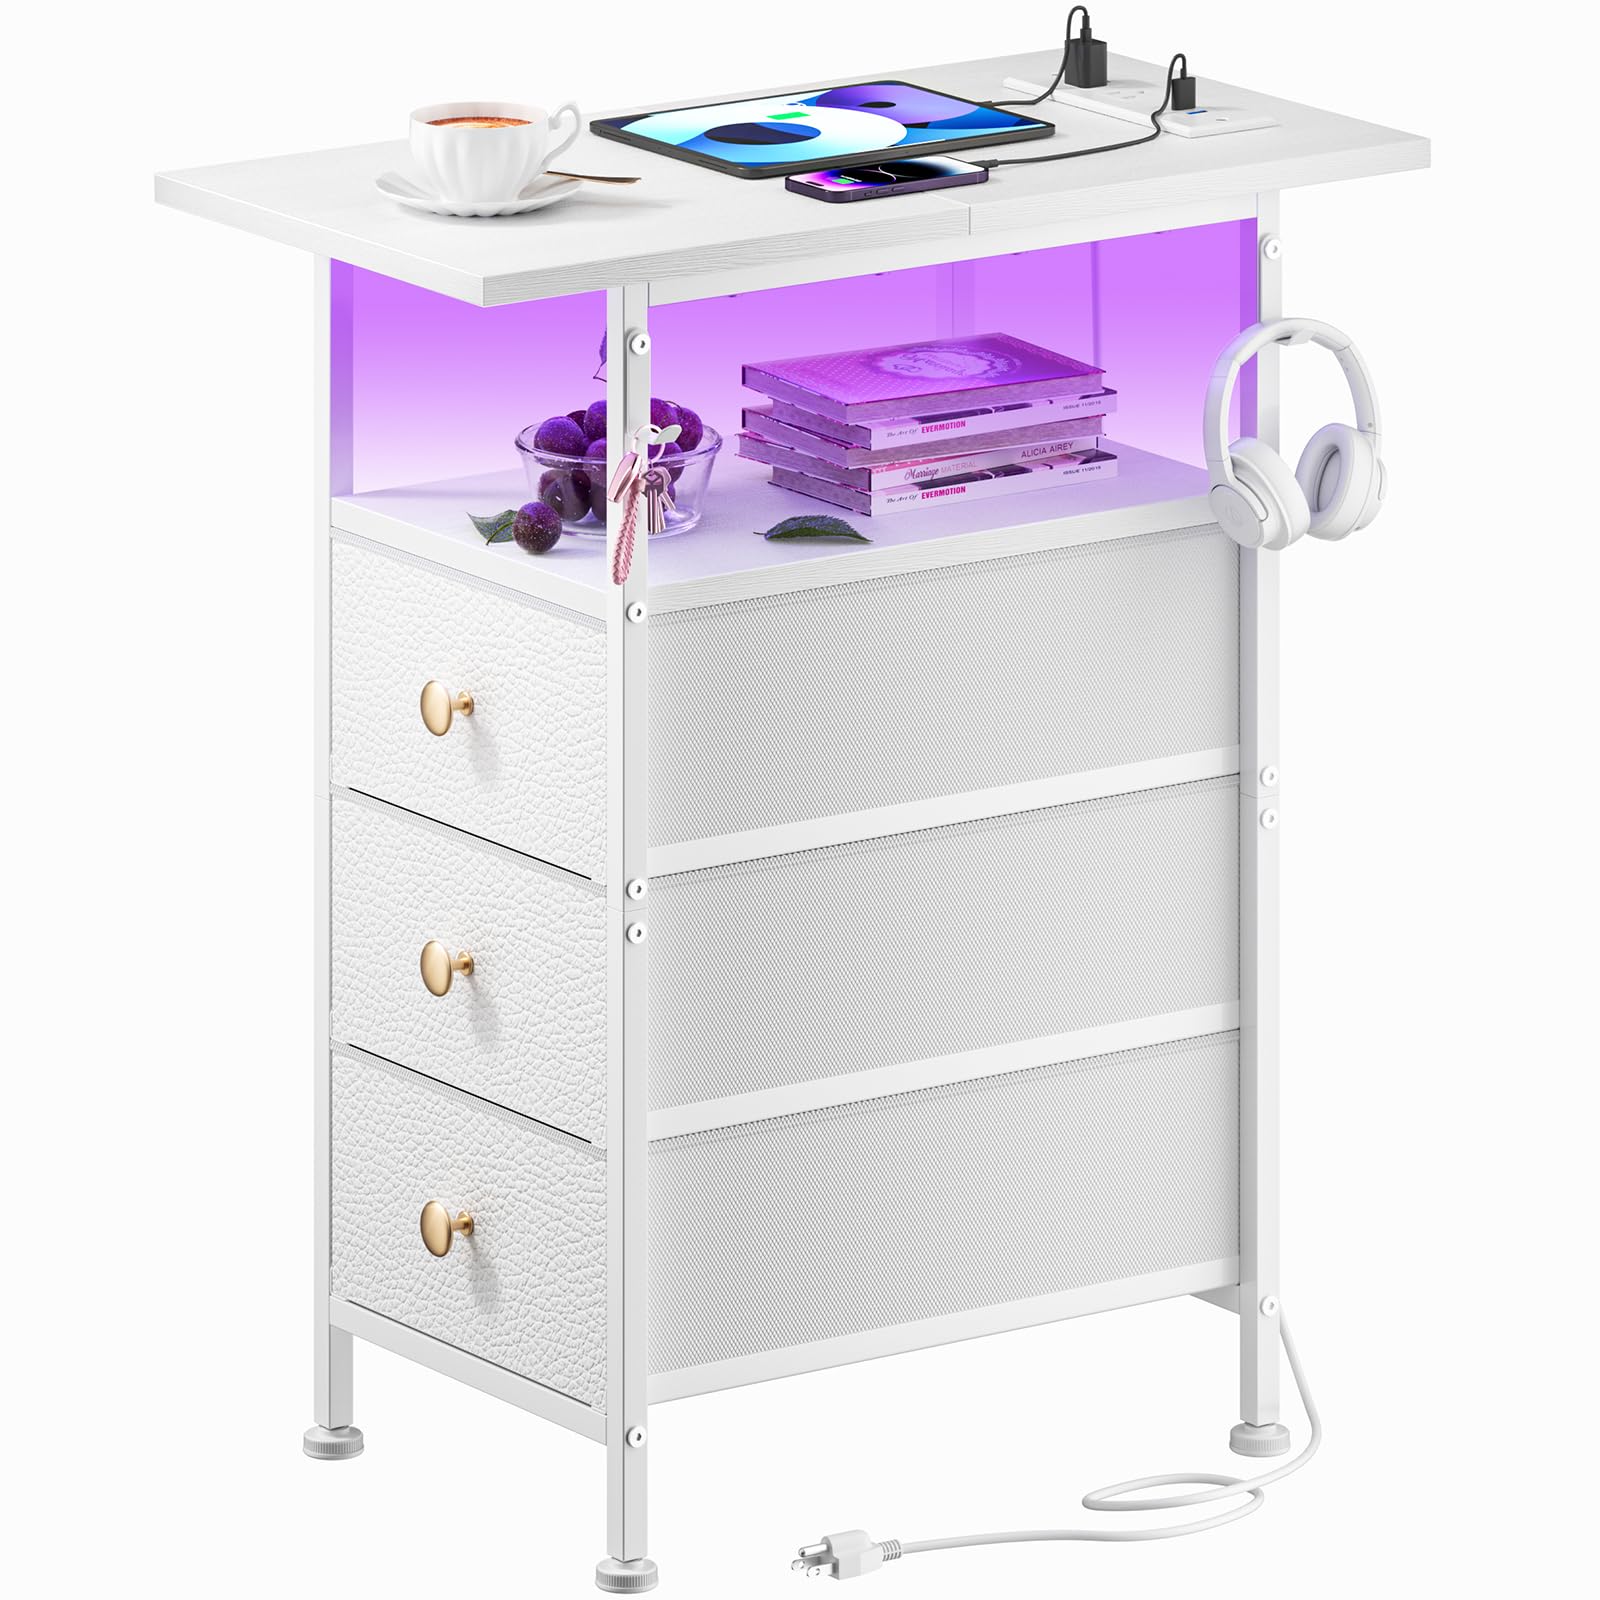
Image: The dresser functioning as a nightstand, with its LED light glowing yellow, illuminating the open shelf area.
Maintenance
- Cleaning: Wipe the wood top and metal frame with a soft, damp cloth. For fabric drawers, spot clean with a mild detergent and allow to air dry. Do not use harsh chemicals or abrasive cleaners.
- Drawer Care: Ensure drawers slide smoothly. If they become stiff, check for obstructions or adjust the frame if necessary.
- Electrical Components: Keep the charging station and LED lights dry. Disconnect from power before cleaning.
Troubleshooting
| Problem | Possible Cause | Solution |
|---|---|---|
| LED lights not turning on | Power connection loose; Remote control battery dead; LED strip damaged | Check power connection; Replace remote battery; Contact customer support |
| Charging station not working | Power cord not plugged in; Device not compatible; Overload | Ensure power cord is fully plugged in; Check device compatibility; Unplug some devices |
| Drawers are stiff or difficult to open/close | Overloaded drawer; Obstruction; Uneven surface | Reduce drawer contents; Check for obstructions; Adjust adjustable feet |
| Dresser is wobbly | Uneven floor; Loose frame connections | Adjust adjustable feet; Re-tighten all frame screws |
Specifications
- Brand: YILQQPER
- Model: B0DK13D127
- Dimensions (Overall): 22.83"D x 11.81"W x 24"H
- Material: Fabric Drawers with Leather Front, Wood Top, Metal Steel Frame
- Number of Drawers: 3
- Charging Station: 2 USB Ports (5V/2A), 2 AC Outlets (120V/12A), 4.9-Foot Power Cord
- LED Light: Multi-color RGB, 28 Modes, 15 Brightness Levels, App/Remote Control
- Additional Features: Adjustable Feet, 2 Side Hooks
- Assembly Required: Yes
Warranty and Support
For warranty information or technical support, please contact YILQQPER customer service. Refer to your purchase receipt for specific warranty terms.
Customer Service: Please refer to the contact information provided with your purchase or visit the official YILQQPER website.
Online Resources: For additional support and FAQs, visit the official YILQQPER website.
Protection Plans: Optional 2-Year and 3-Year protection plans are available for purchase. Refer to your retailer for details.
Returns: This product is subject to a 30-day return policy for refund or replacement. Please consult your retailer's return policy for specific conditions.