Introduction
This manual provides detailed instructions for the assembly, operation, maintenance, and troubleshooting of your new Queen LED Bed Frame. Please read all instructions carefully before beginning assembly and retain this manual for future reference.
Safety Information
- Ensure all parts are present and undamaged before assembly. Do not use if any parts are missing or broken.
- Assemble the bed frame on a soft, clean surface to prevent scratches.
- Do not overtighten screws during assembly.
- Keep small parts away from children during assembly.
- This bed frame is designed to support a maximum weight of 500 LBS. Do not exceed this limit.
- Regularly check all connections to ensure they remain tight.
- Only use the provided power adapter for the LED lights and USB charging station.
Setup and Assembly
Before you begin, ensure you have enough space and a clean, soft surface for assembly. Two people are recommended for easier assembly.
Tools Required (Not Included)
- Phillips Head Screwdriver
- Rubber Mallet (optional, for gentle tapping)
Package Contents
Verify all components are present against the parts list provided in your packaging. Key components include:
- Headboard sections (upholstered and metal frame)
- Footboard sections (upholstered and metal frame)
- Side rails (metal)
- Center support beams and legs
- Metal bed slats
- 4 Storage drawers with wheels
- LED light strip and remote control
- USB charging station unit
- Hardware pack (screws, bolts, washers, Allen wrench)
Assembly Steps
Step 1: Assemble the Headboard and Footboard Frames.
Attach the upholstered panels to the metal headboard and footboard frames using the provided bolts and Allen wrench. Ensure all connections are secure but do not fully tighten until the entire frame is assembled.

Image: The bed frame structure, including the headboard, footboard, and metal slat system, ready for mattress placement.
Step 2: Connect Side Rails.
Attach the side rails to the assembled headboard and footboard sections. Use the appropriate bolts and washers. Ensure the frame is square before tightening all bolts.

Image: Side view of the bed frame, illustrating how the side rails connect the headboard and footboard, with storage drawers visible underneath.
Step 3: Install Center Support and Slats.
Place the center support beam(s) and legs into position. Then, lay the metal bed slats across the frame, securing them to the side rails as per the instructions. This forms the mattress support.

Image: Detailed view of the metal slat system and the rolling mechanism for the under-bed storage drawers.
Step 4: Assemble and Install Storage Drawers.
Assemble the four storage drawers according to the separate drawer instructions, attaching the wheels and upholstered fronts. Once assembled, slide the drawers into position under the bed frame. The image below shows the components of the drawer system.

Image: An exploded diagram of the bed frame, detailing the separate components such as the headboard, footboard, side rails, slats, and the four individual storage drawers.
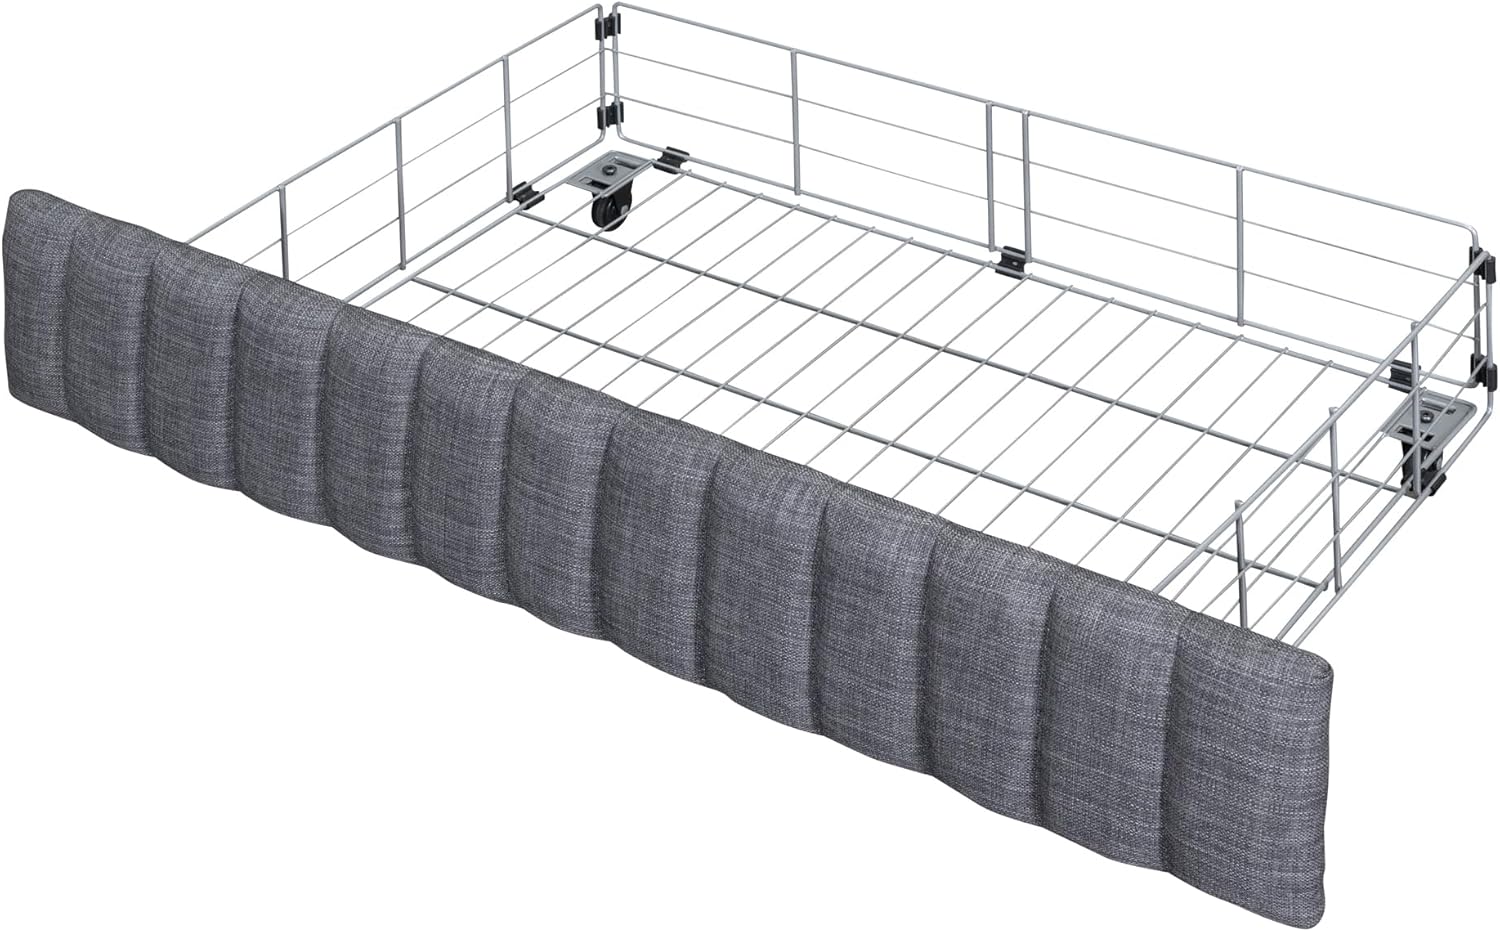
Image: A single, fully assembled under-bed storage drawer with its upholstered front and wheels.
Step 5: Install LED Lights and USB Charging Station.
Attach the LED light strip to the designated area on the headboard, typically along the back or underside of the shelf. Connect the USB charging station unit to the pre-drilled slot on the headboard shelf and connect its power cable. Plug the power adapter into a wall outlet.

Image: Close-up of the upholstered headboard, highlighting the design and the integrated shelf where the LED lights and USB charging station are located.
Step 6: Final Tightening.
Once all components are in place and aligned, go back and fully tighten all bolts and screws. Do not overtighten.
Operating Instructions
LED Headboard Lights
- Power On/Off: Use the provided remote control to turn the LED lights on or off.
- Color Selection: The remote allows you to choose from multiple RGB colors.
- Brightness Adjustment: Adjust the light intensity using the brightness controls on the remote.
- Mode Selection: Select various lighting modes (e.g., flash, strobe, fade, smooth) for different ambiance.
- Ensure the LED light strip is securely attached and the power adapter is plugged into a functional wall outlet.
USB Charging Station
- The headboard features 2 standard outlets and 2 USB ports.
- Plug your electronic devices (phones, tablets, etc.) directly into the USB ports or standard outlets for charging.
- Ensure the bed frame's power cord is plugged into a live wall outlet for the charging station to function.
Storage Drawers
- The four under-bed drawers are on wheels for easy access.
- Pull the drawers out gently to access stored items.
- Push the drawers back in until they are fully under the bed frame.
- Avoid overloading drawers to ensure smooth operation and prevent damage to the wheels.
Maintenance
- Cleaning Fabric: For upholstered parts, gently spot clean with a damp cloth and mild detergent. Do not use harsh chemicals.
- Cleaning Metal: Wipe metal surfaces with a soft, dry cloth.
- Tighten Connections: Periodically check all bolts and screws and tighten them as needed to maintain stability and prevent noise.
- Drawer Wheels: Keep drawer wheels free of debris to ensure smooth operation.
- Electrical Components: Ensure the LED light strip and USB charging station connections are secure and free from damage.
Troubleshooting
| Problem | Possible Cause | Solution |
|---|---|---|
| Bed frame is noisy/squeaks. | Loose bolts or connections. | Check and tighten all bolts and screws on the frame. |
| LED lights not working. | Power adapter unplugged, remote battery dead, loose connection, faulty LED strip. | Ensure power adapter is plugged in. Check remote battery. Verify LED strip connection. Contact support if issue persists. |
| USB ports/outlets not charging. | Bed frame power cord unplugged, faulty charging unit. | Ensure the bed frame's main power cord is securely plugged into a live wall outlet. Test with another device. |
| Drawers are difficult to open/close. | Overloaded, debris in wheels, misaligned. | Reduce drawer contents. Clean wheels. Ensure drawers are properly aligned on their tracks. |
Specifications
| Feature | Detail |
|---|---|
| Product Dimensions (Overall) | 81.7"L x 62"W x 41.7"H (Approximate, refer to diagram for detailed measurements) |
| Size | Queen |
| Color | Grey (with 4 drawers variant) |
| Weight Capacity | 500 LBS |
| Recommended Mattress Thickness | 10-12 inches |
| Product Material | Linen fabric, Metal frame |
| Box Spring Required | No |
| Charging Station | 2 Standard Outlets, 2 USB Ports |
| LED Lights | Multi-color RGB with remote control |
| Storage | 4 Under-bed drawers, Headboard shelf |

Image: Dimensional diagram of the Queen LED Bed Frame, showing overall length, width, height, and specific measurements for the headboard, footboard, and drawer units.
Warranty and Support
For any questions, missing parts, or issues not covered in this manual, please contact the manufacturer or your retailer for assistance. Please have your model number (HSHTTNXHN) and purchase information ready when contacting support.
While specific warranty details are not provided in this document, standard consumer rights apply. Please refer to your purchase receipt or retailer's policy for warranty information.