1. Introduction
This manual provides essential information for the safe and efficient installation, operation, and maintenance of your ZHRCLY RHEKEN JLm80-800A Automatic Self-Priming Pump. This pump is designed for reliable transfer of both hot and cold water in various domestic and light commercial applications. Please read this manual thoroughly before attempting to install or operate the pump to ensure proper function and to prevent injury or damage.
2. Safety Information
WARNING: Failure to follow these safety instructions could result in electric shock, fire, serious injury, or death.
- Always disconnect power before performing any maintenance or installation procedures.
- Ensure the pump is properly grounded according to local electrical codes.
- Do not operate the pump with damaged electrical cords or plugs.
- Protect the pump from freezing temperatures. Freezing can cause severe damage.
- Do not pump flammable or corrosive liquids. This pump is designed for water only.
- Keep children and unauthorized personnel away from the pump during operation.
- Ensure adequate ventilation around the pump to prevent overheating.
3. Product Overview
The ZHRCLY RHEKEN JLm80-800A is an automatic self-priming pump designed for reliable water supply. Its self-priming capability eliminates the need for manual priming after initial setup, making it convenient for various applications. The pump is suitable for boosting water pressure, transferring water, and other general water supply tasks.
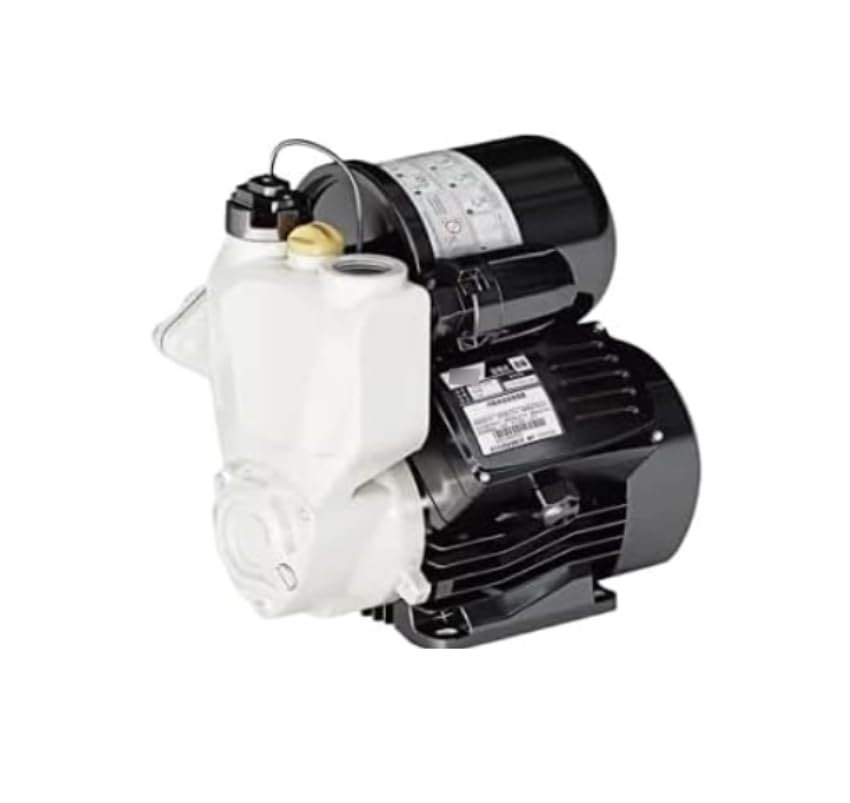
Figure 1: ZHRCLY RHEKEN JLm80-800A Automatic Self-Priming Pump. This image shows the general appearance of the pump unit, including its motor housing and pump body.
Key Features:
- Automatic self-priming function.
- Suitable for hot and cold water applications.
- Durable construction for long-lasting performance.
- Compact design for easy installation.
4. Setup and Installation
4.1 Location Selection
- Install the pump in a dry, well-ventilated area, protected from direct sunlight, rain, and freezing temperatures.
- Ensure the mounting surface is stable and level to minimize vibration.
- Allow sufficient space around the pump for ventilation and future maintenance.
4.2 Plumbing Connections
- Use appropriate pipe fittings and sealants to ensure watertight connections.
- Connect the suction pipe to the pump's inlet and the discharge pipe to the outlet.
- Install a foot valve with a strainer at the end of the suction pipe if drawing water from a well or tank to prevent debris entry and maintain prime.
- Avoid kinks or sharp bends in the piping that could restrict water flow.
4.3 Electrical Connections
- All electrical work must be performed by a qualified electrician and comply with local codes.
- Ensure the power supply voltage matches the pump's requirements (refer to specifications).
- Connect the pump to a dedicated, properly grounded circuit with appropriate overcurrent protection.
4.4 Initial Priming
- Before first use, remove the priming plug (usually located on top of the pump casing).
- Fill the pump casing completely with clean water until it overflows.
- Replace the priming plug securely.
- Open any discharge valves to allow air to escape from the system.
5. Operating Instructions
5.1 Starting the Pump
- Ensure the pump has been properly primed (see Section 4.4).
- Verify all plumbing connections are secure and leak-free.
- Open the discharge valve(s) in your system.
- Connect the pump to the power supply. The pump will start automatically and begin to draw water.
- Allow a few minutes for the pump to establish full flow and pressure.
5.2 Monitoring Operation
- Listen for unusual noises or vibrations, which may indicate a problem.
- Check for leaks around connections.
- Ensure consistent water flow and pressure.
5.3 Shutting Down the Pump
- Close the discharge valve(s) in your system.
- Disconnect the pump from the power supply.
6. Maintenance
6.1 Regular Checks
- Periodically inspect the pump and piping for any signs of leaks, corrosion, or damage.
- Ensure electrical connections are secure and free from moisture.
- Check the foot valve strainer for blockages and clean if necessary.
6.2 Cleaning
- Keep the exterior of the pump clean and free from dust and debris to ensure proper cooling.
- If the pump is used in an environment with high sediment, periodically flush the system.
6.3 Winterization (for cold climates)
- If the pump is installed in an area subject to freezing temperatures, it must be drained completely to prevent damage.
- Disconnect power, open drain plugs, and remove priming plugs to allow all water to escape.
- Store the pump in a warm, dry place if possible, or ensure it is thoroughly insulated.
7. Troubleshooting
Before contacting support, please review the following common issues and their solutions:
| Problem | Possible Cause | Solution |
|---|---|---|
| Pump does not start | No power; tripped circuit breaker; faulty wiring. | Check power supply; reset breaker; inspect wiring (by qualified personnel). |
| Pump runs but no water flow | Loss of prime; clogged suction line/foot valve; air leak in suction line; low water source. | Re-prime the pump; clean strainer; check for leaks; ensure adequate water source. |
| Low water pressure/flow | Partially clogged lines; worn impeller; air in system; undersized piping. | Inspect and clean lines; consult service for impeller replacement; bleed air; verify pipe sizing. |
| Excessive noise/vibration | Air in pump; cavitation; loose mounting; foreign object in pump. | Re-prime; check suction conditions; tighten mounting bolts; inspect pump for obstructions (disconnect power first). |
8. Specifications
| Specification | Detail |
|---|---|
| Model Number | JLm80-800A |
| Brand | ZHRCLY |
| Manufacturer | Original factory |
| Item Weight | 20 pounds |
| Product Dimensions | 1 x 1 x 1 inches |
| ASIN | B0DJVS1252 |
| Date First Available | October 11, 2024 |
9. Warranty and Support
This ZHRCLY RHEKEN JLm80-800A Automatic Self-Priming Pump is covered by a manufacturer's warranty against defects in materials and workmanship. Please refer to the warranty card included with your purchase for specific terms, conditions, and duration. Keep your proof of purchase for warranty claims.
For technical assistance, troubleshooting beyond this manual, or warranty service, please contact ZHRCLY customer support through your retailer or the official brand website. When contacting support, please have your model number (JLm80-800A) and purchase date readily available.