GarveeHome cG-XJuyMkenayxbegy5bwwMuu6J
Garveehome Single Wall Oven User Manual
Model: cG-XJuyMkenayxbegy5bwwMuu6J | Brand: GarveeHome
1. Introduction
Thank you for choosing the Garveehome 24 Inch Electric Wall Oven. This manual provides essential information for the safe and efficient operation, installation, and maintenance of your new appliance. Please read this manual thoroughly before using the oven and keep it for future reference.
This electric wall oven is designed for built-in installation and features 8 cooking modes, a 3000W heating element, 2.5 cubic feet capacity, touch controls, and a triple-layer glass door for optimal cooking performance and safety.
2. Important Safety Information
To reduce the risk of fire, electric shock, injury to persons, or damage when using the oven, follow basic safety precautions, including the following:
- Electrical Safety: Ensure the oven is properly grounded. Do not operate the oven with a damaged cord or plug. Disconnect power before servicing.
- Installation: Install the oven only according to the installation instructions in this manual. Ensure proper ventilation.
- Child Safety: Do not allow children to climb, stand, or hang on the oven door or shelves. Supervise children when the oven is in use.
- Hot Surfaces: The oven interior, door, and surrounding surfaces become hot during operation. Use oven mitts when handling hot items.
- Flammable Materials: Do not store flammable materials in or near the oven.
- Cleaning: Clean the oven regularly as instructed in the maintenance section. Do not use harsh abrasive cleaners or sharp metal scrapers to clean the oven door glass.
- Servicing: Do not repair or replace any part of the oven unless specifically recommended in this manual. All other servicing should be referred to a qualified technician.
3. Setup and Installation
3.1 Unpacking
- Carefully remove the oven from its packaging.
- Remove all packing materials, tape, and protective film from the oven.
- Inspect the oven for any shipping damage. If damaged, do not install and contact customer support.
3.2 Installation Requirements
Ensure your kitchen cabinet opening meets the specified dimensions for built-in installation.
- Product Dimensions: 23.4" (W) x 22.1" (D) x 23.4" (H)
- Built-in Dimensions: 22" (W) x 21.6" (D) x 23.4" (H)
- Electrical Supply: 240 Volts, 3000W. A dedicated circuit is recommended.

Figure 3.1: Standard Size for Easy Installation
This image illustrates the external dimensions of the oven (23.6 inches wide, 23.5 inches high, 22.8 inches deep) and the recommended built-in cabinet dimensions (22.6 inches wide, 23.4 inches high, 22.8 inches deep) for proper fitting into a kitchen cabinet.
3.3 Installation Steps
- Ensure the power supply is turned off at the circuit breaker.
- Carefully slide the oven into the prepared cabinet opening.
- Secure the oven to the cabinet using the provided screws through the mounting holes.
- Connect the oven to the electrical supply according to local electrical codes. It is recommended to have this done by a qualified electrician.
- Turn on the power supply and test the oven's basic functions.
4. Operating the Oven
4.1 Control Panel Overview
The Garveehome oven features a combination of a touch screen and mechanical knobs for precise control.

Figure 4.1: Precise Control Panel
This image displays the oven's control panel, highlighting the touch screen display and the rotary knob. It details various indicators and controls: Pause/Start Oven, Power ON/OFF, Preheat Function Indicator, Defrost Function Indicator, Fermentation Function Indicator, Dehydrate Function Indicator, Preset Indicator, Child Lock Indicator, and Lamp Indicator. Instructions for selecting and confirming temperature, time, and function, as well as activating child lock, are also shown.
- Touch Screen Display: Shows current time, temperature, cooking mode, and other settings.
- Rotary Knob: Used to select and confirm temperature, time, and functions.
- Power ON/OFF Button: Press to turn the oven on or off.
- Pause/Start Button: Press to pause or start a cooking cycle. Press and hold for 5 seconds to turn the oven lamp on/off.
- Preset Button: Press to access preset cooking options. Press and hold for 3 seconds for child lock.
4.2 Cooking Modes
The oven offers 8 quick automatic cooking functions and additional powerful functions to meet various culinary needs.

Figure 4.2: 8 Quick Automatic Cooking Functions
This image displays the eight primary cooking functions of the oven: Defrost, Keep Warm, Bake, Convection, Grill, Vegetable, Rotisserie, and Insulation. Each function is accompanied by an illustrative image of food being prepared using that mode, such as frozen fish for defrost, pizza for bake, and roasted chicken for rotisserie.
- Defrost: For thawing frozen foods.
- Keep Warm: Maintains food at a serving temperature.
- Bake: Standard baking for cakes, cookies, and casseroles.
- Convection: Uses a fan to circulate hot air for even cooking and faster results. Ideal for roasting and baking multiple dishes.
- Grill: For browning and toasting.
- Vegetable: Optimized for cooking vegetables.
- Rotisserie: For roasting meats on a spit.
- Insulation: Likely refers to a low-temperature holding or proofing function.
4.3 Cooking Tips
The oven features 3D circulating hot air technology and a 3000W power rating for efficient and even cooking.

Figure 4.3: All-round 3D Heating
This image shows the interior of the oven with heating elements visible at the top and bottom, and a fan at the back. Orange arrows indicate the circulation of hot air, demonstrating the 3D heating technology that ensures even cooking. A roasted chicken is visible on the bottom rack.
- Preheating: Always preheat the oven to the desired temperature for best results, especially for baking.
- Rack Placement: Use the appropriate rack position for your dish. The 2.5 Cu.Ft capacity allows for cooking multiple items.

Figure 4.4: 2.5 Cu.Ft. Large Capacity
This image shows the oven installed in a kitchen setting, with a graphic overlay indicating its 2.5 cubic feet (70L) capacity. The text emphasizes that it can roast a whole chicken and is suitable for daily cooking and gatherings. A woman and child are shown in the foreground, suggesting family use.
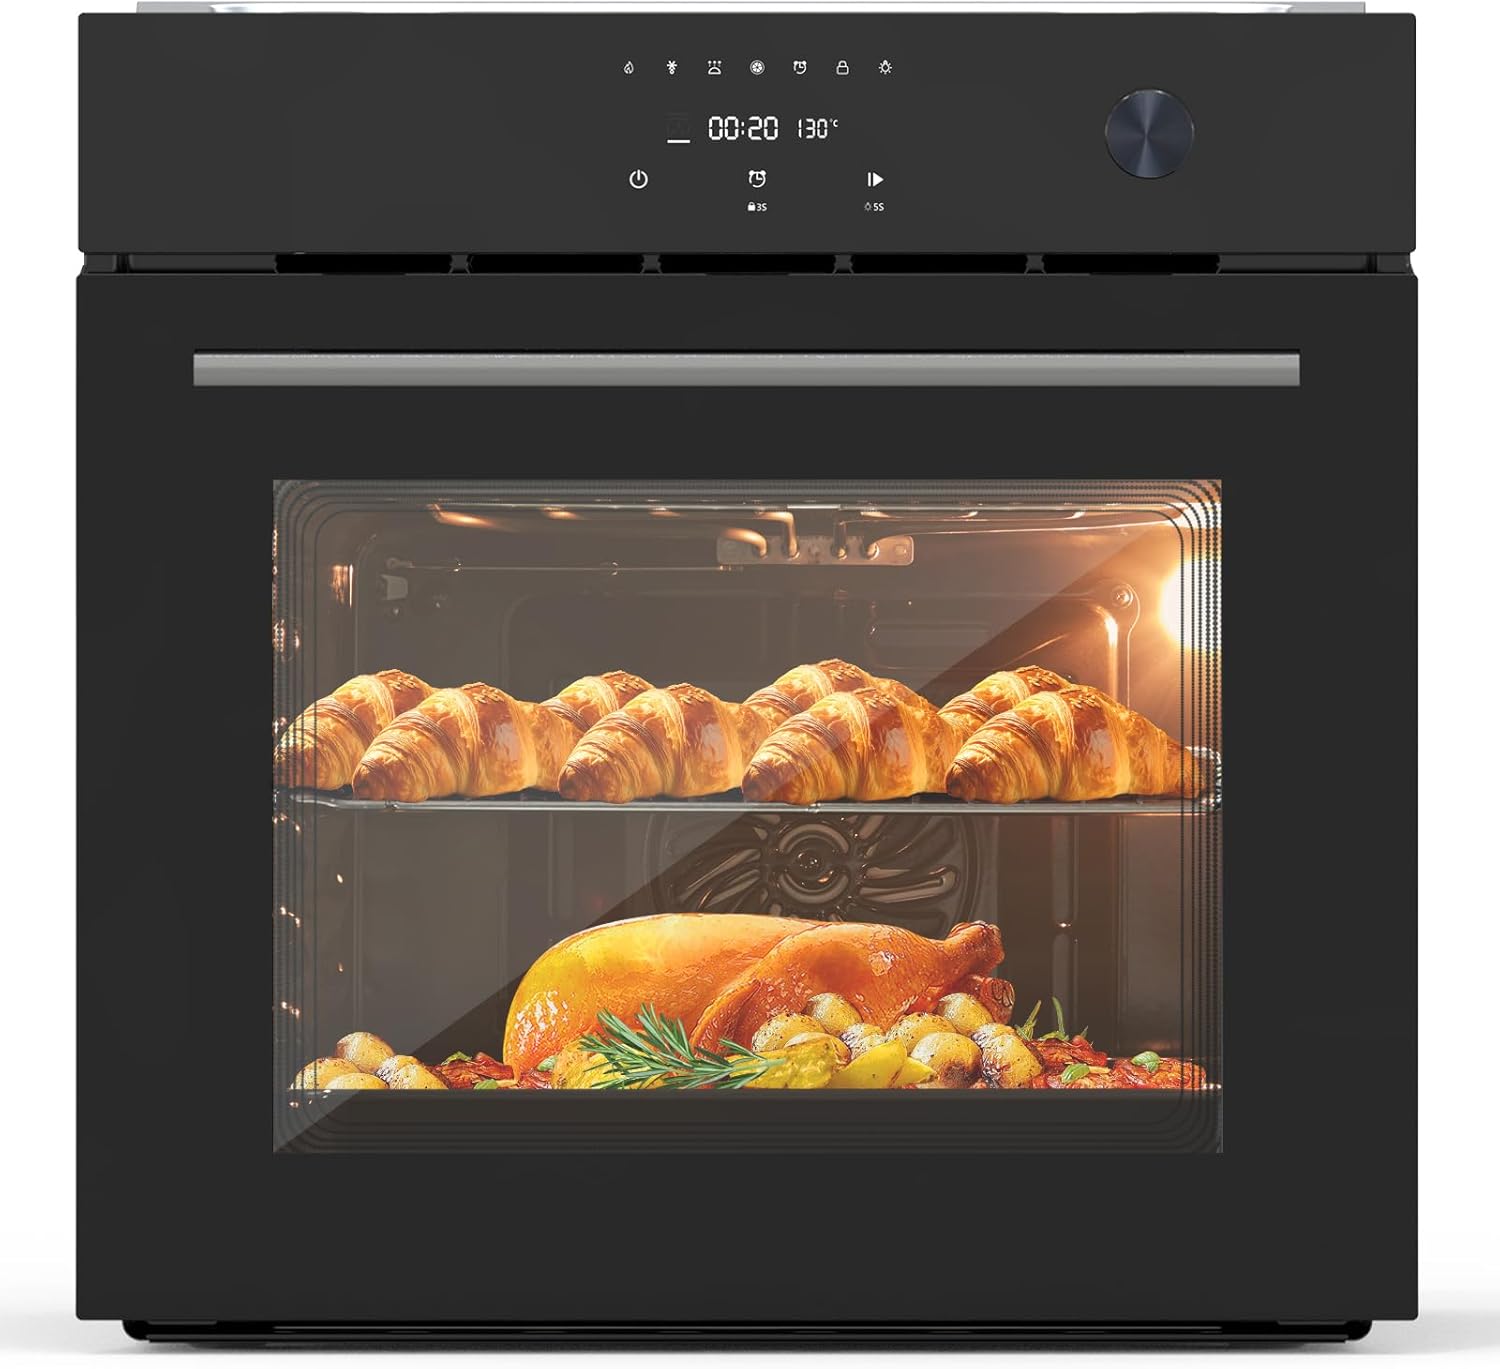
Figure 4.5: Oven in Use with Food
This image provides a clear front view of the Garveehome single wall oven. Inside, croissants are visible on the upper rack, and a roasted chicken with vegetables is on the lower rack, demonstrating the oven's capacity and ability to cook multiple items simultaneously.
- Triple-Layer Glass Door: Provides high transparency for monitoring food and efficient thermal insulation.

Figure 4.6: Triple-layer Tempered Glass Door
This image illustrates the construction of the oven door, highlighting its triple-layer tempered glass design. Arrows indicate how the multiple layers provide efficient thermal insulation, keeping the exterior cool while the interior remains hot. Key benefits like high transparency and easy cleaning are also noted.
- Pull-out Water Tank: Allows adding moisture during baking without opening the door, useful for certain recipes.
5. Maintenance and Care
Regular cleaning and maintenance will ensure the longevity and optimal performance of your Garveehome oven.
5.1 Cleaning the Oven
- Interior: The food-grade enamel interior is designed for easy cleaning. Allow the oven to cool completely before cleaning. Wipe spills immediately with a damp cloth. For stubborn stains, use a mild oven cleaner specifically designed for enamel surfaces.
- Exterior: Clean the exterior surfaces, including the black tempered glass finish, with a soft cloth and mild detergent. Avoid abrasive cleaners or scouring pads that can scratch the surface.
- Oven Door: The triple-layer glass door is easy to clean. Use a glass cleaner on the exterior. Do not use harsh abrasive cleaners or sharp metal scrapers on the glass.
- Racks and Accessories: Remove oven racks and other accessories and wash them in warm, soapy water. Rinse and dry thoroughly.
5.2 General Care
- Do not line the oven bottom or racks with aluminum foil, as this can trap heat and damage the oven.
- Ensure the oven door seals are clean and free of debris to maintain proper insulation.
- Regularly check the power cord for any signs of damage.
6. Troubleshooting
Before contacting customer service, please refer to the following table for common issues and their solutions.
| Problem | Possible Cause | Solution |
|---|---|---|
| Oven does not turn on. | No power supply; circuit breaker tripped. | Check power connection. Reset circuit breaker. |
| Oven not heating properly. | Incorrect mode selected; door not closed properly; heating element issue. | Verify cooking mode and temperature settings. Ensure door is fully closed. Contact service if issue persists. |
| Display shows an error code. | Internal malfunction. | Note the error code and contact customer support for assistance. |
| Oven light not working. | Bulb burnt out; loose connection. | Replace bulb (ensure oven is cool and unplugged). Check connection. |
| Excessive smoke during cooking. | Food spills; grease buildup. | Clean oven interior thoroughly. Reduce amount of grease in cooking. |
7. Specifications
| Feature | Detail |
|---|---|
| Brand | GarveeHome |
| Model Number | cG-XJuyMkenayxbegy5bwwMuu6J |
| Type | Single Electric Wall Oven |
| Capacity | 2.5 Cubic Feet (70L) |
| Product Dimensions (W x D x H) | 23.4" x 22.1" x 23.4" |
| Built-in Dimensions (W x D x H) | 22" x 21.6" x 23.4" |
| Color | Black |
| Voltage | 240 Volts |
| Wattage | 3000W |
| Cooking Modes | 8 (Defrost, Keep Warm, Bake, Convection, Grill, Vegetable, Rotisserie, Insulation) |
| Control Type | Touch Control & Knob |
| Door Type | Triple-Layer Tempered Glass |
| Interior Material | Food-grade Enamel |
| Heating Method | 3D Circulating Hot Air (Convection) |
8. Warranty and Customer Support
GarveeHome is committed to providing high-quality products and excellent customer service.
8.1 Warranty Information
Specific warranty details are typically provided with your purchase documentation. Please refer to the warranty card or contact GarveeHome customer support for information regarding your product's warranty period and coverage.
8.2 Customer Support
If you encounter any issues or have questions regarding your Garveehome Single Wall Oven, our dedicated online service team is here to assist you promptly and efficiently.
Contact Information:
- For inquiries or support, please reach out to the GarveeHome online service team. (Specific contact method not provided in source data, so general instruction is given).
- You may also visit the official GarveeHome store on Amazon for more information: GarveeHome Amazon Store
Ask a question about this manual
Ask about setup, troubleshooting, compatibility, parts, safety, or missing instructions. Manuals+ will review the question and use this page’s manual context to help answer it.