Introduction
Thank you for purchasing the Generic 1800W Electric Chain Saw. This manual provides essential information for the safe and efficient operation, maintenance, and troubleshooting of your new chainsaw. Please read this manual thoroughly before operating the tool and keep it for future reference. Proper understanding and adherence to these instructions will ensure optimal performance and extend the life of your chainsaw.

Image: The 1800W Electric Chain Saw, a powerful corded tool designed for efficient cutting tasks.
Safety Instructions
Operating a chainsaw can be dangerous if proper safety precautions are not followed. Always prioritize your safety and the safety of others.
General Safety Rules:
- Always wear appropriate Personal Protective Equipment (PPE), including safety glasses, hearing protection, gloves, and sturdy footwear.
- Ensure the work area is clear of obstacles, bystanders, and pets.
- Do not operate the chainsaw in wet conditions or in the presence of flammable liquids or gases.
- Inspect the chainsaw before each use for any damage, loose parts, or worn components.
- Keep a firm grip on both handles of the chainsaw during operation.
- Never operate the chainsaw with one hand.
- Be aware of kickback and how to avoid it.
- Disconnect the power supply before performing any maintenance or adjustments.
Electrical Safety:
- Ensure the power supply voltage matches the chainsaw's rating (240V for AU, 220V for EU & UK, 110V for US).
- Use only extension cords rated for outdoor use and appropriate for the chainsaw's power requirements.
- Do not abuse the cord. Never carry the chainsaw by the cord or yank it to disconnect from the outlet.
- Keep the cord away from heat, oil, sharp edges, or moving parts.
Product Overview
Familiarize yourself with the main components of your electric chain saw.

Image: A detailed view of the electric chain saw, highlighting key components such as the Oil Cap, 16-inch Bar, Chain Tensioner, Safety Button, and Back Handle.
Key Components:
- 16-inch Bar: The guide for the cutting chain.
- Chain: The cutting element of the saw.
- Oil Cap: Used to access the oil reservoir for chain lubrication.
- Chain Tensioner: Adjusts the tension of the chain on the bar.
- Safety Button: Must be pressed before the trigger can be engaged to prevent accidental starting.
- Back Handle: Provides a secure grip for operating the saw.
- Wraparound Handle: Offers multiple grip positions for control during various cutting angles.
Specifications
Technical specifications of the 1800W Electric Chain Saw.
| Feature | Specification |
|---|---|
| Output Power | 1800W |
| Rated Voltage | 240V (AU), 220V (EU & UK), 110V (US) |
| Rated Frequency | 50Hz (EU & UK & AU), 60Hz (US) |
| No-load Speed | 5500r/min |
| Chain Speed | 800m/min |
| Guide Plate Size | 16 inch |
| Maximum Cutting Length | 405mm |
| Power Cable Length | Approx. 1500mm / 59 inches |
| Item Size | 800 * 220 * 185mm / 31.49 * 8.66 * 7.28in |
| Item Weight | Approx. 3.34 kg / 7.37 lbs |
Setup
1. Unpacking:
- Carefully remove all components from the packaging.
- Verify that all items listed in the package list are present: Electric Chain Saw, Wrench, User Manual.
- Inspect the chainsaw for any shipping damage. If damaged, do not operate and contact customer support.
2. Chain and Bar Installation (if not pre-assembled):
Refer to the specific instructions in your included paper manual for detailed steps on installing the chain and bar. Ensure the chain is oriented correctly with the cutting edges facing the direction of rotation.
3. Chain Tensioning:
Proper chain tension is crucial for safe and efficient operation. The clever auto-tension system helps prevent over-tightening, increasing the life of the bar and chain.
- Loosen the bar retaining nuts slightly.
- Locate the chain tensioner (refer to Product Overview).
- Turn the tensioner screw to adjust the chain tension. The chain should be snug against the bottom of the bar, but still able to be pulled around by hand. There should be no sag on the underside of the bar.
- Tighten the bar retaining nuts securely once the correct tension is achieved.

Image: The chain tensioning mechanism, designed for simple, tool-free adjustments to ensure optimal chain tension.
4. Adding Chain Oil:
The auto-lubrication system requires chain oil to keep the chain well-oiled and running efficiently.
- Ensure the chainsaw is unplugged.
- Locate and open the oil cap (refer to Product Overview).
- Fill the reservoir with high-quality bar and chain oil. Do not use motor oil or waste oil.
- Replace the oil cap securely.
- Check the oil level frequently during operation and refill as needed.

Image: The oiling system, showing the oil cap being opened to add lubricant, which keeps the bar and chain lubricated during operation.
Operating Instructions
1. Starting the Chainsaw:
- Ensure you are wearing all required PPE.
- Check the chain oil level.
- Plug the chainsaw into a suitable power outlet.
- Hold the chainsaw firmly with both hands, ensuring a balanced stance.
- Press the safety button (if applicable) and then squeeze the trigger to start the motor.
2. Cutting Techniques:
- Always maintain a firm grip and balanced footing.
- Allow the chain to reach full speed before beginning a cut.
- Do not force the saw; let the chain do the work.
- Be aware of the direction of falling timber and clear a safe retreat path.
- For felling trees, plan your cuts carefully, including a felling cut and a hinge.
- For limbing, work from the bottom up, supporting the branch if necessary to prevent pinching.
- The wraparound handle provides excellent control for multi-angle cutting.

Image: The wraparound handle of the chainsaw, designed to provide optimal comfort and control during various cutting operations.
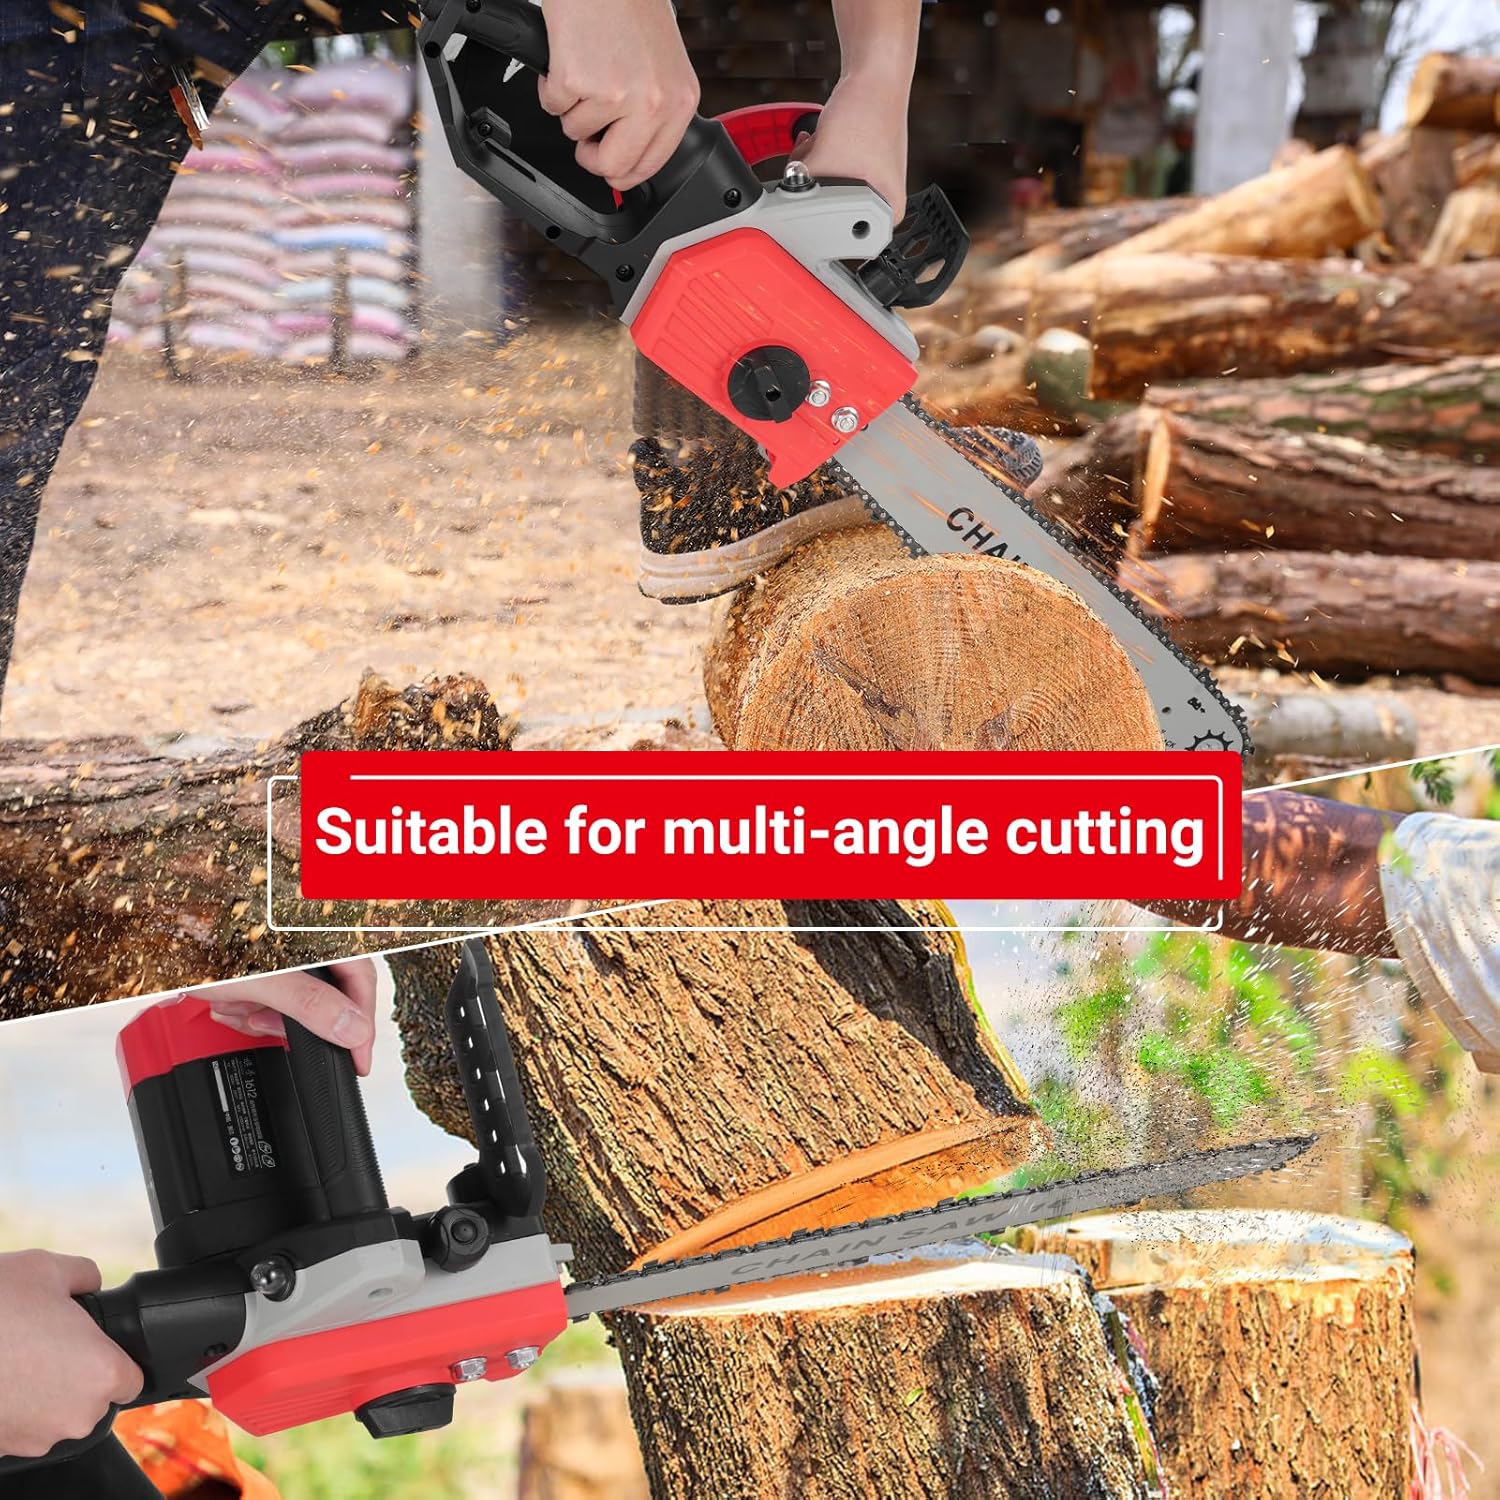
Image: Demonstrates the chainsaw's versatility, suitable for multi-angle cutting tasks on various types of wood.
3. Stopping the Chainsaw:
- Release the trigger to stop the motor.
- Engage the chain brake immediately after stopping the cut. The chain brake shuts down the chain almost instantly to prevent accidental cutting.
- Always unplug the chainsaw from the power outlet when not in use or before performing any adjustments or maintenance.
Maintenance
Regular maintenance ensures the longevity and safe operation of your chainsaw.
1. Chain Lubrication:
- Continuously monitor the oil level in the reservoir.
- Refill with appropriate bar and chain oil as needed.
- A properly lubricated chain will produce a fine mist of oil when running at full speed.
2. Chain Sharpening:
- A sharp chain cuts efficiently and safely. Sharpen the chain regularly or when it starts to produce sawdust instead of chips.
- Use a round file of the correct diameter for your chain.
- Maintain the correct filing angles as specified by the chain manufacturer.
- If unsure, have the chain professionally sharpened.
3. Bar Maintenance:
- Clean the guide bar groove regularly to remove sawdust and debris.
- Flip the guide bar periodically to ensure even wear.
- Check the guide bar for burrs and file them smooth.
4. Cleaning and Storage:
- After each use, unplug the chainsaw and allow it to cool.
- Clean the exterior of the chainsaw with a damp cloth.
- Remove sawdust and debris from the motor housing and cooling vents.
- Store the chainsaw in a dry, secure place, out of reach of children.
Troubleshooting
Refer to this section for common issues and their potential solutions.
| Problem | Possible Cause | Solution |
|---|---|---|
| Chainsaw does not start | No power supply; Safety button not pressed; Damaged power cord. | Check power connection; Ensure safety button is pressed before trigger; Inspect power cord for damage. |
| Chain not moving or moving slowly | Chain brake engaged; Incorrect chain tension; Chain dull or damaged; Lack of lubrication. | Disengage chain brake; Adjust chain tension; Sharpen or replace chain; Refill chain oil reservoir. |
| Saw cuts poorly or unevenly | Dull chain; Incorrect chain tension; Damaged chain or bar. | Sharpen chain; Adjust chain tension; Inspect and replace damaged components. |
| Excessive smoke or burning smell | Lack of chain lubrication; Overheating motor; Chain binding. | Refill chain oil; Allow motor to cool; Check for chain binding and clear debris. If problem persists, discontinue use and seek professional service. |
Warranty and Support
For information regarding warranty coverage, technical support, or replacement parts, please refer to the warranty card included with your purchase or contact the retailer where the product was acquired. Keep your proof of purchase for any warranty claims.


