WVC-800W
Solar Micro Inverter WVC-800W User Manual
Model: WVC-800W | Brand: Generic
1. Introduction
This manual provides detailed instructions for the installation, operation, and maintenance of the Generic WVC-800W Grid-tied Micro Inverter. This device is designed to convert direct current (DC) from solar panels into alternating current (AC) for grid connection, optimizing energy collection through Maximum Power Point Tracking (MPPT) technology.

Figure 1: Generic WVC-800W Micro Inverter. This image shows the compact, silver-colored micro inverter unit with its various connection ports for DC input from solar panels and AC output to the grid.
2. Safety Information and Precautions
Please read all safety instructions carefully before installation and operation. Failure to follow these instructions may result in electric shock, fire, or serious injury.
- Ensure the DC input voltage from solar panels is within the specified range of 22V to 60V. Exceeding this range can damage the inverter.
- It is recommended to use solar panels with a power output greater than 30W and a standard voltage of 36V.
- Connect solar panels in parallel. Series connection may cause the input voltage to be too high, exceeding the inverter's operating voltage range.
- The inverter automatically shuts off output when the power grid is faulty, ensuring safety.
- The input and output circuits are completely isolated for enhanced electrical safety.
- Do not attempt to disassemble or repair the inverter yourself. Refer to qualified personnel for service.
- Ensure proper grounding of the inverter.
3. Product Specifications

Figure 2: Product dimensions and detailed specifications. This image provides a top-down view of the inverter with its dimensions (199mm x 210mm) and a table listing various technical specifications.
| Parameter | Value (WVC-800W) |
|---|---|
| Type | Grid-tied Micro Inverter |
| Material | Aluminum alloy + PCB board + various components |
| Number of MC4 Input Connectors | 2 groups |
| MPPT Max. Power Point Tracking Voltage Range | 30V - 54V |
| Operating Voltage Range | 22 - 60V |
| Minimum Start-up Voltage | 20V |
| Max. Branch Input Voltage | 60V |
| AC Output Voltage | 120V/230V (automatic identification) |
| Max DC Input Power | 800W |
| Operating Temperature Range | -40°C to +65°C |
| Rated AC Frequency | 50Hz |
| Monitoring System | Mobile Phone APP |
| Output Power Factor | >0.99 |
| Total Harmonic Distortion Rate of Output Current | THD<5% |
| Maximum Conversion Efficiency | 95% |
| MPPT Tracking Efficiency | 99.9% |
| Waterproof Class | IP65 |
| Cooling Method | Auto-cooling |
| Package Dimensions | 3.94 x 3.94 x 3.94 inches |
| Item Weight | 2.2 pounds |
| Manufacturer | WANGYYDS |
4. Packing List
Verify that all components are present in the package:
- 1 x WVC-800W Micro Inverter
- 1 x Communication Antenna
- 2 x Set of Fixing Screws
- 1 x AC Output Line
- 1 x Installation User Manual (this document)
5. Installation and Setup
Follow these steps for proper installation of your micro inverter system.
5.1. Wiring Diagram

Figure 3: Wiring Diagram. This diagram illustrates the connection of solar panels to the micro inverter, and the inverter's connection to a two-way AC meter and the residential grid.
5.2. Installation Steps
- Mounting the Inverter: Securely mount the micro inverter in a suitable location, ensuring proper ventilation and protection from direct sunlight and extreme weather conditions. The IP65 waterproof rating provides protection against rain, but proper placement is still advised.
- Connecting Solar Panels (DC Input): Connect the DC output cables from your solar panels to the MC4 input connectors on the micro inverter. Ensure correct polarity (positive to positive, negative to negative). The WVC-800W model has 2 input groups.
- Connecting to AC Grid (AC Output): Connect the AC output line from the inverter to your residential grid. This typically involves connecting to a dedicated circuit breaker in your electrical panel. Consult a qualified electrician if unsure. The inverter automatically adapts to 120V or 230V output voltage.
- Antenna Installation: Attach the communication antenna to the designated port on the inverter for wireless monitoring capabilities.
- Stacked Use (Optional): For higher power requirements, multiple WVC micro inverters can be used in a stacked configuration. For example, four 300W inverters can combine for 1200W output. The number of stacked units is unlimited, provided each is connected correctly.
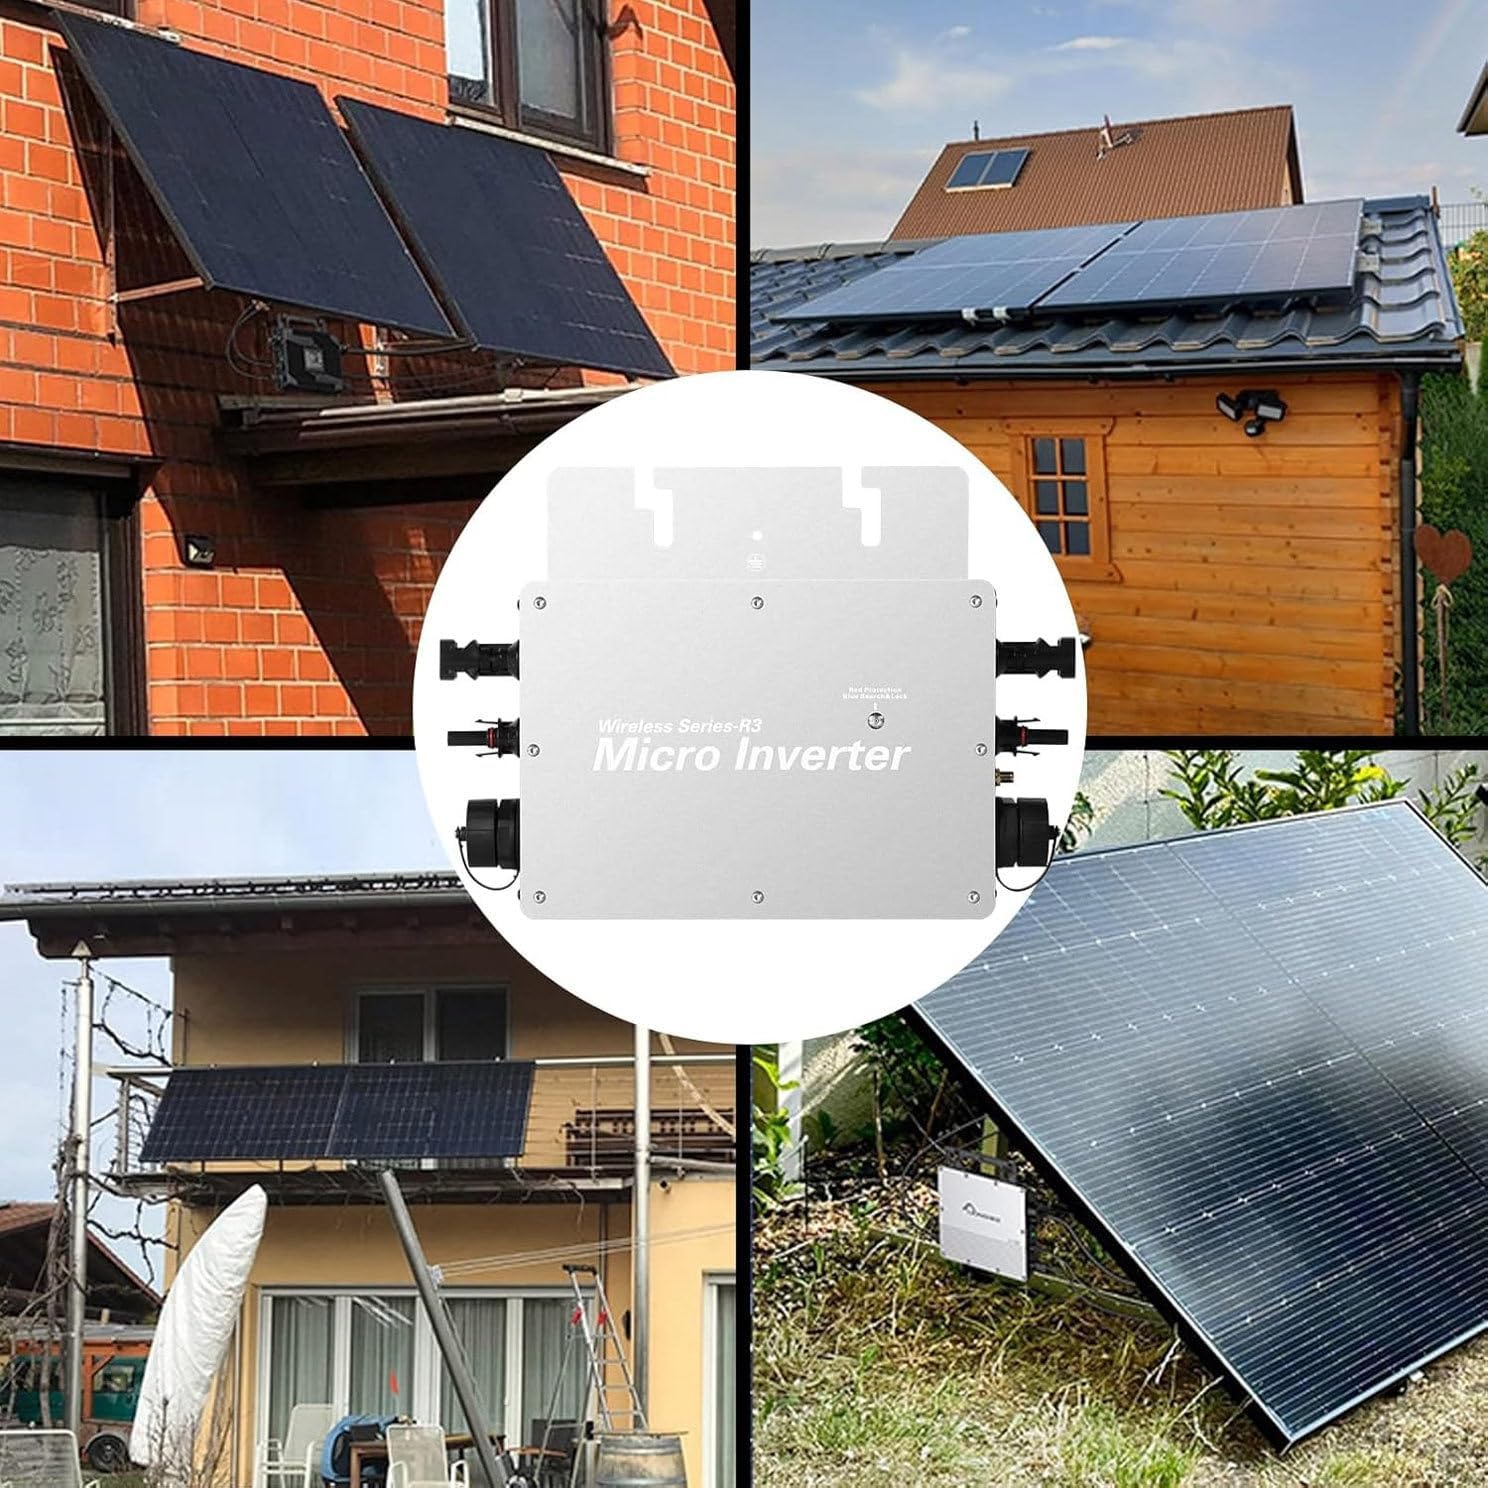
Figure 4: Example installation scenarios. This image displays different ways the micro inverter can be integrated into various solar panel setups, including rooftop and ground-mounted systems.
6. Operating Instructions: APP Intelligent Monitoring
The WVC-800W Micro Inverter features intelligent monitoring via a mobile phone application. This allows you to track the system's performance in real-time.
6.1. Initial APP Connection

Figure 5: APP connection overview. This image illustrates the three main steps: connecting the machine to solar panels, connecting the output to the national grid, and connecting the machine to the APP for data monitoring.
- Ensure your inverter is properly installed and connected to both solar panels and the AC grid.
- Download the monitoring APP. You can scan the QR code provided in the manual or visit the official download link: APP Download Link.
- Register or log in to your personal account within the APP.
6.2. Configuration Steps for WiFi Cloud Monitoring

Figure 6: WiFi Cloud Monitoring Configuration. This image provides an 8-step visual guide on how to set up the WiFi monitoring feature using the mobile application, from downloading the app to viewing real-time power data.
- Download APP: Download the "Cloud Intelligence" APP on your mobile phone or scan the QR code on the manual to download. Register/login personal account.
- Enable Bluetooth/WiFi: On your mobile phone, turn on Bluetooth, WiFi, and location services. Ensure the device line is connected.
- Add Device: Enter the APP, click "+" in the upper right corner to add devices.
- Scan and Add: After scanning for the device, it will be displayed. Click "Add".
- Enter WiFi Info: Enter your home WiFi account and password information.
- Connect Device: Click "Next" to start connecting the device.
- Device Added: The device is added successfully, and the device name can be freely modified.
- View Data: The interface displays the current real-time power, total power generation, AC voltage, AC frequency, AC current, and other important parameters.
7. Maintenance
The WVC-800W Micro Inverter is designed for low maintenance. Follow these general guidelines:
- Cleaning: Periodically clean the exterior of the inverter to prevent dust and debris buildup. Use a soft, dry cloth. Do not use abrasive cleaners or solvents.
- Waterproof Protection: The IP65 waterproof rating ensures protection against dust and low-pressure water jets. However, avoid submerging the unit or exposing it to high-pressure water.
- Cooling: The inverter uses an auto-cooling method. Ensure that the cooling fins are not obstructed to allow for proper heat dissipation.
- Connection Checks: Periodically inspect all electrical connections (DC input, AC output) to ensure they are secure and free from corrosion.
- Environmental Conditions: While designed for a wide operating temperature range (-40°C to +65°C), extreme conditions can affect performance. Ensure the installation environment is as stable as possible.

Figure 7: IP65 Waterproof and Temperature Range. This image visually represents the inverter's IP65 waterproof capability and its wide operating temperature range, indicating suitability for various outdoor conditions.
8. Troubleshooting
If you encounter issues with your micro inverter, refer to the following common troubleshooting steps:
- No Power Output:
- Check all DC input connections from solar panels. Ensure correct polarity and secure connections.
- Verify that the solar panel voltage is within the inverter's operating range (22V-60V).
- Check the AC output connection to the grid. Ensure the circuit breaker is on and connections are secure.
- Confirm that the power grid is operational. The inverter will automatically shut off output if the grid is faulty.
- Low Power Output:
- Ensure solar panels are clean and free from shading.
- Verify that solar panels are connected in parallel, as recommended, to optimize voltage.
- Check the MPPT tracking efficiency via the mobile APP.
- APP Connection Issues:
- Ensure Bluetooth, WiFi, and location services are enabled on your mobile device.
- Verify that the inverter's communication antenna is properly installed.
- Check your home WiFi network for connectivity issues.
- Restart the APP or your mobile device.
- Unusual Noises or Smells: Immediately disconnect the inverter from both DC and AC power sources. Do not attempt to operate the unit. Contact customer service for assistance.
9. Customer Support
For any questions, technical assistance, or support, please contact our customer service team. We aim to respond within 24 hours.
Contact information is typically provided by the seller or manufacturer. Please refer to your purchase documentation for specific contact details.