
1. Introduction
This manual provides essential information for the proper installation, operation, and maintenance of your Armaggeddon Tritron Pro 300 Gaming PC Case. Please read these instructions carefully before beginning installation to ensure optimal performance and safety. Keep this manual for future reference.
2. Safety Information
- Always disconnect the power supply from the wall outlet before installing or servicing any components inside the PC case.
- Handle components with care to avoid damage from static electricity. Consider using an anti-static wrist strap.
- Be cautious of sharp edges inside the case.
- Do not obstruct ventilation openings. Ensure adequate airflow around the case.
- Keep the case away from direct sunlight, heat sources, and moisture.
- This product is intended for indoor use only.
3. Package Contents
Verify that all items are present in your package:
- Armaggeddon Tritron Pro 300 Gaming PC Case
- 3 x ARGB Fans (pre-installed)
- Accessory kit (screws, standoffs, cable ties, etc.)
- User Manual (this document)
4. Product Overview
The Armaggeddon Tritron Pro 300 is a mid-tower gaming PC case designed for optimal airflow, cable management, and aesthetic appeal. It features a tempered glass side panel and integrated ARGB lighting.
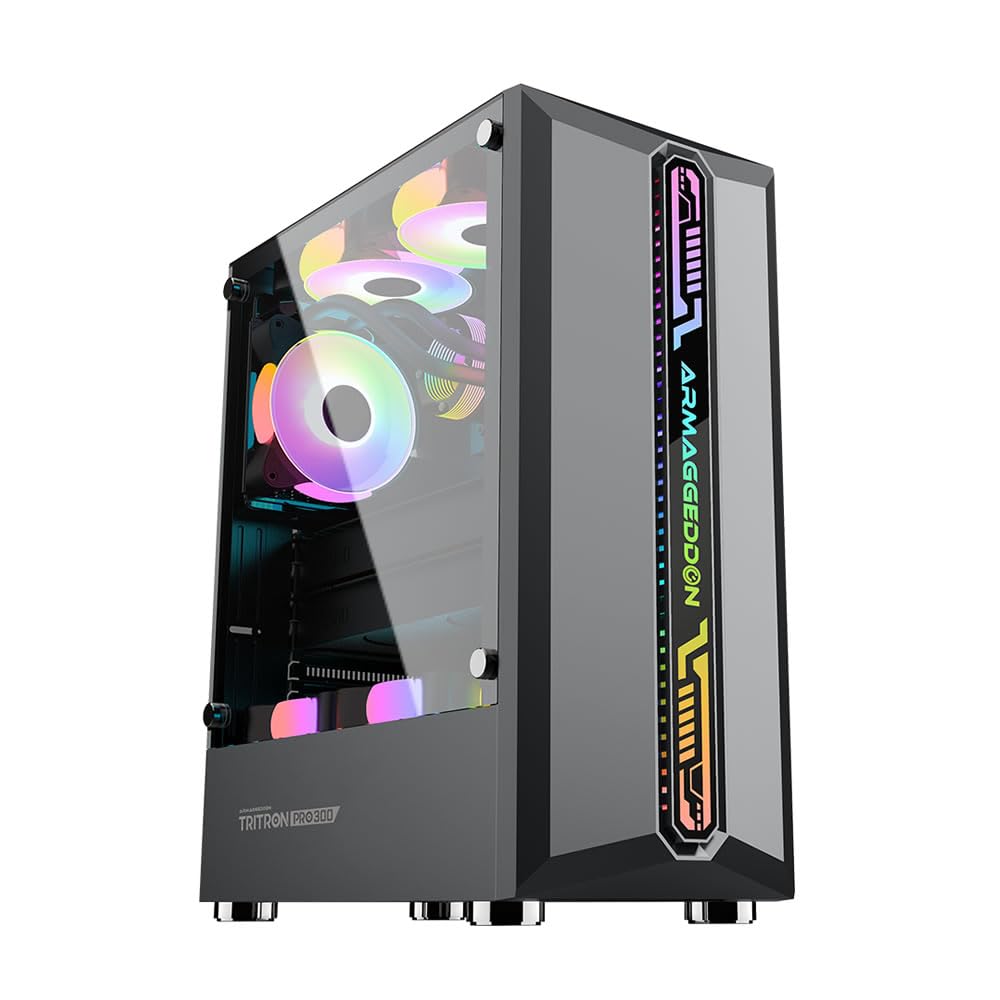
Figure 4.1: Front-left view of the Armaggeddon Tritron Pro 300 Gaming PC Case, showcasing its design and RGB lighting.

Figure 4.2: Rear-right view of the case, highlighting the interior layout and rear panel connections.

Figure 4.3: Front panel view, illustrating the RGB Ambilight strips and overall aesthetic.
Key Features:
- RGB Ambilight Strips: Synchronized ARGB lighting effects for a customizable visual experience.
- Tempered Glass Side Panel: Provides a clear view of your internal components.
- Magnetic Dust Screen: Located on the top panel to prevent dust accumulation while allowing light transmission.
- Wide Motherboard Compatibility: Supports Mini ITX, Micro-ATX, and ATX motherboards.
- Efficient Cable Management: Designed with hidden cable routing for a clean and organized build.
- Ample Installation Space: Accommodates various components including long graphics cards and multiple fans.

Figure 4.4: Feature highlights of the Tritron Pro 300, detailing its internal design and component support.
5. Setup and Installation Guide
Follow these steps to install your PC components into the Armaggeddon Tritron Pro 300 case.
5.1 Preparing the Case
- Place the case on a flat, stable surface.
- Remove the tempered glass side panel by unscrewing the four thumb screws and carefully lifting the panel away. Set it aside on a soft, non-abrasive surface.
- Remove the rear side panel by unscrewing the two thumb screws and sliding it backward.
5.2 Motherboard Installation
- Install the I/O shield that came with your motherboard into the opening at the rear of the case.
- Align your motherboard with the pre-installed standoffs. Ensure the screw holes on the motherboard match the standoffs.
- Secure the motherboard using the appropriate screws from the accessory kit. Do not overtighten.
5.3 Power Supply Unit (PSU) Installation
- Locate the PSU mounting area at the bottom rear of the case.
- Slide your PSU into the designated bay from the rear of the case.
- Secure the PSU with screws from the accessory kit through the rear of the case.
5.4 Storage Drive Installation
The case supports 1 x 2.5-inch SSD and 1 x 3.5-inch HDD.
- 2.5-inch SSD: Locate the SSD mounting bracket behind the motherboard tray or in the PSU shroud area. Secure the SSD to the bracket with screws, then attach the bracket to the case.
- 3.5-inch HDD: Locate the HDD drive bay, typically beneath the PSU shroud. Slide the HDD into the bay and secure it with screws.
5.5 Expansion Card Installation (GPU, etc.)
- Remove the necessary expansion slot covers from the rear of the case.
- Insert your expansion card (e.g., graphics card) into the appropriate PCIe slot on your motherboard.
- Secure the expansion card with a screw to the case chassis.
5.6 Fan Installation and Cooling
The case comes with 3 pre-installed ARGB fans. Additional fans can be installed as follows:
- Front: Up to 3 x 120mm fans
- Top: Up to 2 x 120mm fans
- Rear: 1 x 120mm fan (usually pre-installed)
- PSU Chamber: Up to 2 x 120mm fans
Ensure fans are oriented correctly for optimal airflow (intake or exhaust).
5.7 Connecting Front Panel I/O
Connect the following cables from the case to the corresponding headers on your motherboard:
- USB 3.0: Connect the large blue connector to the USB 3.0 header.
- USB 2.0: Connect the USB 2.0 connectors to the USB 2.0 headers.
- HD Audio: Connect the HD Audio connector to the audio header.
- Power SW, Reset SW, HDD LED, Power LED: Connect these small connectors to the front panel headers according to your motherboard manual.
- LED Button: Connect the ARGB cable from the front panel to your motherboard's ARGB header or the included ARGB controller.
5.8 Cable Management
Utilize the space behind the motherboard tray and the cable routing cutouts to neatly route and secure cables using the provided cable ties. This improves airflow and aesthetics.
5.9 Final Assembly
- Once all components are installed and cables are managed, reattach the rear side panel.
- Carefully reattach the tempered glass side panel and secure it with the four thumb screws.
6. Operating Instructions
6.1 Powering On
After connecting all external peripherals and the power cable to your PSU, press the Power button on the top panel of the case to turn on your system.
6.2 RGB Lighting Control
The Armaggeddon Tritron Pro 300 features integrated ARGB lighting. Use the dedicated LED button on the top panel to cycle through various lighting modes and colors. If connected to a compatible motherboard's ARGB header, you can also control the lighting via motherboard software.
7. Maintenance
7.1 Cleaning the Dust Filters
The top panel features a magnetic dust screen. Regularly remove and clean this filter to maintain optimal airflow and prevent dust buildup inside the case. Simply lift the magnetic filter, clean it with water or a soft brush, and reattach it.
7.2 General Cleaning
Use a soft, damp cloth to wipe down the exterior surfaces of the case. For the tempered glass panel, use a glass cleaner and a microfiber cloth to avoid streaks. Avoid using harsh chemicals or abrasive materials.
7.3 Internal Cleaning
Periodically, with the system powered off and unplugged, open the side panels and use compressed air to remove dust from internal components and fans. Ensure fans are held stationary while cleaning to prevent damage.
8. Troubleshooting
- System not powering on: Ensure all power cables (24-pin ATX, 8-pin CPU, GPU power) are securely connected. Check the PSU switch is in the 'ON' position. Verify front panel power switch connection to the motherboard.
- Fans not spinning/RGB not working: Check fan power connections to the motherboard or fan controller. Ensure ARGB cables are correctly connected to the motherboard's ARGB header or the integrated controller. Try cycling RGB modes with the LED button.
- No display output: Ensure your graphics card is properly seated in its PCIe slot and has all necessary power cables connected. Verify monitor cable connection.
- USB ports not working: Check if the USB 2.0 and USB 3.0 front panel connectors are securely attached to the motherboard headers.
For more detailed troubleshooting, refer to the manuals for your specific motherboard, power supply, and other components.
9. Specifications
Below are the technical specifications for the Armaggeddon Tritron Pro 300 Gaming PC Case:

Figure 9.1: Detailed specifications of the Tritron Pro 300.
| Feature | Specification |
|---|---|
| Chassis Material | SPCC 0.45mm Fully Black Steel Structure, Tempered Glass |
| USB Ports | 2 x USB 2.0 (Type-A High Speed), 1 x USB 3.0 (Type-A) |
| Audio Ports | 1 x HD Audio Port, 1 x Microphone Port |
| Buttons | 1 x Power Button, 1 x Reset Button, 1 x LED Button |
| Drive Bays | 1 x 2.5-inch SSD, 1 x 3.5-inch HDD |
| Expansion Slots | 7 |
| Fan Support (Max) | Front: 3 x 120mm, Top: 2 x 120mm, Rear: 1 x 120mm, PSU Chamber: 2 x 120mm |
| Included Fans | 3 x ARGB Fans |
| Chassis Dimensions (L x W x H) | 380mm x 190mm x 447mm |
| Supported Motherboard Sizes | Mini ITX (170 x 170mm), Micro-ATX (244 x 244mm), ATX (305 x 244mm) |
| Max GPU Length | 320mm (305mm with rear fan) |
| Max CPU Cooler Height | 165mm |
| Power Supply Mounting Type | Bottom Mount |
10. Warranty and Support
10.1 Warranty Information
This Armaggeddon Tritron Pro 300 Gaming PC Case comes with a 1-year warranty from the date of purchase. The warranty covers manufacturing defects and faulty components under normal use. It does not cover damage caused by misuse, accidents, unauthorized modifications, or improper installation.
10.2 Technical Support
For technical assistance or warranty claims, please contact your retailer or the manufacturer, Leapfrog Distribution Sdn. Bhd. Ensure you have your proof of purchase and the product model number (TRITONPRO300BLK) ready when contacting support.
For additional resources and product information, you may visit the official Armaggeddon website or consult online PC building communities.