WB13X25500
Generic WB13X25500 Range Oven Stove Igniter Instruction Manual
Model: WB13X25500
Introduction
This document provides essential information for the installation, handling, and maintenance of the Generic WB13X25500 Range Oven Stove Igniter. This igniter is designed as a replacement part for various General Electric range and oven models. Please read these instructions carefully before proceeding with installation or handling.
Product Overview and Compatibility
The WB13X25500 Range Oven Stove Igniter is a replacement component for oven and range units. It replaces part numbers AP5986244 and PS11726670.
This igniter is compatible with the following General Electric models:
- JGB735SP1SS
- JGSS66FEL3DS
- PGS930BEL3TS
- JGB700SEJ1SS
- JGS760FEL1DS
Note: This is a generic product and not an OEM part. It is designed to be compatible with the listed models. OEM brand names and logos are trademarks of their respective owners and are used here solely for compatibility demonstration.
Symptoms Addressed
Replacing a faulty igniter with the WB13X25500 can resolve the following common oven and range issues:
- Oven not heating up
- Delayed ignition or no ignition at all
- Weak or intermittent flame
Important Handling Information
The Range Oven Stove Igniter WB13X25500 is extremely fragile and sensitive to contamination. Always handle the igniter with care, avoiding direct contact with the ceramic heating element. Oils from skin can damage the igniter's surface and reduce its lifespan.
Installation Guide
Safety Warning: Before attempting any installation or repair, ensure the appliance is completely disconnected from its power source (unplugged or circuit breaker turned off) to prevent electric shock or injury. Gas supply should also be turned off if working on a gas appliance.
While specific installation steps may vary by appliance model, the general procedure for replacing an oven igniter includes:
- Prepare the Appliance: Disconnect power and gas supply to the range/oven. Allow the oven to cool completely if it was recently in use.
- Access the Igniter: Open the oven door and remove any racks. Locate the bottom panel of the oven cavity, which may need to be removed to access the igniter. This usually involves removing a few screws.
- Locate the Old Igniter: The igniter is typically mounted near the burner tube. Observe how the old igniter is mounted and connected.
- Disconnect Wiring: Carefully disconnect the electrical wires leading to the old igniter. Note the orientation of the wires if they are not interchangeable.
- Remove Old Igniter: Unscrew or unclip the old igniter from its mounting bracket. Handle it gently as it may be brittle.
- Install New Igniter: Mount the new WB13X25500 igniter onto the bracket using the original screws or clips. Ensure it is securely fastened.
- Connect Wiring: Connect the new igniter's wires to the appliance's wiring. Use the provided wire connectors if necessary, ensuring a secure connection.
- Reassemble: Replace the oven bottom panel and any other components that were removed.
- Test Appliance: Restore power and gas supply. Test the oven to ensure the igniter functions correctly and the burner ignites properly.
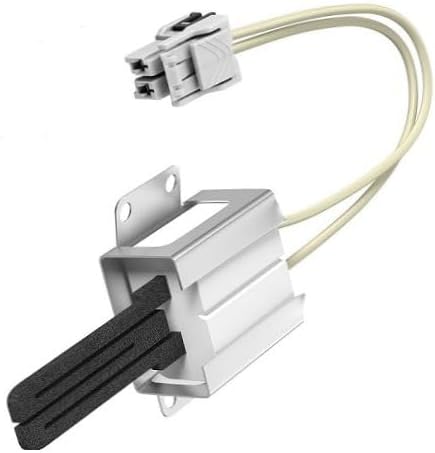
Image 1: The WB13X25500 Range Oven Stove Igniter, showing the ceramic igniter element, metal bracket, and electrical wires with a connector.

Image 2: A detailed view of the igniter's ceramic heating element and its protective housing, highlighting its fragile nature.
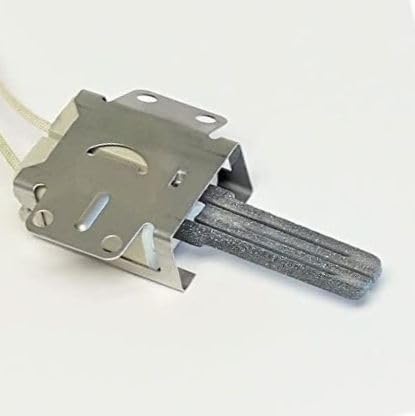
Image 3: A side perspective of the igniter, illustrating the mounting bracket and the elongated ceramic igniter element.

Image 4: Two white wire caps, typically used for securing electrical connections during installation.
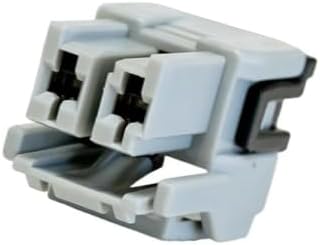
Image 5: A gray electrical connector, which may be part of the igniter's wiring harness for connecting to the appliance's electrical system.
Operating Principles
The oven igniter functions by drawing electrical current, which causes its ceramic element to heat up to a high temperature. This heat then ignites the gas flowing from the burner. A properly functioning igniter ensures quick and reliable ignition of the oven's gas burner, allowing the oven to reach and maintain the desired temperature.
Maintenance
Due to the delicate nature of the igniter, no routine maintenance is typically required beyond careful handling during installation. Avoid touching the ceramic element with bare hands, as skin oils can create hot spots and lead to premature failure. If the igniter becomes visibly dirty, gently clean it with a soft, dry brush, ensuring no residue remains.
Troubleshooting
If your oven continues to exhibit issues after replacing the igniter, consider the following:
- No Ignition: Double-check all electrical connections to ensure they are secure and properly insulated. Verify that the gas supply is on and that there are no blockages in the burner tube.
- Delayed Ignition: While the new igniter should resolve this, ensure the igniter is positioned correctly relative to the burner tube. A weak gas flow could also contribute to delayed ignition.
- Oven Not Heating: Confirm that the igniter glows brightly. If it glows but the gas does not ignite, there might be an issue with the gas valve or gas supply. If it does not glow, re-check wiring and power supply.
If problems persist, it is recommended to consult a qualified appliance technician.
Specifications
| Feature | Detail |
|---|---|
| Part Number | WB13X25500_DPB |
| Replaces Part Numbers | AP5986244, PS11726670 |
| Voltage | 120 Volts |
| Item Weight | 5 ounces |
| Product Dimensions | 5.6 x 2.6 x 2.16 inches |
| Included Components | 1 x Range Oven Stove Igniter WB13X25500 |
Warranty Information
This product comes with a 1-month warranty from the date of purchase. Please retain your proof of purchase for any warranty claims. The warranty covers manufacturing defects but does not cover damage due to improper installation, misuse, or accidental breakage.
Support
For further assistance or if you encounter issues not covered in this manual, please refer to the retailer where the product was purchased. When seeking support, have your product model number (WB13X25500) and purchase details readily available.