
10L0L G22 G29 Club Car DS Precedent EZGO TXT
10L0L Golf Cart Keyless Ignition Switch User Manual
Models: Yamaha G22/G29, Club Car DS/Precedent, EZGO TXT
1. Introduction
This manual provides detailed instructions for the installation, operation, and maintenance of your 10L0L Golf Cart Keyless Ignition Switch. Please read this manual thoroughly before installation and use to ensure proper function and safety.
The 10L0L Golf Cart Keyless Ignition Switch offers a convenient one-click start feature, eliminating the need for traditional keys. It is designed for compatibility with various electric golf cart models, including 20-80V EZGO TXT, Club Car DS/Precedent, and Yamaha G22/G29.

Figure 1.1: The 10L0L Keyless Ignition Switch is compatible with EZGO, Yamaha, and Club Car golf cart models.
2. Safety Information
WARNING: Always ensure the golf cart is in a safe, stationary position with the parking brake engaged before performing any installation or maintenance. Disconnect the main battery power before working on electrical components to prevent electrical shock or damage.
- Only operate the golf cart when seated and in control.
- Ensure all connections are secure and insulated to prevent short circuits.
- Keep remote fobs away from children to prevent accidental activation.
- Do not attempt to modify the product. Unauthorized modifications may void the warranty and pose safety risks.
3. Package Contents
Verify that all components are present before beginning installation:
- 1x Keyless Ignition Switch Unit (Start Button)
- 2x Remote Control Fobs
- 1x Processing Unit
- 1x Receiver
- Mounting Hardware (nuts, washers)
- Wiring Harness with connectors
- Detailed Installation Guide (this manual)

Figure 3.1: Product Measurement diagram illustrating the key components and their dimensions, including the start button, processing unit, remote control/sensor, receiver, and mounting parts.
4. Specifications
| Feature | Specification |
|---|---|
| Brand | 10L0L |
| Model Compatibility | Yamaha G22/G29, Club Car DS/Precedent, EZGO TXT (electric golf carts) |
| Operating Voltage | 12-48 Volts (DC) |
| Operation Mode | Manual (Push Button) |
| Switch Type | Push Button |
| Contact Type | Normally Open |
| Connector Type | Screw Terminals |
| Mounting Type | Flush Mount |
| Control Method | Touch / Remote |
| Max Sensing Distance | 8 meters (approx. 26 feet) |
| Contact Material | Copper |
| IP Rating | IP55 |
5. Setup and Installation
The installation process involves replacing your existing ignition switch with the 10L0L Keyless Ignition Switch. It is recommended to have basic electrical knowledge or consult a professional if unsure.
5.1 Before You Begin
- Gather necessary tools: screwdriver set, wrench, wire strippers/crimpers, electrical tape.
- Ensure the golf cart is turned off and the main battery power is disconnected.
- Identify the location of your current ignition switch on the dashboard.
5.2 Installation Steps
- Remove Existing Ignition Switch: Carefully remove the screws or fasteners holding your current ignition switch in place. Disconnect the wiring from the old switch, noting the wire colors and their corresponding terminals for reference.
- Prepare Wiring: The 10L0L Keyless Ignition Switch comes with a wiring harness. Identify the ACC IN and ACC OUT wires. These will connect to your golf cart's existing ignition wiring.
- Connect Wiring: Connect the ACC IN wire from the new switch to the golf cart's ignition input wire. Connect the ACC OUT wire from the new switch to the golf cart's ignition output wire. Connect the ground wire (usually black) to a suitable ground point on the golf cart chassis. Connect the power wire (usually red) to a constant 12-48V power source (e.g., battery positive terminal or a fused accessory wire). Ensure all connections are secure and properly insulated.
- Mount the Switch: Insert the new keyless ignition switch into the dashboard opening. Secure it using the provided mounting hardware (nut and washer). Ensure it is flush and stable.
- Connect Receiver: Plug the receiver unit into the main processing unit. Position the receiver in a location that allows for optimal signal reception from the remote fobs.
- Secure Components: Neatly arrange and secure all wiring and components using zip ties or electrical tape to prevent interference or damage.
- Reconnect Power: Reconnect the main battery power to the golf cart.
Video 5.1: An official product video demonstrating the installation process of the 10L0L Golf Cart Keyless Ignition Switch, showing wiring connections and mounting.
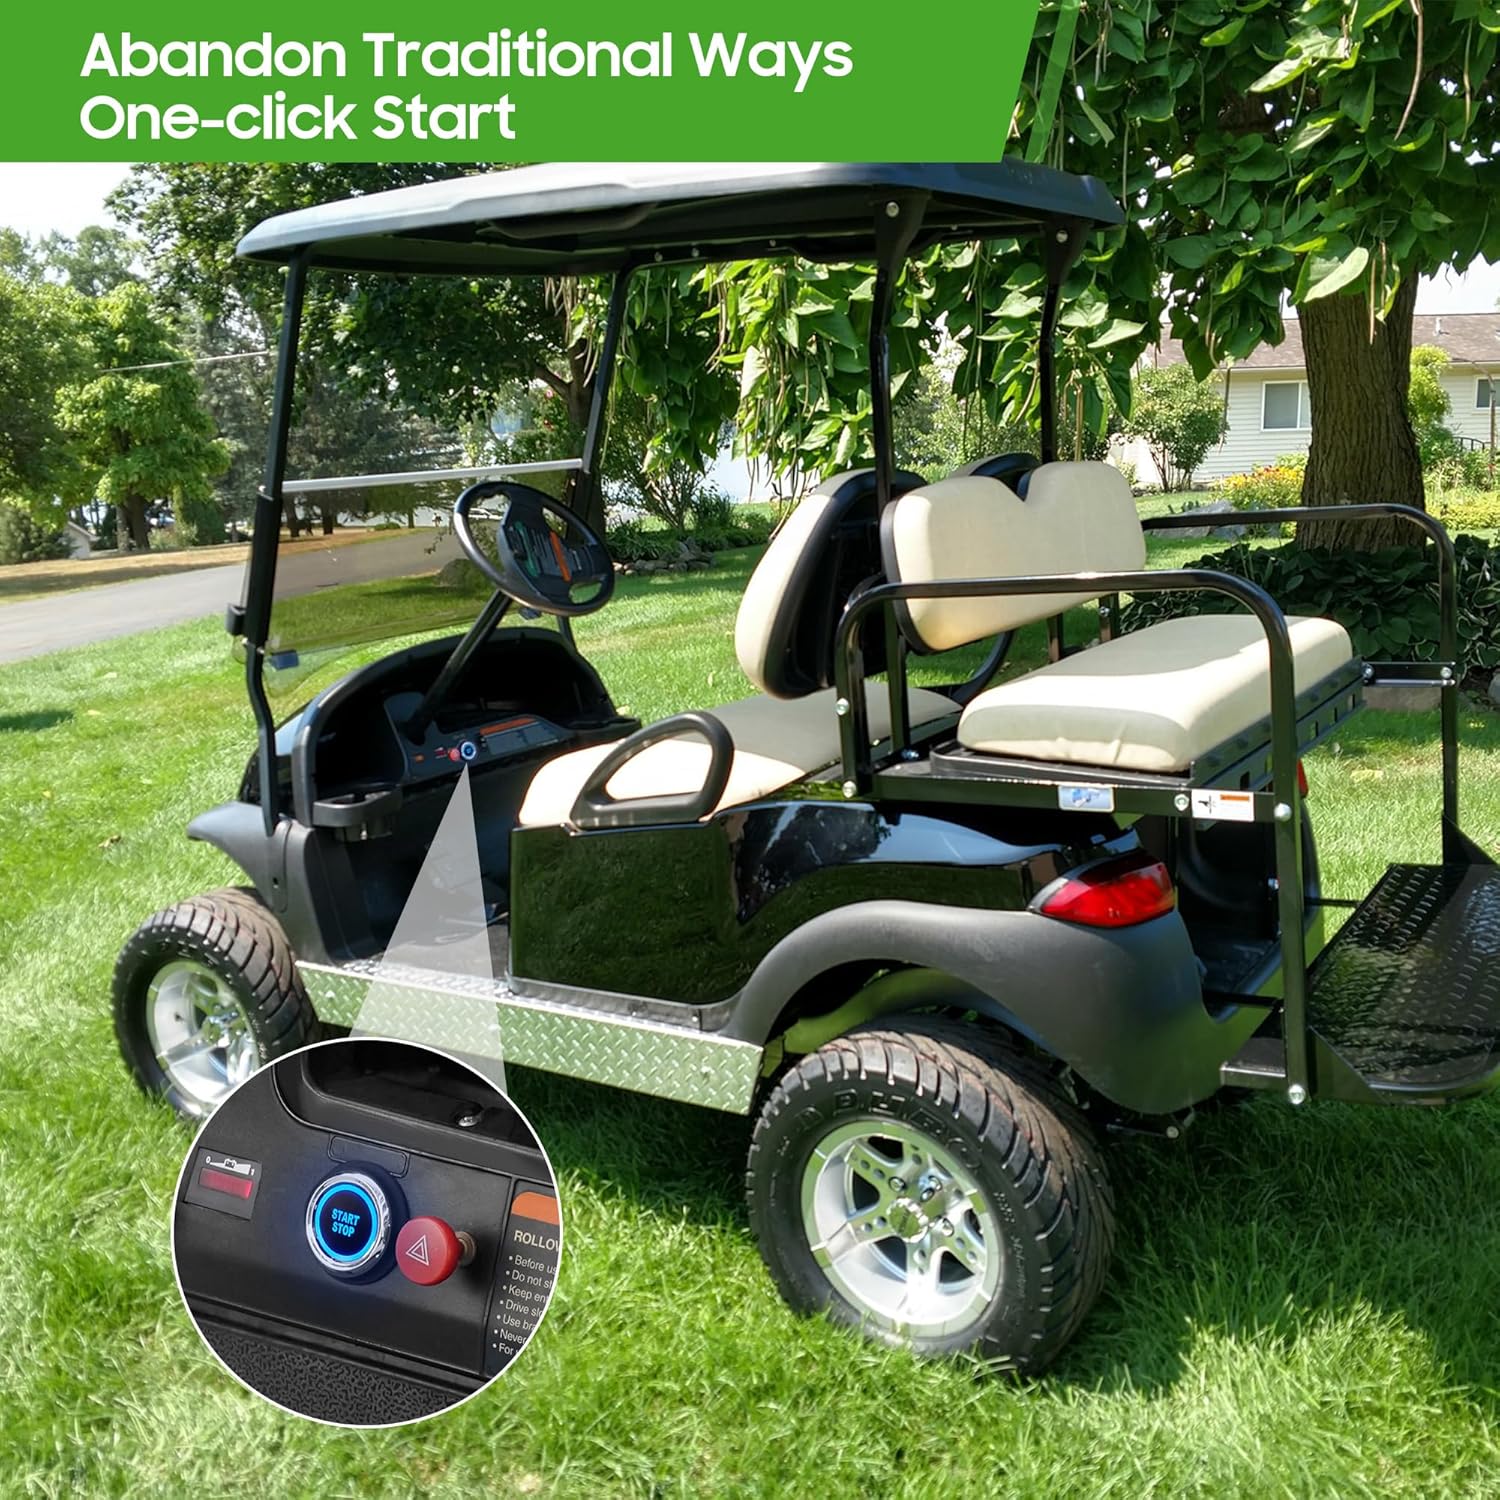
Figure 5.1: The installed 10L0L Keyless Ignition Switch button on a golf cart dashboard, ready for operation.
6. Operating Instructions
The 10L0L Keyless Ignition Switch provides a simple one-click operation for starting and stopping your golf cart.
6.1 Starting the Golf Cart
- Ensure the golf cart is in neutral and the parking brake is engaged.
- With a remote fob within 8 meters (approx. 26 feet) of the golf cart, the ignition switch button will illuminate red, indicating it has detected the remote and is in standby mode.
- Press the "START STOP" button on the dashboard. The button will illuminate blue, indicating the golf cart's ignition is active and ready to drive.

Figure 6.1: The keyless ignition switch button displaying a red light when a remote is detected (standby) and a blue light when the golf cart is started.
6.2 Stopping the Golf Cart
- Bring the golf cart to a complete stop and engage the parking brake.
- Press the "START STOP" button on the dashboard. The button's blue illumination will turn off, indicating the ignition is disengaged.
6.3 Remote Sensing
The system features an extended range detection of up to 8 meters (26 feet). This allows the golf cart to detect the remote fob from a distance, preparing the ignition for activation.

Figure 6.2: A red golf cart on a grassy area, showing a remote fob and an overlay indicating a maximum sensing distance of 8 meters (26 feet).
7. Maintenance
Regular maintenance ensures the longevity and reliable operation of your keyless ignition switch.
- Cleaning: Wipe the switch and surrounding dashboard area with a soft, damp cloth. Avoid abrasive cleaners or solvents.
- Connections: Periodically check all electrical connections to ensure they are secure and free from corrosion.
- Remote Fob Batteries: The remote fobs are powered by small batteries. If the sensing range decreases or the fob becomes unresponsive, replace the battery. Refer to the fob's internal markings for the correct battery type.
- Environmental Protection: The unit has an IP55 rating, meaning it is protected against dust ingress and low-pressure water jets. While durable, avoid prolonged exposure to heavy rain or submersion.
8. Troubleshooting
If you encounter issues with your 10L0L Keyless Ignition Switch, refer to the following table for common problems and solutions.
| Problem | Possible Cause | Solution |
|---|---|---|
| Switch button does not light up (no red or blue). | No power to the unit, loose wiring, or dead remote fob battery. | Check main battery connection. Verify all wiring connections are secure. Replace remote fob battery. |
| Switch button lights red but golf cart does not start when pressed. | Incorrect wiring to golf cart ignition system, golf cart in gear, or parking brake not engaged. | Double-check ACC IN/OUT wiring. Ensure golf cart is in neutral and parking brake is engaged. Consult golf cart manual for specific starting requirements. |
| Remote sensing range is reduced. | Low remote fob battery, interference, or receiver obstruction. | Replace remote fob battery. Ensure no large metal objects are blocking the signal path to the receiver. |
| Golf cart starts intermittently. | Loose electrical connections or faulty remote fob. | Inspect all wiring for secure connections. Try using the second remote fob to determine if the issue is with a specific fob. |
If the problem persists after attempting these solutions, please contact 10L0L customer support.
9. Warranty and Support
10L0L products are designed for quality and reliability. For specific warranty details, please refer to the product packaging or the official 10L0L website. Keep your purchase receipt as proof of purchase.
For technical assistance, troubleshooting beyond this manual, or warranty claims, please contact 10L0L customer support:
- Website: Visit the 10L0L Store on Amazon
- Email: support@10l0l.com (Example)
- Phone: 1-800-123-4567 (Example)
When contacting support, please have your product model number (B0DJM4X5Z1) and purchase date ready.
Ask a question about this manual
Ask about setup, troubleshooting, compatibility, parts, safety, or missing instructions. Manuals+ will review the question and use this page’s manual context to help answer it.